How to Transfer Music from Computer to Android [5 Easy Ways]
Discover easy ways to transfer your music collection from your computer to your Android device. This article provides step-by-step guidance, allowing you to enjoy your favorite tracks on the go. Say goodbye to the hassle and hello to a unified music experience on your Android.
You’ve downloaded a fantastic album or curated a playlist on your computer. Now you want to enjoy it on your Android phone while on the go. But how do you get your beloved tunes onto your mobile device seamlessly?
This article explores several methods to transfer music from your PC to Android. It will allow you to groove to your favorite tracks wherever you are. Let’s dive into the first method to simplify transferring music from your computer to your Android device.
Bonus Tip: You may also need the tips below.
- Top 7 Apps to Transfer Files from PC to Android [Full Guide] >
- 5 Proven Methods to Transfer Photos from PC to Android >
Transfer Music from PC to Android in Simple Clicks
Here we would like to first introduce DroidKit – Android Phone Toolkit, a powerful software designed to tackle various Android problems. Its intuitive interface and extensive functionality simplify resolving any Android issue. Among its impressive features, DroidKit Data Manager mode stands out. It is the perfect tool to transfer music from your PC to Android seamlessly. And you don’t need to worry about the music quality being damaged during the transfer. All music will keep the original quality. Most importantly, DroidKit supports all Android devices and brands, such as Samsung, Huawei, Xiaomi, LG, and many more. You can also learn more about the highlights of DroidKit below.
Free Download * 100% Clean & Safe
- 1-Click transfer – You only need to click the button to easily transfer your music to your phone within 3 steps. There are no technical requirements.
- Lightning speed – No matter how many or how large your music files are, DroidKit can help you transfer them in just a few minutes.
- Not just music – DroidKit can also help you transfer photos, videos, contacts, WhatsApp, text messages, etc. from computer to Android and vice versa.
- 100% safe and confidential – DroidKit uses top encryption technology to ensure that your personal information and data will not be leaked to anyone else.
In addition, as a one-stop Android solution, you can also use DroidKit to unlock the locked Android screen, recover lost data with or without backup, bypass Google account/FRP lock, fix Android OS issues, and so on.
Then, we’ll provide you with a step-by-step guide on how to use DroidKit’s Data Manager mode to transfer your music collection effortlessly. So just free download DroidKit on your computer, and follow these steps to transfer music from PC to Android in clicks.
Step 1. Launch DroidKit and connect your Android device to your computer using a USB cable. From the home screen, select the Data Manager mode.
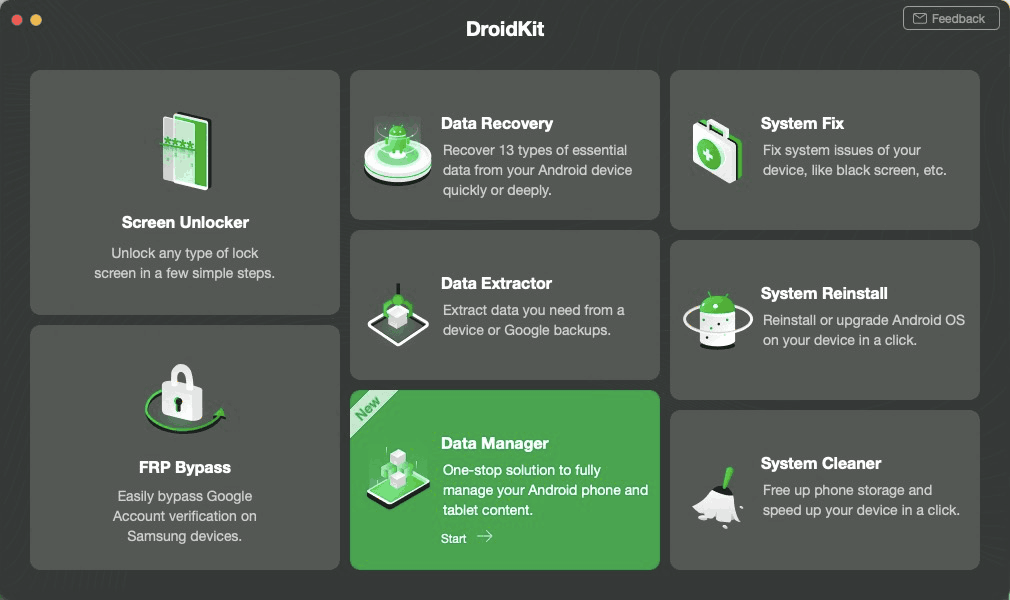
Choose Data Manager Function
Step 2. Click Start. And select Add Content from the 3 options.
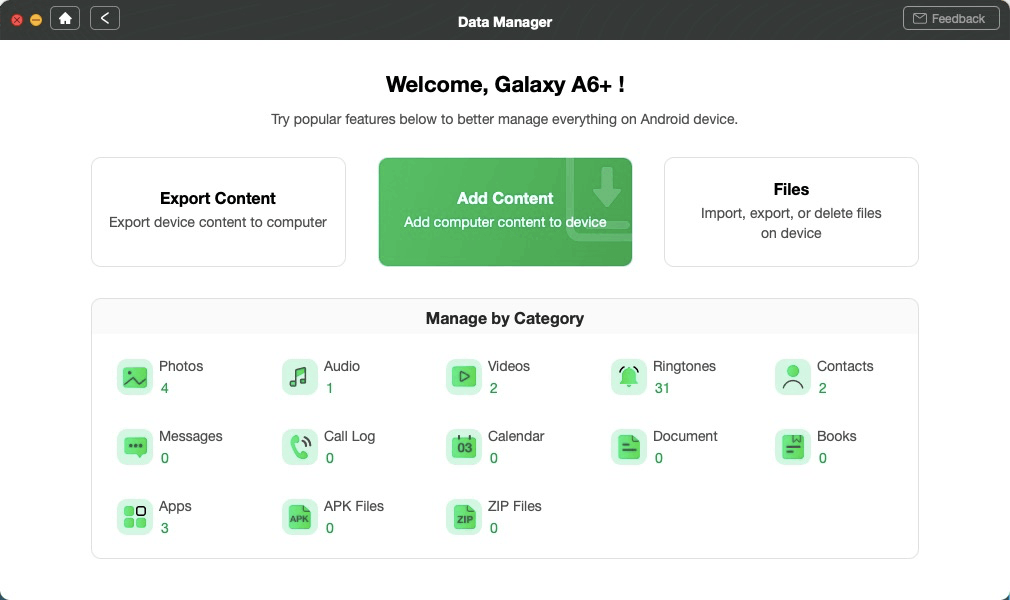
Click Add Content Button
Step 3. Then you need to select the data types you want to transfer. Then click the Next button to start.

Choose Any Photos You Like to Transfer
Step 4. Once the transfer process is complete, you will be presented with the following interface.
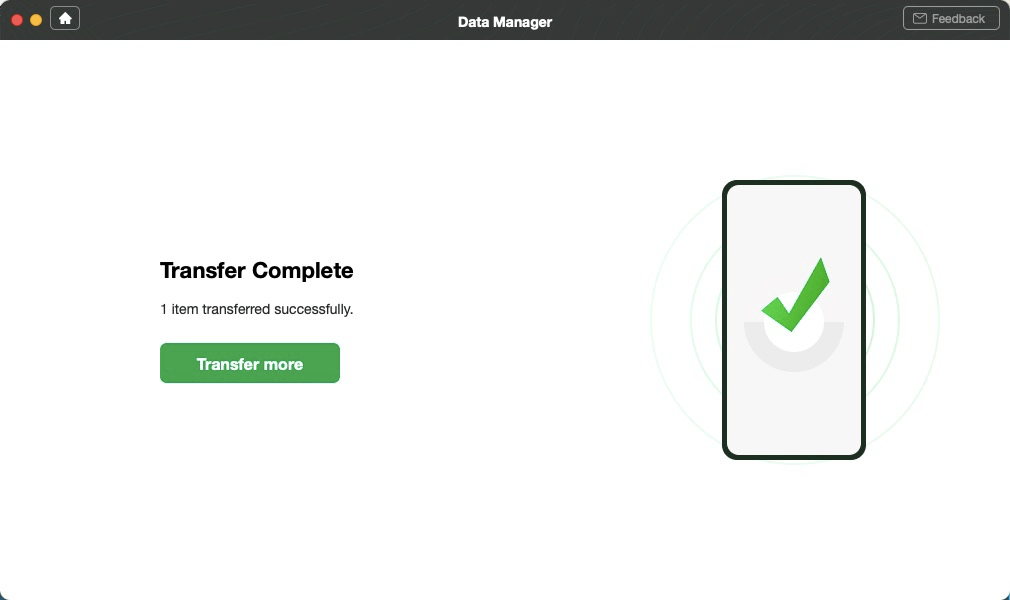
Photo Transferred Successfully
DroidKit makes transferring music a breeze. Enjoy your favorite tracks wherever you are. Let’s explore some common methods to transfer music from pc to Android.
Transfer Music from PC to Android with USB
Transferring music from your PC to Android using a USB connection is reliable and straightforward. Regardless of whether you are utilizing a Windows or Mac computer. Follow these step-by-step instructions to transfer your music files effortlessly:
Step 1. Linking your Android device to your computer is straightforward. You only need a USB cable to establish a reliable connection between your devices.
Step 2. To access the menu on your Android device, swipe down from the top of the screen. Tap on the USB notification and select “Transferring files.”
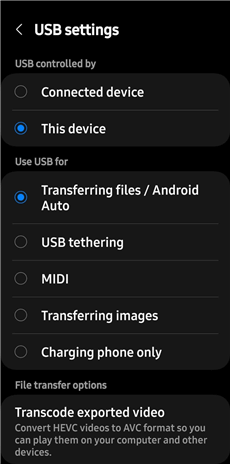
Select Transferring Files Option
Step 3. On your computer, the AutoPlay window may appear. Select “Open device to view files” or a similar option if prompted.
Step 4. In the file explorer or finder window, locate and copy the music files on your computer that you want to transfer to your Android device.
Step 5. Go to the folder representing your connected Android device in the file explorer or finder window. Right-click inside the folder and choose the “Paste” option.
Step 6. Wait for the copying process to complete. Once the transfer is finished, safely disconnect your Android device from your computer by ejecting it.
We have now explored transferring music from PC to Android using a USB connection. Let’s move on to an alternative method without needing a USB cable.
Transfer Music from PC to Android without USB
What if you don’t have a USB cable or prefer a wireless solution? Google Drive comes to the rescue! In this section, we’ll show you how to leverage the power of cloud storage to transfer your music files from your PC to your Android device effortlessly. Get ready to embrace the convenience of wireless file transfer.
Step 1. Sign in to your Google account on your computer. If you don’t have a Google account, create one for free.
Step 2. Navigate to Google Drive. Click on the “+ New” button and select “Folder” to create a new folder where you’ll upload your music files. Name it as “Music.”
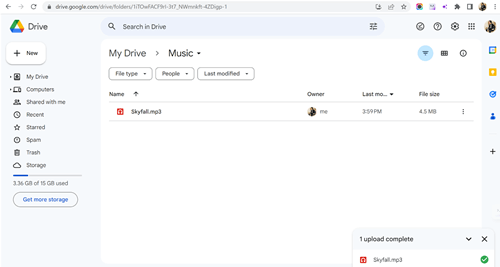
Upload Music to Google Drive
Step 3. Open the newly made folder and click on “File upload.” Browse your computer’s file explorer and upload the music files or folders you want to transfer.
Step 4. You require to install the Google Drive app to access Google Drive on your Android device. Sign in to the app with the same Google account used on your computer.
Step 5. Open the Google Drive app and the uploaded “Music” folder.
Step 6. Tap on the music files you want to transfer to your Android device, then tap on the three-dot menu icon and select the “Download” option.
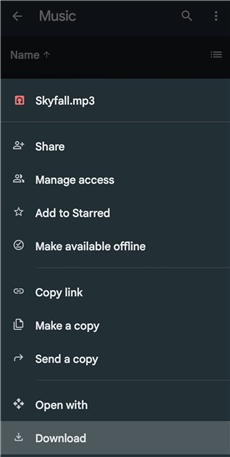
Select the Download Option
Step 7. The chosen music files will be downloaded to your Android device’s internal storage or the designated downloads folder.
Once the download is complete, you can access and play the transferred music files using your preferred music player app on your Android device.
Now, let’s shift gears and explore another method for transferring music. The next section guides you through transferring music using Bluetooth.
Transfer Music from PC to Android with Bluetooth
If you enjoy the freedom of wireless technology, sharing music from your PC to your Android device via Bluetooth is a fantastic option. We’ll guide you through the pairing process and show you how to transfer your favorite tracks effortlessly. Say goodbye to cables and hello to wireless music transfer!
Step 1. Ensure that Bluetooth is enabled on both your PC and Android device.
Step 2. On your PC, locate the music files you want to transfer. Right-click on them and select the “Send to” option, followed by “Bluetooth device.”
Step 3. Your PC will search for nearby Bluetooth devices. Select your Android from the index of available devices.
Step 4. On your Android device, a notification will occur, asking you to accept the incoming Bluetooth transfer. Tap “Accept” or “OK” to proceed.
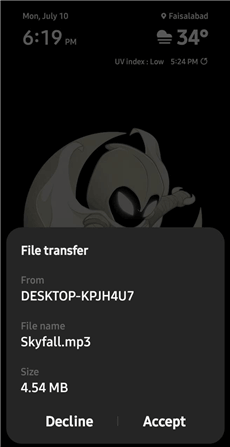
Tap Accept to Transfer Music
Step 5. The selected music files will transfer via Bluetooth from your PC to your Android device. Wait for the transfer to complete.
Once the transfer is finished, enjoy the transferred music files via the default music player.
Transfer Music from PC to Android via YouTube Music
Similar to iCloud on Apple iPhones, you can utilize cloud storage to store and access music across multiple devices. By storing your music on an online server, you can easily access it from any device using your Google account. In this section, we will explore how you can use YouTube Music to upload music from your computer and access it on your Android device.
Step 1. Open your preferred internet browser and navigate to YouTube Music
Step 2. Click on “Sign In” located in the top-right corner of the page. Enter your Google account credentials to sign in to YouTube Music. If you don’t have an account, you can create one at this stage.
Step 3. Once signed in, click on your account profile icon in the top-right corner to access the menu options. Select “Upload Music” from the menu.
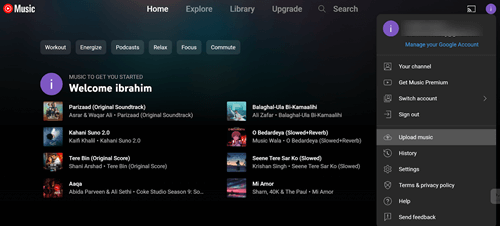
Select Upload Music from the Menu
Step 4. Choose the music files you want to upload from your computer. Once selected, click “Open.”
Step 5. After the upload is complete, you can find your uploaded music in the “Library” section, under “Songs” and then “Uploads”.
Congratulations! Your music has been successfully uploaded to YouTube Music. You can now access your uploaded music from any device by signing in to your YouTube Music account.
The Bottom Line
Sharing music from your PC to your Android device should no longer be daunting, thanks to the various methods we’ve explored in this comprehensive guide. There’s always a method that suits your needs. And if you want to 1-click transfer music from PC to Android, just try DroidKit for free now. It will transfer all your music to your device within 3 steps and minutes. Now, you can easily enjoy your favorite tunes on the go without any hassle. If you have any questions or need further assistance, please comment below. Consider sharing this guide with others who may find it helpful. Happy music transferring!
Free Download * 100% Clean & Safe

Senior writer of the iMobie team as well as an Apple fan, love to help more users solve various types of iOS & Android-related issues.
Product-related questions? Contact Our Support Team to Get Quick Solution >
