Top 10 Ways to Fix Screen Burn on Android Phones
This article will discuss how to fix screen burn on Android phones. We will explore simple solutions like adjusting brightness and screen timeout. We will also discuss when replacing the display is necessary. Additionally, if your phone’s screen is black or broken, we’ll discover an amazing tool to recover your data.
Got screen burn on your Android phone? Don’t worry! It’s quite common and can be super annoying to see. While it may seem like a big issue, there are various ways to address it. In this article, we’ll show you how to fix screen burn on Android phone without any professional help. We will guide you through ten simple solutions to bring your phone’s display back to life. You can try each one and see which one works for your device. Let’s dive in!
Part 1. What Is Screen Burn-in and Can You Fix It?
Screen burn happens when a static image stays on your screen for too long. This can cause a ghost picture to appear. It looks like a shadow on your screen, even if you are viewing something else.
This happens most on specific phone screens, such as OLED and AMOLED. Because they use tiny lights to show colors. If a particular image is shown too often or for too long, those tiny lights get stuck. This leaves a permanent shadow behind.
Luckily, you can often fix it. There are simple ways to make that shadow reduce or go away. Success depends on how bad the problem is. Sometimes, easy steps can fix it right away. Other times, it is a bit harder to restore. But do not worry! We will show you how to fix screen burn on Android phone. You can bring your display back to life.
Part 2. What Is the Main Cause of Screen Burn?
Here are some of the main causes of screen burn on mobile devices:
- Static Elements on the Screen: Things that do not move can cause burn-in. This includes your phone’s navigation bar. It also includes app icons. Always-on clocks can cause it, too.
- Uneven Pixel Usage: The little lights on your OLED screen don’t wear out evenly. Some lights, like the very bright ones, get tired faster. This causes a ghost picture to appear.
- High Brightness Settings: Setting your screen to be too bright is not a good idea. It makes the little lights on your screen wear out faster.
- Blue Pixel Degradation: Screens have tiny colored lights of red, green, and blue. The blue ones wear out the fastest. This can cause the colors on your screen to appear slightly distorted.
- Extended Use Without Screen Refresh: Leaving a screen on for a long time is not good. It does not matter if it’s a phone or a TV. This increases the risk of screen burn.
Part 3. How to Fix Burn Screen on Android Phone
In this section, we will explore how to fix screen burn on Android phone using ten simple fixes:
Fix 1. Use Burn-in Fixer Apps
Specialized apps like OLED Tools and Screen Burn Fixer can help “unstick” pixels. These apps run patterns of solid colors or shifting gradients across your display to even out pixel wear. Such apps display rapidly changing patterns to help equalize pixel wear. This way, it can reduce minor burn-in when the damage is not severe.
Fix 2. Use Screen Burn-in Test or Recovery Videos
Full-screen color and test videos can similarly refresh pixels. Many websites and YouTube channels offer burn-in test and recovery videos. These cycle through red, green, blue, black, white, and other colors in sequence.
Playing these videos can help “unstick retained images.” Here is how to fix screen burn on Android phone using screen burn-in test or recovery videos:
- On your phone, search for a burn-in test video and select one that matches your screen.
- Turn off Auto-Lock and play the video in full-screen for at least 5–15 minutes (longer is better).
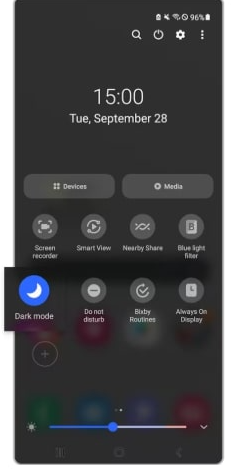
Fix 3. Enable Dark Mode
Using dark or black-themed interfaces keeps OLED pixels turned off for dark areas. It eventually reduces burn-in. Many Android phones support Dark Mode or allow you to set dark themes per app. Since OLED pixels emit no light when showing black, dark mode both saves battery and reduces wear.
To enable dark mode:
- Android 10 and above: Go to “Settings” > “Display” and enable “Dark Theme” or “Dark Mode.” You can also swipe down the notification bar and enable it from there.
- Apps: In apps that support it (e.g., Gmail, Chrome), enable dark theme within the app’s settings.
Fix 4. Use a Burn-in Reduction Feature
Some devices include built-in burn-in protection. For example, most modern Samsung OLED screens are equipped with a built-in Pixel Refresher feature. It attempts to eliminate screen burn-in. While not all phones have it, using any available burn-in reduction feature is recommended when dealing with persistent image retention.
Fix 5. Adjust Screen Brightness and Timeout Settings
Bright screens can cause burn-in faster. Keeping your screen brightness high all the time makes screen burn worse. Lower brightness helps the screen stay healthy. A shorter timeout helps too. Here is how to fix screen burn on Android phone by adjusting screen brightness:
1. Reduce Brightness: Go to “Settings” and then “Display.” Slide the brightness level lower.
2. Enable Adaptive/Auto-Brightness: In “Display” settings, turn on “Adaptive Brightness.” The screen will automatically get dimmer in the dark.
3. Shorten Screen Timeout: In your “Display” settings, set the “Screen timeout.” Make it a shorter time.
Fix 6. Change Wallpaper and Icon Layout Regularly
Static home-screen images can cause burn-in under app icons or status areas. To prevent this, change your wallpaper and layout often. Many experts recommend using dynamic or moving wallpapers instead of static ones.
Fix 7. Update Your Software
Sometimes it is not really burn-in. What if it is a simple software bug? This can make your screen look a little weird. A simple update can fix the problem.
Here is what you need to do:
1. Go to your phone’s “Settings.”
2. Find “About Phone” or “System.”
3. Look for “Software Update.”
4. Then install any new updates that show up.
Make sure you restart your device afterwards.
Fix 8. Use Adaptive or Auto Brightness
Another solution for how to fix screen burn on Android phone is enabling Adaptive Brightness. This setting makes your screen adjust itself. It gets brighter in the sun. It gets dimmer in a dark room. Your screen is never brighter than it should be. It is a simple way to protect your screen.
There are no complicated steps. Simply go to the “Display Settings” on your Android device and enable “Adaptive Brightness” or “Auto Brightness.”
Fix 9. Consider Warranty or Professional Repair
If screen burn stays, you may need some outside help. If the ghost image appeared early, check your phone’s warranty. Companies sometimes replace defective parts. In severe cases, professional help might be necessary. This includes getting the screen replaced.
Here is what you can do:
1. Check Your Warranty: Find the purchase date and warranty period. This is often in your phone’s Settings. Or you can find it in your receipts.
2. Contact the Manufacturer or Retailer: Explain the issue to them. If it is under warranty, they may repair it. They may even replace the screen for you.
3. Professional Repair Shops: If your warranty is over, a repair shop can help you. They can sometimes replace the display module. They can also confirm if it is true burn-in.
Fix 10. Replace the Display Panel
The only guaranteed fix for permanent burn-in is replacing the display. In severe cases, the only way to fix burn-in is by replacing the screen or the device entirely. Likewise, experts advise considering a new screen, as professional panel replacement is often the most reliable solution.
In the next section, we’ll explore how you can recover your important files before making any major changes.
Part 4. Bonus: Recover Data on Android Black Screen
If your phone screen is black or broken, you must be worried about your data on it. Extracting your important data from it might seem impossible. But don’t you worry! DroidKit has a great solution for you. Its “Data Extractor” feature helps you get your files. You can recover photos, contacts, videos, and a lot more with just a few clicks.
DroidKit works with many Android devices. This includes Samsung, Xiaomi, OPPO, Vivo, and more. Not only data extraction, but it also has many other features. You can say it is a complete solution for your Android device.
Here are some of the other features of DroidKit:
- Data Recovery: Get back lost or deleted files. This includes photos, messages, contacts, and a lot more.
- System Repair: Fix common issues on your Android phone. It can handle freezes, crashes, and other problems.
- Phone Unlock: Remove screen locks from your device. This includes PINs, passwords, and fingerprints.
- Data Transfer: Easily move your data between Android devices. This includes contacts, messages, and media.
- Remove Google account: You can easily remove a Google account from your device.
- Manage Android data: This lets you manage and organize all your files and information on your Android.
Download DroidKit now and recover what you thought would never come back.
Free Download * 100% Clean & Safe
Steps to Extract Data on Android Using DroidKit
Here is a step-by-step guide on using DroidKit’s data recovery feature:
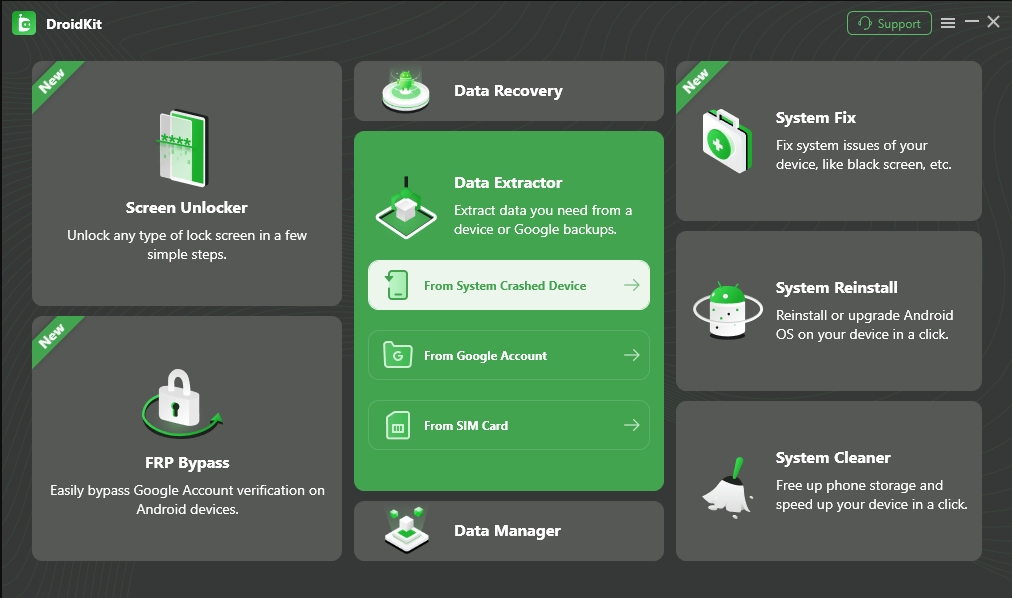
Step 1. After installing DroidKit on your computer, open it and choose the “From System Crashed Device” option in the “Data Extractor” mode.
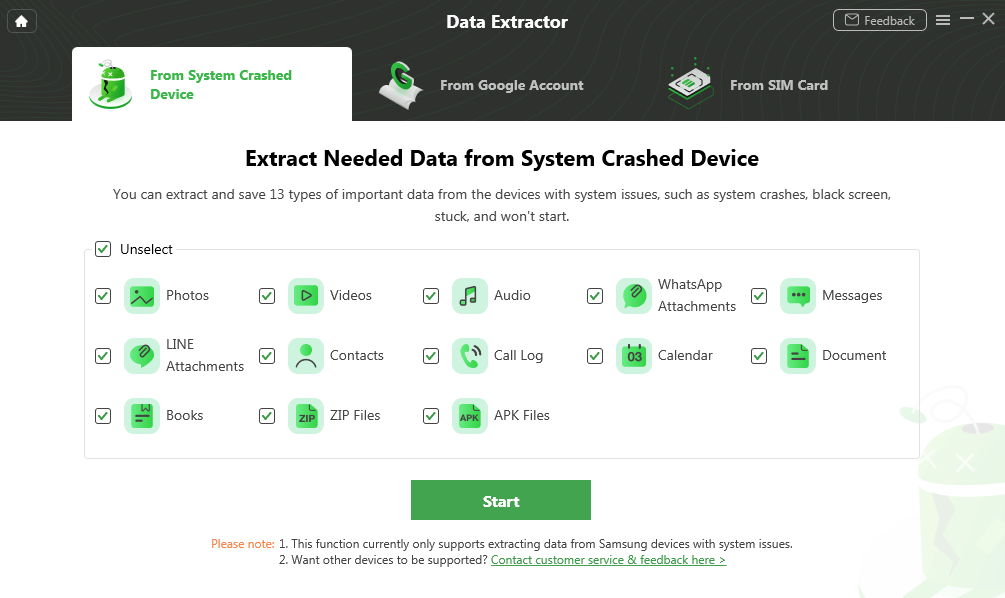
Step 2. Now, pick the data you want to extract. The app can recover 13 types of data. After you choose, click the “Start” button.
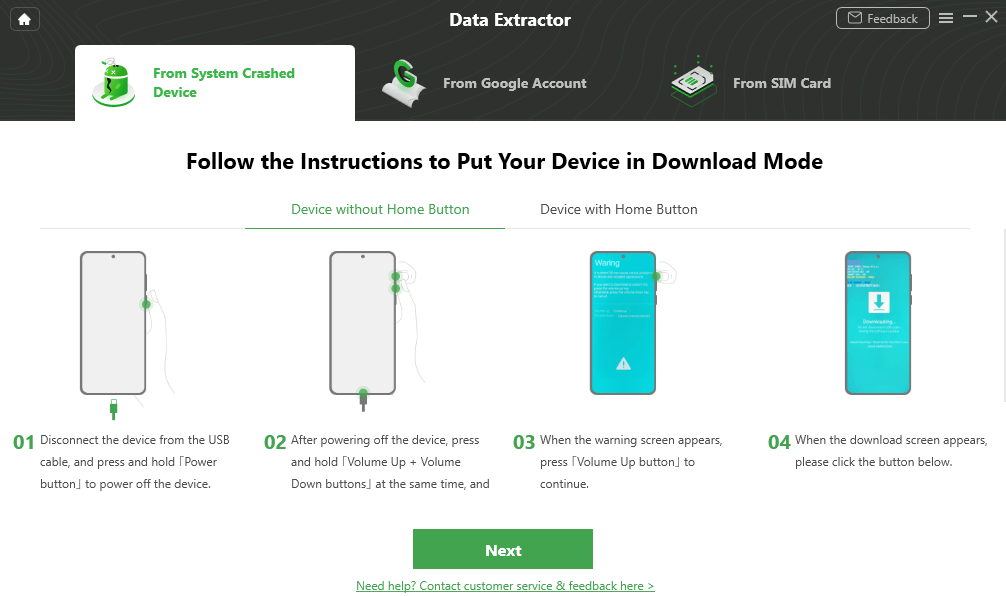
Step 3. Next, follow the on-screen instructions and put your device into recovery mode. You can also move through the options to get instructions as per your device type. Once done, click “Next.”
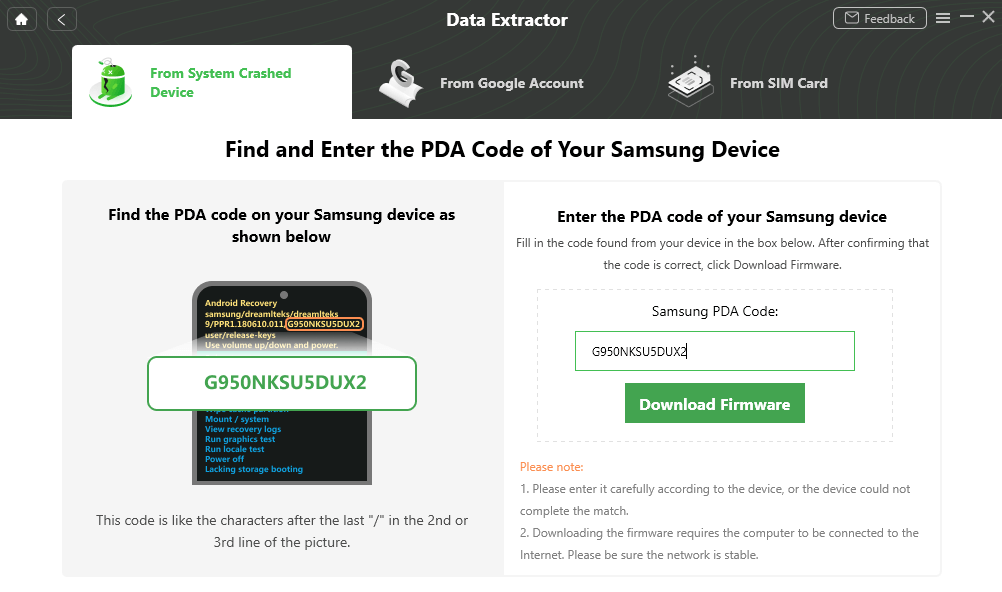
Step 4. DroidKit will access the PDA code of your device. Find and type that code into the box on your screen. After that, click the “Download Firmware” button. The tool will start downloading the firmware package.
Step 5. Once the download is done, click “Fix Now.” You are supposed to put your device into “Download Mode.” The app will show you how to do this. After that, click the “Next” button.
Step 6. DroidKit will automatically start repairing your phone’s system. Once the system is fixed, connect your device to the computer again. When it is detected, click “Next.” This time, DroidKit will then quickly scan your phone. It looks for all your data. Choose to restore it “To Device” or “To PC.” Once the process is finished, you are all done!

Conclusion
Wrapping it up! As we already know, screen burn can be annoying, but thankfully, there are simple solutions that can fix it. From performing a screen burn-in test and using advanced tools to adjusting screen timeout, we have explored how to fix screen burn on Android phones. And if your screen is severely damaged and there is no solution other than replacing the display, make sure to recover your data first. You can use DroidKit to do so. It can help you retrieve almost everything your phone has. Download it now and try it yourself.
Free Download * 100% Clean & Safe

Roger Smith is a senior technical writer with years of experience in providing Android solutions. He loves to help users solve various problems such as Android unlock, Android data recovery, and Android system repair.
Product-related questions? Contact Our Support Team to Get Quick Solution >
