How to Unroot Android Phones
Rooting your Android phone can offer you more permissions to control your device as you want, but sometimes it also incurs some risks. Especially when you find your Android operating system not safe, you seek to unroot the device. In this post, you will find 3 useful methods to unroot your Android phone.

How to Unroot Android Phones
Having known the risks and disadvantages of rooting an Android phone, you may seek to unroot your Android phone with or without a computer. Many of the apps that allow you to root your Android phone without a PC also have the “Unroot” function. In case you used an app like the KingRoot to gain superuser access to your smartphone you can also utilize it to reverse the rooting process.
However, some rooting apps for Android phones don’t have this feature yet. Therefore, in this article, we are going to show you several other tools to unroot your phone.
Unroot Your Phone with SuperSU
A lot of rooting apps for Android phones will have installed the SuperSU app on your device automatically as soon as the rooting process is completed. By doing so, it allows you to manage root permissions and offers you an easy way to unroot the device.

Unroot Your Phone with SuperSU
Even if SuperSU isn’t installed after the rooting process, you can also download it from the Google Play Store. Here’s what you need to do to unroot your phone with SuperSU:
Step 1. Launch the app and head over to the Settings tab. Locate the Full Unroot option and tap on it. The app will commence the unrooting process and you just wait for this process to be completed.
Step 2. Restart your phone after the app notifies you that the unrooting process is done and proceed to check if all of its functions are working.
Unroot Your Phone with Universal Unroot
If you don’t want to unroot your phone with SuperSu, you can try the Universal Unroot app, but you must make sure that it is compatible with your device.
After you install this app on your phone you just have to tap on the “Unroot” button and the app will do all the work for you, so you can just restart your phone afterward and continue using it normally. However, this method of unrooting an Android phone won’t always work as you may run into compatibility issues or the app may simply fail to unroot your device.
Unroot Your Device with ES File Explorer
Even though its primary function is to manage data on Android phones, the ES File Explorer can also be used to unroot a phone. This process can get a little technical and it may be overwhelming for you if you’re going through it for the first time.

Unroot Your Device with ES File Explorer
So, here’s what you need to do to unroot an Android phone with the ES File Explorer:
Step 1. Install the app on your phone and open it. Expand the drop-down menu in the upper left corner of the app’s main window and find the Root Explorer feature. This option will be switched off by default.
Step 2. After you tap on the Root Explorer option you will be asked to provide the root permission, do so, and return to the app’s main window. Open the box that contains the storage information and use it to find your phone’s root folder that should be named either ‘system’ or ‘bin’ and proceed to delete the SU and ‘busy box’ files.
Step 3. Return to the ES File Explorer’s storage info box and search for the App folder, open it and delete the ‘superuser.apk’ file. Restart your phone when done, and wait for the OS to load to check if you unroot your device successfully.
Bonus Tip. Backup Your Android Phone Before Unrooting
For some models of Android phones, unrooting may result in erasing data. Also, erasing data may occur when the unrooting process is applied unproperly. Therefore, in order to make sure the data safe and secure, you’d better back up your Android phone in advance. Some people would like to use Google’s cloud services to back up data but they more or less have some limitations. Especially when you don’t have a Google account, you’d better find other solutions to back up your Android phone. PhoneTrans can easily back up your Android data to your computer. The special Back-Up feature will make the most complete backup in terms of your needs. Now free download PhoneTrans on your computer and back up your Android data in case of a factory reset or otherwise loss of any data during the unrooting process.
Free Download * 100% Clean & Safe
Once you have downloaded the latest version of PhoneTrans, open it, connect your Android phone to the computer and take the following steps to back up your Android phone before unrooting.
Step 1. Click on Phone Backup on the Welcome page > Click on Back Up to proceed to the next page.
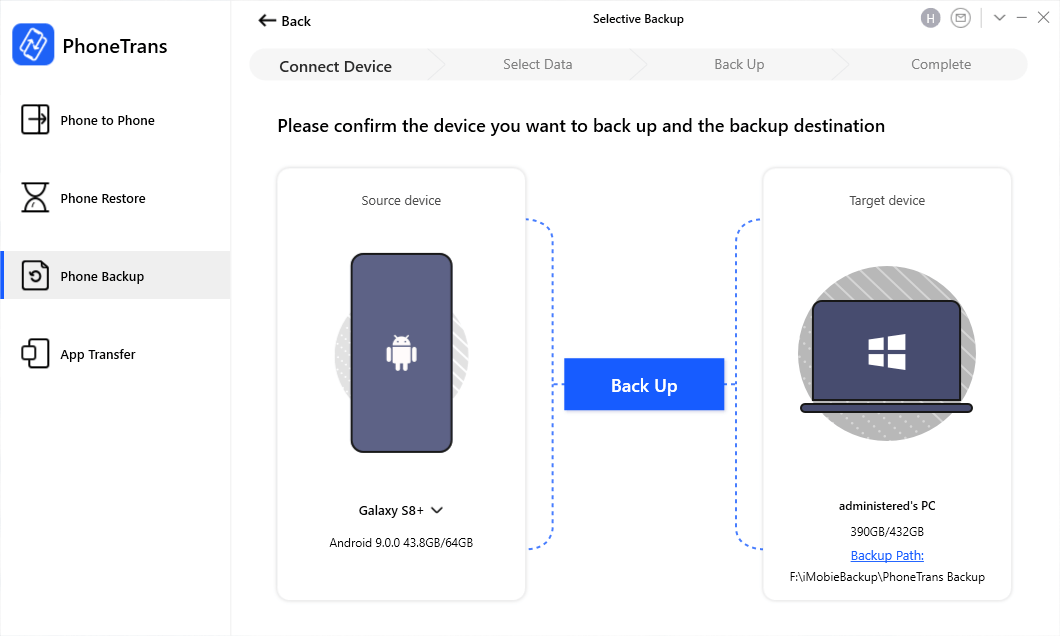
Connect Your Android Phone to the Computer
Step 2. View and click the data types you’d like to back up from your Android phone > Click on Back Up Now to start the process.
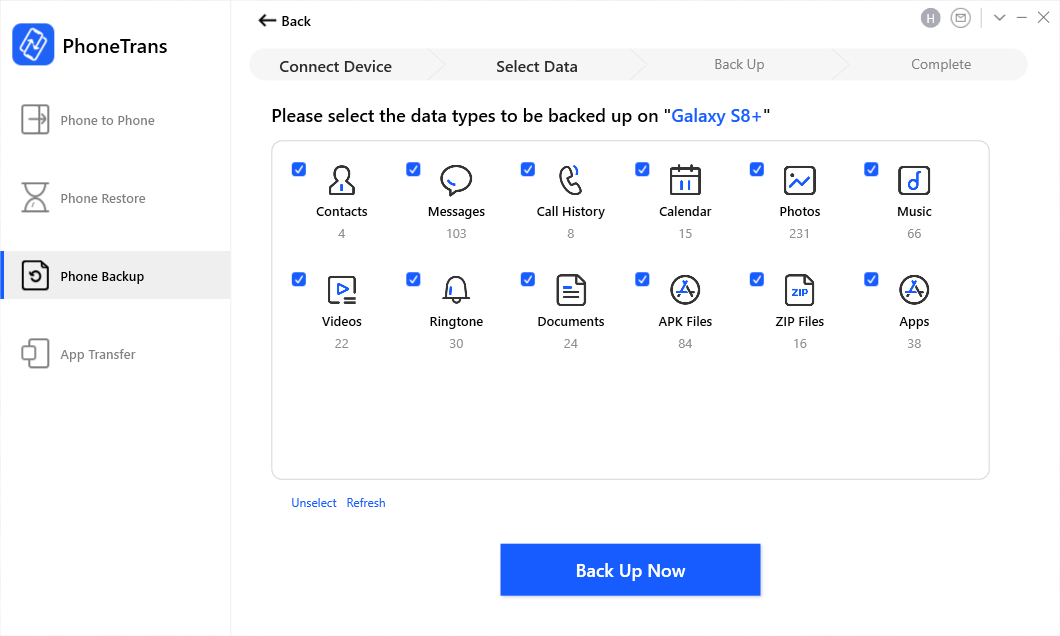
Choose Data You Want to Backup from Android Phone
Step 3. Then you will see the backup page. How long will it take to back up an Android phone depends on how much data you’d like to back up.
The Bottom Line
Like rooting an Android phone, there are several tools that allow you to go through the unrooting process effortlessly. Nonetheless, you will have to check if any of these apps are compatible with the phone you have rooted if you want to use them to restore your phone.

Member of iMobie team as well as an Apple fan, love to help more users solve various types of iOS & Android related issues.
Product-related questions? Contact Our Support Team to Get Quick Solution >
