4 Fixes to Bypass Google Pixel FRP
Since the release of Android 5.0, also known as Lollipop, the security system on most Android phones is more rigid than ever before. You now have to deal with FRP lock each time to reset your device. In case you lose your Google Account credentials after a factory reset on Google Pixel, you can try out any of these 4 solutions provided in this post.
Hi, Recently, I carried out a factory reset on my Google Pixel 6 because it’s running all operations at a slow pace. After the reset, I’m stuck on the Google verification screen. I can’t remember the details of the Google Account linked to the phone anymore. Is there any way I can fix or bypass FRP on my Google Pixel?
If you use an Android device running on the Lollipop version (Android 5.0), and carry out a factory reset on it, then you must be willing to deal with FRP/Google Account authentication. Your device will ask you to provide the corresponding details of the Google profile linked with it. In a scenario where you cannot remember or don’t know the details (because you are a second-hand user), FRP bypass would come in handy.
Vital Android FRP Bypass Tips
How to Bypass FRP in Different Situations
There are multiple ways to fix FRP on Google Pixel. However, this post will focus on the top 4 techniques suggested by Android experts to fix or bypass FRP lock on any Google Pixel model. Read on!
1. Bypass Google Pixel FRP by FRP Bypass APK
FRP Bypass APK are programs designed to fix FRP lock issues on an Android device. It deactivates FRP lock, thereby giving you access to your device again so you can carry out any operation without restrictions.
Apply the procedure below to bypass Google verification/FRP on your Google Pixel phone with the help of FRP Bypass APK:
- Get the most recent and suitable version of the FRP Bypass APK installed on your computer system.
- Next, copy and paste the APK file into a USB drive.
- Once done, grab the Google Pixel phone and connect it to the USB drive using an OTG cable.
- Kindly install the copied FRP Bypass APK document on your phone by clicking on the appropriate buttons when the File Manager screen comes up.
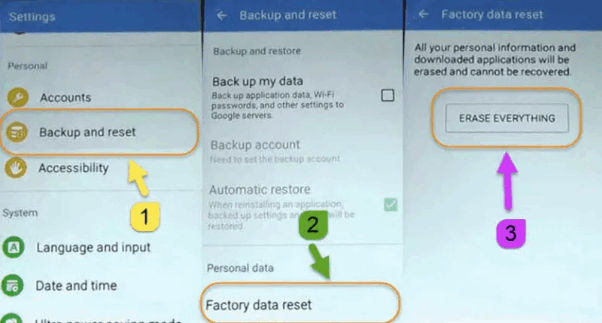
- Launch Settings, then navigate to where you have Backup and Reset and click on it.
- Once done, hit the Factory Reset button. Tap Reset again and all content plus the settings on your phone will reset automatically.
- Now, your Google Pixel phone will reboot and FRP will be cleared immediately.
FRP Bypass APK
2. Google Pixel FRP Bypass without PC
Not in possession of a PC? You can still bypass Google FRP lock on your Google Pixel phone. No matter the Pixel model you are using, this approach will clear FRP. Just follow the simple instructions given below to eradicate FRP lock on your Google Pixel phone:
- When your Google Pixel phone comes up, select Assistive Options, then click on Vision settings.
- A drop-down menu with several options will come up. Hit the TalkBack button to proceed.
- Once done, proceed to activate TalkBack by sliding the Use TalkBack icon right.
- Draw the L shape on the next screen that pops up, and a dialogue prompt labelled Welcome to Talkback will come up just like below:
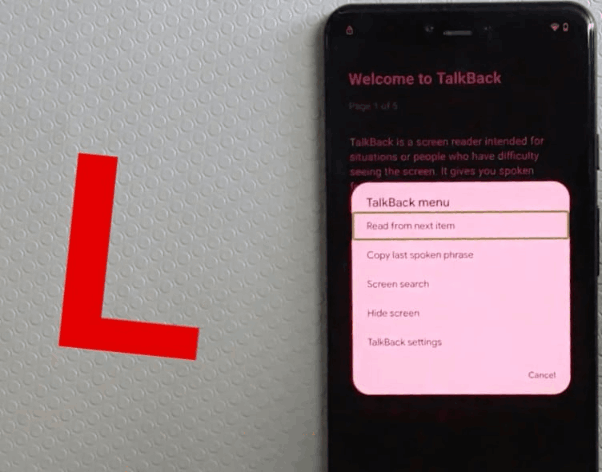
Welcome to Talkback Appears
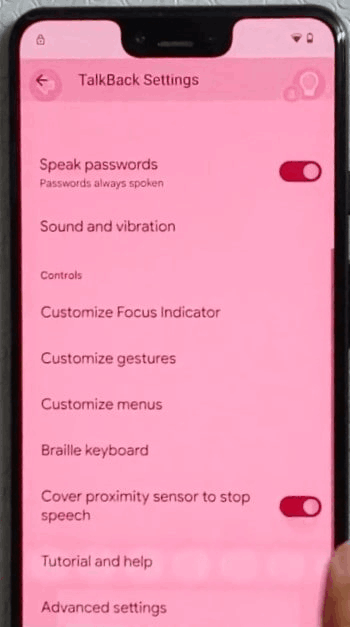
- Choose TalkBack Settings. Once TalkBack is activated, tap on the corresponding option, then double-tap on the same option to continue.
- Now, on the TalkBack Settings screen, hold down the Volume Up + Volume Down buttons simultaneously to deactivate TalkBack.
- Scroll down to the bottom of the screen displayed, and click on Braille Keyboard > set up Braille keyboard.
Go to Set Up Braille Keyboard
- A prompt with instructions on how to configure or set up the Braille keyboard will come up. Select Settings to proceed.
- Toggle the slider for TalkBack Braille keyboard to enable the feature on your Google Pixel phone.
- Head to the WiFi settings screen and select another network > add new. Click on the keyboard icon when the screen below comes up:
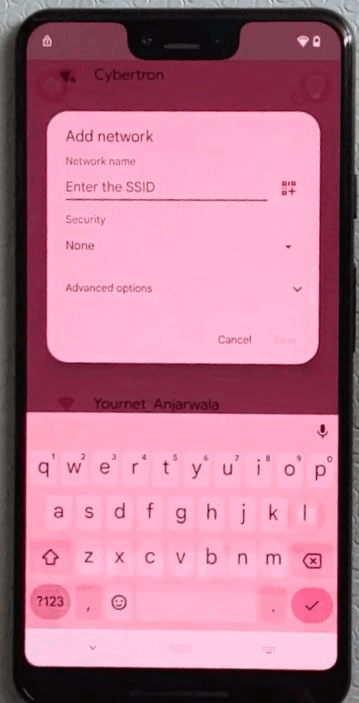
Add A New Network
- Choose your preferred keyboard option. Select the TalkBack Braille keyboard for this article.
- Another interface like the one down here will come up:
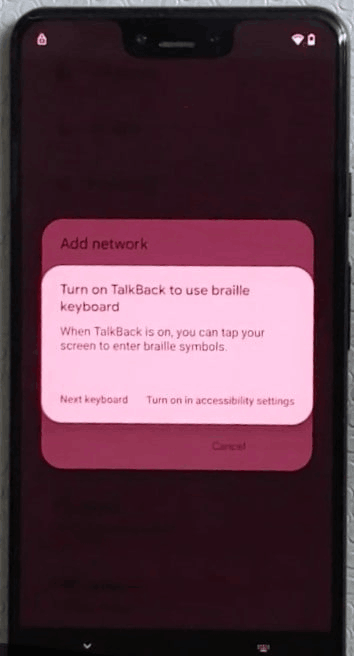
Turn on TalkBack Braille Keyboard
- Please click Turn on in accessibility settings, and the Accessibility screen will come up.
- Choose Accessibility Menu underneath the Interaction controls.
- Tap on Accessibility > Assistant and click on the keyboard icon to proceed.
- You will be directed to the screen, which is just like the screenshot above.
- Hit the Next keyboard button and type Google with your keyboard. Hit the Enter button or tap on the corresponding Google icon.
- When the corresponding Google page appears, click on the Microphone icon and say “Open settings”. Without further delay, the Settings menu will come up.
- Click Apps > (number of apps) to show all applications on your phone.
- At the upper right corner of your screen, tap on the three vertical dots and choose Show system.
- Select Android Setup > Force stop.
- Now, navigate back and enter Google Play Services in the search field. Click on the corresponding icon to disable it.
- Finally, go back to the welcome screen and proceed to configure your Google Pixel phone. When the setup screen comes up, click Accessibility > Assistant.
- Once done, you will be required to activate Google Play Services. Please do so by clicking the right buttons.
After completing the steps above, the FRP lock will disappear from your device in no time.
Limitations
- The steps required for this procedure are lengthy.
- It doesn’t work most of the time.
3. Use Pin Lock Sim to Access Chrome
Here is another recommended solution to fix the FRP lock on your Google Pixel smartphone. For this procedure, you will be using your SIM card. Use the instructions provided below to use the PIN lock SIM to unlock FRP:
- Eject the SIM Card from your Google Pixel phone using a pin or ejector, then connect the phone to a nearby WiFi network.
- Re-insert the SIM card and mistype the PIN code as many times as possible until your device displays a field for you to enter PUK. Kindly enter the wrong PUK number till the SIM card becomes useless/barred.
- Next, click on the Padlock icon on your screen to launch another menu.
- A warning settings prompt will come up at the top of your screen. Hit the All Options button to continue.
- Now, search YouTube by entering the keyword in the search field.
- Launch the Settings menu on YouTube then click History and Privacy to open YouTube’s terms of service.
- In no time, the Chrome browser will come up. Accept the terms and conditions when the corresponding prompt appears. Once done, hit Next, then choose No Thanks afterward.
- Restart your Google Pixel phone and proceed to set up a PIN code so you can start using the device without restrictions.
4. Bypass Android FRP via FRP Unlocker
About three troubleshooting solutions have been demonstrated, however, not all can bypass FRP lock on your Google Pixel phone. In case you still have trouble bypassing FRP on your device, we recommend the ultimate FRP unlocker- iMobie DroidKit. With this software, you can easily deactivate FRP and reclaim control of your Google Pixel phone.
iMobie DroidKit is amongst the top-notch Android unlock solutions with excellent FRP unlock records. It handles Google verification issues (also known as FRP) without compromising your device. You don’t need any OTG cable or USB flash drive when using this software to bypass FRP on your Google Pixel phone. Another great advantage of using the software is the capability to handle FRP issues without tampering with your data files.
Free Download* 100% Clean & Safe
Step 1: Once you get the latest version of iMobie DroidKit, launch it on your computer and select FRP Bypass.
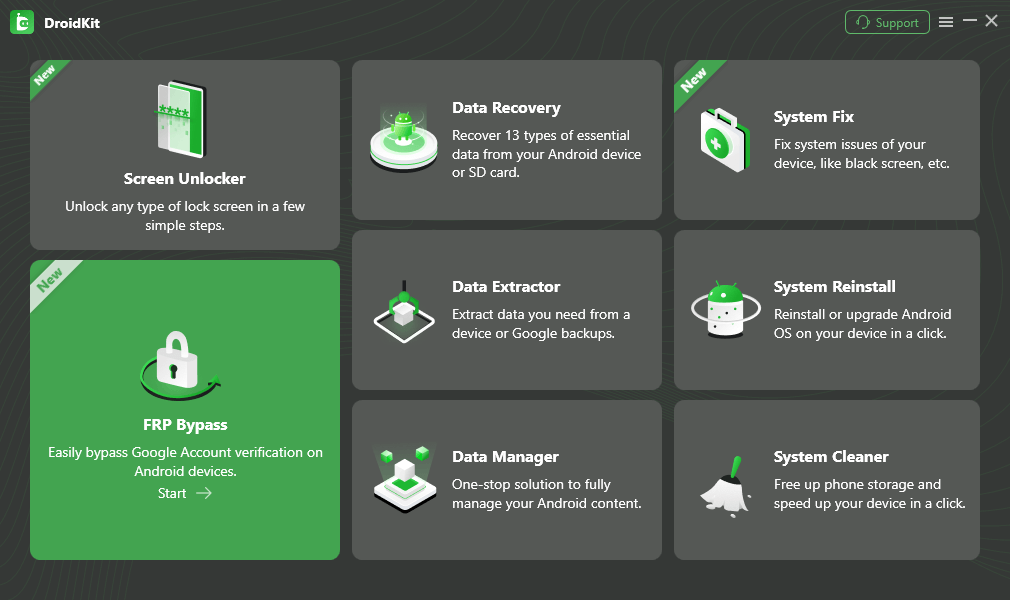
Choose FRP Bypass Mode
Step 2: Connect your device to the computer, press the Start button.
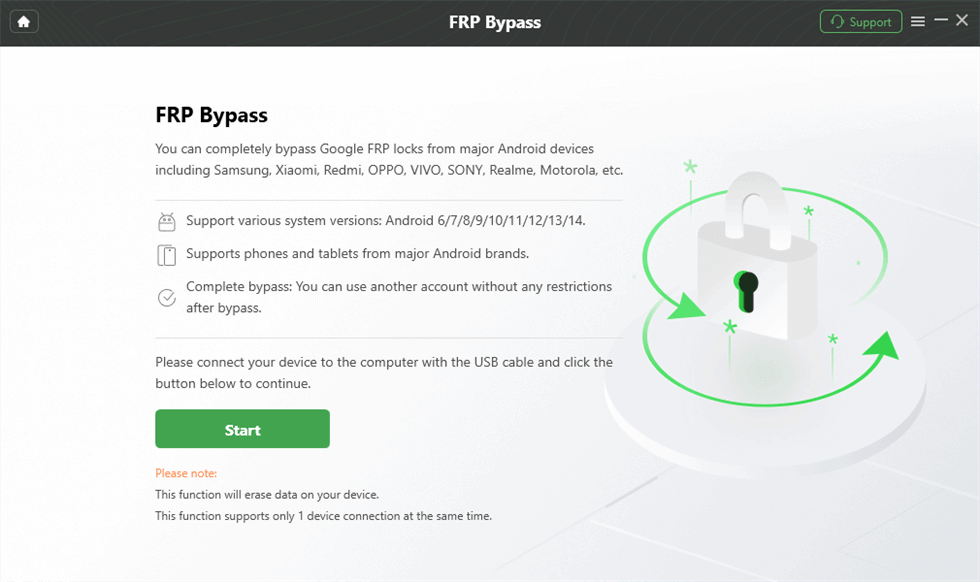
Click on Start
Step 3: Now you just need to choose your device’s brand.
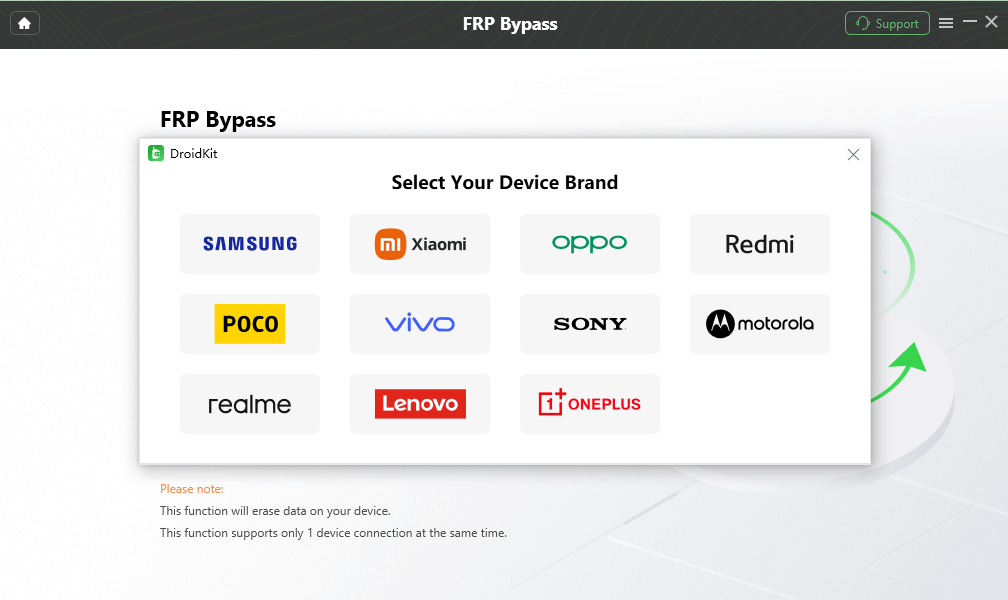
Choose Device Brand
Step 4: The configuration file will be prepared for your device. Later, tap on Start to Bypass to continue.
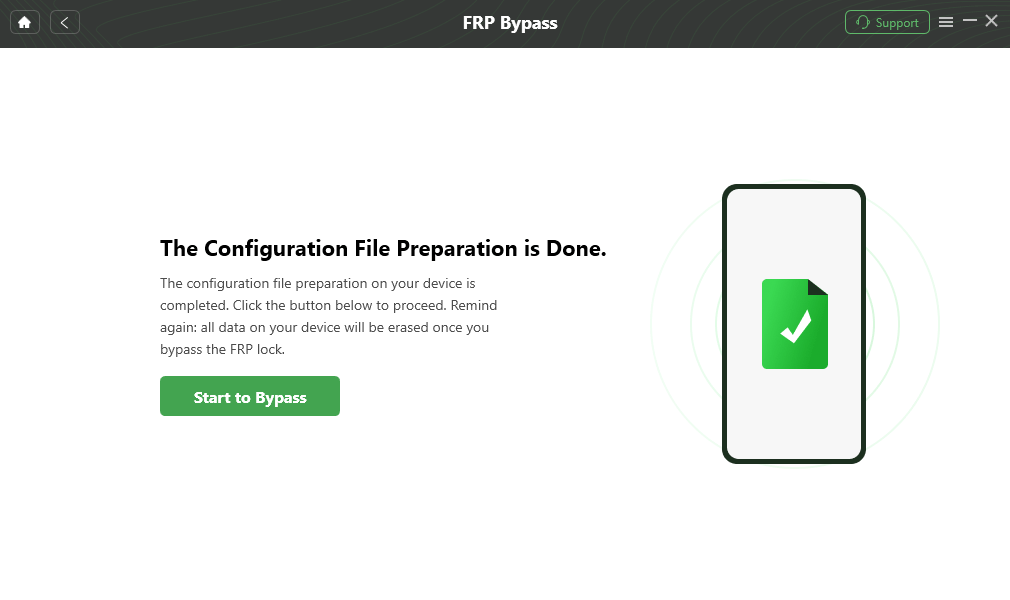
Click Start to Bypass
Step 5: Select your device’s Android system version. Then, hit the Next button.
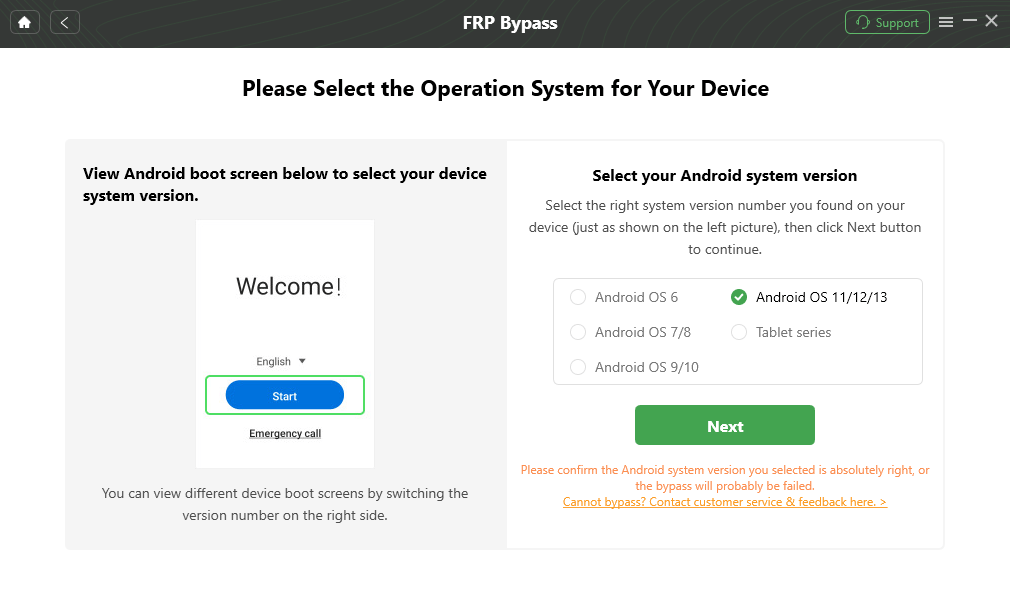
Choose System Version
Step 6: Set up your phone according to the on-screen instructions.
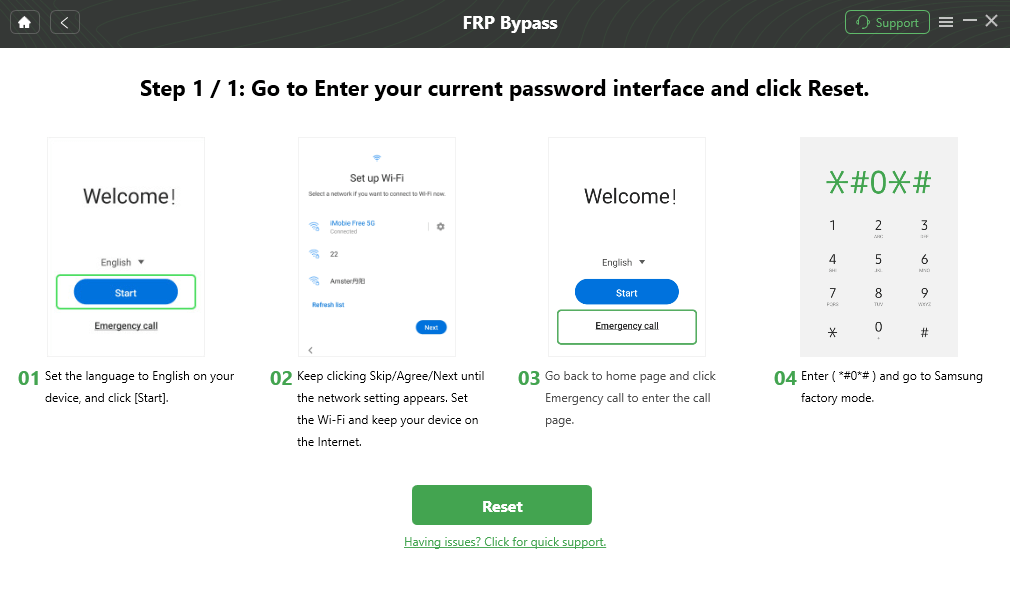
Click Reset
Step 7: After completing the preceding steps, it will begin to circumvent the FRP lock. Finally, the Bypass will be completed, and your device will be restarted.
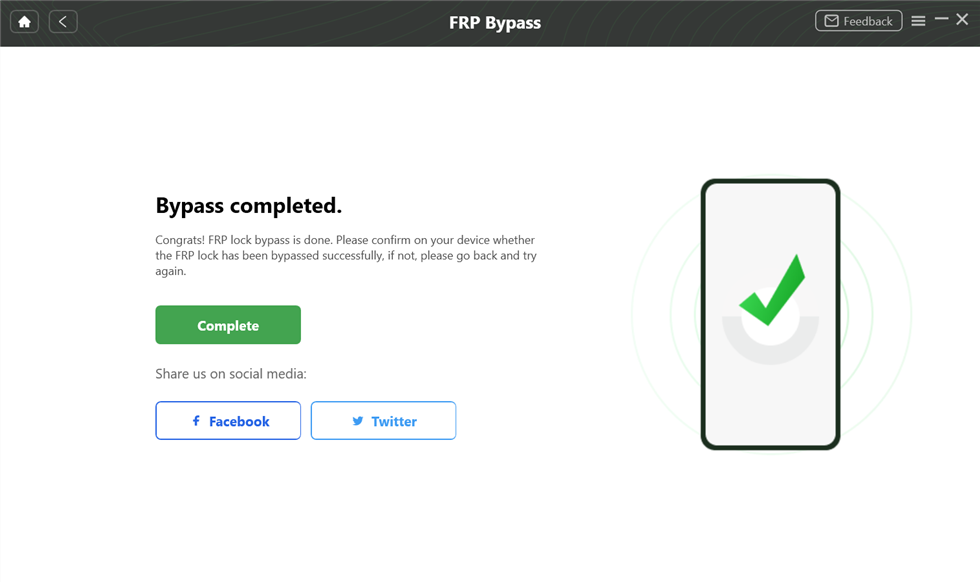
FRP Bypass Complete
FAQs
Can a factory reset remove FRP on Google Pixel?
No! To reset your Google Pixel phone, you must provide the corresponding Google Account details linked to the device. Once that’s done, you can proceed to reset the device to factory settings.
What is Google Pixel FRP?
Google Pixel FRP is an extra security feature used to protect your Pixel phone. This feature was established by Google and tucked into all Android phones running on Android 5.0 up to date. It works by requesting the Google Account details linked to your Google Pixel phone each time you want to reset it or after performing a factory reset.
Final Words
With this Google Pixel FRP bypass guide, you can always handle FRP lock issues on any Google Pixel model. We’ve discussed the top 4 ways to remove FRP/Google verification on Google Pixel. Kindly follow them appropriately.

Roger Smith is a senior technical writer with years of experience in providing Android solutions. He loves to help users solve various problems such as Android unlock, Android data recovery, and Android system repair.
Product-related questions? Contact Our Support Team to Get Quick Solution >
