How to Delete Album on iPhone Easily?
If you don’t know how to delete an album on your iPhone, read through this article and find a way to do it.
It is no big surprise that iPhone is extremely popular because of its excellent camera quality. With every launch, the camera quality keeps enhancing to give users a better experience. Also, every iPhone comes with a preinstalled application for images, i.e., Photos. Here you can browse, save and organize your images conveniently.
However, the problem arises when the device clutters up because of too many images, ultimately leading to the creation of multiple albums. If this sounds like your situation, then do not worry. In the coming parts of the article, you will learn about how to delete an album on iPhone quickly. There’s a bonus tip for you at the end, so make sure you read it till the end.
Album That Can’t Be Deleted
To increase the storage space and speed up an iPhone, you would need to delete some pictures or albums from it. But before we move further to discuss the deletion process, it is significant for you to know that if you’ve synced your iPhone with iTunes or iCloud, deleting certain albums is not possible. Moreover, there are ideally three categories of an album in your iPhone that you cannot delete. These are listed down below:
1. Media Type Album:
Media type albums include Live Photos, Long Exposure, Videos, Portrait, and Panorama. You cannot delete these albums from your iPhone. It is because the original app in the device, i.e., Photos, automatically creates them on the basis of the properties of the app.
2. People, Favorites, and Places Albums:
You will find these albums on your iPhone by default. However, you can’t delete albums created by the name of Places, Favorites, and People because these are created automatically by the device itself to organize the Photo application.
3. Albums synced to iTunes:
If you’re searching about how to remove an album from iPhone photos, then remember, you can’t delete the albums that are synced from PC through iTunes. It is because when you sync your iPhone by iTunes, its content becomes dominated by iTunes.
How to Delete Album on iPhone
Now that you are aware of the albums that can’t be deleted on iPhone let’s talk about how to delete albums on iPhone? All the iPhone models have a Photos app where you can remove an album. It is essential here to highlight that you can easily delete all the third-party albums and those you have created by using the “+” icon.
Removing an album from the iPhone requires no particular skill. Thus, you can delete albums in a matter of a few seconds. Here are the instructions that you need to follow to resolve the issue of how to remove an album from iPhone photos:
- Click on the Photos app on your iPhone.
- Click on the Albums tab that appears at the bottom. Then, click on the See All option given in the top-right corner.
- In the top-right corner, you find the Edit option. Click on it to proceed.
- Now, the delete feature will be enabled on the screen. You’ll see a red-colored minus button over all the created albums. Tap on it and click on the Delete Album option from the pop-up message.
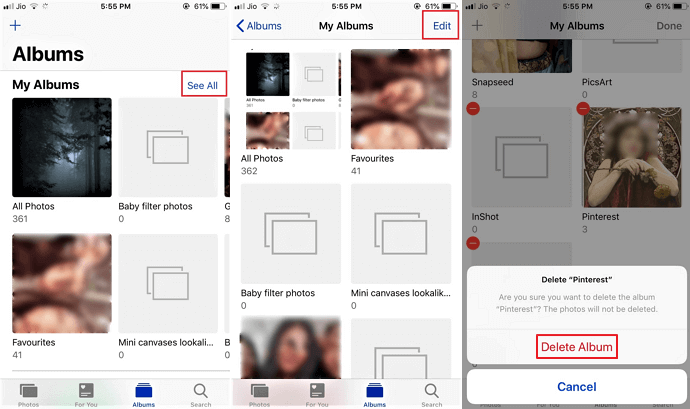
Delete Album on iPhone
That’s all it takes to delete an album on iPhone. You can use the above-mentioned method to delete as many albums as you prefer.
Why Albums I Didn’t Create Appear on My iPhone?
A lot of times, while browsing the Photos app on your iPhone, you may happen to see albums that you never created on your own. Indeed this can be annoying because iPhone offers limited storage space, and such albums mostly have duplicate files. In such a case, it is only normal to wonder how these albums are appearing on your iPhone,
iPhone automatically creates new albums for all the third-party applications that possess your permission to save the content which you post on them. For example, if you have posted anything on Instagram, your iPhone will automatically create a dedicated album to save your post. That’s how you get to albums that are not created by yourself on your device.
How to Restore Deleted Albums
At times while deleting an album on iPhone, you may accidentally delete the wrong one. But fortunately, iPhone allows you to recover deleted content of the Photos app within 30 days of deletion. However, you can’t recover an entire deleted album. It means you will have to recover pictures one at a time or all at once. Here’s how you can do it:
- Tap on the Photos app on your device.
- Tap on the Albums option and click on the Recently Deleted option.
- Click the Select option and choose the images to recover. Otherwise, click on Recover All option.
- Click the Recover option to confirm.
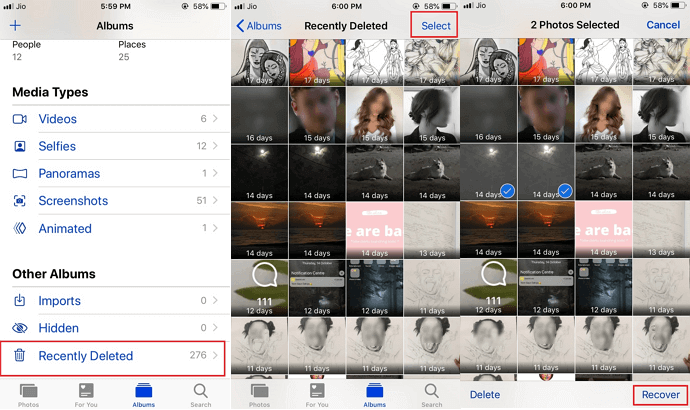
Restore Deleted Albums on iPhone
With this, you will have recovered pictures back in their original albums.
Bonus Tip. How to Mass Delete Photos
If you want to delete all photos massively, AnyTrans is the tool you need. Also, you can use this software to create backups for your photos. Moreover, it is capable of deleting the synced photos from iPhone/iPad easily, exporting the whole iPhone photo library to a computer all at once, and transferring photos between iPhones, etc.
Now, you can download AnyTrans and follow the steps below to delete all photos on your device with one click.
Free Download * 100% Clean & Safe
Step 1. Open AnyTrans, and plug in your iPhone with a USB cable. Click on Photos on the interface.
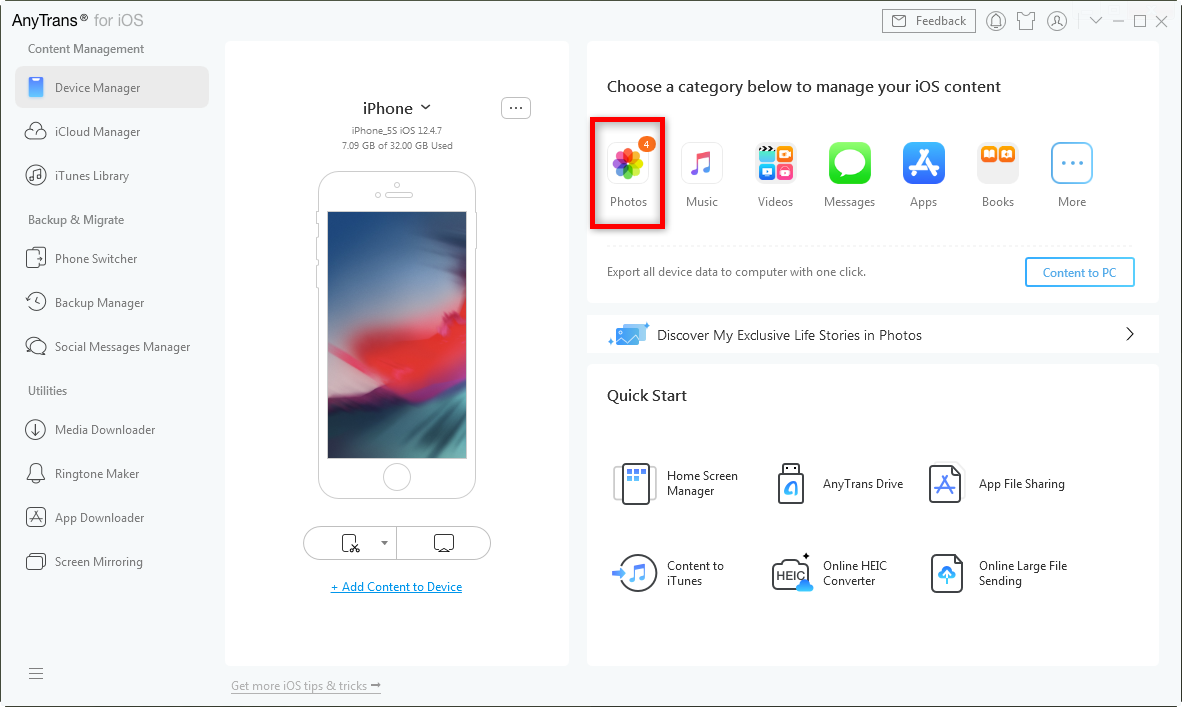
Connect Your iPhone to AnyTrans and Choose Photos
Step 2. Select the All to select all photos, click the trash icon to delete all photos.
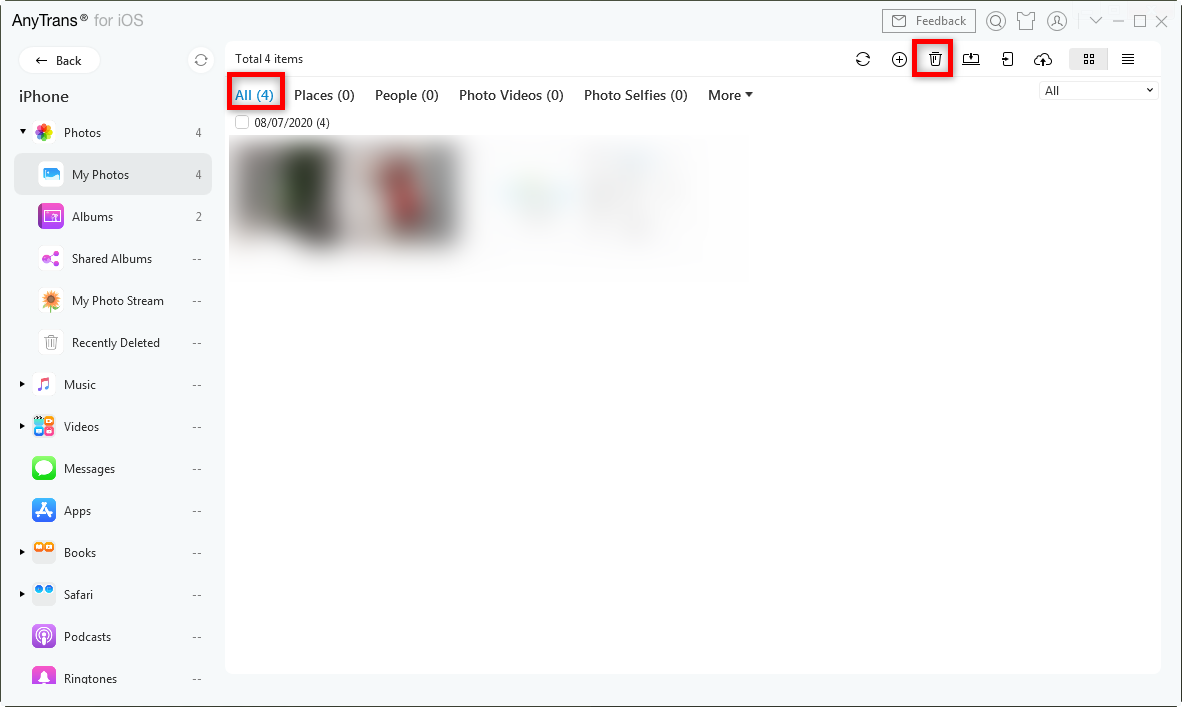
Select All and Delete
The Bottom Line
With the solutions mentioned above, the problem of how to remove an album from iPhone photos will be resolved without any hassle. Deleting albums will help you in increasing the storage space and decluttering your device. However, if you mistakenly delete a precious album, don’t forget to use the bonus tip for your rescue.

Member of iMobie team as well as an Apple fan, love to help more users solve various types of iOS & Android related issues.
Product-related questions? Contact Our Support Team to Get Quick Solution >
