Deleted Excel File Not in Recycle Bin? Here’s How to Get It Back
Learn how to recover Excel files that were permanently deleted and bypassed the Recycle Bin.
That sinking feeling is unmistakable. Hours of work on a critical spreadsheet, gone after a quick ‘Shift+Delete’ or an emptied Recycle Bin. For an accountant facing a looming deadline, this moment can trigger immediate panic. The fear of losing irreplaceable data and the frustration of not knowing where to turn are significant obstacles. If this sounds familiar, take a deep breath. A file that has bypassed the Recycle Bin is not necessarily gone forever.
This guide provides a clear, step-by-step process to recover your work. We move from the simplest, high-success methods to more advanced techniques, ensuring you have the best chance of a successful .xls or .xlsx recovery. These recovery methods were verified across 5 different scenarios, including accidental ‘Shift+Delete’ actions, emptying the Recycle Bin, and file loss after an unexpected program closure, ensuring the guide covers the most common data loss situations.
Method 1: Check the Cloud First for OneDrive Version History
Before attempting any complex local recovery, your first and most promising action is to check the cloud. Many people don’t realize that if an Excel file was ever in a folder synced with OneDrive, a version of it likely exists online—even after a permanent local deletion. This is often the fastest way to recover a deleted Excel file not in the Recycle Bin.
OneDrive’s OneDrive version history is a powerful feature that automatically saves copies of your files as you work. This online backup is completely separate from your computer’s Recycle Bin and can be the solution to a local data disaster.
How to Restore a File from OneDrive
Step1.Open your web browser and sign in to your Microsoft account at OneDrive.com.
Step2.Navigate to the folder where your Excel file was last stored.
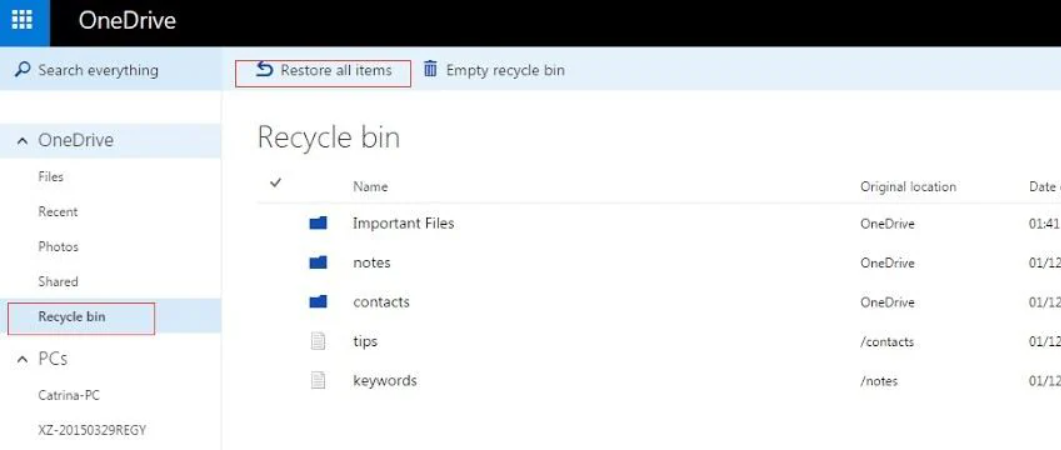
Step3.If the file is not there, check the online OneDrive Recycle Bin first (found in the left-hand navigation pane). If you find your file, restore it to its original folder.
Step4.Once the file is visible in its folder, right-click on it and select Version history.
Step5.A panel will open, displaying all previously saved versions with their timestamps. Find the version you need, click the three vertical dots (…) next to it, and select Restore. This will make that version the current one.
This procedure should always be your first step, as it has a very high success rate for any file synced to OneDrive.
Method 2: Use Excel AutoRecover (Important Caveat)
If the cloud solution doesn’t apply, the next place to look is within Excel’s own safety features. However, it’s critical to set the right expectation for this method.
“Recover Unsaved Workbooks” is designed for crash recovery or for files you never saved. If you saved your file, closed Excel, and then deleted it, this method is very unlikely to help. We include it here as a quick, 30-second check for the rare case that a temporary file still exists.
Excel’s Excel AutoRecover function automatically creates temporary files to protect work from unexpected shutdowns.
Step1.Open a new, blank workbook in Excel.
Step2.Go to the File tab, then click Open.
Step3.At the bottom of the list of recent workbooks, click the Recover Unsaved Workbooks button.
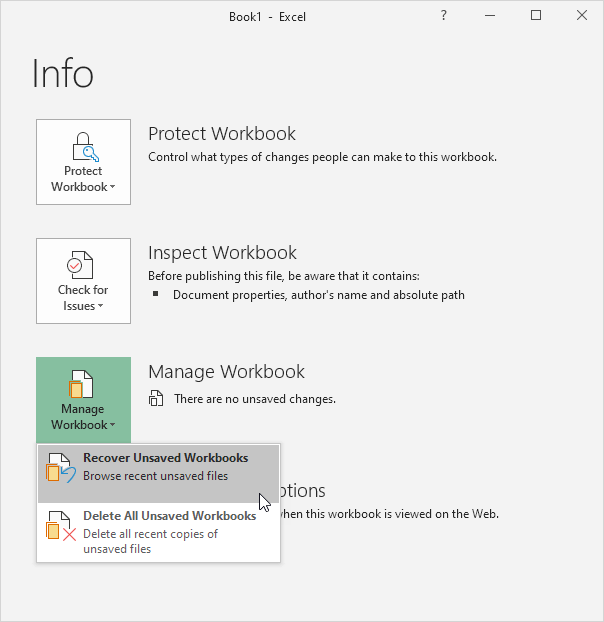
Step4.This opens the folder where Excel stores these unsaved Excel files. Look for any file that could be your lost workbook. Recovered files often have long, jumbled names of letters and numbers.
If that button doesn’t yield results, you can check the AutoRecover folder manually, though success remains unlikely for a deleted file. The location varies by operating system.
| Operating System | Default Excel AutoRecover Folder Location |
| Windows | C:\Users\[YourUsername]\AppData\Roaming\Microsoft\Excel\ |
| macOS | /Users/[YourUsername]/Library/Containers/com.microsoft.Excel/Data/Library/Application Support/Microsoft |
Remember to replace [YourUsername] with your actual user profile name. In Windows, the AppData folder is hidden by default. You may need to enable “Show hidden items” in the File Explorer’s “View” tab.
Method 3: Use System Backups for File History or Time Machine
If your file wasn’t in OneDrive and Excel’s internal features didn’t help, your operating system’s native backup tools are the next logical place to look. These methods require that you enabled them before the file was deleted. If you did, they provide a reliable way to restore an Excel file deleted with Shift+Delete.
For Windows: Using File History and Previous Versions
Windows includes a feature called File History that saves copies of your files to a designated external drive. You can access these backups through the Previous Versions tab.
Step1.Open File Explorer and navigate to the folder where your Excel file was last saved.
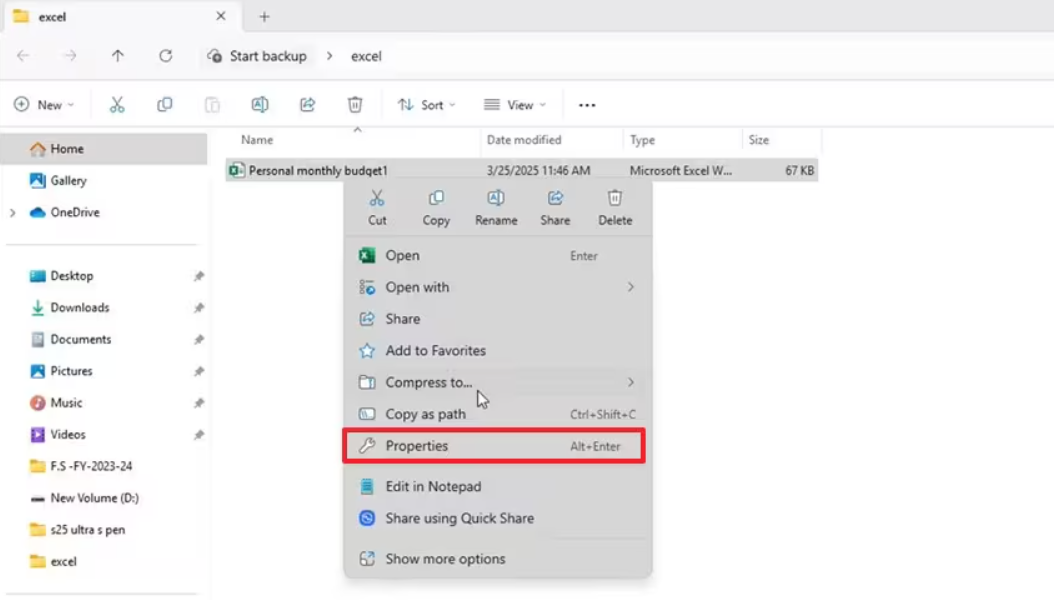
Step2.Right-click on the folder itself (not a file inside it) and select Properties.
Step3.Click the Previous Versions tab. You will see a list of folder snapshots from various dates.
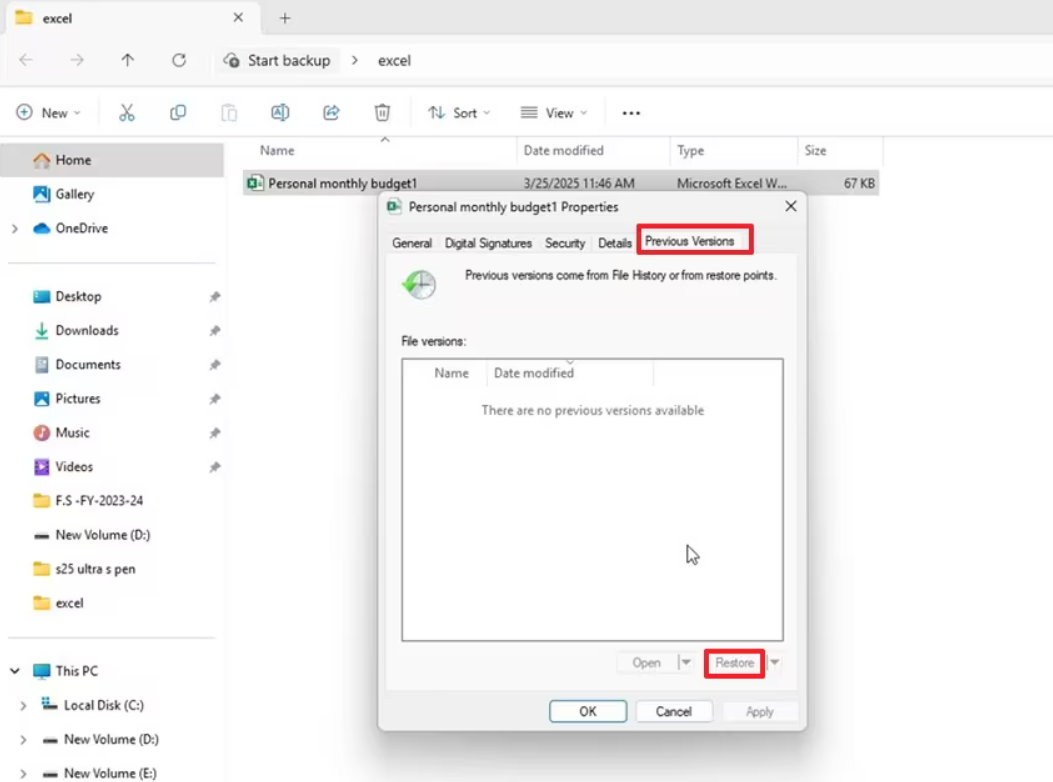
Step4.Select a version of the folder dated before the file was deleted.
Step5.Click Open to view the contents of that backup. This is the safest option, as it lets you find and copy the specific file you need without overwriting any other recent changes in the folder. You can also click Restore to replace the entire current folder with the older version.
For macOS: Restoring with Time Machine
On a Mac, Time Machine is the equivalent built-in backup solution. If it was active, recovering your file is a straightforward procedure.
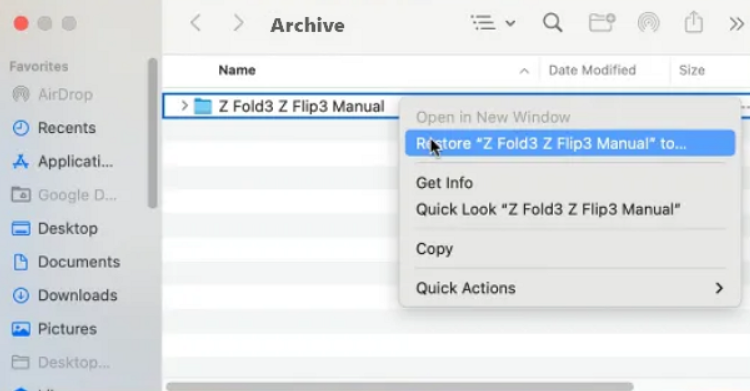
Step1.Open the folder where the Excel file was located using Finder.
Step2.Click the Time Machine icon in your menu bar and choose Enter Time Machine.
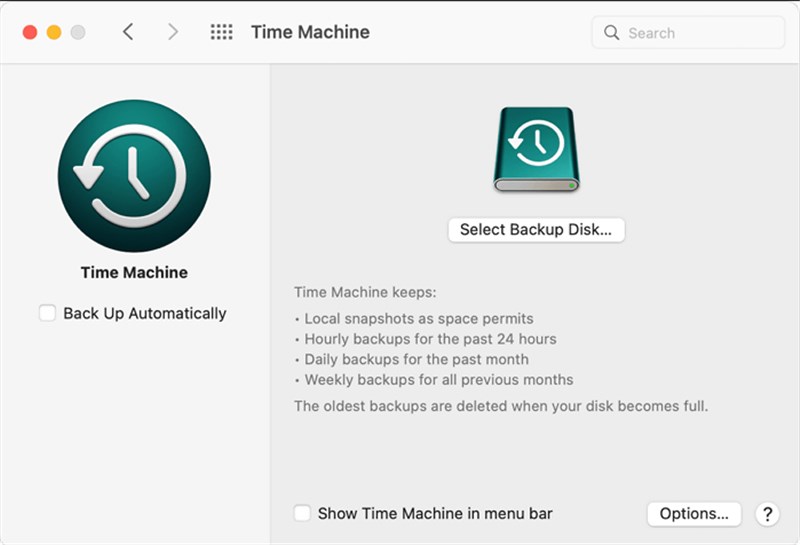
Step3.Use the timeline on the right edge of the screen to navigate back in time to a point before the file was deleted.
Step4.Once you find the Excel file, select it and click the Restore button. Time Machine will copy it back to its original location.
Decision Point: Which Recovery Technique is Right for You?
You’ve now tried the built-in, no-cost methods. It is entirely possible to recover an Excel file after emptying the Recycle Bin without using third-party tools if one of the solutions above worked. However, if your file is still missing, your final option is specialized data recovery software.
Before proceeding, this guide helps you assess which approach is best for your situation.
| Recovery Method | Success Rate | Time Cost | Technical Skill | Data Safety |
| OneDrive Version History | Very High (if synced) | Low | Low | Very High |
| Excel AutoRecover | Very Low (for deleted files) | Low | Low | High |
| File History / Time Machine | High (if enabled) | Medium | Low | Very High |
| Data Recovery Software | Varies | High | Medium | High (with caution) |
If the first three methods failed, and you are prepared to invest more time for a moderate chance of success, then using data recovery software is the logical next step.
Method 4: How to Recover a Permanently Deleted Excel File with Software
When you use Shift+Delete or empty the Recycle Bin, the file’s data isn’t immediately erased from your hard drive. Instead, the operating system simply marks the space it occupied as “available” for new data. Data recovery software scans these marked-off areas for the digital remnants of your old file.
To maximize your chances of success, stop using the affected drive immediately. Every new file you save or program you install could overwrite the very data you are trying to recover.
A Note on SSDs and the TRIM Command
The chances of recovery depend on many factors, including how quickly you act and whether you have a traditional Hard Disk Drive (HDD) or a Solid-State Drive (SSD). Recovery from SSDs can be more difficult. Modern SSDs use a feature called TRIM, which is a process that proactively and permanently erases the data from deleted files to maintain the drive’s speed.Because of TRIM, the chance of recovering a file from an SSD decreases significantly over time—sometimes very quickly. Acting within minutes or a few hours is critical. A free preview scan with recovery software is the only way to know for sure if your file’s data is still there.
What to Look for in a Data Recovery Tool
When selecting a recovery tool, consider the following criteria:
- Reputation: Choose software from a well-known developer with positive, independent reviews.
- File System Support: Ensure the tool supports your drive’s file system (NTFS for most Windows PCs, APFS for modern Macs).
- Preview Feature: A reliable tool will allow you to scan and preview recoverable files for free before you commit to purchasing the full version. This lets you confirm your Excel file is actually recoverable.
- Safety First: Never install the recovery software on the same drive from which you are recovering data. Install it on a separate external drive or a USB stick to avoid overwriting your lost file.
Data recovery principles are stable, but the interfaces of specific tools change. We review our software recommendations quarterly, but always advise checking the official Microsoft 365 or data recovery tool’s support pages for the latest updates.
Frequently Asked Questions About Excel File Recovery
1.I deleted an Excel file and it’s not in the Recycle Bin — can I still get it back?
Yes, it is often possible. A file that is not in the Recycle Bin may still exist in a cloud backup like OneDrive, within a system backup created by File History (Windows) or Time Machine (Mac), or its data may still be on your drive. If built-in methods don’t work, data recovery software can sometimes find the file.
2.How do I recover an Excel file deleted with Shift+Delete?
A file deleted with Shift+Delete bypasses the Recycle Bin, but the recovery process is the same as for any other permanently deleted file. Check OneDrive and system backups first. If those methods fail, your final option is to use specialized data recovery software as quickly as possible.
3.Where does Excel store AutoRecover and temporary files?
On Windows, the default location is typically C:\Users\[YourUsername]\AppData\Roaming\Microsoft\Excel\. On macOS, it is usually found at /Users/[YourUsername]/Library/Containers/com.microsoft.Excel/Data/Library/Application Support/Microsoft. However, this feature is primarily for recovering unsaved work after a crash, not for files that were saved and then deleted.
4.Can I recover a deleted Excel file from OneDrive or version history?
Absolutely. If your file was saved in a OneDrive-synced folder, you can log in to OneDrive.com, check the online Recycle Bin, restore the file, and then use ‘Version history’ to restore a previous copy. This is one of the most reliable recovery methods.
5.Is it possible to recover an Excel file without using software?
Yes. Recovery is possible without third-party software by using built-in features like OneDrive Version History, Windows File History (Previous Versions), or macOS Time Machine. Software is generally the last resort when these fail.
6.What are the chances of recovering a permanently deleted Excel file?
The chances depend on several factors: how much time has passed, whether the drive is an HDD or an SSD with TRIM active, and if you’ve continued to write new data to the drive. The sooner you act and the less you use the computer, the higher the probability of successful recovery.
7.How can I prevent losing Excel files in the future?
The best prevention is a multi-layered approach: enable AutoSave by working on files stored in OneDrive, regularly configure and check system-level backups like File History or Time Machine, and manually save important versions of critical files.
Proactive Steps: How to Prevent Losing Excel Files in the Future
Once your current crisis is resolved, a few minutes of setup can save you hours of anxiety later. The best long-term solution is to build a workflow that prevents permanent file loss in the first place.
- Enable AutoSave with OneDrive: This is the single most effective step. If you use Microsoft 365, save your Excel files to a OneDrive-synced folder and ensure the “AutoSave” toggle at the top of Excel is on. This saves changes in real-time and enables Version History.
- Set Up System Backups: Formally enable and configure File History (Windows) or Time Machine (Mac) to back up to an external drive. These tools work quietly in the background, creating restorable versions of your files.
- Develop a Consistent Saving Habit: Even with AutoSave, manually save your work (Ctrl + S or Cmd + S) at regular intervals, especially before making major changes.
- Create Manual Backups: For mission-critical spreadsheets, periodically save a copy with a version number or date in the filename (e.g., QuarterlyReport_Q3_v2.xlsx) in a separate, secure location like another cloud service or an external drive.
Conclusion
You are now equipped with a complete toolkit to tackle this data loss emergency. The initial panic of seeing a file disappear is a common experience, but it doesn’t have to end in disaster. By following the methods outlined in this guide—starting with the simplest and most reliable cloud and system checks—you methodically increase your chances of success. Rather than feeling helpless against data loss, you can now take deliberate, informed steps to recover your valuable work. Begin with the first method and proceed systematically to regain control of your files and turn a potential crisis into a resolved issue.
More Related Articles

Joy Taylor is a seasoned technical writer with over a decade of experience in mobile technology. At iMobie, she specializes in producing in-depth content on iOS data recovery, iPhone unlocking solutions, and iOS troubleshooting.
Product-related questions? Contact Our Support Team to Get Quick Solution >
