Trying to farm a specific Pokémon for candies or a shiny can be deeply frustrating. You need hundreds of candies for an evolution, but the spawns you see are completely random. This guide directly addresses the most common obstacles you face: outdated Pokémon Go map resources that lead nowhere, confusing nest migration schedules, and in-game events that suddenly disrupt your hunt. The problem isn’t your luck; it’s your tools.
Here, we provide a field-tested procedure for locating a Pokémon GO nest. By understanding and using nests—special areas where one species appears in large numbers—you can stop relying on chance. This guide will give you the strategy to efficiently farm the candies you need, hunt for shinies, and accelerate your game progress. The nest-finding techniques described below have been confirmed across 15 different park locations on both iOS and Android devices to ensure they are universally effective.
Table of ContentsHide
What Are Pokémon GO Nests? The Core Mechanics
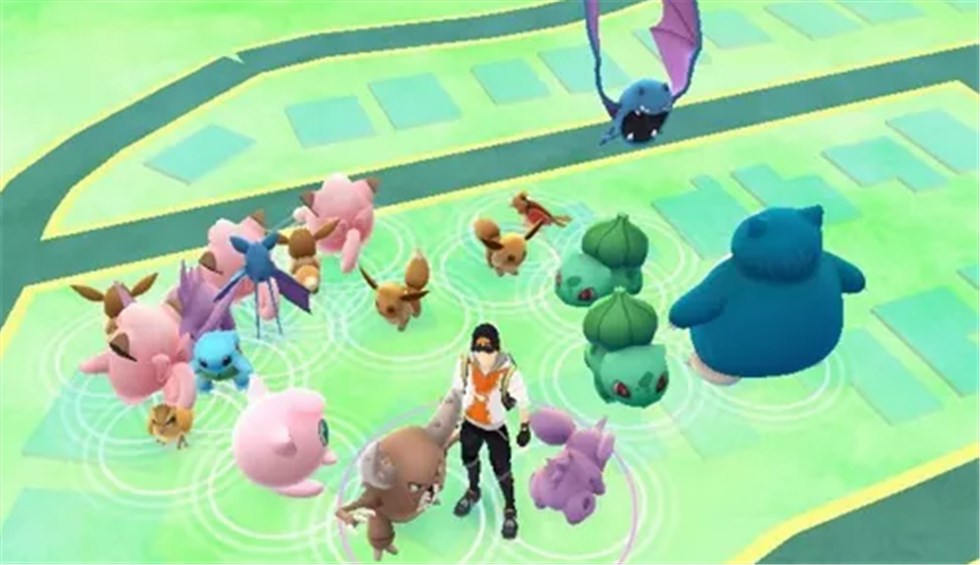
A nest is a specific, real-world location—almost always a park or public green space—where a single species of Pokémon spawns at a much higher rate than normal. Instead of a random assortment, you will find an area populated by multiple instances of a single nesting species, like Scyther, Magnemite, or a recent starter.
These concentrated spawns are tied to specific points within the nest’s boundaries. A nest essentially forces these points to generate a particular species for a limited time. This system is governed by two main rules:
1. Location: Nests are tied to geographical areas marked as parks or recreational grounds in the game’s map data (the dark green patches). Regular streets or commercial areas do not contain nests.
2. Rotation: The nesting species changes every two weeks in a global event called a nest migration. A park that is a Charmander nest today could become a Mudkip nest after the next rotation.
Understanding this mechanic is the foundation for any successful nest hunt. It separates targeted farming from aimless wandering.
Method 1: Using a Nest Map for Fast Results
The most efficient technique for finding active nests is using a community-driven map or a Pokémon Go scanner resource. After The Silph Road’s renowned atlas shut down, players shifted to new platforms to report their findings. These tools save you the time and effort of physically checking multiple parks.
For example, I was recently hunting a shiny Teddiursa. Instead of wandering randomly, I checked a nest map and saw that a large local park was reported as a Teddiursa nest. It turned out to be a massive nest, and after checking over 300 of them in a couple of hours, I finally got the shiny. This is the power of a targeted approach.
Here is the procedure for using these essential tools today:
Step 1. Find a Current Nest Map: Your best bet is PogoMap.info. It’s a long-standing community project where players report and confirm nests. Another excellent resource is Niantic’s own Campfire app. Check the map feature within local community groups to see if players are tagging nests.

Step 2. Navigate to Your Area: Once on the website or app, zoom in on your city to see reported nests. They are typically marked with an icon of the Pokémon species.
Step 3. Verify the Report Date: This is the most critical step. Always check when the nest was last reported. If the report is from before the most recent nest migration, the information is outdated. A trustworthy report should be from the last day or two.
Before traveling to a reported nest, check local Pokémon GO community Discord servers or social media groups. Real-time confirmation from other players can save you a wasted trip.
Method 2: How to Identify Nests Manually
If maps for your area are unreliable or you enjoy the thrill of discovery, you can learn to identify nests through in-game observation. This method empowers you to become your own best resource.
The clearest indicator of a nest is a dense cluster of a single, non-common Pokémon species. Here’s what to look for:
- Focus on Dark Green Areas: Nests are almost exclusively found in areas shaded a darker green on the in-game map, which signifies parks. If you see a cluster of a single species on a normal city block, it is likely a temporary “cluster spawn,” not a persistent nest.
- Observe Spawn Density and Frequency: When you enter a potential nest, you should see at least two or three of the same species on your screen at once. Over 30-60 minutes, a healthy nest should produce a consistent stream of that Pokémon from multiple points within the park’s boundaries.
- Distinguish from Event Spawns: Be mindful of ongoing events. If a Pokémon is featured globally (like a Community Day), seeing many of them does not mean you’ve found a nest. A true nest features a Pokémon that is not part of the current event’s boosted spawns.
Gauging a Nest’s Quality
Not all nests are created equal. An expert hunter knows how to quickly judge a nest’s value.
- Low-Yield Nest: A small park might only have 3-5 nest spawn points. Over 15 minutes, you might only see a handful of the nesting Pokémon. This is fine for filling a Pokédex entry, but poor for serious farming.
- High-Yield Nest (or “Mega-Nest”): A large park, golf course, or nature reserve could have 20+ spawn points. You’ll be continuously encountering the nesting Pokémon, making it ideal for shiny hunting or farming XL Candy.
When you first arrive at a nest, do a quick loop. If you only encounter 2-3 of the target Pokémon in 10 minutes, it’s a low-yield nest. If you’re seeing them pop up constantly, you’ve found a great spot.
Which Method Is Right for You?
Using a community map is perfect for players who want to plan a specific hunt with maximum efficiency. It requires low time investment upfront and gives you a high chance of success, provided your local community is active. Manual discovery is better for explorers or players in areas with poor map data. It takes more time and requires you to travel, but the information you gather is 100% accurate at that moment.
Advanced Strategies: Migration, Events, and Shiny Hunting
Once you’ve mastered finding nests, you can optimize your strategy by understanding the more complex mechanics that govern them.
Understanding the Nest Migration Schedule
This is the most critical concept for advanced hunters. The entire pool of nesting Pokémon rotates globally in a scheduled event. This nest migration happens every two weeks on a Thursday at 5:00 PM PDT (Pacific Daylight Time). At this exact time, every nest in the world changes to a new Pokémon. Knowing this schedule is crucial for verifying map data and planning your visits.
In-game events often change the global spawn pool, which can impact or even disable nests. This is a major source of confusion and can ruin a planned trip if you’re not aware.
Override: Some events, especially Community Days or Spotlight Hours, will completely replace nest spawns with event Pokémon. The nest will return to normal after the event ends.
Dilution: Other events might add boosted spawns alongside the regular nest spawns, reducing how often you see the nesting species but not eliminating it.
Always check the “Today” view in-game for active event details before heading out to a nest.
Using Nests for Efficient Shiny Hunting
Nests do not increase the shiny rate of a Pokémon. The odds remain the same. However, nests are arguably the single best tool for shiny hunting.
Why? Because shiny hunting is a numbers game. Finding a shiny is about maximizing the number of encounters you have with a specific Pokémon. A nest dramatically increases your encounter rate, allowing you to check hundreds of a single species in a fraction of the time it would take otherwise. If you are hunting a shiny-eligible species, finding its nest is the most effective way to improve your chances.
The world of Pokémon GO is always changing. We continuously monitor community tools and Niantic updates, and this guide will be updated to reflect any new nest-finding techniques or changes to spawn mechanics.
Explore More Pokémon Nests With a GPS Location Tool
Finding a good Pokémon GO nest can be time-consuming, especially after nest migrations or during event rotations. As explained in Pokémon Nest Guide, players often rely on community maps, Discord reports, and park exploration to locate high-yield nests efficiently.
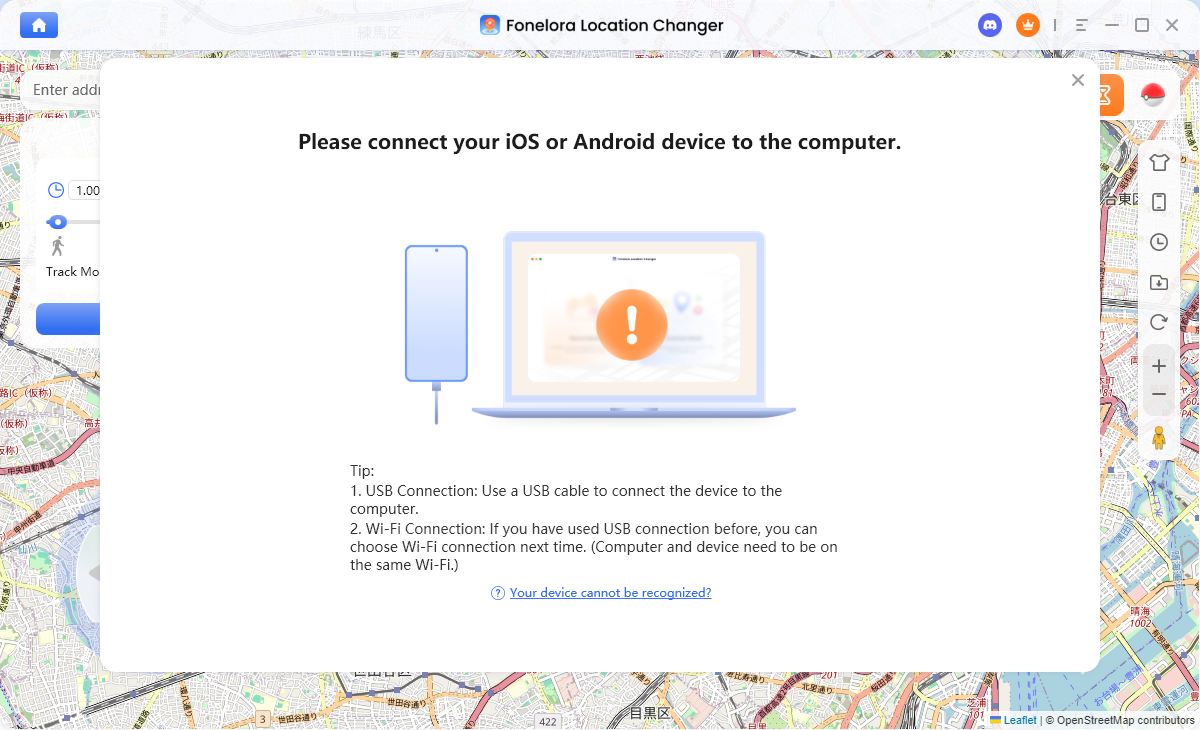
To improve nest searching flexibility, some players also use Fonelora Location Changer to explore more park areas and active spawn locations virtually.
Why Players Use Fonelora Location Changer
According to Fonelora Location Changer, the software includes several GPS simulation features useful for Pokémon GO exploration:
- Teleport Mode
- GPS Joystick
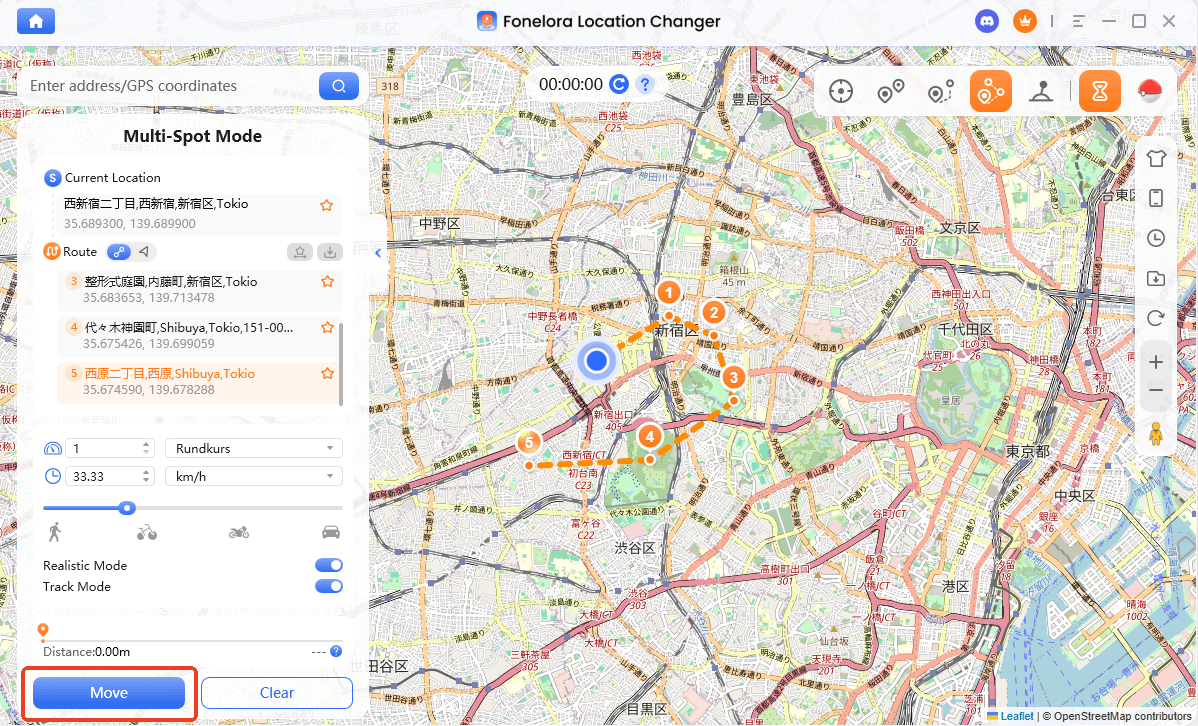
- Multi-Spot Route Simulation
- Adjustable Walking Speed
- GPX Route Import
- Cooldown Timer
The platform also advertises compatibility with:
- iPhone and iPad
- Android devices
- iOS 18 and iOS 26
- Android 15 and newer systems
Unlike modified Pokémon GO apps, the software focuses on device-level GPS simulation rather than altering the game client itself.
Key Highlights for Nest Hunting
Explore More Parks Efficiently
Pokémon nests are commonly tied to parks and green areas. Community resources frequently mention large parks and nature reserves as the best nesting locations.
Fonelora’s route simulation allows players to check multiple parks and nest areas more efficiently during migration periods.
GPX Route Support
Many community nest groups share GPX walking routes for large nests and farming areas. Reddit discussions frequently reference GPX-based nest navigation strategies.
Fonelora supports GPX route importing for structured exploration.
Smooth GPS Route Simulation
Instead of relying only on instant teleportation, users can simulate:
- walking
- cycling
- driving routes
with customizable movement speeds for more natural gameplay patterns.
Built-In Cooldown Timer
The cooldown timer helps players manage movement timing more realistically between distant nest locations.
How to Use Fonelora Location Changer for Pokémon GO Nests
Step 1: Install the Software
Download and install Fonelora Location Changer on your Windows or Mac computer.

Step 2: Connect Your Device
Connect your iPhone or Android device using:
- USB
- Wi-Fi
- Bluetooth
depending on your preferred setup.
Step 3: Choose a GPS Mode
Select one of the available movement modes:
- Teleport Mode
- Joystick Mode
- Multi-Spot Route
- Jump Teleport
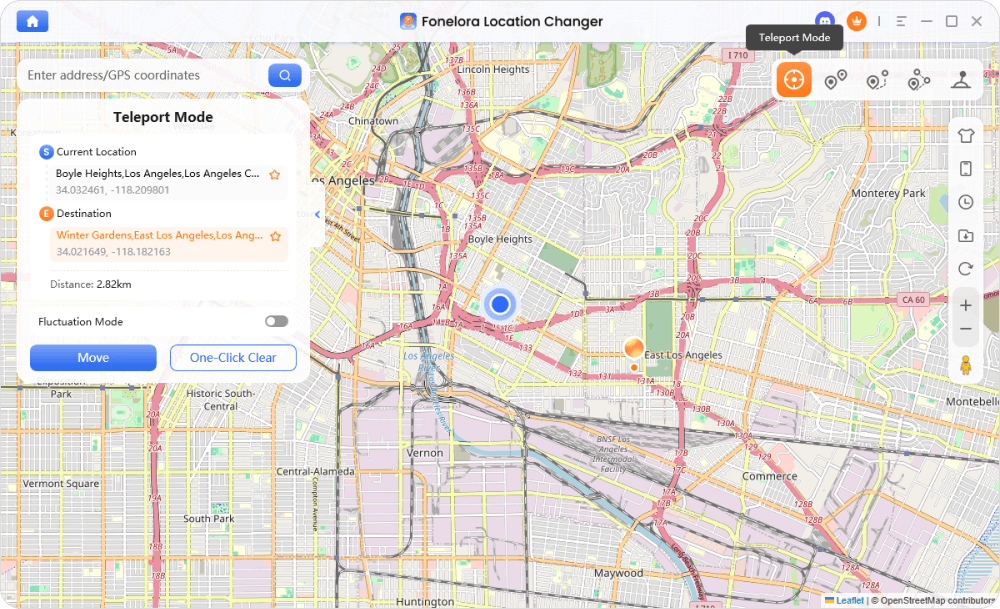
Step 4: Click “Move” to complete the location change.
Frequently Asked Questions (FAQ)
- What is a nest in Pokémon GO?
- A nest is a specific area, almost always a park, where a single species of Pokémon spawns in high numbers. This species rotates every two weeks.
- How do Pokémon GO nests work?
- Nests are comprised of multiple spawn points within a designated area that are programmed to generate a high percentage of one nesting species, overriding the normal variety of spawns.
- Which Pokémon can appear in nests?
- The pool of possible nesting species rotates with each in-game season. Extremely rare Pokémon (like Larvesta), most evolved forms, and regional exclusives do not nest. For a community-updated list of what can currently be found in nests, resources like Leek Duck are excellent.
- How often do nests change in Pokémon GO?
- Nests change species every two weeks during the nest migration, which occurs on a Thursday at 5:00 PM PDT.
Take Control of Your Pokémon Hunt
You no longer need to rely on random luck to find the Pokémon you need. Understanding how to use nests transforms your gameplay and saves time. Combined with tools like a catching rate calculator and Fonelora Location Changer to explore more active nest areas, you can hunt more efficiently. Stop waiting—use the right tools and go find your first nest today.


Hot Topics
