Google Phone Verification Not Working? What You Can Do
Google phone verification not working? Learn why Google asks for phone verification, what account recovery options you can try, and what to do if Google verification appears after an Android factory reset.
Quick Answer: You usually cannot simply skip Google phone verification when Google requires it for account security. If you cannot receive a code, try Google Account Recovery, use another verified sign-in method, update your recovery phone number if you still have access, or verify from a trusted device. If the verification appears after an Android factory reset, it may be Factory Reset Protection, which requires proof that you own the device.
Google phone verification can appear when you create a new Google Account, sign in to Gmail, recover an account, turn on security features, or set up an Android phone after a factory reset. Although many users search for ways to bypass Gmail phone verification, the safer question is: what legitimate recovery options can you use when Google phone verification is not working?
This guide explains why Google asks for phone verification, what to do when you cannot receive a verification code, how Gmail verification differs from Android FRP verification, and when a tool-assisted option may be relevant for supported owned Android devices.
Why Google Asks for Phone Number Verification
Google may ask for a phone number to help protect your account and reduce abuse. A phone number can be used to confirm that you are a real person, prevent automated account creation, secure suspicious sign-ins, and help you recover access if you forget your password.
The main reasons Google may ask for phone verification include:
- Security: Phone verification helps Google confirm your identity when account activity looks unusual.
- Spam and abuse prevention: Requiring a phone number can make it harder for bots or spammers to create large numbers of fake accounts.
- Account recovery: A recovery phone number can help you regain access if you forget your password or lose access to your account.
- Two-Step Verification: If you enable two-step verification, Google may use your phone as one of the ways to confirm it is really you.
- Device ownership checks: On Android phones, Google verification after a factory reset may be part of Factory Reset Protection.
Because phone verification is a security feature, there is no universal way to force Google to skip it. The available options depend on your account status, previous recovery setup, device, location, and verification scenario.
Which Google Verification Problem Are You Facing?
Before trying any method, identify the exact verification problem. Gmail sign-in verification, new account phone verification, and Android FRP verification are not the same issue.
| Scenario | What It Means | Best Next Step |
|---|---|---|
| Creating a new Google Account | Google may ask for a phone number to confirm you are not creating abusive or automated accounts. | Use your own reachable number if requested, or check whether the phone field is optional. |
| Signing in to Gmail | Google may require phone verification if the sign-in looks risky or unfamiliar. | Try another verified method, trusted device, or recovery email. |
| Lost old phone number | You cannot receive the verification code sent to the number linked to your account. | Use Google Account Recovery and update your recovery phone after regaining access. |
| Android phone after factory reset | The phone may be locked by Factory Reset Protection and require the previously synced Google Account. | Verify device ownership, contact the previous owner, or use supported FRP guidance for your own device. |
Method 1. Use Google Account Recovery
If you cannot receive a Gmail phone verification code, Google Account Recovery should be your first option. This is the safest path when you own the account but no longer have access to the old phone number.
Google may ask you to verify your identity using:
- A recovery email address
- A trusted device where you are already signed in
- Backup codes if you set them up before
- Security prompts on another device
- Previous passwords or account activity information
For the best chance of recovery, use a device and network that you have used before with the same Google Account. Avoid repeated random attempts, because too many failed attempts may make account recovery harder.
Method 2. Try Another Verification Option
When Google asks for a phone verification code, look for options such as “Try another way” or another available verification method. The available options depend on what you previously added to your Google Account.
You may be able to verify with:
- A recovery email
- A signed-in Android phone
- A Google prompt
- Backup codes
- A security key
- Another phone number already linked to your account
If you regain access, update your recovery phone number and recovery email immediately. This can help prevent the same problem from happening again.
Method 3. Check Whether Phone Number Is Optional During Account Creation
When creating a new Google Account, Google may or may not require a phone number. In some cases, the phone number field may be optional. In other cases, Google may require phone verification based on security checks, account activity, device, location, or abuse-prevention signals.
You can check whether the phone number field is optional during the normal account creation process. Do not use fake information or temporary identity details, because you may need the same recovery information later to protect or recover the account.
Here is where the account creation option may appear during the sign-in flow:
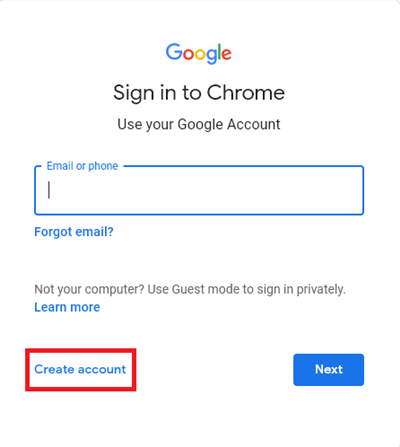
Click Create Account
If Google requires phone verification, you usually need to complete the requested verification or try again later with a legitimate recovery method. The requirement can vary and may change over time.
Method 4. What to Do After Android Factory Reset
If your Android phone asks for Google verification after a factory reset, this is different from ordinary Gmail phone verification. It is usually related to Factory Reset Protection , also known as FRP.
FRP is designed to protect Android devices after a reset. If a phone was previously synced with a Google Account, Android may ask you to sign in with that account before you can finish setup.
Before using any tool or guide, check the following:
- Do you own the device?
- Do you know the Google Account previously synced to the device?
- Can you recover that Google Account?
- Was the device bought second-hand?
- Can the previous owner remove the device from their Google Account?
- What is the exact device model and Android version?
If the device belongs to you, try signing in with the previously synced Google Account first. If the device is second-hand, ask the previous owner to remove the device from their account before you continue.
Tool-Assisted Option for Supported Android FRP Cases
If you are locked on the Google verification screen after factory resetting your own Android device, DroidKit may be a tool-assisted option for supported FRP cases. It should be used only for devices you own or are authorized to unlock. Check your device model, Android version, and ownership status before proceeding.
DroidKit - Tool-Assisted Option for Supported Android FRP Cases
If Google verification appears after a factory reset on your own Android device, DroidKit may help with supported FRP scenarios. Check compatibility before using it.
Here is the general DroidKit workflow for supported Android FRP cases:
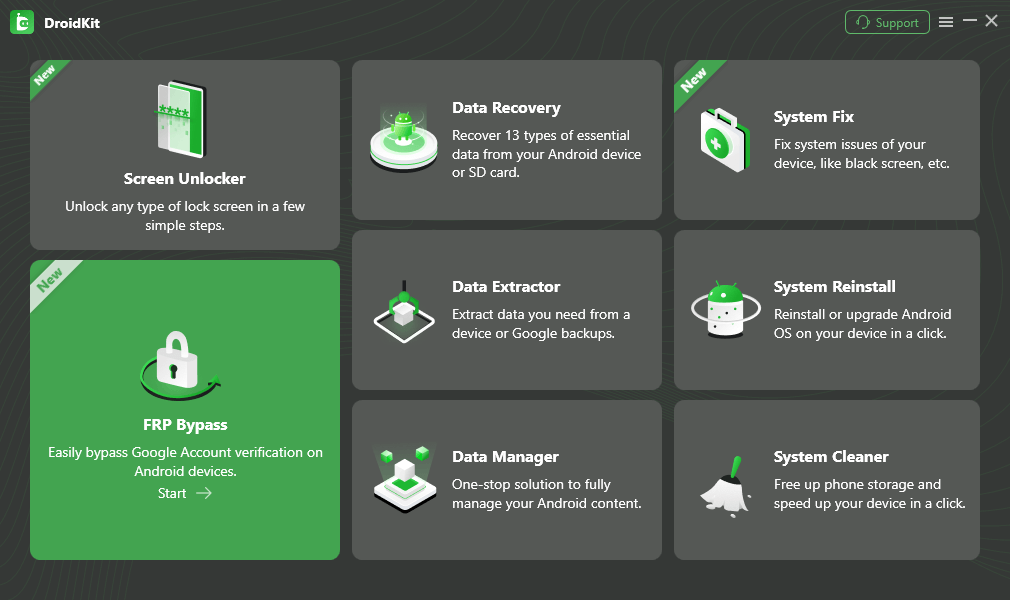
Step 1. Launch DroidKit and select FRP Bypass mode from the menu.
Choose FRP Bypass Mode
Step 2. Connect your Android phone to the computer with a USB cable. Then click Start and select your device brand if prompted.
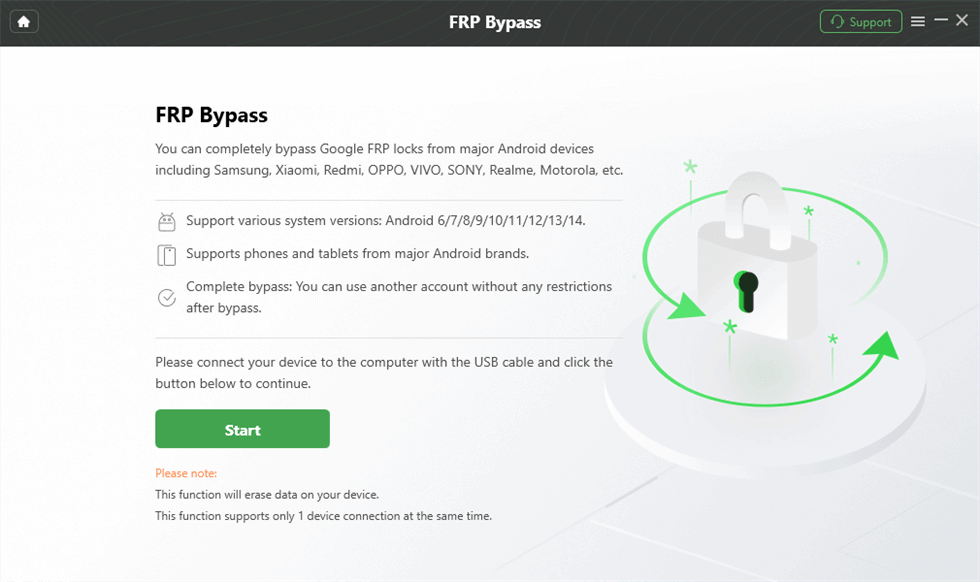
Connect Device and Click Start
Step 3. DroidKit will prepare a configuration file for your device. When it is ready, click Start to Bypass .
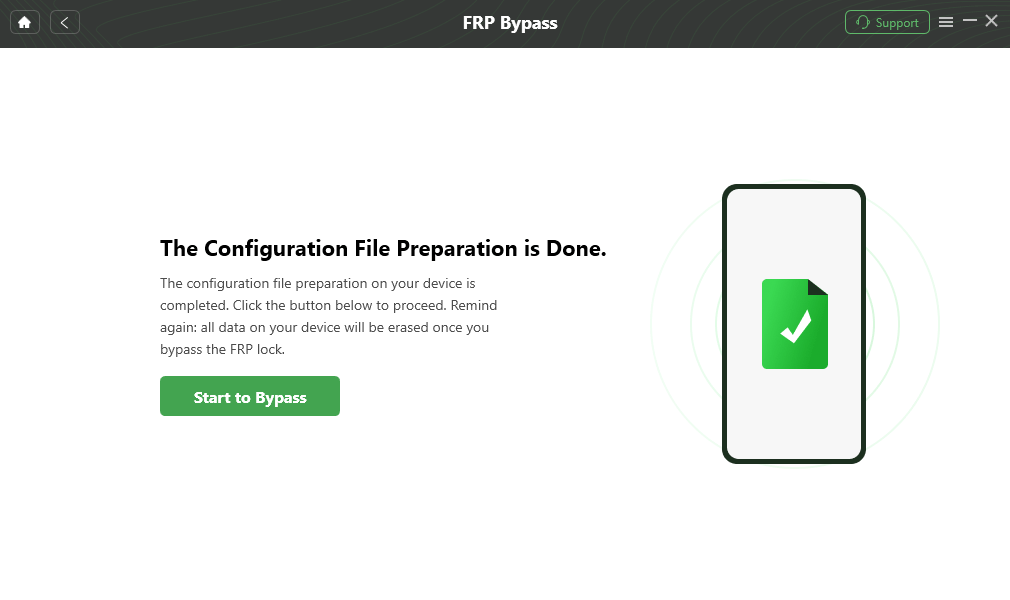
Click Start to Bypass
Step 4. Select your phone’s Android system version and click Next . Make sure the selected version matches your device.
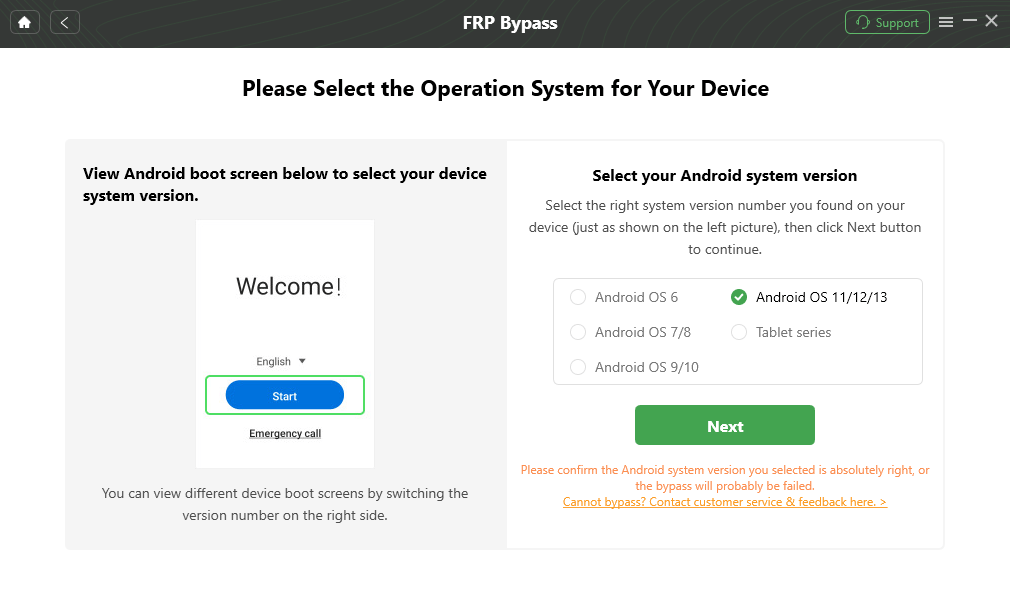
Choose System Version
Step 5. Follow the on-screen instructions for your device model and Android version.
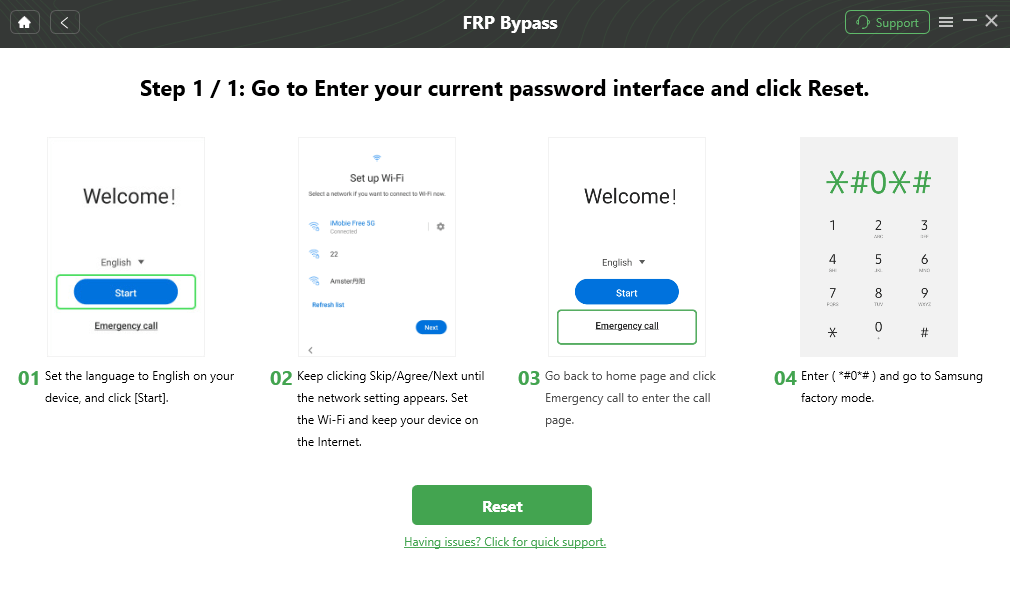
Complete Corresponding Settings
Step 6. When the process finishes, DroidKit will show the completion screen. If the process does not work, check device compatibility and do not repeat random methods without confirming the cause.
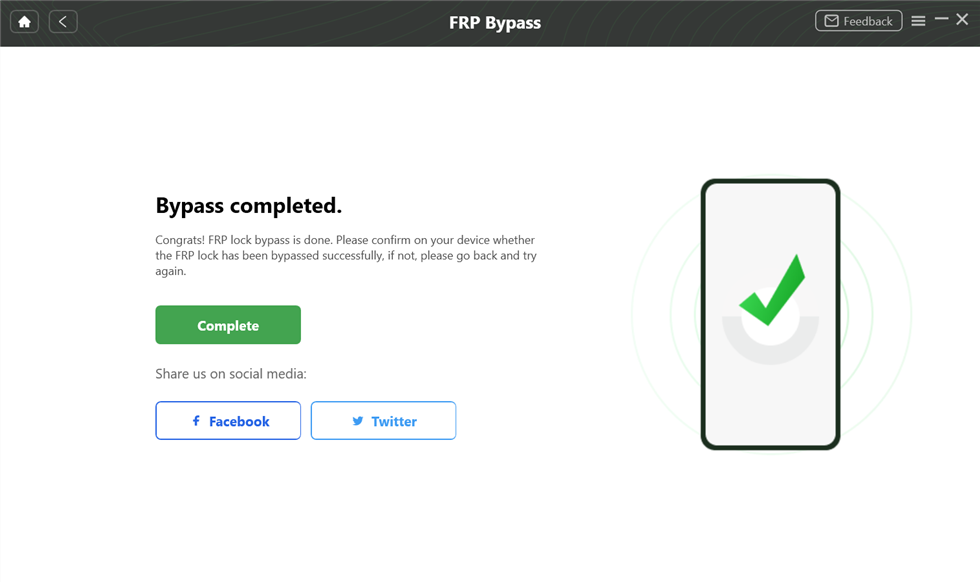
FRP Bypass Complete
Should You Use a Virtual Phone Number?
Some users consider virtual phone numbers when they do not want to use a personal phone number for Google verification. However, virtual or temporary numbers are not always reliable for Google Account security.
A virtual phone number may create problems because:
- Google may reject temporary or shared numbers.
- The number may expire or become inaccessible later.
- You may need the same number again for future account recovery.
- Some providers may charge fees or limit availability by region.
- Using a number you do not control can make account recovery harder.
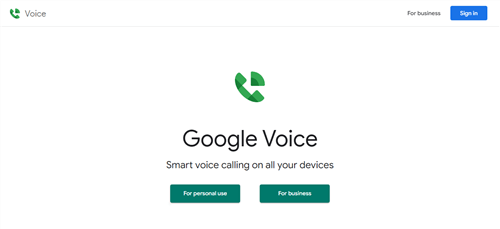
Interface of Google Voice website
For long-term account safety, it is better to use a phone number you own and can access. If privacy is your concern, review your Google Account privacy and security settings after setup instead of relying on a temporary number.
FAQs About Google Phone Verification
Can I skip Google phone verification?
Sometimes Google may not ask for a phone number, but if Google requires phone verification for security, you usually need to complete it or use an available account recovery option. The requirement can depend on account activity, device, location, and Google’s abuse-prevention checks.
Why does Google ask for my phone number?
Google may ask for phone verification to confirm you are a real person, protect your account, prevent spam or abuse, and support account recovery. A recovery phone number can also help you regain access if you forget your password or lose access to your account.
What can I do if I no longer have access to my old phone number?
Try Google Account Recovery first. You may be asked to verify with another method, such as a recovery email, a trusted device, backup codes, or other information linked to your account. If you still have access to the account, update your recovery phone number as soon as possible.
Is Gmail phone verification the same as Android FRP verification?
No. Gmail phone verification usually protects your Google Account during sign-in or account creation. Android FRP verification appears after a factory reset and is designed to confirm device ownership. FRP may require the Google Account previously synced to the Android device.
Can DroidKit help with Google phone verification?
DroidKit should only be considered as a tool-assisted option for supported Android FRP or Google verification cases after factory reset on owned devices. It should not be used as a general Gmail account phone verification bypass tool.
Is it safe to use a virtual phone number for Google verification?
A virtual number may not be reliable for long-term account security. Google may reject temporary numbers, ask for additional verification, or require future access to the same number. For account recovery, it is safer to use a phone number you own and can access.
What if my Android phone asks for Google verification after factory reset?
This is likely Factory Reset Protection. Try signing in with the Google Account previously synced to the device or ask the previous owner to remove the device from their account. Use tool-assisted options only for your own device and only after checking compatibility.
The Bottom Line
Google phone verification is designed to protect your account and prevent abuse. If you cannot receive a verification code, start with Google Account Recovery, try another verified sign-in option, and update your recovery information after you regain access.
If Google verification appears after an Android factory reset, it may be Android Factory Reset Protection rather than ordinary Gmail phone verification. In that case, verify the Google Account previously synced to the device or ask the previous owner to remove the phone from their account.
For your own Android device, a tool-assisted option such as DroidKit may be relevant only for supported FRP cases. Always check device compatibility, Android version, and ownership status before proceeding.
Related Articles

Senior writer of the iMobie team as well as an Apple fan, love to help more users solve various types of iOS & Android-related issues.
Product-related questions? Contact Our Support Team to Get Quick Solution >
