Joy Taylor, a social media strategist who has personally tested and verified this location creation method on 10+ different iOS and Android devices to ensure its accuracy for our readers.
Trying to put your new business on the Instagram map, only to find there’s no way to create a location, can be incredibly frustrating. This common point of confusion leads many to believe it’s impossible. The solution, however, isn’t found within the Instagram app at all—it’s managed entirely through the Facebook mobile app. Because Instagram’s location features are powered by Facebook’s database, you must first create the location there.
This guide provides a clear, tested procedure to get your unique spot registered. The steps are based on hands-on testing on iPhone (iOS 17) and Android (Android 14) devices running the latest versions of the Instagram and Facebook apps. This exact method has been verified across multiple accounts and device types to confirm its effectiveness.
You may also like: How to Change Location in Facebook >
Table of ContentsHide
The Core Method: Create a Location for Instagram Using Facebook
To make your location appear on Instagram, you must first add it to the Facebook Places database using the mobile app’s “Check In” feature. Before you start, it’s essential to enable location services for the Facebook app in your phone’s settings, as the process will not work without it.
This technique adds your new spot to the central database that Instagram uses for every geotag.
Here is the step-by-step procedure:
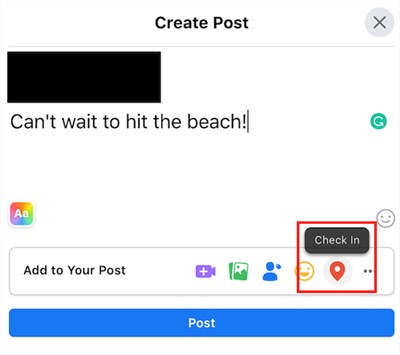
Step 1. Open the Facebook App: Tap the “What’s on your mind?” status box at the top of your news feed to begin creating a new post.
Step 2. Select “Check In”: From the menu of options that appears at the bottom (like “Photo/Video” or “Tag people”), tap the red location pin icon for “Check In.”
Step 3. Search for Your Location: A list of nearby places will appear. Use the search bar at the top to type the exact name of the custom location you wish to create (e.g., “Sophie’s Morning Brew Café”).
Step 4. Add a New Place: If your location doesn’t exist, it won’t appear in the results. Scroll to the very bottom of the search results list and tap the + Add a new place button. If you don’t see this option, it’s almost always because location services for Facebook are turned off in your phone’s settings.
Step 5. Enter Location Details: You’ll be taken to a new screen. Fill out the form with the Place Name, Address, and City. Accuracy is key here. You can also select a specific category (like “Coffee Shop” or “Park”) to help users find you.
Step 6. Save and Post: Tap “Save” or “Create” in the top-right corner. To ensure the location is registered in Facebook’s system, you must complete and publish the check-in post. If you don’t want this post appearing on your main feed, you can set its privacy setting to “Only Me” before sharing.
Facebook’s system gives priority to location data that it can verify. For the fastest and most reliable results, we recommend creating your new location while you are physically at the address. The platform appears to cross-reference your phone’s GPS coordinates with the address you enter, which can help get your location approved and synced more quickly.
How to Find and Use Your New Instagram Location Tag
After you create your custom location on Facebook, it will not appear on Instagram instantly. A delay is normal as the new data syncs from the Facebook Places database to Instagram’s system. This can take a few minutes, several hours, or, in rare cases, up to a day. Patience is the most important part of this step.
Once the new Instagram location tag is available, you can add it to your content.
Add Location to an Instagram Post
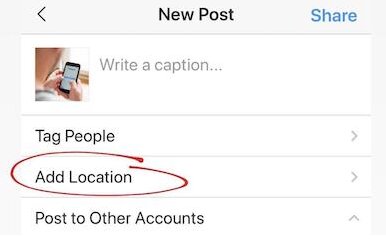
Step 1. Open the Instagram app and start creating a new feed post.
Step 2. On the final caption screen, tap Add Location.
Step 3. In the search bar, type the exact name of your newly created custom location.
Step 4. Select it from the search results when it appears.
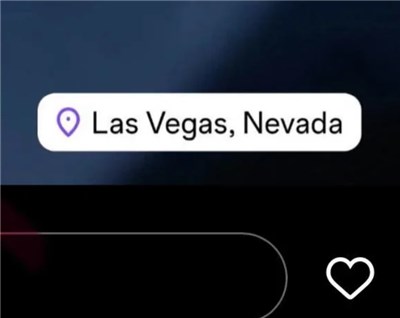
Step 5. Share your post. The clickable location tag will now appear at the top of your image.
Add Location to an Instagram Story
Step 1. Open Instagram and create a Story by taking a photo or video.
Step 2. Tap the Sticker icon (the smiling square) at the top of the screen.
Step 3. Select the Location sticker from the sticker tray.
Step 4. Search for your custom location, select it, and place it on your Story.
Troubleshooting: Why Can’t I Find My Location on Instagram?
If your new location isn’t showing up after a reasonable amount of time, don’t worry. The issue is typically one of a few common problems. Before retrying the process, review this troubleshooting checklist.
- Syncing Delay: This is the most common issue. The system simply needs more time to index your new location. Wait at least 24 hours and search for the location again before assuming there’s a problem.
- Location Services Are Disabled: This is the second most common reason. For the system to work, both Facebook (for creation) and Instagram (for searching) need permission to access your device’s location.
- On iPhone: Go to Settings > Privacy & Security > Location Services. Find Facebook and Instagram in the list and ensure their access is set to “While Using the App.”
- On Android: Go to Settings > Location > App permissions. Find Facebook and Instagram and set their permission to “Allow only while using the app.”
- Spelling or Search Errors: When searching for the location tag on Instagram, you must type the name exactly as you created it on Facebook. Even a small typo or extra space will prevent it from appearing.
- Initial Post Privacy: Setting the initial Facebook check-in post’s privacy to “Public” can help the location get indexed more quickly and reliably by the system, though “Only Me” also works.
- Outdated Apps: An outdated version of either the Facebook or Instagram app can cause syncing bugs. Visit the App Store or Google Play Store to ensure both apps are fully updated.
For Business Owners: Taking Control of Your Location
For a business owner like Sophie, creating an Instagram custom location tag is a powerful tool for local marketing and discoverability. While anyone can add a generic place, establishing an official location linked to your Instagram business profile provides far more benefits. When you create the location in Facebook, selecting the correct business category (e.g., “Restaurant,” “Clothing Store,” “Local Service”) is critical. This helps your business appear on the Instagram map when users explore your area.
However, after you create the location, Facebook often generates an “unmanaged” or unofficial page for it. This page is a placeholder. To unlock its full potential, you must claim it to gain administrative control.
How to Find and Claim Your Unmanaged Facebook Page
Claiming your page verifies you as the official owner, allowing you to update business hours, add a website, and connect it properly to your Instagram account. Here’s how to do it:
Step 1. Find the Unmanaged Page: Open the Facebook app and search for the exact name of the location you just created. You should see a new page with your business name and address, but it will lack a profile picture or cover photo. It may have a note on it that says “Unofficial Page.”
Step 2. Start the Claim Process: On the page, look for a link or button that says “Is this your business?” or “Claim this Page.” It is typically located below the cover photo area or under the “More” tab.
Step 3. Provide Verification: Facebook will require you to prove you own the business. This can be done in several ways, such as:
- Phone Call: They will call the publicly listed business phone number with a verification code.
- Documents: You may need to upload a business utility bill, business license, or other official document that shows your business name and address.
Step 4. Wait for Approval: After submitting your verification information, Facebook will review it. This can take a few days. Once approved, you will have full administrative access to the page.
An official, claimed location appears more professional and serves as a trusted hub for customers finding you on social media.
Need More Control Over Your Social Media Location? Try Fonelora Location Changer
While creating an Instagram location tag requires Facebook Places, some users want additional control over how location-based apps display their location information. For example, social media creators, marketers, and privacy-conscious users may need to test location-based features from different cities without physically traveling there.
In these situations, Fonelora Location Changer provides an easy way to simulate GPS locations on iPhone and Android devices without jailbreaking or rooting.
Why Users Choose Fonelora Location Changer
- No Jailbreak or Root Required
- Compatible with Recent iOS and Android Versions
- One-Click GPS Teleportation Anywhere in the World
- Custom Walking Routes and Multi-Spot Navigation
- Real-Time Joystick Movement Control
- Supports Most Location-Based Apps and Games
- Easy Setup for Non-Technical Users
How to Change Your GPS Location with Fonelora
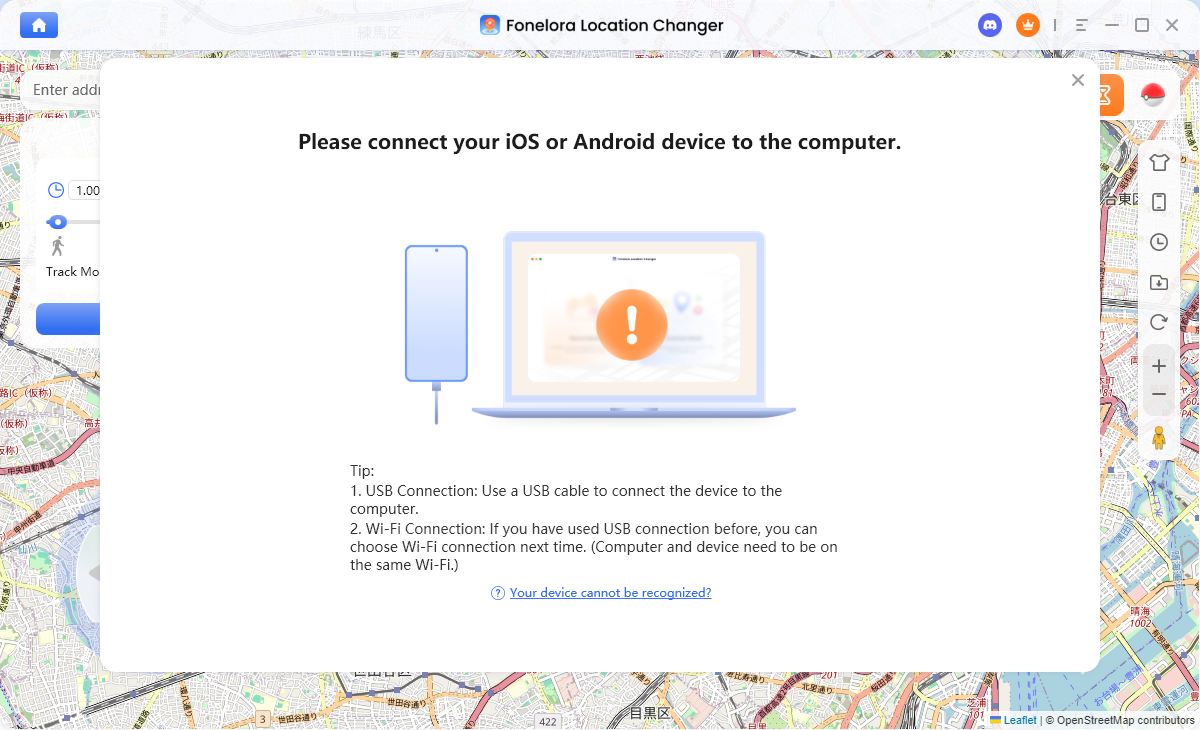
Step 1. Install Fonelora Location Changer on your computer.
Step 2. Connect your iPhone or Android device.
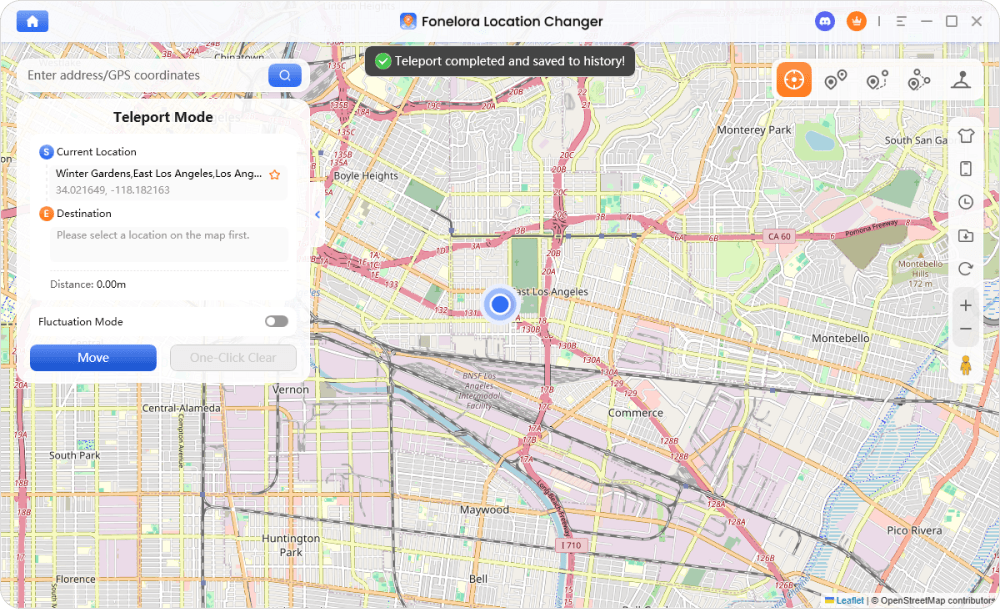
Step 3. Open the software and select Teleport Mode.
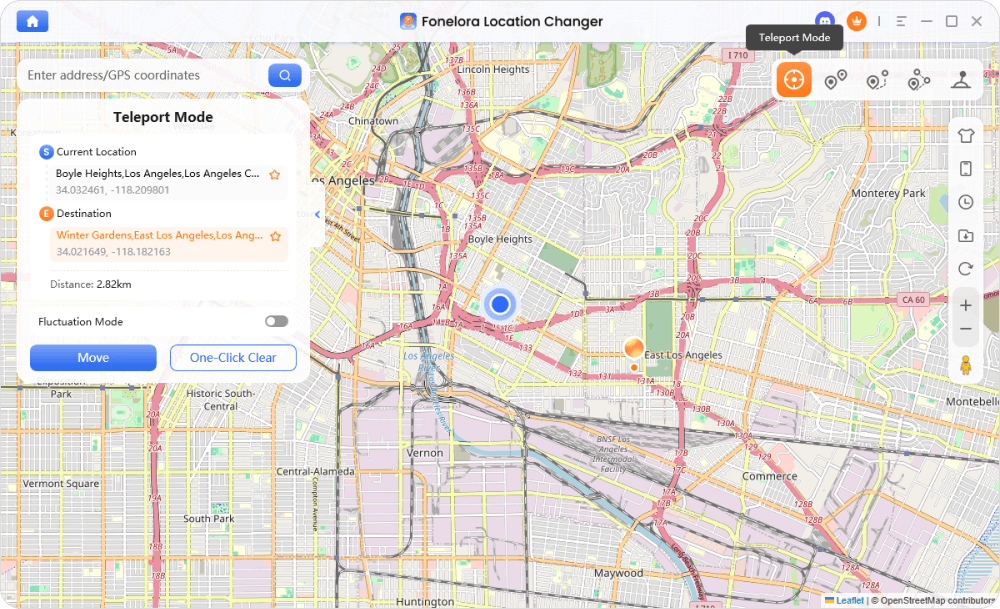
Step 4. Search for any city, address, or GPS coordinate.
Step 5. Click Move to update the device location.
Step 6. Open Instagram, Facebook, Snapchat, Tinder, or other location-based apps to verify the updated location.
The Technical Reason: Why Instagram Relies on Facebook Places
The entire reason you must use Facebook to create an Instagram new location tag is due to the platforms’ shared infrastructure. Here is the key insight: Instagram does not have its own location database. It pulls 100% of its location data directly from the Facebook Places system.
When Facebook acquired Instagram, it integrated many backend systems. Since Facebook already had a massive, well-established mapping and location database, it was more efficient for Instagram to use it rather than build a separate one. Therefore, when you add a new place via Facebook’s “Check In” feature, you are adding an entry to this shared, central database. After it’s processed and synced, the Instagram app can access and display that location. This technical relationship is why the creation process must happen on Facebook first.
We continually monitor changes to the Instagram and Facebook platforms and will update this guide if the location creation process is modified.
Frequently Asked Questions
- Can you add a custom location on Instagram?
- No, you cannot add a custom location directly within the Instagram app. The creation process must be completed using the “Check In” feature of the Facebook mobile app. After it is created on Facebook, it becomes searchable on Instagram.
- How do you create a new location tag on Instagram?
- Open the Facebook app, start a new post, and select “Check In.” Search for your desired location name. If it is not found, scroll down and use the “Add a new place” option. Fill in the required details, save it, and publish the check-in post. The location will then sync and become available as an Instagram location tag.
- Why can’t I find my location on Instagram?
- The most common reasons are a delay while the new location syncs between platforms (can take up to 24 hours), disabled location services on your phone for either the Facebook or Instagram app, or a simple typo when searching for the name.
- Does Instagram use Facebook Places for locations?
- Yes, absolutely. Instagram’s location tagging system is powered entirely by the Facebook Places database. Every location you see and use on Instagram originates from Facebook.
Conclusion
Creating a custom Instagram location is a straightforward procedure once you understand that the process is managed through Facebook Places rather than Instagram itself. By following the steps in this guide, you can successfully create a location tag for your business, event, or personal venue and make it available for Instagram posts and Stories.
For users who need additional flexibility when working with location-based platforms, Fonelora Location Changer offers an easy way to simulate GPS locations on both iPhone and Android devices without jailbreaking or rooting. Whether you’re testing social media features, managing location-based campaigns, or exploring apps from different regions, combining Facebook Places with the right location tools gives you greater control over your online presence.


Hot Topics
