Players often experience sheer frustration when they jump to a new location to snipe a rare 100 IV Shundo they found on Discord, only to find the game completely unresponsive when they need it most. Consider Daniel, a player who caught a basic spawn in Los Angeles, immediately jumped to Tokyo to grab a rare regional exclusive, and watched every creature flee instantly while Pokestops stopped working entirely.
He accidentally triggered a localized penalty—a soft ban—because he fundamentally misunderstood how the waiting period works. A common misconception is that the act of changing your location causes the penalty. It does not. The timer only matters if you perform a specific trigger action at your first location before moving to the second. If you haven’t played all day, you can open your app, jump straight to Tokyo, and immediately start catching. Daniel’s mistake was interacting in Los Angeles right before the move.
Adding to this problem, many charts online provide conflicting information, creating confusion about which actions actually start the timer. Because a lack of simple, authentic examples causes players to waste hours waiting unnecessarily or accidentally ruining their accounts, this guide provides a clearly tested procedure. We will break down exactly how to manage your wait times, ensuring your account remains entirely safe.
Table of ContentsHide
The Verified Cooldown Time Chart: Distance vs. Wait Time
When navigating the game’s map, relying on an accurate chart is the most critical step for avoiding penalties. This visual guide dictates the exact waiting periods required based on your travel distance. To guarantee safe gameplay, you must wait the specified duration after your last in-game interaction before interacting at a new, distant location.
Here is the standard table based on strictly tested distance thresholds:
| Distance Traveled | Required Wait Time |
| 1 to 5 Kilometers | 1 to 2 Minutes |
| 10 to 25 Kilometers | 6 to 11 Minutes |
| 50 to 100 Kilometers | 20 to 35 Minutes |
| 250 to 500 Kilometers | 45 to 60 Minutes |
| 750 to 1,000 Kilometers | 75 to 90 Minutes |
| 1,500+ Kilometers | 120 Minutes (2 Hours) |
This table applies universally across all standard gameplay scenarios. The absolute maximum required waiting time is always two hours, regardless of whether you travel 1,500 kilometers or 10,000 kilometers. Saving this chart to your device guarantees you always have the correct timing references instantly available. By strictly following these parameters, you ensure your gameplay decisions are grounded in verifiable data rather than guesswork.
What Actions Trigger a Soft Ban?
To navigate location changes safely, you must understand exactly which in-game actions activate the tracking system. Not every screen tap requires a waiting period. The game monitors specific interactions that affect the game world or your localized inventory.
Actions That Start the Timer
Performing any of the following actions at Location A will instantly lock your coordinates, meaning you must wait the required time before performing them at Location B:
- Catching a Wild Creature: Throwing any type of Poke Ball at a wild spawn on the map or from an Incense.
- Feeding Berries: Giving a berry to a wild creature or a defender in a Gym.
- Spinning Stops or Gyms: Rotating the photo disc at any Pokestop or Gym to collect items.
- Battling in Gyms: Engaging in combat with defending creatures or placing a defender.
CRITICAL WARNING: The “Dropped Ball” Trap
One of the most common and agonizing mistakes players make involves shiny checking. Teleporting to a location and tapping a creature to see if it is shiny is completely safe and does not trigger a timer. However, accidentally dropping a Poke Ball on the catch screen instantly registers as an interaction. If your finger slips and a ball falls to the ground while shiny checking in New York, your coordinates are instantly locked there. If you immediately jump to London, you will be soft-banned. Always keep your fingers away from the ball icon when checking!
Safe Actions (No Waiting Required)
You can perform these actions at any time, even immediately after a long-distance jump, without activating the tracker:
- Teleporting to a new location (without interacting).
- Tapping a wild creature to shiny check (as long as you do not drop a ball or feed a berry).
- Evolving, transferring, or powering up creatures in your storage.
- Trading with friends.
- Opening or sending gifts.
- Hatching eggs and applying incubators.
- Claiming quest or research rewards.
Knowing this exact rule ensures you only wait when absolutely necessary, optimizing your time and avoiding unnecessary delays.
Selecting a Tool: Manual Methods vs. Automated Timers
When managing your location changes, you have two primary methods: tracking the time manually or relying on automated software features. Choosing the right procedure depends on your preferred playstyle, technical comfort level, and tolerance for manual data entry.
Manual Timers
The manual method involves using your smartphone’s standard alarm clock or stopwatch.
- Success Rate: High, provided you accurately record the exact minute of your last in-game action.
- Time Cost: Requires constant attention and manual tracking for every single jump.
- Technical Skill: Minimal. Anyone can set a basic alarm clock.
- Safety Risk: Moderate. Human error, such as miscalculating the distance or simply forgetting to start the clock after catching a creature, can easily trigger a penalty.
Automated Tools
For players seeking a guaranteed outcome without the burden of tracking times on their own, automated tools provide a highly reliable solution. Many dedicated applications include built-in timers that calculate the necessary waiting period based on your exact location data.
- Success Rate: Extremely high. The software strictly calculates the exact waiting period based on precise distance inputs.
- Time Cost: Zero manual effort. The application handles all tracking automatically on your screen.
- Technical Risk: Low, provided you use reputable software that accurately overlays timer warnings without altering the underlying game code.
Simplify Cooldown Management with Fonelora Location Changer
Knowing the cooldown chart is important, but manually calculating distances and wait times can still lead to mistakes. For players who frequently change locations, Fonelora Location Changer provides a more convenient way to manage GPS movement on both iOS and Android devices. With features such as instant teleportation, joystick control, route simulation, and a built-in cooldown timer, it helps reduce guesswork and makes location changes easier to manage.
How to Use Fonelora Location Changer
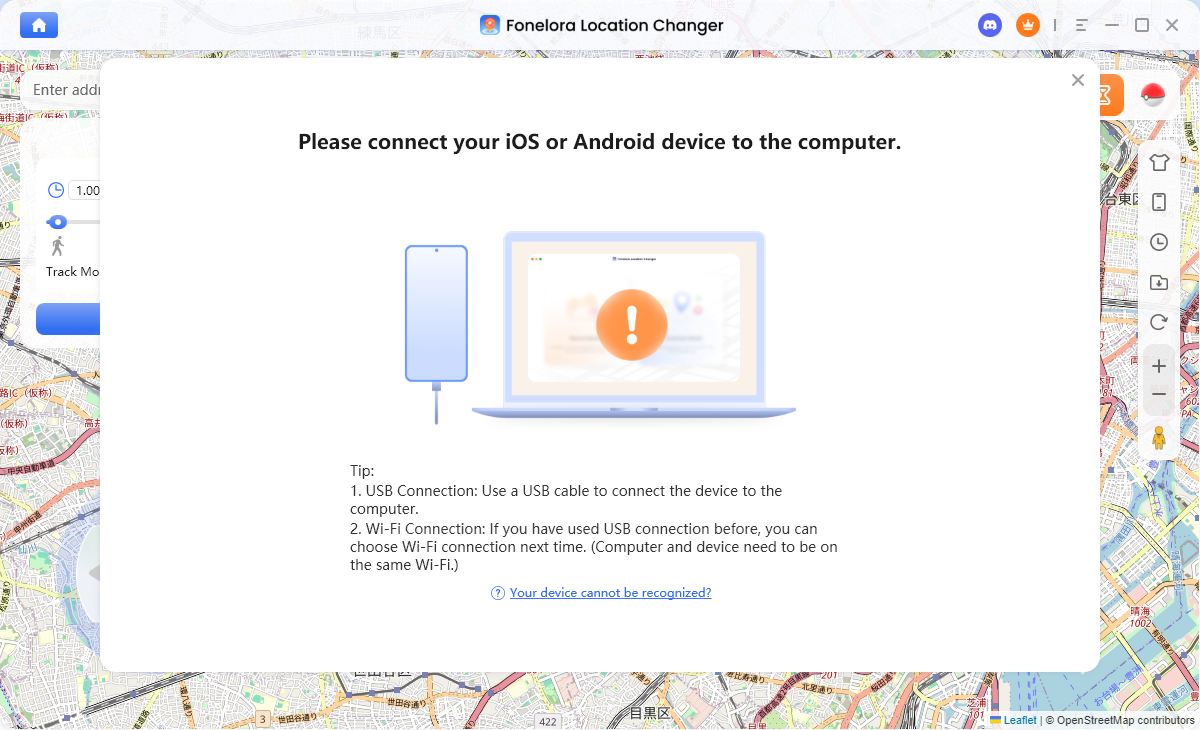
Step 1. Download and install Fonelora Location Changer on your Windows PC or Mac.

Step 2. Connect your iPhone or Android device to the computer using a USB cable.
Step 3. Launch the software and select Teleport Mode from the main interface.
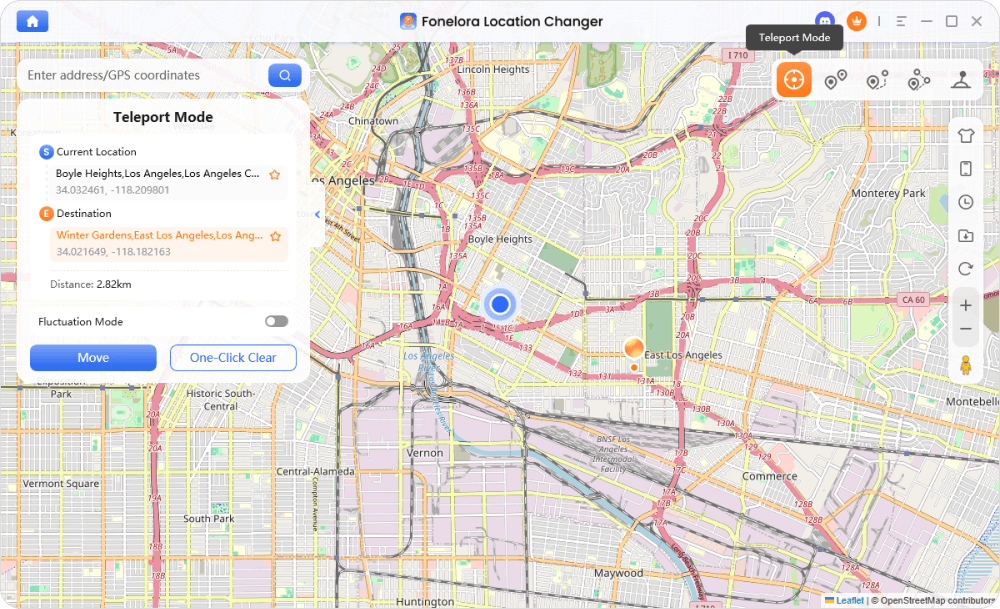
Step 4. Enter the destination coordinates or search for the location you want to visit.
Step 5. Click Move to change your device’s GPS location instantly.
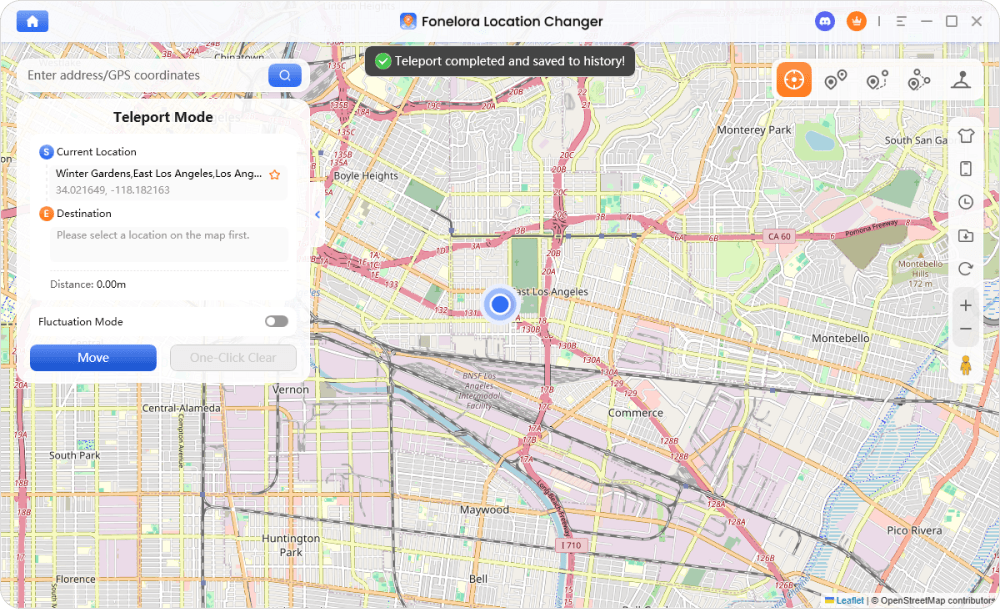
Step 6. Check the built-in cooldown timer before performing any in-game actions. The software automatically recommends an appropriate waiting period based on travel distance.
Step 7. Once the cooldown has elapsed, open Pokémon GO and continue catching Pokémon, spinning PokéStops, or joining raids as normal.
By combining accurate cooldown tracking with flexible GPS controls, Fonelora Location Changer offers a practical alternative for players who want to explore different regions without constantly worrying about manual calculations or timing errors.
Real-World Scenarios: Applying Location Change Rules
To truly grasp how to apply the chart, let us return to Daniel’s transcontinental jump and correct the mechanical misunderstanding.
Daniel, a player who enjoys exploring rare spawn locations, was playing locally in Los Angeles. He caught a Pidgey outside his apartment. Five minutes later, he received a Discord notification for a rare 100 IV spawn in Tokyo. He immediately typed in the coordinates, jumped to Tokyo, and tapped the rare spawn. He threw a Golden Razz Berry and an Ultra Ball, but the creature instantly broke out and fled. He then tried to spin a nearby Pokestop, but nothing happened. He was soft-banned.
Why did this happen? It was not the act of jumping to Tokyo that caused the ban. It was the fact that he caught the Pidgey in LA. By catching that Pidgey, he locked his coordinates to Los Angeles.
After researching the rules, Daniel learned that long-distance teleports require waiting up to two hours after your last interaction before interacting with the game again. Because Tokyo is over 1,500 kilometers away from LA, the chart dictates a strict 120-minute wait.
The Correct Procedure:
If Daniel wanted that Tokyo spawn safely, he should have tapped on the creature in Tokyo to enter the catch screen, and then simply left his phone open on that screen for two hours without dropping a ball or feeding a berry. Once the two hours from his LA Pidgey catch had passed, he could safely throw the Ultra Ball. By following the chart in future sessions, Daniel avoided further penalties and could continue exploring different regions safely.
Pro-Tip on Travel Simulation:
Experienced players explain that the system is designed to simulate realistic travel speeds. When a player suddenly changes location over a long distance, the game expects a waiting period before allowing certain actions such as catching, spinning, or battling. The waiting time generally increases with the distance traveled, which is why charts are widely used by players to estimate safe interaction times. This travel simulation timing is the technical foundation of all location-based tracking rules.
Decoding Soft Ban Mechanics
When you fail to account for the required wait time, the game enforces strict penalties to maintain fair play. Understanding soft ban mechanics is an essential part of recognizing when you have made a tracking error and knowing how to recover.
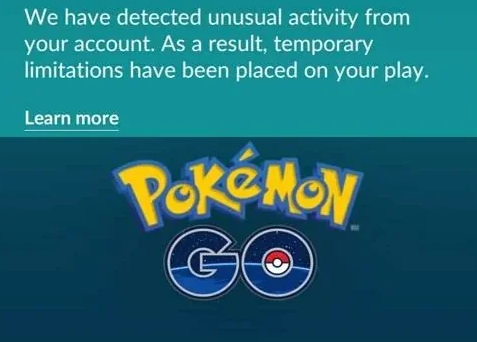
A soft ban is an automated temporary restriction placed on your account when you violate movement restrictions. If the game detects that you have traveled faster than physically possible—such as logging an interaction in New York and another in London three minutes later—the system immediately locks your primary gameplay abilities.
When under a soft ban, you will encounter the following localized restrictions:
- Fleeing Catches: Every wild creature will instantly break out of the very first Poke Ball thrown and flee the encounter, regardless of the ball type or berries used.
- Unresponsive Stops: Spinning a Pokestop or Gym photo disc will yield zero items, and the disc will not change color to signify completion.
- Gym Lockouts: You will be unable to assign defenders or successfully engage in Gym battles.
This state is entirely temporary and directly tied to the maximum two-hour waiting limit. The moment your required waiting duration expires, normal functionality resumes automatically. By carefully monitoring your interactions and referencing a reliable explanation of these mechanics, you completely remove the risk of experiencing these gameplay interruptions.
Frequently Asked Questions
To finalize your understanding, here are concise, factual answers to the most common queries regarding location changes.
- What happens if you ignore the wait time?
- Ignoring the required duration triggers an immediate soft ban. All catches will instantly flee, and stops will not distribute any items until the required waiting period has fully elapsed.
- Does catching a creature reset the timer?
- Yes. Catching a creature, dropping a Poke Ball, or spinning a stop will establish a new timestamp. Your next required wait time will be calculated from the exact minute of that final action.
- Can players avoid soft bans by following charts?
- Absolutely. Following a verified chart guarantees your interactions remain within the bounds of safe travel distance limits, keeping your account completely free from localized penalties.
Regain Control of Your Exploration
Navigating location changes no longer has to be stressful. Once you understand that cooldown timers are triggered by in-game interactions—not simply by changing locations—you can avoid the confusion that leads to unnecessary soft bans. By following a reliable cooldown chart and managing your movements carefully, you can explore different regions with greater confidence and efficiency.
For players who want an even more convenient solution, Fonelora Location Changer helps simplify the entire process. Unlike modified game clients that alter game files and increase account risks, Fonelora changes your device’s GPS location directly while providing practical tools such as teleport mode, joystick control, route simulation, and an intelligent cooldown timer. This allows you to monitor travel distances and recommended waiting times without relying on manual calculations.
Whether you’re hunting regional Pokémon, joining remote raid hotspots, or planning long-distance routes, Fonelora Location Changer offers a smoother and more organized way to manage location changes. With the right cooldown strategy and a reliable GPS management tool, you can spend less time worrying about timing mistakes and more time enjoying your adventures around the world.


Hot Topics
