Encrypting Android Phone Unsuccessful? How to Fix?
Encrypting an Android phone unsuccessful can be frustrating since you will be denied access to your Android smartphone. There are merely 3 methods to solve this problem, either of which will be introduced in the post. Read the post carefully and follow the steps to fix the problem in minutes.
Android System Issues & Fixes
Your smartphone is probably encrypted, so you shouldn’t be surprised if at one point the Encrypting Android Phone Unsuccessful message pops up on your screen. However, you should be worried if you see this message because you are not going to be able to use your phone until you solve the problem.
As soon as the message appears, you will be denied access to the Android smartphone you are using or data that is stored on the device. There are only two ways to fix this issue and in this article, we are going to show you. So let’s take a look at how you can fix the Encrypting Android Phone Unsuccessful error.
What is the Encrypting Android Phone Unsuccessful?
Full-device encryption was first introduced ten years ago with the release of the seventh version of Android labeled Android 2.3 Gingerbread. The purpose of encryption is to store the phone’s data in an unreadable format.
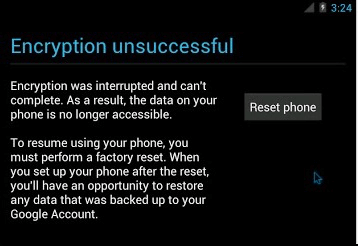
Encrypting Android Phone Unsuccessful
Inserting the PIN code or lock screen pattern prompts the device to decode the data and make it available to the device’s user. Although it protects your data, encryption can potentially prevent you from accessing it.
When The Encrypting Android Phone Unsuccessful appears on your screen it indicates that a software or hardware malfunction has caused the encryption process to fail. The device’s inability to recognize its internal memory, overloaded, or corrupted cache are some of the most common reasons why this error occurs.
Although you can try restarting your phone, chances are that you won’t be able to fix the problem in this manner. You should also keep in mind that you may end up losing all media files and other types of data only if you have backed up on Google Drive, a computer, an external hard drive, etc.
How to Turn Off Encryption on Android
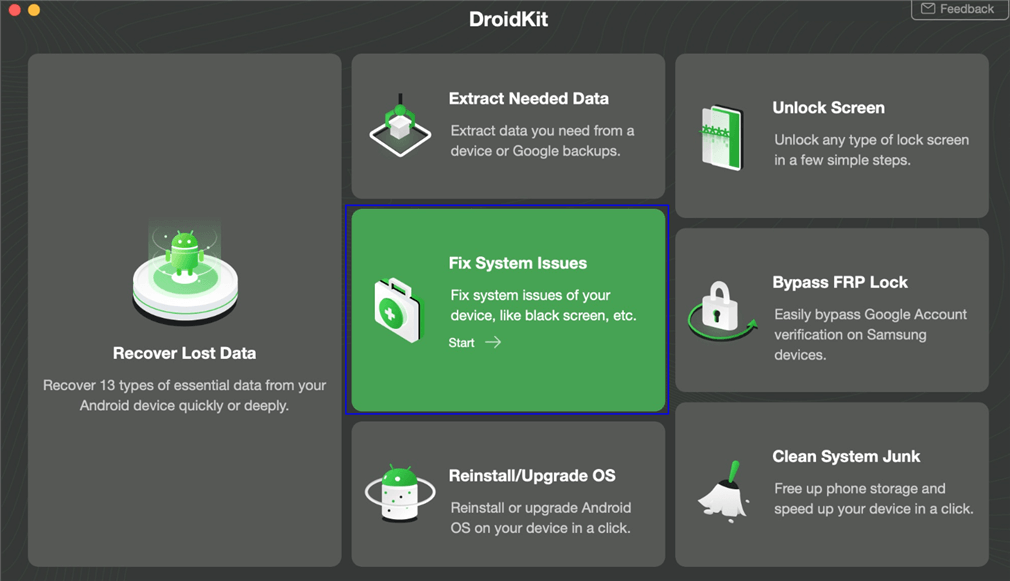
If reset phone is not working to turn off encryption on Android, you can try DroidKit’s system repair tool. It enables you to fix all Android system issues like your screen shows Downloading…Do Not Turn Off Target, stuck on the Samsung logo, Samsung shows a black screen or frozen screen, etc.
DroidKit comes with customized solutions for each Android OS and device model to repair the system. And, the ROM downloaded and installed on your device when fixing the problem is definitely official from Samsung. So it’s 100% secure and stable, with no risk of being infected with viruses or malware.
Here are the steps:
Step 1. Get DroidKit installed on your computer > Tap on Fix System Issues.
Free Download * 100% Clean & Safe
Click Fix System Issues
Step 2. Connect your Android and click Start.
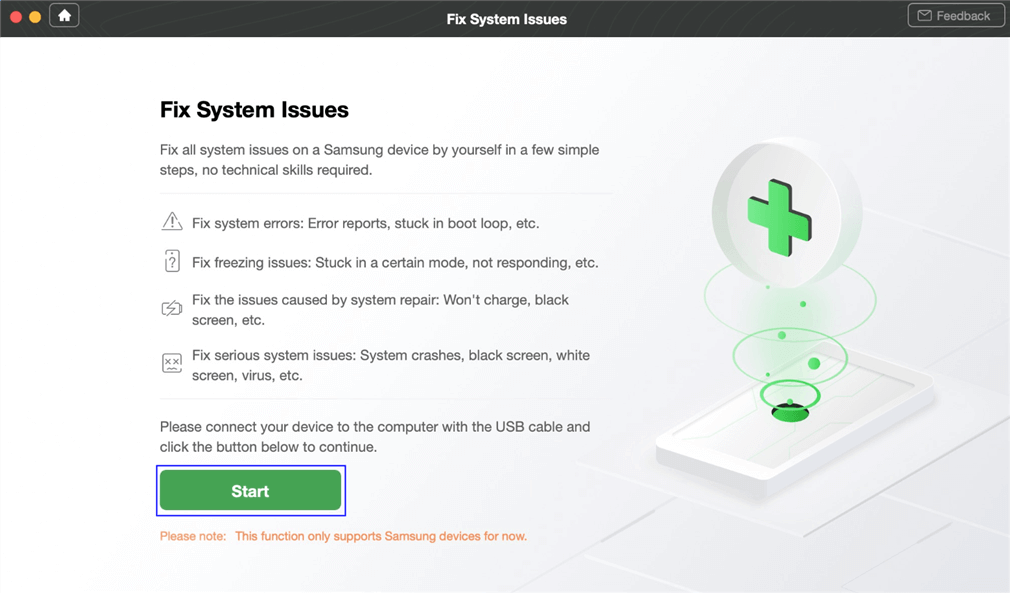
Click the Start Button to Continue Fixing
Step 3. Wait for PDA code matching, click Download Now to get the firmware.

Start to Download Firmware Package
Step 4. After downloaded, click Fix Now button to continue.
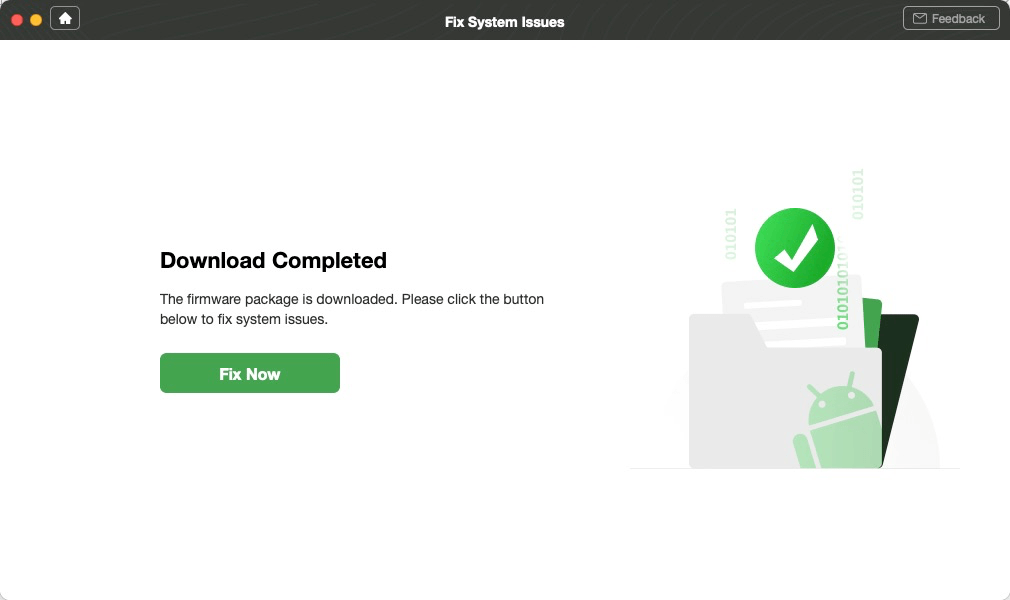
Click Fix Now after Firmware Downloaded
Step 5. Follow the on-screen instructions to put your device into download mode.
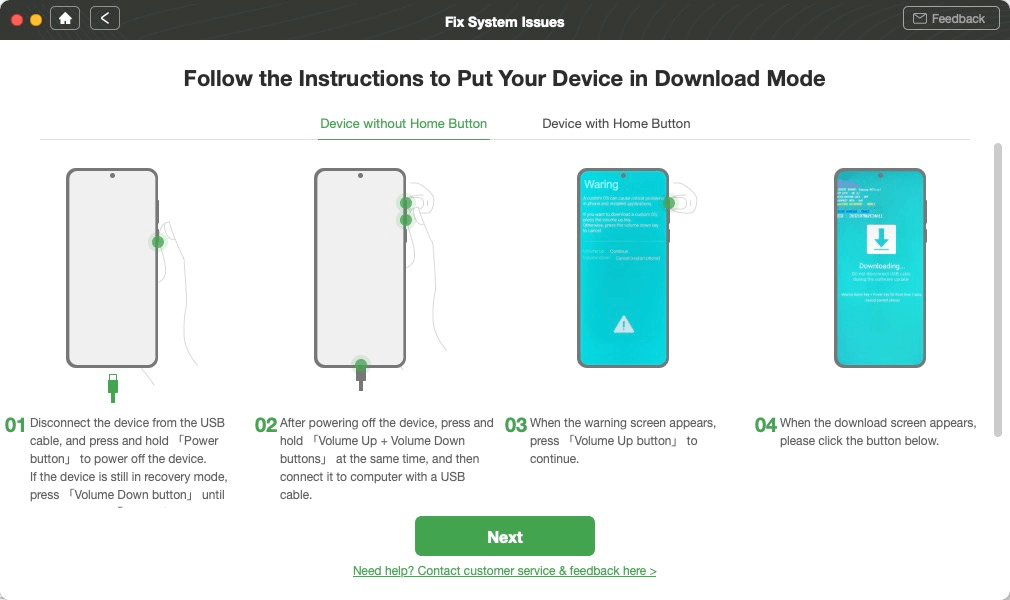
Get Your Phone into Download Mode
Step 6. Later, the repairing process will start automatically. After the process is completed, you will get the system fixed successfully page as below. All the system issues are fixed and your Android device will be restarted.
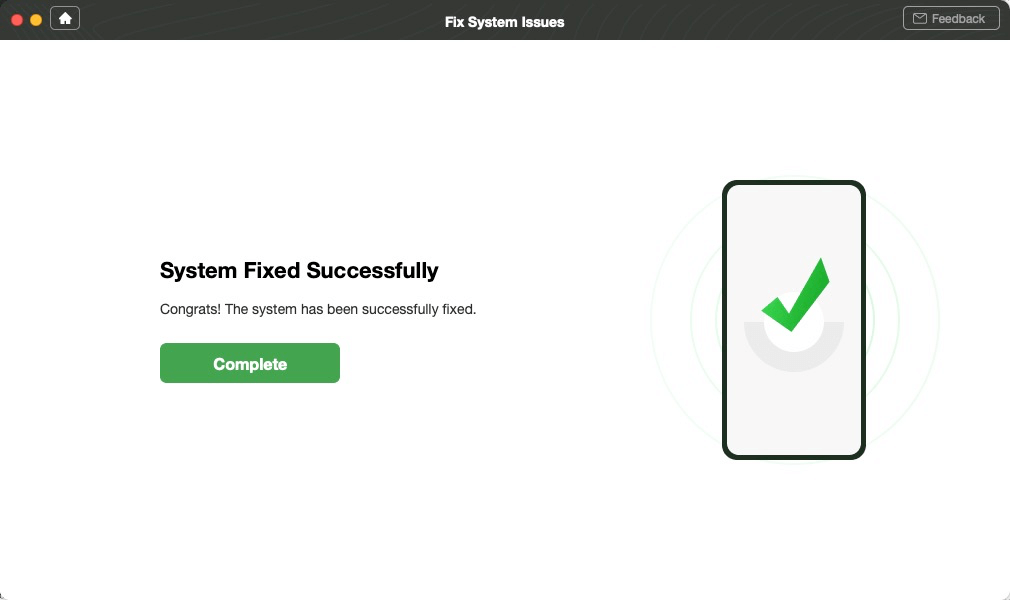
System Fixed Successfully
How Do I Factory Reset my Encrypted Android
Besides, you can either perform a factory reset or flash a new ROM onto your device. Neither of these options is easy since you will have to customize your Android phone from scratch which can take a significant amount of time. The Reset Phone button will be displayed below the message and tapping on it will initiate the factory reset of the device. This will erase all data and phone settings which means that you are going to lose the data you didn’t back up.
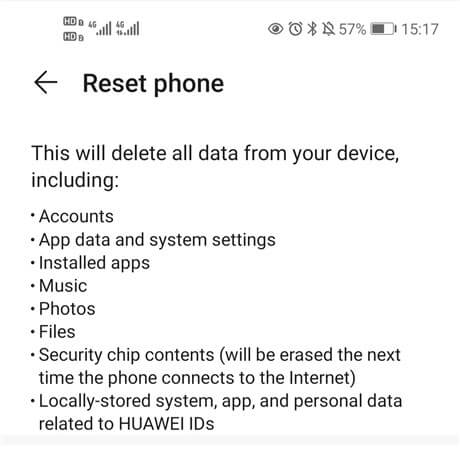
Reset the Phone to the Factory Settings
Once you tap on the Reset Phone button, the device will start deleting the data and cache and it will restart afterward. You will have to sign in to your Google account and go through the entire setup process step by step, after the operating system loads.
Fortunately, you will be able to restore all data that was stored on Google Drive as soon as you log into your Google account.
Fix Encryption Unsuccessful by Flashing a New ROM
The second method of fixing the Encrypting Android Phone Unsuccessful issue is more difficult, and it requires you to understand how Android OS functions. In addition, you will have to figure out how to access the device’s Recovery mode and its rooting guide.
It is also worth pointing out that the process of flashing a new ROM may not be the same for all Android phones, although the general steps are similar or identical.
So, the first thing you will have to do is to try to create a backup for the apps and data you have on your phone. However, you may not be able to do this if the Encrypting Android Phone Unsuccessful message is displayed on your screen.
You will have to switch off your phone and then you will have to press and hold a combination of volume and power buttons that is specific for the device you own in order to access the Bootloader.
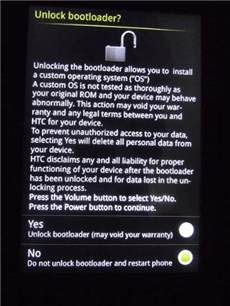
Access the Bootloader
You should select Yes in the Unlock Bootloader window and proceed to download the ROM you want to install. Once you downloaded the ROM to your phone, you should restart it in the Recovery Mode.
Choose the Install option, after you gain access to the device’s Recovery Mode, then locate the ROM zip file you downloaded and proceed with the installation process. It is paramount to delete cache and data after flashing a new ROM.
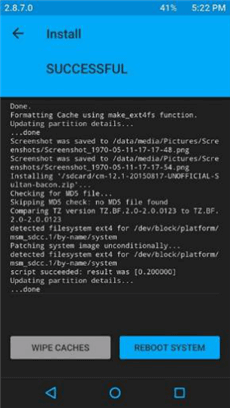
Flash a New ROM
Reboot the system and start your phone normally, then head over to the Settings app to check if the ROM installation was successful. Locate the Storage menu and then navigate to the USB Storage submenu that should now contain the information about the ROM you installed.
In case you cannot see the ROM in the USB Storage submenu, you will have to install it again.
Is it Worth Encrypting an Android Phone?
All recent versions of Android phones are already encrypted when you purchase them, and if you don’t want your device to be encrypted you will have to reset it to the factory settings before you start using it.
Only a handful of Android phones allows their users to toggle the encryption on and off in accordance with their preferences. That’s why you need to find the best way to disable encryption on your device.
Although it keeps your data safe when working properly the encryption process can also prevent you from accessing your phone or the data that is stored on it. This issue is easily resolved by creating backups for every file you create or keep on your smartphone.
The Bottom Line
Despite being an indicator of a more serious underlying issue, the Encrypting Android Phone Unsuccessful problem can be solved by resetting the device to the factory settings. Flashing a new ROM is the only alternative option you have, but this process can be overwhelming for anyone who hasn’t gone through it before.
Hopefully, this article has helped you fix the Encrypting Android Phone Unsuccessful error. Leave a comment and share your experiences with us.

Member of iMobie team as well as an Apple fan, love to help more users solve various types of iOS & Android related issues.
Product-related questions? Contact Our Support Team to Get Quick Solution >
