Samsung Tablet FRP Bypass: Choose by Galaxy Tab Model & Method
Samsung tablet FRP routes differ across Galaxy Tab models, Android and One UI builds, and the setup screens still available after reset. Start with your exact tablet model, then check whether the older keyboard-to-Settings path is present, whether Samsung Support can verify ownership, or whether a compatible guided PC workflow fits your device.
If your Samsung Galaxy Tab asks for a previously synced Google account after a factory reset, Factory Reset Protection (FRP) is active. The next step depends on more than the words “Samsung tablet”: a Tab A8, Tab E, Tablet A model, and another Galaxy Tab can have different Android versions, One UI builds, and setup screens.
Start with the exact tablet model and the point where you are stuck. If you still control the Google account previously used on the tablet, recover or sign in to that account first. If the Galaxy Tab was purchased second-hand and is still linked to another person, ask the previous owner to remove the account properly.
If neither situation applies, this Samsung Tablet FRP Hub helps you choose between a model-specific Galaxy Tab guide, an older no-PC keyboard route, Samsung Support, or a compatible PC-based FRP workflow. The important checkpoint is whether the screens required by a method actually exist on your tablet.
For Samsung phones and other Galaxy families, use the Samsung FRP bypass guide. This page stays focused on Galaxy Tab and Samsung tablet FRP.
Table of ContentsHide
Samsung Tablet FRP: Which Route Fits Your Galaxy Tab?
Compare Samsung Tablet FRP Options
Samsung Galaxy Tab FRP Guides by Model
DroidKit FRP Bypass for Compatible Samsung Tablets
Google Keyboard No-PC Route: Does the Old Settings Path Still Exist?
Why the Google Keyboard FRP Route Stops
Official Route: Contact Samsung Support with Proof of Ownership
What to Do Based on Where You Get Stuck
Samsung Tablet FRP FAQ
Choose the Route That Matches Your Galaxy Tab
Samsung Tablet FRP: Which Route Fits Your Galaxy Tab?
Do not choose a method only because it is labeled “Samsung FRP bypass.” First match the route to the tablet model, account situation, and setup checkpoint that is actually available.
| Your Situation | Check First | Best Starting Point |
| You know or can recover the previously synced Google account | Google account access | Sign in or recover the account instead of using a bypass route. |
| The tablet was purchased used and is still linked to another account | Previous-owner access | Ask the seller or previous owner to remove the account properly. |
| You know the exact Galaxy Tab model | Whether a dedicated model guide exists | Use the model-specific guide before trying a generic tablet method. |
| The old keyboard, Help & Feedback, and Settings path still appears | Whether every required screen matches the older tutorial | Evaluate the no-PC route cautiously and stop when the screens diverge. |
| Keyboard Settings, Help & Feedback, or Settings access is missing | The point where the manual route stops | Do not repeat the same route; move to another tablet-specific option. |
| You have proof of purchase | Samsung ownership requirements | Contact Samsung Support for an official support route. |
| The manual route does not match and you have a computer | Whether the device is covered by the selected FRP workflow | Evaluate a compatible guided PC-based option. |
Compare Samsung Tablet FRP Options
The table below compares the main routes by prerequisites rather than assuming that one method is best for every Galaxy Tab.
| Route | PC Needed | Best Fit | Main Limitation |
| Google account recovery | No | You still control or can recover the account previously used on the tablet | Requires access to the account recovery information. |
| Galaxy Tab model-specific guide | Depends on the guide | You know the exact Samsung tablet model | The instructions still need to match the tablet’s current Android/One UI setup. |
| Google Keyboard no-PC route | No | The older keyboard, Help & Feedback, web/search, and Settings path is still present | It cannot continue when one of those setup checkpoints is missing. |
| Samsung Support | No | Original owners who can provide the requested ownership information | Samsung may require purchase and device details before providing support. |
| DroidKit FRP Bypass | Windows or Mac | Users who prefer an on-screen workflow when the older manual route no longer matches | The FRP workflow must support the connected device situation. |
If you specifically want to compare software rather than manual tablet routes, see the Samsung FRP tool options.
Samsung Galaxy Tab FRP Guides by Model
This page is the Samsung Tablet FRP Sub Hub. When a dedicated child guide exists for your model or intent, use it before applying instructions written for another Galaxy Tab.
| Galaxy Tab / Intent | Recommended Guide | When to Use It |
| Samsung Tab A8 | Samsung Tab A8 FRP unlock guide | Use when the locked tablet is specifically a Galaxy Tab A8. |
| Samsung Tablet A | Samsung Tablet A FRP bypass guide | Use for the Tablet A-specific FRP scenario covered by that guide. |
| Samsung Tab E | Samsung Tab E Google account and reset guide | Use when an older Tab E is blocked by the Google account requirement after reset. |
| Another Samsung tablet | Samsung FRP guide by Galaxy family | Use the broader Samsung Hub when your exact tablet does not have a dedicated child page here. |
If your exact model is not listed, do not assume that a Tab A8 or Tab E sequence applies simply because both devices are Samsung tablets. Compare the Android/One UI screens and method prerequisites first.
DroidKit FRP Bypass for Compatible Samsung Tablets
DroidKit is relevant on this page when the older Samsung tablet setup route no longer matches the device and you prefer an on-screen PC workflow. It should not be chosen simply because a Galaxy Tab is newer; first check whether the connected tablet is covered by the FRP workflow shown by the software.
This route may be worth evaluating when:
- Keyboard Settings or Help & Feedback does not appear on the tablet;
- the older no-PC guide reaches a screen that your Galaxy Tab does not have;
- you prefer a Windows or Mac workflow instead of searching for additional setup shortcuts; and
- the Samsung tablet scenario presented by DroidKit matches the connected device.
For product-specific information before starting, see DroidKit FRP Bypass.
Steps to Start the Samsung Tablet FRP Workflow
Step 1. Install DroidKit on your Windows or Mac computer. Open the software and choose FRP Bypass.
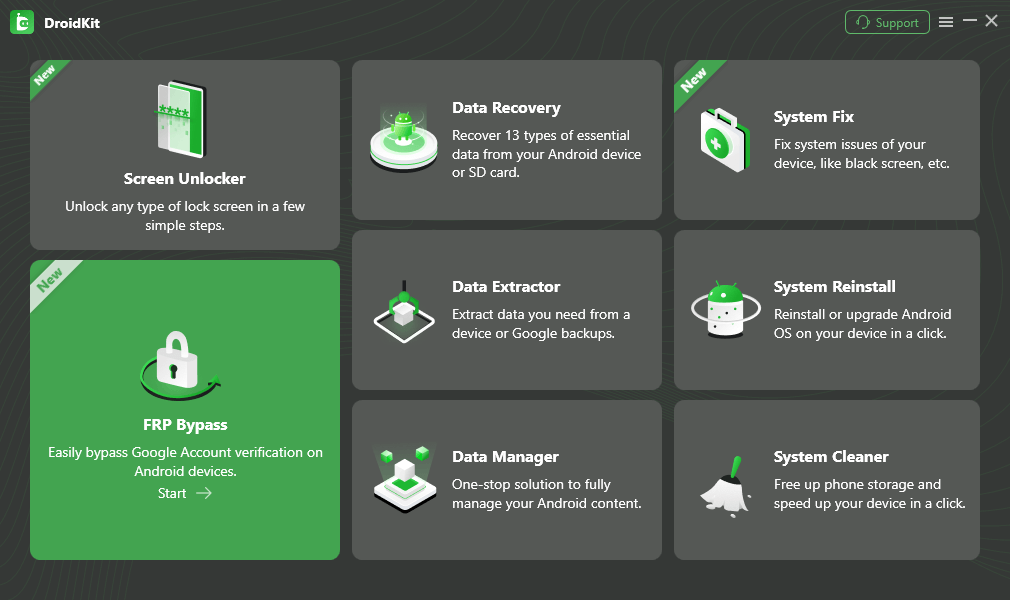
Choose FRP Bypass mode in DroidKit.
Step 2. Connect the Samsung tablet to the computer with a data-capable USB cable, then click Start.
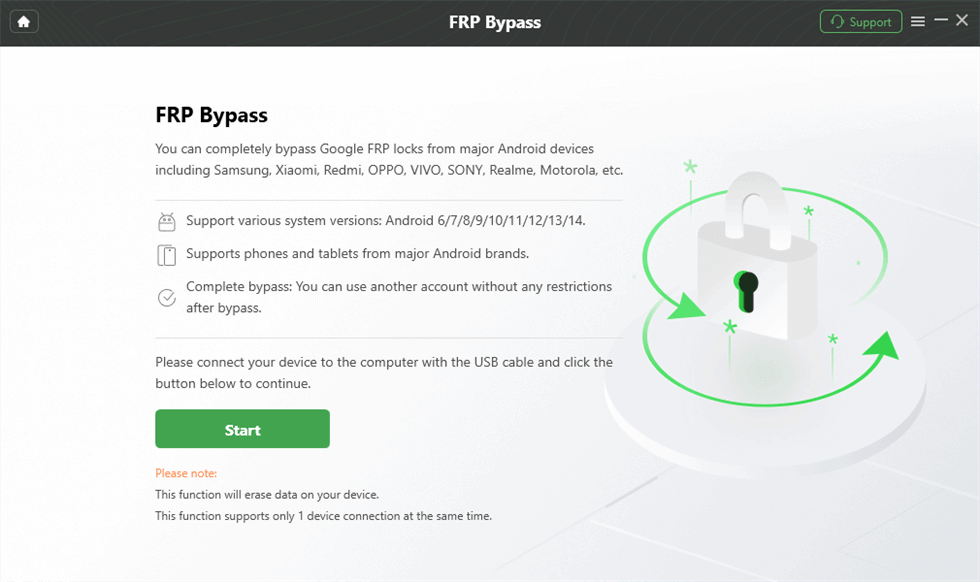
Connect the Samsung tablet and start the FRP workflow.
Step 3. Select the device brand and continue with the workflow presented for the connected device.
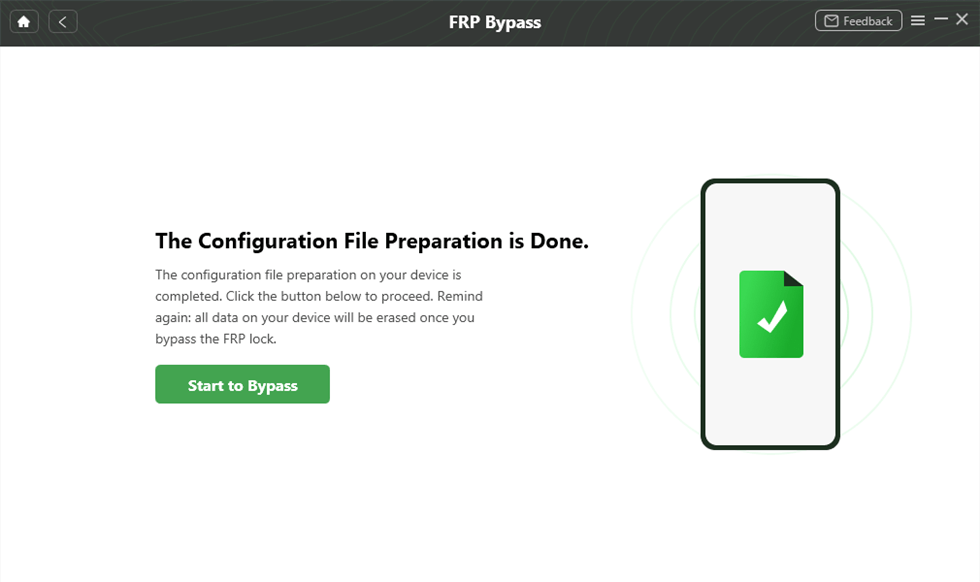
Continue with the FRP workflow shown for the connected device.
Step 4. Select the operating system or device series requested by the software. If the interface offers a Tablet series route for your connected device, choose the matching option.
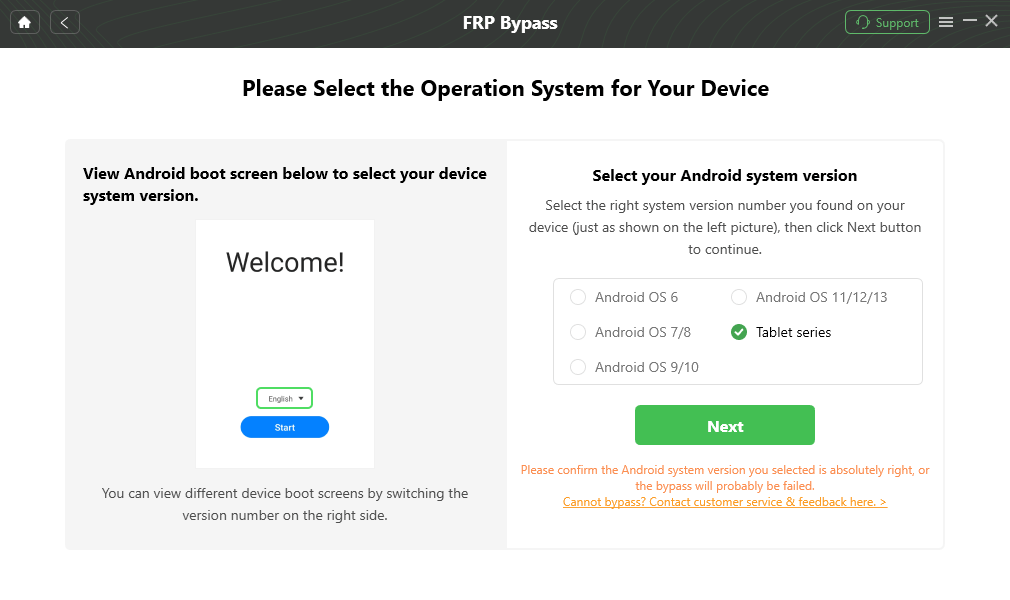
Choose the tablet series option when it matches the connected device.
Step 5. Follow the device-specific instructions shown on screen. If the workflow presents a Reset step for your Samsung tablet, complete the preceding settings before continuing.
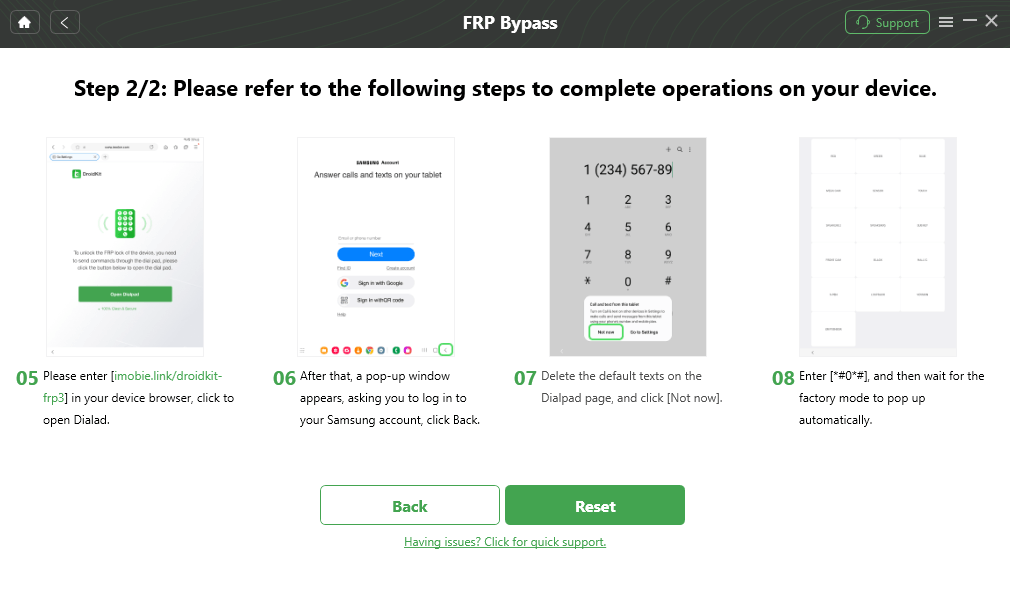
Follow the reset step only when it appears in the applicable tablet workflow.
Step 6. Let the software complete the workflow, then follow the setup instructions shown for the tablet.
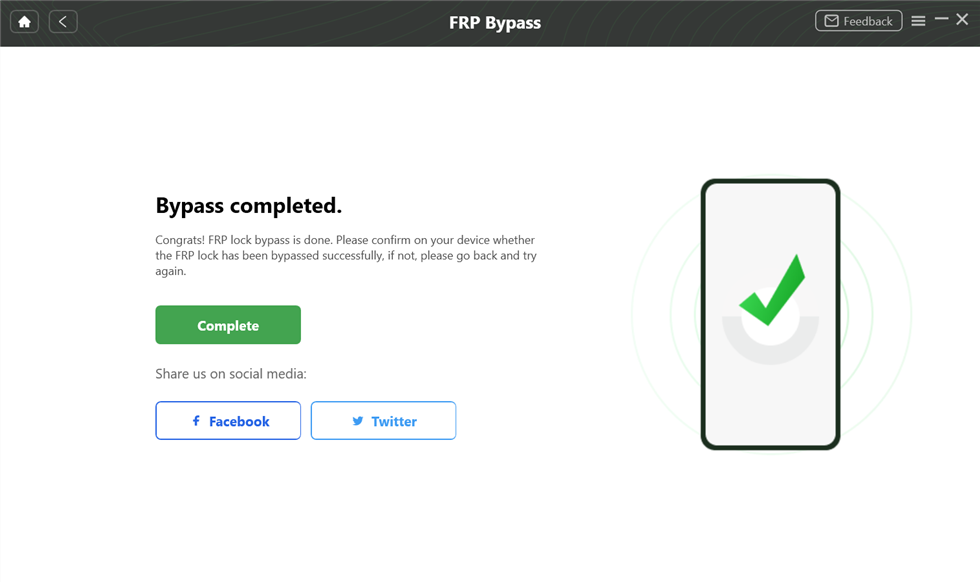
DroidKit FRP workflow completion screen.
Compatibility note: Do not treat “Samsung tablet” as proof that every Galaxy Tab is covered by the same workflow. Follow the device and series options displayed by the software for the connected tablet.
Google Keyboard No-PC Route: Does the Old Settings Path Still Exist?
Older Samsung tablet FRP tutorials may use a keyboard route to move from the Google verification screen into Keyboard Settings, Help & Feedback, a search or web action, and then Android Settings. The useful first step is to check whether those screens still exist on your tablet.
This section does not assume that enabling OEM unlocking removes FRP. OEM unlocking and Google account verification are different settings, so a generic sequence should not treat one as proof that the other has been removed.
Checkpoint 1: Can You Reach Keyboard Settings?
Step 1. Turn on the Galaxy Tab and connect it to Wi-Fi as required by setup.
Step 2. At the Google verification screen, tap a text field to display the keyboard.
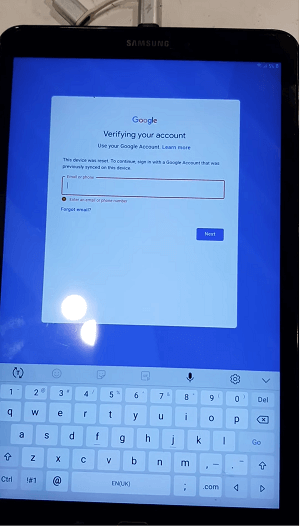
Open the keyboard from the Google verification screen.
Step 3. Check whether the keyboard interface exposes the Settings route described by the older guide you are following.
If no keyboard settings path appears, stop this route. The remaining steps depend on access you do not have.
Checkpoint 2: Is Help & Feedback Available?
If Keyboard Settings opens, check whether Help & Feedback is present and whether the content shown by the older tutorial matches your tablet.
If Help & Feedback is missing or leads to a different interface, treat that as a compatibility mismatch rather than repeatedly reopening the keyboard.
Checkpoint 3: Can the Route Reach Android Settings?
Some older instructions rely on selecting text or opening a search/web action from a help page and then reaching Android Settings. Continue only if your tablet exposes the same path.
If a search option cannot open Settings, or the route remains inside the setup wizard, the manual method has reached its stopping point on that Galaxy Tab.
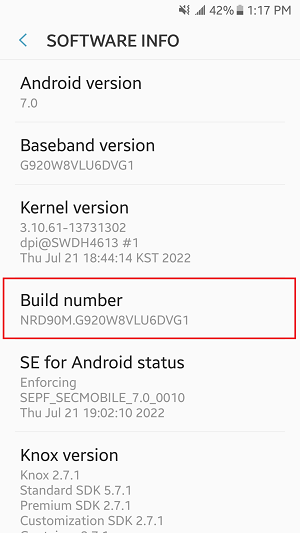
Older tutorials may proceed into Android settings, but the available screens depend on the tablet software.
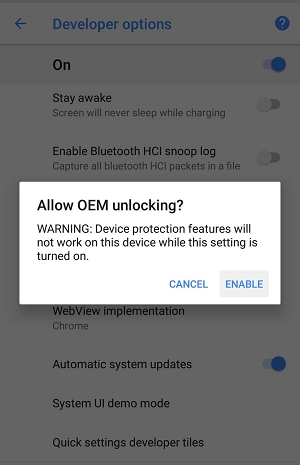
OEM unlocking is a separate device setting and should not be treated as a universal FRP removal step.
Why the Google Keyboard FRP Route Stops
The missing checkpoint tells you more than the age of the tutorial. Use the table below to decide when to stop the no-PC route.
| Where You Get Stuck | What It Means | What to Do Next |
| The keyboard does not expose the expected Settings route | The first shortcut required by the older method is unavailable. | Stop the keyboard route and check a model-specific Galaxy Tab guide. |
| Help & Feedback is missing | The tutorial does not match the current setup interface. | Do not repeat the earlier steps; move to another route. |
| A search or web action cannot reach Settings | The manual route cannot cross from the setup screen into Android Settings. | Use Samsung Support or evaluate a compatible PC workflow. |
| Settings opens but the next screen differs from the guide | The tablet build or interface does not match the tutorial. | Do not force steps written for another Galaxy Tab or software state. |
| OEM unlocking is missing or unavailable | That setting is not available in the current device state. | Do not treat OEM unlocking as a required universal FRP fix; choose another route. |
| Your exact model has a dedicated child guide | A narrower guide is available | Use the model-specific page instead of continuing with a generic workaround. |
The important stopping rule is whether the required setup path still exists, not whether an online guide labels itself “no PC” or “for all Samsung tablets.”
Official Route: Contact Samsung Support with Proof of Ownership
If you are the original owner and can provide the information Samsung requests, official support is an important alternative to manual workarounds. Samsung may ask for device and purchase details before deciding what support is available for the locked tablet.
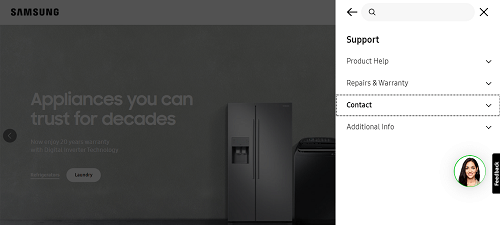
Contact Samsung Support when you can verify ownership of the tablet.
Step 1. Prepare the exact Galaxy Tab model, serial number, and any purchase information you have.
Step 2. Visit Samsung Support or the Samsung support site for your region.
Step 3. Choose the available support channel, such as chat, phone, or a repair request.
Step 4. Explain that the tablet reaches Google account verification after a factory reset.
Step 5. Follow Samsung’s ownership-verification instructions and provide the requested device information.
Step 6. Use the resolution offered for your specific ownership and device situation.
What to Do Based on Where You Get Stuck
Use the failure point rather than repeatedly switching between unrelated Samsung tablet tutorials.
| Your Blocker | Best Next Move |
| You know the synced Google account | Use account recovery or sign-in first. |
| You have a Tab A8, Tablet A, or Tab E | Open the exact model or model-family guide in the table above. |
| Keyboard Settings never appears | Stop the older keyboard route. |
| Help & Feedback is missing | Do not repeat the no-PC sequence; the required path is unavailable. |
| The route reaches Settings but later screens do not match | Return to the tablet model and software state instead of copying steps from another build. |
| You have purchase records and prefer official help | Contact Samsung Support. |
| The manual route is unavailable and you prefer a computer workflow | Check whether a Samsung FRP tool or DroidKit workflow supports the device. |
Samsung Tablet FRP FAQ
Can I bypass FRP on a Samsung tablet without a PC?
An older no-PC route may be relevant only when the required keyboard, Help & Feedback, search, and Settings checkpoints still exist on the Galaxy Tab. If one of those screens is missing, continuing the same sequence is unlikely to help.
What should I try first on a Samsung tablet locked after reset?
First check whether you can recover the Google account previously synced with the tablet. If not, identify the exact Galaxy Tab model and use its dedicated FRP guide when available. Only then compare a manual route, Samsung Support, or a compatible PC workflow.
What is the easiest Samsung tablet FRP route?
Ease depends on what the tablet allows. Account recovery is the simplest route when the original account is accessible. When an older keyboard path is unavailable, an on-screen PC workflow may be easier to follow, but only if it supports the connected tablet.
Can I bypass FRP on a Galaxy Tab A9 without a PC?
Do not decide from the model name alone. Check whether the keyboard, Help & Feedback, search, and Settings checkpoints required by the older no-PC route actually appear on your Tab A9. If they do not, that route does not match the current setup.
Why is Help & Feedback missing from my Samsung tablet?
The setup interface on your Galaxy Tab does not expose the same path used by the older tutorial. Because the next steps depend on that screen, treat the missing menu as a stopping point rather than repeatedly reopening the keyboard.
Does enabling OEM unlocking remove Samsung tablet FRP?
Do not treat OEM unlocking as a universal FRP-removal step. It is a separate device setting from Google account verification, and its presence or absence does not by itself prove that FRP has been removed.
Does Samsung Support remove FRP for every Galaxy Tab?
Do not assume a guaranteed outcome. Samsung may request the tablet model, serial number, proof of purchase, or other ownership information before determining what official support is available.
Will an FRP route restore data erased by the factory reset?
No FRP route should be expected to restore files already erased by the reset that triggered Google verification. Treat the tablet’s previous local data as potentially unavailable unless it exists in a separate backup.
How can I avoid FRP problems before selling or resetting a Samsung tablet?
Before handing the tablet to another person, remove the Google accounts from Android Settings while you still have access to the device. When possible, complete the factory reset from Settings only after confirming that the accounts intended for removal are no longer attached.
Choose the Route That Matches Your Galaxy Tab
A Samsung tablet FRP decision should start with the exact Galaxy Tab model and the last setup screen you can reach. Tab A8, Tablet A, and Tab E users should use their dedicated child guides first. If the keyboard-to-Settings path is missing, stop treating that older no-PC route as applicable to the tablet.
Samsung Support remains an important route when you can verify ownership. A PC-based FRP workflow becomes relevant when the manual path no longer matches and the connected tablet is covered by the software. That sequence keeps the page focused on the actual Galaxy Tab blocker instead of repeatedly testing unrelated FRP tricks.
More Related Articles


Roger Smith is a senior technical writer with years of experience in providing Android solutions. He loves to help users solve various problems such as Android unlock, Android data recovery, and Android system repair.
Product-related questions? Contact Our Support Team to Get Quick Solution >
