How to Crop Photos on iPhone iPad
One of the ways to remove certain objects from your photos is to crop them. Today, you will learn how to crop photos on your iPhone in the following guide. You will then have your photos with no unwanted items in it.
iPhone Photo Editing Tips
Edit Photos on iPhone
Edit Live Photos on iPhone
While taking a photo, most users generally do not pay attention to whatever else that gets captured while focusing on the main object. This is where the post-processing crop feature comes into the picture. Cropping allows you to crop your photo and remove the parts from it that you do not want.
For instance, if you took a photo of a bus but you ended-up capturing a bike on the side as well, you can have that other part cropped in your photos so only the main object you want remains in it. If you own an iPhone, cropping a photo becomes even easier. You do not even need an app to crop a photo on an iPhone.
There are three stages to using the iPhone’s photo crop feature and we cover all of those in the following guide for you.
Part 1: How to Automatically Crop Photos on Your iPhone and iPad
If you do not have a certain size in mind that you want to crop your photo to or you just want to crop the photo so it fits the size requirements for a website, you can use your iOS device’s automatic cropping option to do the task.
Automatic crop lets you crop your photo to various predefined sizes. You can choose any one of them and it will instantly perform the task on your iPhone or iPad.
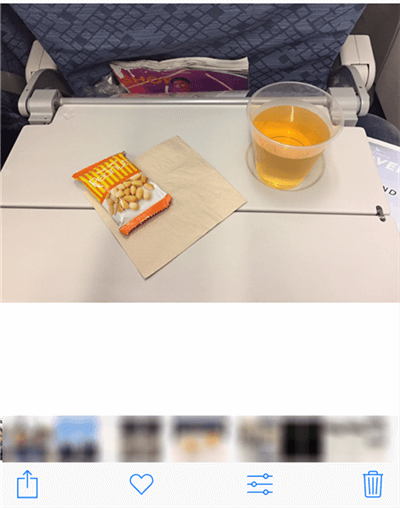
Step 1. Open the Photos app on your device and locate the photo you want to crop.
Step 2. When your photo opens in full-screen mode, tap on the edit icon appearing at the bottom of your screen. It will open all the available photo editing tools for you.
Edit a photo on the iPhone
Step 3. One of the editing tools you will see on your screen is the crop tool. It should be the first one in the bottom bar. Tap on it and it will let you crop your photo.
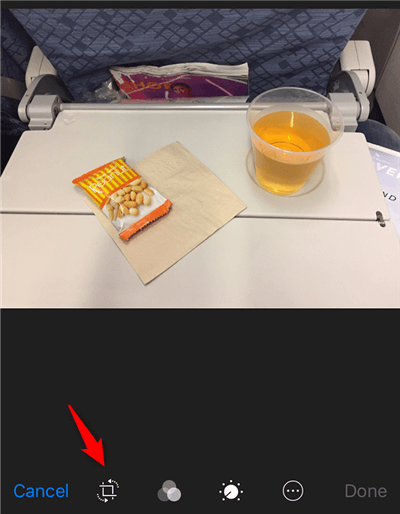
Select the Crop Option from Tool Bar
Step 4. On the following screen, you will be able to adjust the borders for cropping. Since you want to automatically do the task, tap on the icon appearing at the bottom-right corner of your screen.
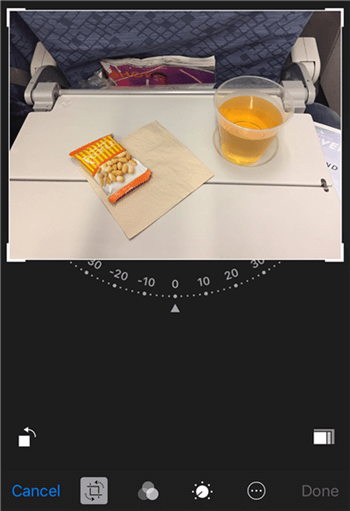
Open the Crop Tool Options
Step 5. You will now see a number of automatic crop options you can apply to your photo. Choose any of them and it will crop your photo accordingly.

Select from the Available Crop Options
Your edited and cropped photo should be available in the Photos app for you to view.
That was how to crop a picture on an iPhone using the built-in editing tool.
Part 2: How to Manually Crop Photos on Your iPhone and iPad
If you would prefer more flexibility in cropping your photos, you have that option as well in the Photos app on your device. This lets you crop your photo according to how you want and not the automatic mode.
The following illustrates how you go about using the manual cropping mode on your iPhone or iPad.
Step 1. Launch the Photos app and find and tap on the photo that you want to manually crop.
Step 2. Tap on the edit option at the bottom to start editing your selected photo.
Step 3. Various editing options will fill in the gap at the bottom. The one that you want to tap on is called crop and should be the first one in the menu bar.
Step 4. The following screen lets you adjust the handles of the crop tool. Use all four handles at each corner of the photo and drag them inwards or outwards to crop your photo. When you have reached your desired position, tap on Done at the bottom-right corner to save your photo.
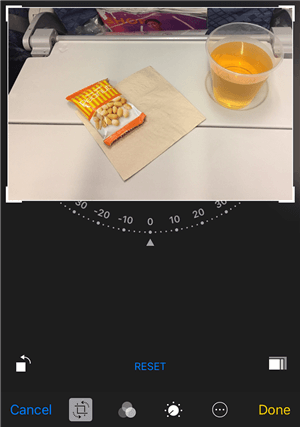
Save the Cropped Photo
Your manually cropped photo is now available in the Photos app on your iOS device.
Part 3: How to Go Back to the Original Size of the Pictures
If you ended-up saving your photo while you were not finished cropping it, you now likely have a photo that is mis-cropped. You will probably want to get your photo back to its original size so you can re-crop it as you want.
Getting a cropped photo back to its original condition is actually pretty easy on an iPhone. Your iPhone or iPad lets you easily undo the changes you made to your photo and you can do it using the Photos app itself.
Step 1. Launch the Photos app from the springboard on your iPhone.
Step 2. Look for the mis-cropped photo in your albums and tap on it so it launches full-screen on your device.
Step 3. Select the edit option available at the bottom to start editing your photo.
Step 4. Soon as the editing options appear on your screen, you will notice that you now have a new option called Revert at the bottom-right corner of your screen. This option lets you undo the changes you made to your photo using the crop tool. Tap on it.
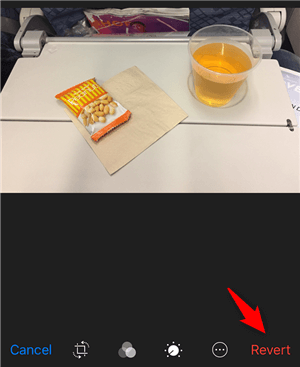
How to Revert Back the Cropped Photo
Your photo will go back to its original size and all the cropping effects will be removed from it. Your fixed photo should be available in the Photos app.
You might wonder how you could get the photo back in its original size as the photo was cropped and got saved, too. The reason you were able to do it is that your iPhone also saves a copy of the original photo when you edit a photo. This copy is usually not available for you to access in Photos but it is stored internally helping you restore your first version of the photo.
The Bottom Line
Our guide above on how to crop an iPhone photo should help you get rid of unwanted items from your photos. It should also help make your photos compatible with some of the sites that demand a specific size for your uploaded photos.
More Related Articles

Senior writer of the iMobie team as well as an Apple fan, love to help more users solve various types of iOS & Android-related issues.
Product-related questions? Contact Our Support Team to Get Quick Solution >
