7 Ways to Free Up Storage on Samsung Android Phone
The seven solutions in this article might help you solve phone storage full issue on a Samsung/Android. To increase storage and speed, perform the following methods. DroidKit will prove as a lifesaver! Please read on!
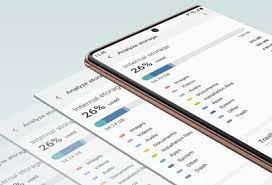
Free Up Storage on Samsung Android Phone
Are you running out of storage space on your Samsung Android phone? Android phone storage full is annoying at any time! Luckily, we’ve got you covered.
This article will look at seven simple ways to free up space on your phone and enhance its functionality. We’ll go over everything, including how to transfer files to your PC, clear the app cache, and, if required, factory reset your device.
Now let’s get started and get your phone back to working correctly!
Further Reading: How to Transfer Photos from Google Photos to Gallery>>
Solution 1: Clear App Cache to Free up Space on the Android
Your Android phone needs to have the app cache cleared for various causes. The main benefit is that it allows you to free up important device storage space. Your applications’ temporary data can occupy a sizable amount of space on your phone.
Deleting this data from the cache frees up space for other items. These are images, movies, or applications. Also, deleting the app cache may help your phone run more efficiently. The performance might be slowed down when it has a lot of temporary data saved.
Consequently, cleaning the app cache is a quick technique to ensure the durability of your smartphone. You can assist in keeping your device operating properly and prevent these problems by clearing the cache regularly.
Note: Overloading your phone with data can cause performance issues, crashes, and other concerns.
How to Clear App Cache to Free up Space on the Android?
Here is a step-by-step guide on how to delete apps from your Android device’s cache:
Step 1. On your Android smartphone, launch the Settings app.
Step 2. Choose “Apps” or “Applications” by scrolling down.
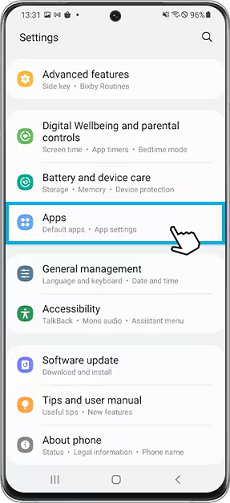
Locate the Apps tab in settings
Step 3. From the list of installed programs, pick the program whose cache you wish to remove.
Step 4. Instead, select “Storage & cache” (depending on your Android version).
Step 5. Choose “Clear cache” from the menu.

Clear the Cache
Step 6. Tap “OK” or “Clear” to confirm that you wish to remove the app’s cache.
Remember that clearing the app cache will remove temporary data. This will include settings and login credentials for that particular app.
But, it will only remove some crucial information. These are like contacts or images, making it a secure option to clear up space on your device.
Solution 2: Transfer Files from Android to Computer at Once [Fast & Most Loved]
Having too much data saved on your phone can slow your phone’s speed. While in certain situations, you can run out of room to download new apps or take more images. You can keep your information organized by moving files from your Android mobile to your PC. The quickest way to transfer files from Android to computer at once is using DroidKit – Android Phone Toolkit.
DroidKit is one of the best toolkits developed to help you to transfer data from your Android device to your computer. You can quickly transfer various things from your phone to your computer using DroidKit. These include photographs, movies, music, documents, and more. The main features of DroidKit are as below:
- Compatible with both Mac and Windows. Supports all Android smartphones and tablets.
- Fast transfer speed. For example, it supports transferring 1500 + photos in 3 minutes.
- Preview and transfer data between Android and Mac/PC computers according to your needs.
- Recover various kinds of Android data and files if you deleted them unexpectedly.
- Supports FRP bypass, extraction of data from broken devices, clearing of system junk, and many others.
DroidKit allows you to transfer many files at once, saving your effort. Free get DroidKit to have a try now!
Free Download * 100% Clean & Safe
After following the steps below on DroidKit, you’ll accomplish your task in seconds!
Step 1. Download and launch DroidKit on your PC. Open it and navigate to the Data Manager mode.
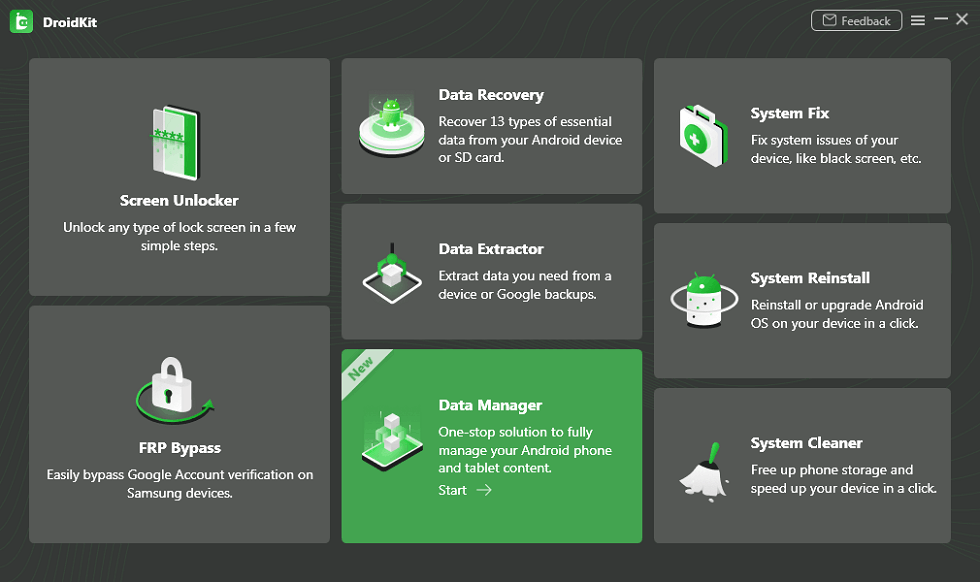
Choose Data Manager
Step 2. Connect your phone to the computer via a USB cable. DroidKit will immediately detect your device, and the interface below will pop up on your screen. Choose the Export Content mode to initiate the process.
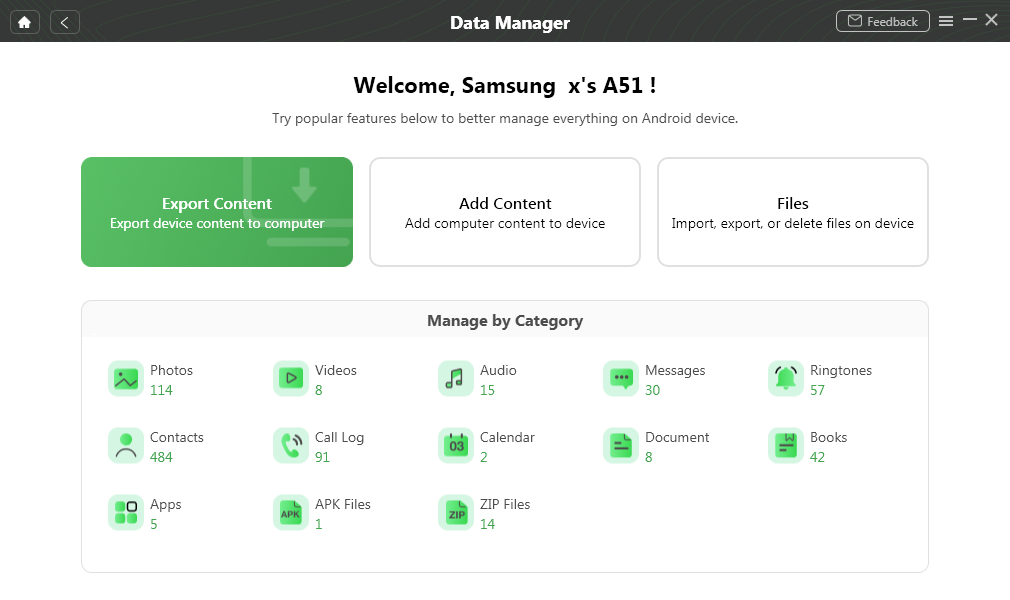
Choose Export Content
Step 3. Once previewing and selecting the data you’d like to transfer, click on the To PC icon to enable the transfer of files from your Android to your Mac.
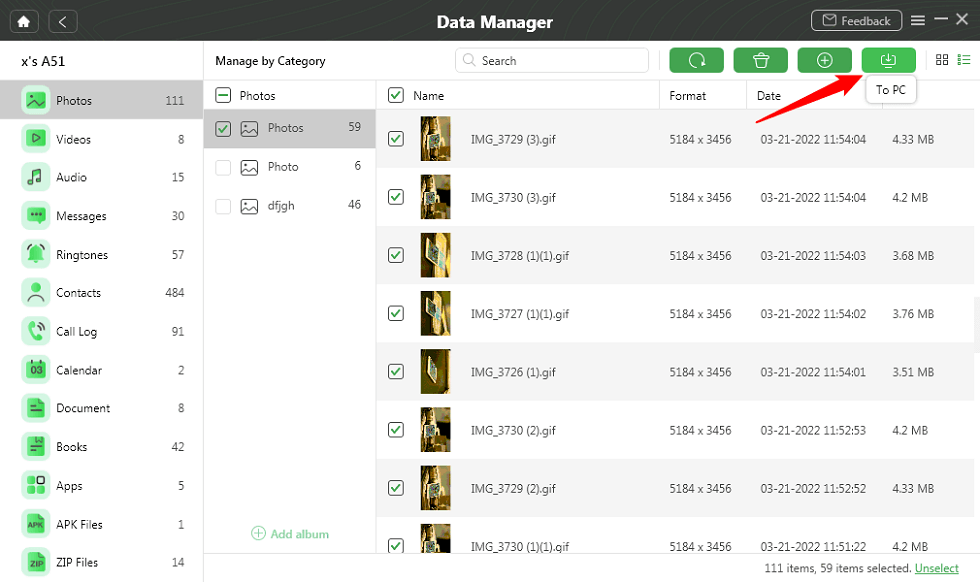
Transfer Photos to PC
Step 4. Wait for the transferring process and later you will get the Transfer Complete page as below.
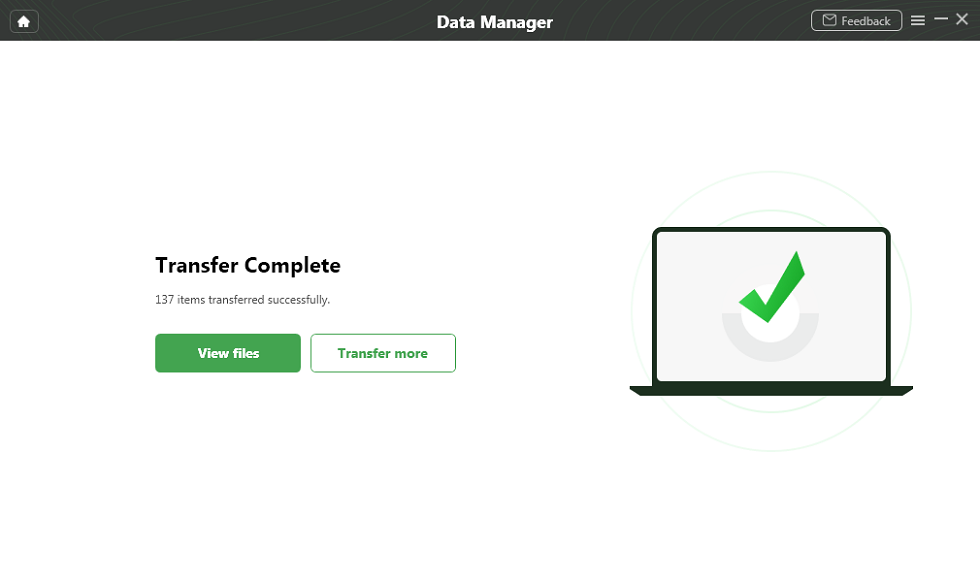
Transfer Phone to PC Completed
To find data exported to a computer, click View files, and to return to the previous interface, click Transfer More.
After clicking View Files, you can confirm the data transferred from an Android handset to a computer.
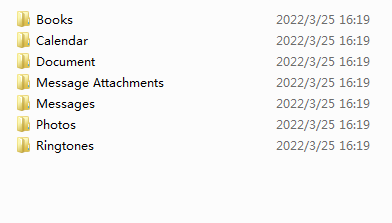
View Transferred Files on PC
Solution 3: Save Pictures & Videos to an External SD Card Instead of an Internal Memory
A great way to free up space on the internal memory is to save photos and videos to an external SD card. Taking pictures and recordings automatically saves them to internal storage on most smartphones. This can rapidly become full if you take many pictures and videos.
You can clear up space on your phone and keep your media files safe and secure. Also, transferring information to other devices or backing them up to the cloud is simple when utilizing an SD card.
Here are a few steps to follow to make it possible:
1. You should first plug the external SD card into your device (if it isn’t already). Do it before you can store any images or videos on it.
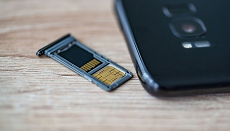
Plug the SD card
2. Then, enter the settings menu on your camera app. After that, find a setting that allows you to change the default save location.
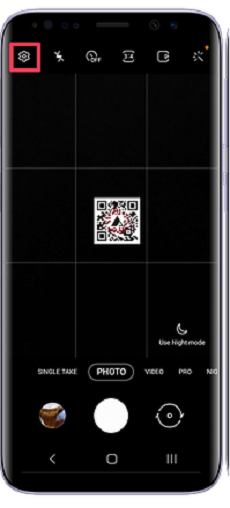
Camera Settings
3. It will be located under “Storage” or “Storage location,” depending on your device and camera app.
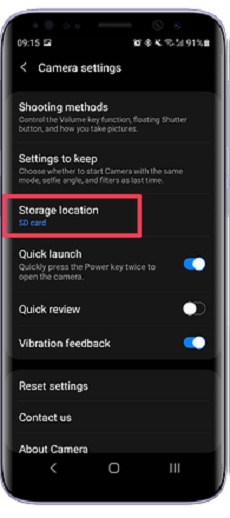
Choose the Storage Location
4. Use “SD card” as the default save place to save all future images and videos rather than on your hard drive.
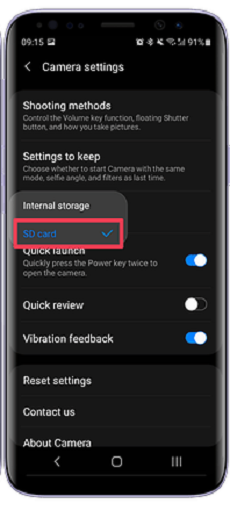
Change the location to an SD card
Note: Remember that not all Android smartphones allow external SD cards. Thus before buying one, confirm that your device has an SD card slot.
Even if your media files are stored on an SD card, you should regularly back them up. It ensures they are recovered when your device fails or has other problems.
Solution 4: Delete Unnecessary Downloads
Another efficient method to clear up space on your Android device is to delete unwanted downloads. Downloaded files are frequently stored in internal storage by default.
But if you need to be more cautious, you can find that your phone has a lot of useless files eating up important storage. It’s crucial to remember that deleting files permanently removes them from your device, so only get rid of anything you don’t need or want anymore.
Moreover, you can use a file management program. It is to assist you in finding and delete unwanted files from your device if you are unsure which files are safe to delete.
A Step-by-Step Guide to Delete Unnecessary Downloads
Use these steps to remove unnecessary downloads from your Android device:
Step 1. On your Android smartphone, launch the “Downloads” tab.
Locate the Downloads Option
Step 2. Search the list of files for any that you no longer require or desire.
Step 3. To pick a file, press and hold it. Next, tap the “trash can” symbol to remove it.
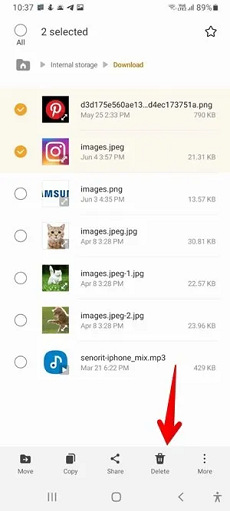
Delete the Downloads
Step 4. For any more files you wish to remove, simply repeat this procedure.
Alternatively, you can remove useless downloads using a file management tool. You just need to launch the file management application. Then go to the “Downloads” folder, choose the files you wish to remove, and hit the delete button.
Solution 5: Move Apps from Internal Storage to SD card
One more efficient method to clear up space on your Android device is to move apps from internal storage to an SD card. Moving apps to an SD card can free up crucial internal storage space on your phone.
Since apps can take up a lot of space on your phone, especially if you have many of them loaded.
Note: Certain programs still need some internal storage space to operate correctly. Moving them to an SD card may not free up as much space as you expect.
How to Move Apps from Internal Storage to SD Card?
- Follow these procedures to transfer applications from internal storage to an SD card:
- If it isn’t already there, put an SD card into your Android handset.
- On your smartphone, go to “Settings” and choose “Apps” or “App Management.”
- Choose the app or applications you want to relocate from the list of installed apps.
- In the app, tap “Storage” or “Storage Usage,” as appropriate.
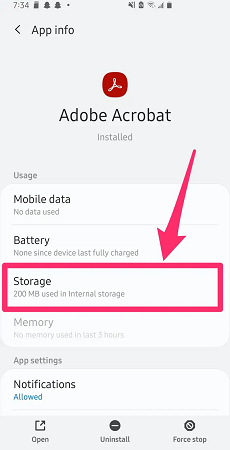
Find the Storage Tab
- Find and select the “Change” or “Move” option to move the app to an SD card.
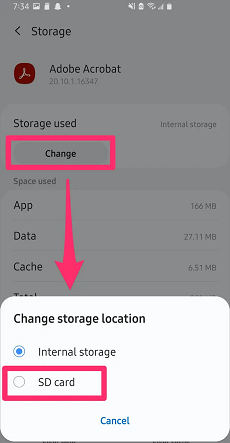
Change the Storage Location
- Follow the on-screen directions to complete the procedure.
Note: Not all applications can be transferred to an SD card; some may stop working correctly.
However, transferring programs to an SD card may cause them to run worse, so moving just the least-used or resource-demanding apps is vital.
Solution 6: Disable Default Apps
Removing default applications, you don’t use is another excellent technique to clear up space on your Android device. It’s vital to disable applications you are confident you don’t need or desire.
Default applications are those that come pre-installed on your smartphone. Although some may be helpful, others could consume vital storage space without offering much value.
Not all default applications may be deactivated since some may be necessary for your device to work properly. Deactivating default apps may also lead to certain functioning difficulties.
Instructions to Disable Default Apps
Take these procedures to stop your Android smartphone from using default apps:
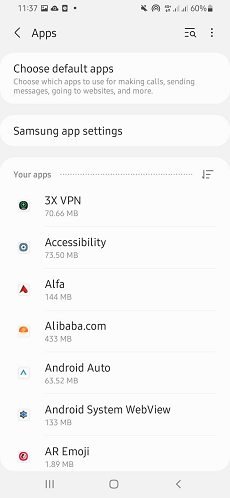
Step 1. On your Samsung phone, go to “Settings” and choose “Apps” or “App Management.”

Locate the Apps Tab from Settings
Step 2. Locate the default app(s) you wish to deactivate by browsing the list of installed applications.
Browse the Default App
Step 3. After selecting “Diable” or “Uninstall,” tap “Ok.”
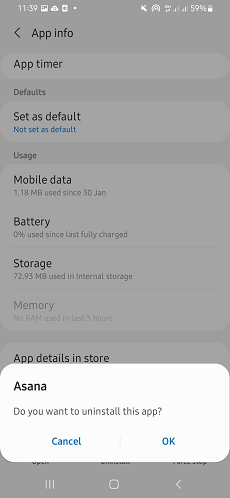
Uninstall the Default App
Step 4. To finish the procedure, adhere to the on-screen instructions.
Note: Removing default apps may free up less space than other techniques. But it may still be a practical approach to improve the speed and storage of your device.
Solution 7: Factory Reset Your Device
Although factory resetting your Android smartphone is an extreme measure, it can be a helpful technique to significantly increase the available storage on your phone.
All settings and data on your device are deleted when you perform a factory reset. This puts it back in the condition it was when you bought it.
Note: To prevent losing any crucial data, it’s crucial to back up any relevant data before conducting a factory reset.
Steps to Factory Reset Your Device
Follow these methods to factory reset your Samsung Android device:
- On your smartphone, select “System” under “Settings.”
- Look for and choose “Backup & reset” or “Reset options.”
- “Erase all data (factory reset)” or a comparable option should be used.
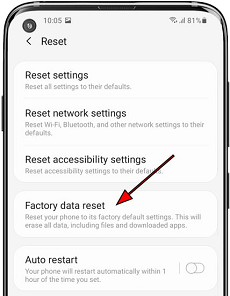
Factory Data Reset
- To confirm the factory reset, follow the on-screen instructions.
Remember that a factory reset will remove your smartphone’s data and settings. So you should only do it as a last option if all other attempts to free up space on your phone have failed.
After the factory reset, you’ll also need to set up your smartphone as if it were brand-new. So plan to spend some time customizing it and downloading applications again.
The Bottom Line
It is concluded that clearing up storage space on your Samsung Android phone is crucial for maintaining the device’s optimal performance.
There are numerous ways to help you free up space and improve the performance of your device. These include clearing app cache, file transfers, saving media files to external storage, and more. But DroidKit will make your way more manageable! Free get DroidKit to enjoy its service now~
The solutions in this article might help you solve Android phone storage full issue. It ensures adequate storage space for all your essential data and apps.
Free Download * 100% Clean & Safe
More Related Articles
- Backup Android Phone to PC Before Factory Reset >
- Transfer Data from Motorola to Motorola >
- Where Are Contacts Stored on Android >
- Best SMS Recovery Apps for Android >
- How to Extract Data from Broken Android Phone >
- How to Recover Data from Dead Android & iPhone >
- Best Apps to Transfer Data from Android to Android >
- How to Recover Deleted Photos on Samsung [3 Minutes] >
- How to Open WhatsApp Backup File on a PC >
- How Can I Transfer WhatsApp Backup from Google Drive to iCloud >

Senior writer of the iMobie team as well as an Apple fan, love to help more users solve various types of iOS & Android-related issues.
Product-related questions? Contact Our Support Team to Get Quick Solution >
