How to Transfer Photos from Google Pixel to Computer [Solved]
Whether resetting your phone or moving your photos to a safe place to clear up your device’s storage, we’ve got you covered! In this article, we will take you through 6 ways to easily transfer photos from Google Pixel to computer.
Getting a stellar smartphone with an amazing camera has its perks. However, the real issue arises when you start running out of space. This calls for transferring your cherished photos to another device, perhaps a PC.
For many people transferring photos from one device to another is a piece of cake. But, some less tech-savvy ones find it quite overwhelming to do so. Therefore, for anyone looking to transfer photos from your smartphone to a computer, this article is for you! It discusses 6 simple and easy ways to transfer photos from Google Pixel to computer. So, let’s dive straight into it!
Transfer Photos from Google Pixel to Computer in 1 Click
The first method that we will use to transfer photos from Google Pixel to computer is via a professional Android data manager – DroidKit. It is a complete Android toolkit that offers multiple troubleshooting features, like managing and transferring Android data, removing lock screen passwords, upgrading and reinstalling OS, bypassing Google accounts, recovering lost data, and more.
When you need to transfer photos from Google Pixel to computer, DroidKit can help you do it easily with a simple click on the button. And after transferring, all photos will still maintain the original quality without any damage or loss. You can also learn more about what DroidKit can do for you in transferring data below.
Free Download * 100% Clean & Safe
- Transfer all Android data – Photos, videos, contacts, text messages, WhatsApp data, etc. All Android data can be transferred from Android devices to computer and vice versa.
- Selective or batch transfer – You can preview all the photos in your device and select the ones you really want to transfer. Or you can batch transfer all data with 1 click.
- Lightning speed – No matter how many or how big your photos are, the entire transfer process only takes a few minutes or even seconds. No tedious wait.
- Support all Android devices – DroidKit supports all Google Pixel models. Besides, if you are using other Android devices, like Samsung, Huawei, LG, Motorola, etc., you can also use this tool to transfer data.
Now get DroidKit for free, and here are steps to transfer photos from Google Pixel to computer in 1 click.
Step 1. Open DroidKit on your PC/Mac. In the meantime, connect your Google Pixel to the PC using a USB cable. Select Data Manager from the interface.
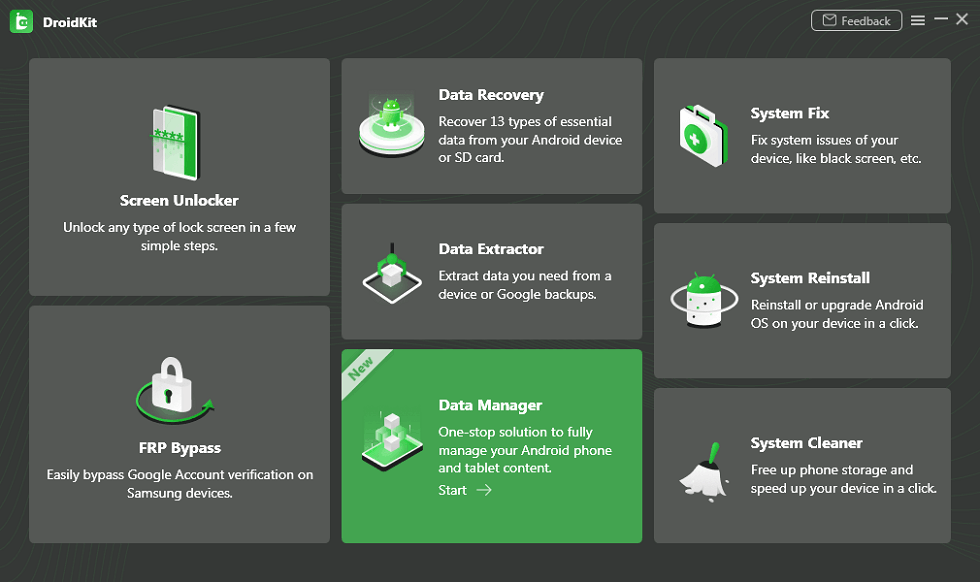
Choose Data Manager
Step 2. Now, select Export Content > Photos to export photos to your computer from your device.
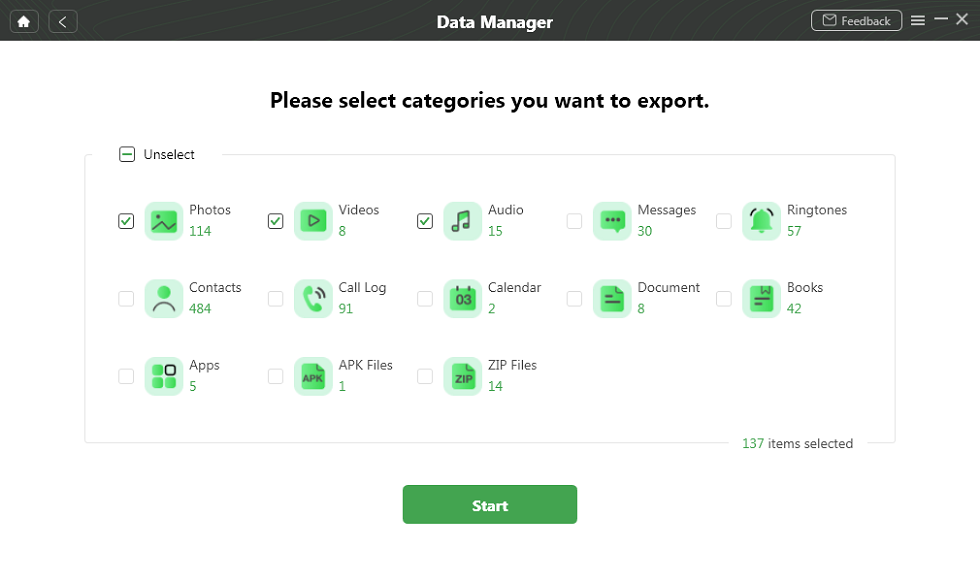
Select Data You Want
Step 3. You can freely preview all your photos on your device and choose what to transfer.
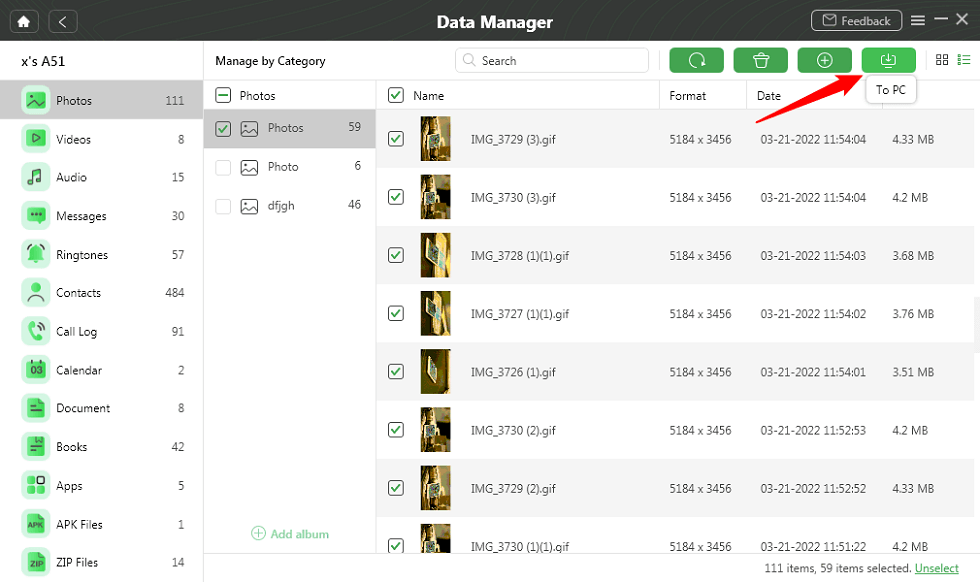
Transfer Photos to PC
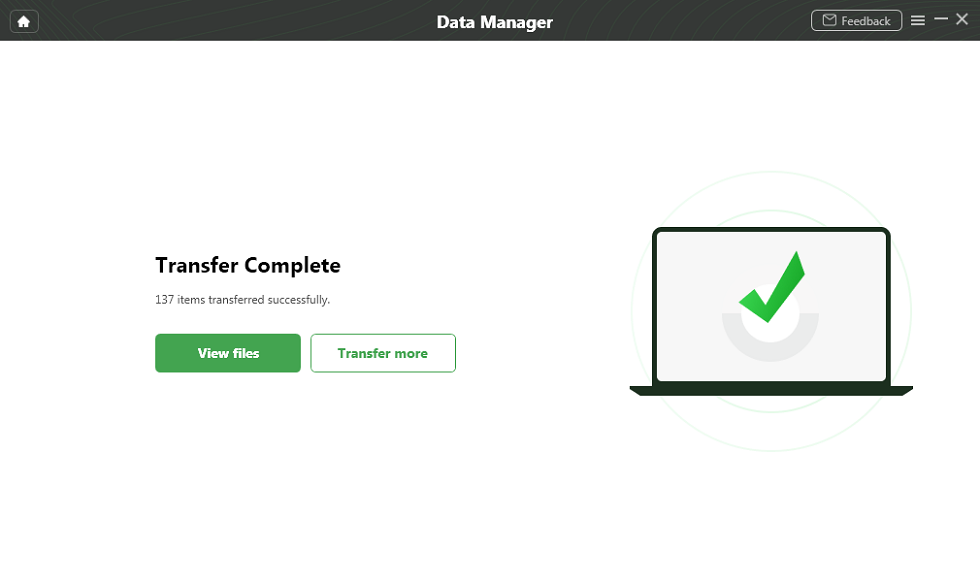
Step 4. Tap on the To PC button to transfer. Once all the selected photos have been transferred from your phone to the PC, you can click on View Files to view them.
Transfer Phone to PC Completed
And that’s how you can transfer photos from Google Pixel to computer in just 5 simple steps!
Apart from using a third-party app, there are several other ways of transferring photos from your Google Pixel to your computer. Let’s have a look…
Transfer Photos from Google Pixel to Computer via Google Drive
Another easy way to transfer photos from Google Pixel to computer is via Google Drive. Google Drive offers a convenient cloud storage solution that allows you to store and access your photos from anywhere. However, this method only transfers music, videos, photos, and documents.
To transfer photos from your Google Pixel to your computer using Google Drive, follow these steps:
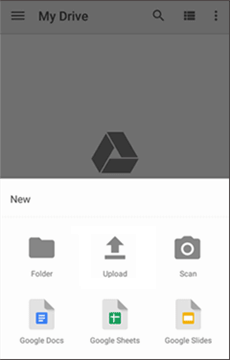
Step 1. Open the Google Drive app on your Google Pixel and sign in with your Google account or create a new account if you don’t have one.
Step 2. Tap “+ > Upload” and select the photos you wish to upload.
Upload Files to Google Drive
Step 3. Once the upload is complete, open Google Drive on your computer and sign in with the same Google account.
Step 4. Locate the uploaded photos in your Google Drive account, right-click on the selected photos, and choose the “Download” option.
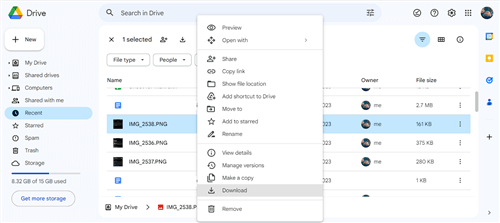
Choose the Download Option
The photos will be downloaded to your computer, allowing you to access and manage them locally.
Bonus Tip: You may also need this tip about Google Drive – How to Fix: Files Missing from Google Drive >
Transfer Photos from Google Pixel to Computer with USB Cable
Not everybody uses Google Drive. Therefore, if you want to go a bit old-school and prefer a direct and reliable connection, using a USB cable to transfer photos is a great option. For this method, you must have a good-quality USB cable. Follow these easy steps to use a USB cable to transfer photos:
Step 1. Connect your Google Pixel to your computer using a compatible USB cable.
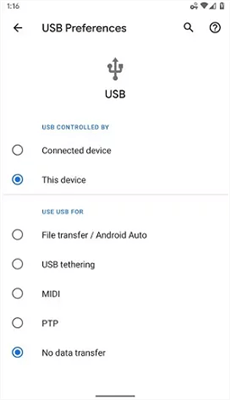
Step 2. Once connected, you’ll get a notification on your phone saying, “USB charging this device” or “USB for file transfer.” Tap the notification and select the option enabling file transfer or media transfer mode.
Choose USB for File Transfer
Step 3. Your PC should recognize your Google Pixel as an external storage device.
Step 4. Open your computer’s File Explorer or Finder and navigate to Google Pixel’s storage.
Step 5. Locate the “DCIM” folder, which contains your photos and videos. Open it to access your photos.
Step 6. Select the photos you want to transfer to your computer using “Ctrl + Click” (Windows) or Command + Click (Mac) to select multiple files.
Step 7. Right-click on the selected photos and select “Copy.”
Step 8. Go to the desired folder on your computer, right-click, and choose the “Paste” option to transfer the photos from your Google Pixel to your computer.
Transfer Photos from Google Pixel to Computer with Email
Another easy way to transfer photos from Google Pixel to computer is via email. However, this method is only good if you want to send just a handful of photos. Also, it takes a little longer than the other methods because it takes some time to attach the photos. Nevertheless, it is a straightforward method. To transfer photos via email, follow these steps:
Step 1. Open the gallery on your Google Pixel and locate the photos you want to transfer.
Step 2. Long-press on one of the photos to select it. Tap on all the other photos you want to transfer to select them.
Step 3. Once you have selected all the photos you wish to transfer, click on “Share > Mail.”
Click on Share via Mail
Step 4. Enter your email address in the given space, and send the email.
Step 5. Next, open your email from your PC, and download the photos you sent from your phone to the desired folder on your PC.
Transfer Photos from Google Pixel to Computer via SD Card
Transferring photos via an SD card is a good option if you want to save yourself from the hassle of using third-party apps and cables. This method lets you easily transfer photos using the SD card as an intermediary. However, your Google Pixel must support external storage via an SD card for this method to work. Here’s what you need to do:
Step 1. Insert an SD card into your Google Pixel’s SD card slot. Make sure the SD card is properly inserted and recognized by your device.
Step 2. Long-press on one of the photos to select it. Tap on all the other photos you want to transfer to select them.
Step 3. Once you have selected all the photos you wish to transfer, click on “Share > SD Card/External Storage.”
Step 4. Eject the SD card from your phone and insert it into your PC’s SD card slot.
Step 5. Launch “File Explorer” and locate the SD card storage.
Step 6. Select the photos you want to transfer to the PC using “Ctrl +Click,” right-click on them and click “Copy.”
Step 7. Go to the desired folder on your computer, right-click, and choose the “Paste” option to transfer the photos from your Google Pixel to your computer.
Transfer Photos from Google Pixel to Computer via Bluetooth
If you want to wirelessly transfer photos from Google Pixel to computer, you can use the Bluetooth feature. For this method, you simply need to enable Bluetooth on your phone and computer and transfer photos. To transfer photos from Google Pixel to PC via Bluetooth, follow these steps:
Step 1. On your Google Pixel, enable Bluetooth by going to Settings > Connections > Bluetooth.
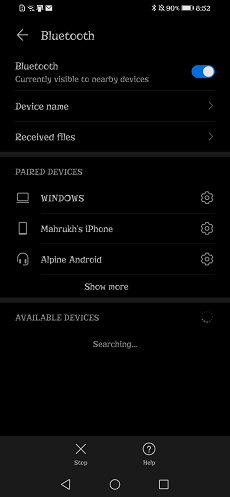
Turn on Bluetooth on the Phone
Step 2. On your PC, go to “Settings > Bluetooth & Devices” and turn the toggle on for Bluetooth.
Step 3. Search for available Bluetooth devices on your Google Pixel and select your PC from the list.
Step 4. Follow the on-screen prompts to complete the pairing process.
Step 5. Select the photos you want to transfer from your phone’s gallery and tap “Share > Bluetooth.” Select the paired PC from the list of available devices.
Step 6. All your selected data will be transferred to your new Motorola phone in just a few minutes.
And that’s how you transfer photos from Google Pixel to computer using different methods!
The Bottom Line
Transferring your cherished photos from your Google Pixel to a computer is important for keeping them safe, well-organized, and ready to share with others. In this article, we’ve discussed several methods to transfer photos from Google Pixel to computer. And if you have lots of photos to transfer, DroidKit must be your first choice to do that, because it can help you transfer data just in a simple click and a few minutes. Just free download DroidKit and enjoy a smooth and hassle-free transfer process!
Free Download * 100% Clean & Safe
More Related Articles
- Backup Android Phone to PC Before Factory Reset >
- Transfer Data from Motorola to Motorola >
- Where Are Contacts Stored on Android >
- Best SMS Recovery Apps for Android >
- How to Extract Data from Broken Android Phone >
- How to Recover Data from Dead Android & iPhone >
- Best Apps to Transfer Data from Android to Android >
- How to Recover Deleted Photos on Samsung [3 Minutes] >
- How to Open WhatsApp Backup File on a PC >
- How Can I Transfer WhatsApp Backup from Google Drive to iCloud >

Senior writer of the iMobie team as well as an Apple fan, love to help more users solve various types of iOS & Android-related issues.
Product-related questions? Contact Our Support Team to Get Quick Solution >
