Samsung Galaxy Recycle Bin: Where Is It and How to Recover?
This article will help you find the recycle bin on Samsung Galaxy phones. It will guide you to recover your permanently deleted data by following simple steps.
Samsung is a well-reputed name in the smartphone industry. It has made some top-notch high-tech devices with advanced features for users. In addition, Samsung has given a Recycle Bin option where deleted items are stored temporarily. Many users accidentally delete some photos and videos. This situation may lead to panic situations for the users.
This article will explain how to locate Recycle Bin on your Samsung device and recover such data. Even if you have deleted your data permanently, it is possible to recover that too. Let us jump into answering all such worrying questions one by one.
You can also read some other tips about Samsung recovery:
- How to Recover Data from Broken Samsung >
- Quick Ways to Recover Deleted Messages With/Without Samsung Backup >
Does Samsung Galaxy Have a Recycle Bin?
If you wonder if your Samsung device has a recycle bin, the answer is Yes. Most of the latest Samsung devices have recycle bins in the gallery. You have to open your gallery and find the album “Recycle Bin.” all your deleted photos and videos will be there.
If you can’t find “Recycle Bin,” you can also use third-party applications for Android recovery to find the deleted items of your device.
Now moving toward “Where can you find your Recycle Bin on your Samsung phone.”
Where Is the Recycle Bin Located on Samsung Devices?
The latest smart devices of Samsung have a “Recycle Bin” album in their gallery. It contains all your deleted items like photos, videos, documents, and more.
If you can’t locate that, there may be a Trash Folder in your hidden files. All your deleted items will go to the Trash Folder and remain there for 30 days. You can find your deleted items and restore them. After 30 days, all the files disappear from that folder too.
Let us look at how to get access to Recycle Bin in a stepwise manner.
How to Access Samsung Galaxy Recycle Bin?
Suppose you have accidentally deleted some crucial files from your device. You don’t have to worry. You can gain access to Samsung Galaxy Recycle Bin. Please follow the instructions below.
Step 1. Open the Gallery app on your device.
Step 2. You will see three dots in the top right corner of the screen. Tap them.
Step 3. Select “Recycle Bin” from the drop-down menu.
Step 4. You will find all your recently deleted files there.
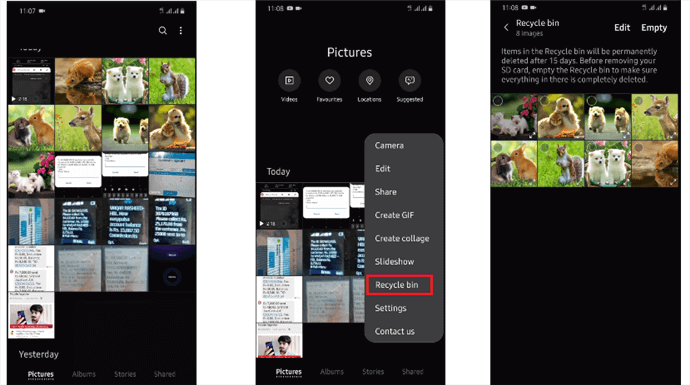
Access to Samsung Recycle Bin
After locating Recycle Bin, we will learn how to recover deleted photos from Samsung devices.
How to Recover Deleted Photos from Samsung Galaxy Recycle Bin?
Losing your essential photos is a frustrating experience. It might have created a lot of trouble for you. But you don’t have to worry much about it. There are a few options for you to recover your data. First, we will talk about the way to recover deleted photos from Recycle Bin. Knowing where your deleted photos and videos are located makes it easy to recover your items. Please follow the instructions given below.
- Select the items you want to recover.
- Tap “Restore,” and you will restore all the wanted files to your device.
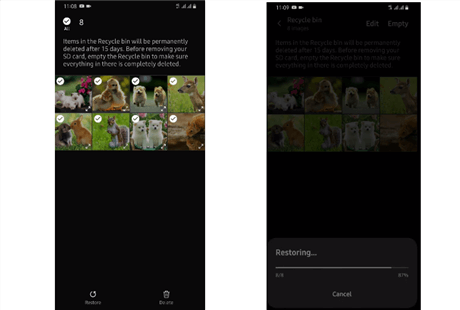
Tap on Restore to Recover Photos
Besides, Samsung Cloud backs up your data, including photos, videos, and documents. You can recover your data by opening Samsung Cloud and restoring the wanted items by clicking the restore button. This method is only used when you have made a backup of all your data.
But what if you don’t have a backup, or your phone has permanently deleted your photos? In the next part, we will learn how to restore permanently deleted photos.
Can’t Miss: Here are two tips for you to recover Android photos.
- Recover Deleted Photos from Android Gallery >
- Recover Deleted Photos from Android Internal Storage >
Restore Permanently Deleted Photos When There Is No Backup
Suppose you don’t have a backup of your data. And more than thirty days have passed since you deleted your data. Then you have to use a third-party application. Using this method, you will recover permanently deleted photos. DroidKit is one of the best Android data recovery tools. No matter whether you have backed up your photos before, with this tool, you can find them back with ease. And it has an easy-to-use interface and works with excellent efficiency. Let’s see some of its highlights now.
Free Download * 100% Clean & Safe
- Recover 13 types of data – All Android data, such as photos, videos, music, contacts, phone numbers, call history, WhatsApp data, Apps, etc. are included.
- Multiple recovery modes – Recovery without backup, from Google backup, from SD card, and even from damaged Samsung phones are all supported.
- Freely browse and select – It allows you to view the data before deciding what to recover, ensuring that you can really get back precious data instead of junk files.
- Cover 2000+ Android devices – Support almost all Android devices, no matter which brand they come from, such as Samsung, Huawei, LG, etc.
Besides, DroidKit can also help you fix system issues like screen not responding, stuck on the logo, etc. And if you need to bypass Android lock screen, it will be a good unlocker for you as well.
Now just free download the latest version of DroidKit and follow the steps below to recover your photos without backup.
Step 1. Open DrodiKit on your Windows or Mac computer and choose the Deep Recovery from Device option in the Data Recovery mode.
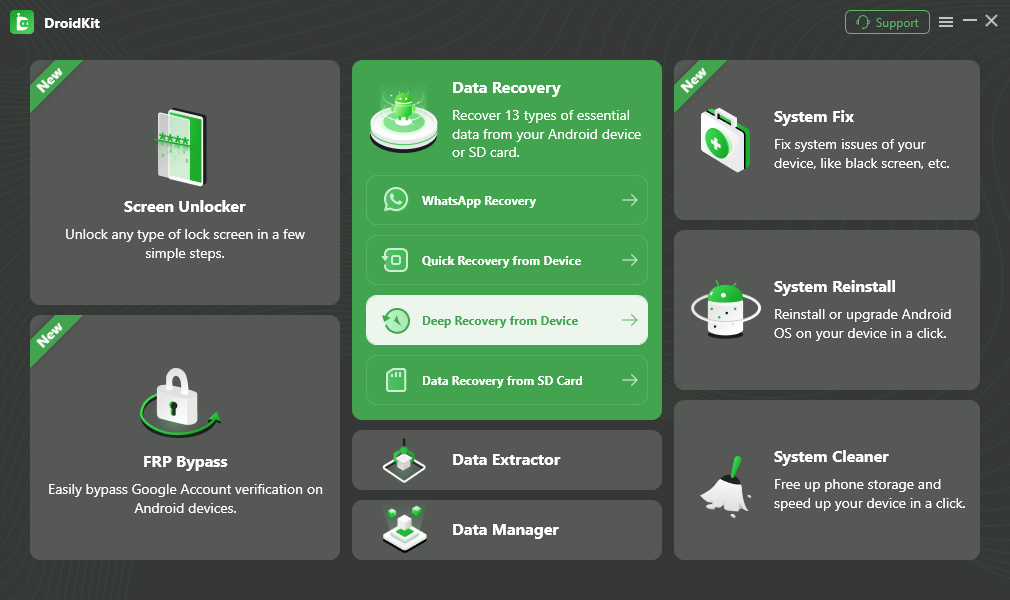
Choose Deep Recovery from Device under Data Recovery
Step 2. You will see multiple data types on the next screen. Since you want to recover your photos, please choose Photos and click the Start button.
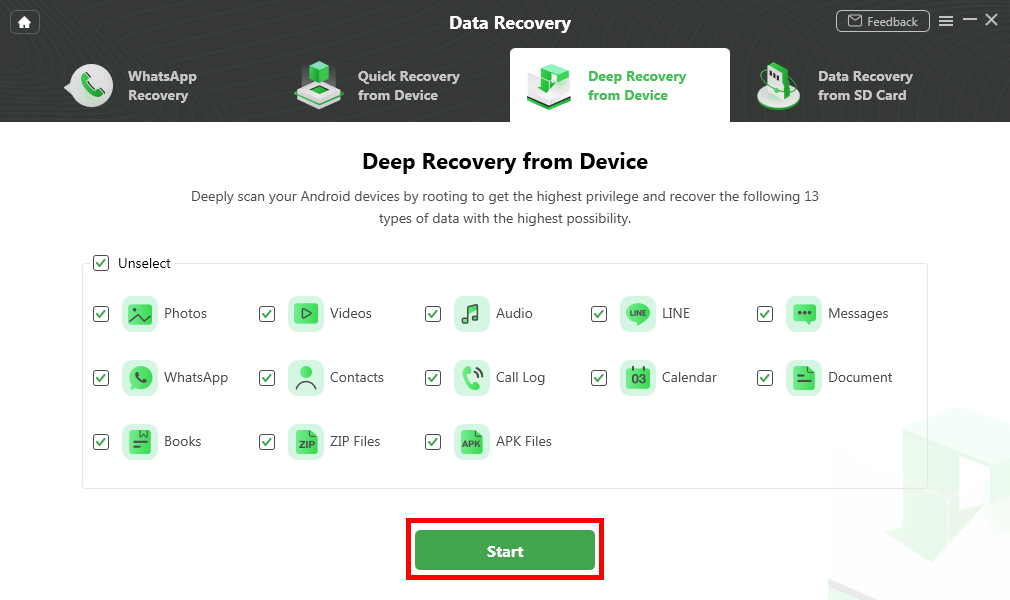
Select Photos and Click Start
Step 3. Please connect your device to the computer via a USB cable. Once your device is connected, you will see the following interface. Then please select the Start button.
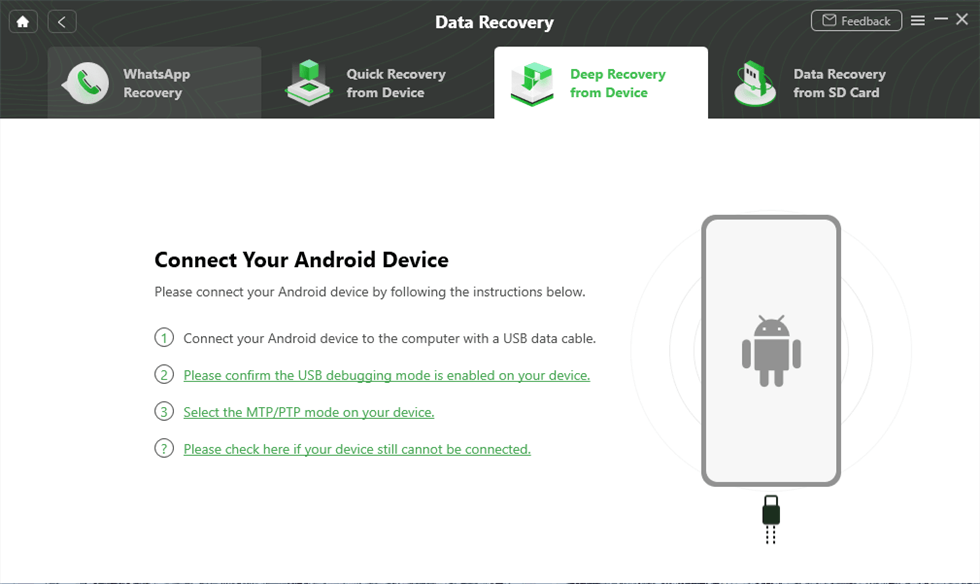
Connect Your Android Device to the Computer
Step 4. Now DroidKit will check the root status of your device. If you need to root your device, you should tap on the Root Now button.
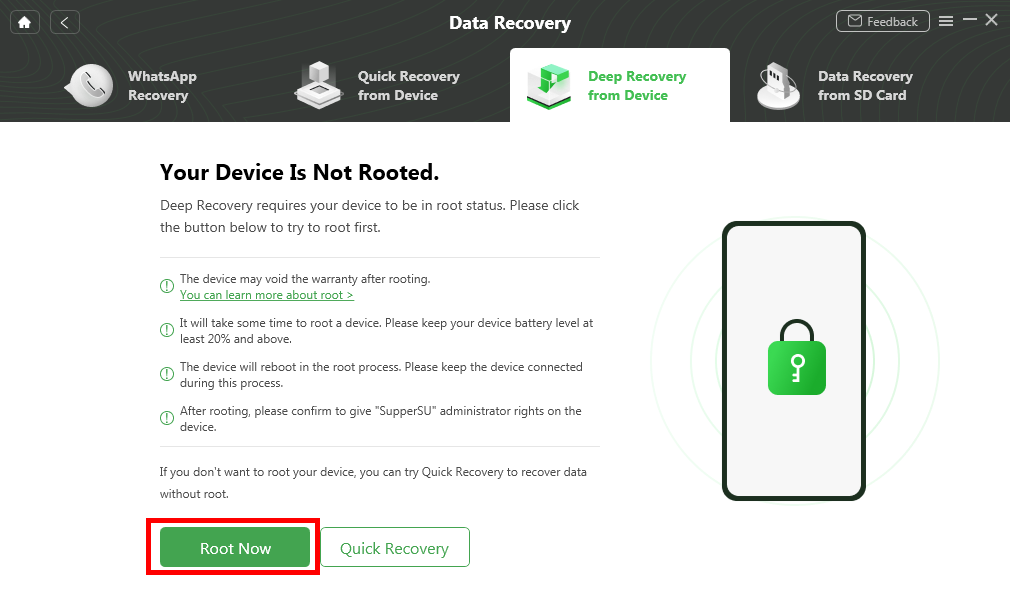
Tap on Root Now to Continue
Step 5. After rooting, it will scan your device automatically. You will see the scanned data at the end of the completion of scanning. Please select the scanned data you want to recover. You can either recover your data to your device or your PC.
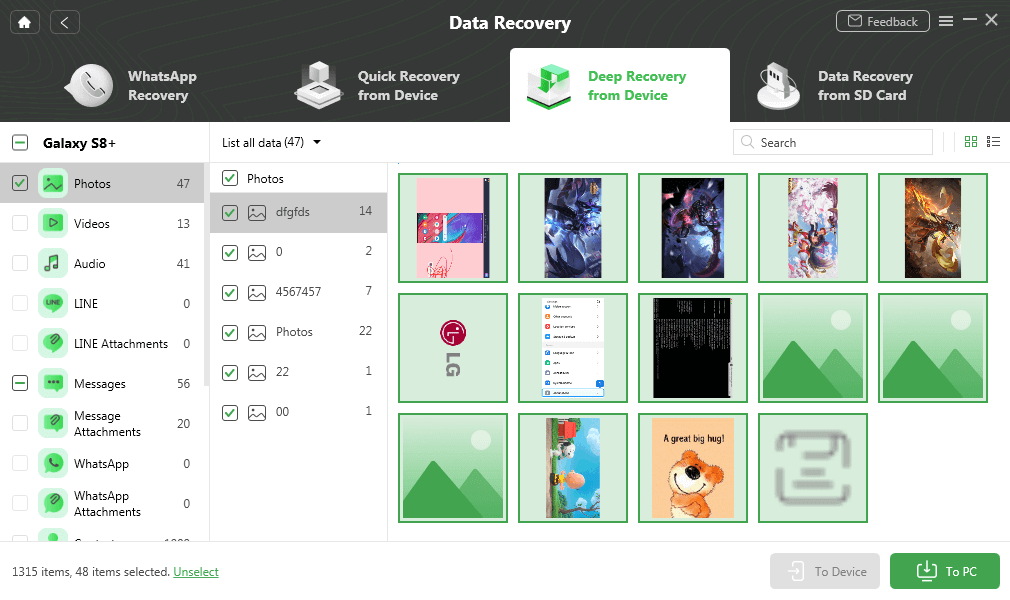
Select Android Photos to Recover
Step 6. Then please wait for the recovery process. Once the recovery process is completed, you will see the following interface. You will successfully recover your permanently deleted photos from your Samsung Galaxy device.
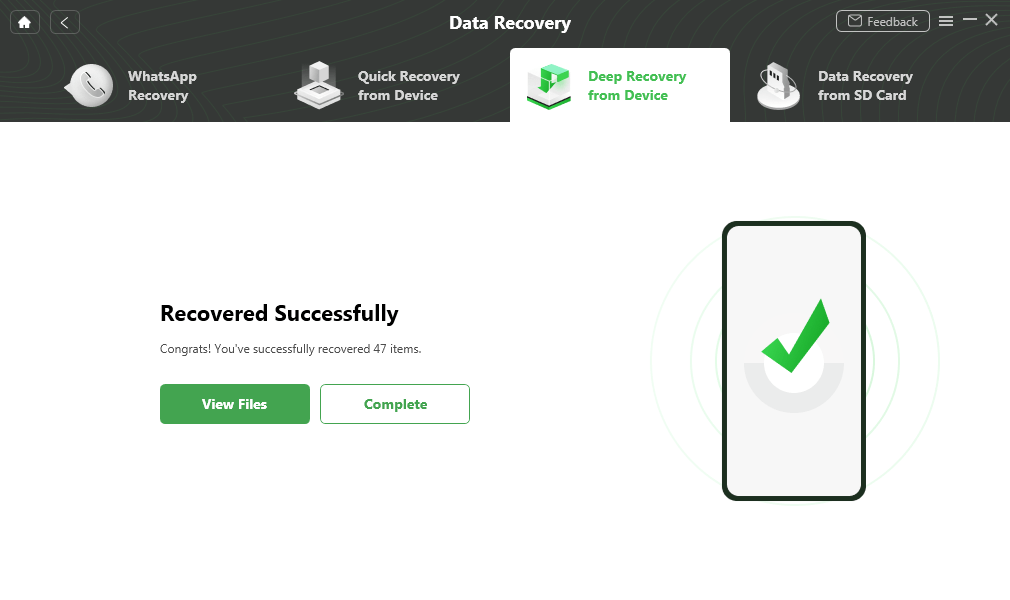
Data Recovery Successfully
Let us learn to empty the Recycle Bin.
How Do I Empty the Recycle Bin on My Samsung?
It is an effortless and quick way to empty the recycle bin. Please follow the steps.
- Open the Gallery app on your device.
- There are three dots in the top right corner of your screen. Tap them and select Recycle Bin.
- After opening Recycle Bin, you will see three dots in the top right corner. Tap them.
- Select the ‘Empty’ button. All the data in your recycle bin will be cleared, and your Recycle Bin will be empty.

Select the Empty Button
The Bottom Line
Samsung Galaxy phones are exceptional in capturing high-quality pictures. But due to human error, some files can get deleted. Fortunately, Recycle Bin is a feature for storing recently deleted items and lessens the worry. Even if you fail to find “Recycle Bin” on your device and have permanently deleted your photos, DroidKit will be your savior in that tough time. Feel free to comment if you find this article helpful. Share with your friends and family too.
Free Download * 100% Clean & Safe

Senior writer of the iMobie team as well as an Apple fan, love to help more users solve various types of iOS & Android-related issues.
Product-related questions? Contact Our Support Team to Get Quick Solution >
