Samsung Tab E Factory Reset Without Google Account: 5 Ways
Resetting a Galaxy Tab E can erase the tablet, but it may not remove Google FRP. See which route fits your situation before using Recovery Mode, Google Keyboard, ADB, DroidKit, or Samsung Support.
Need to reset a Samsung Galaxy Tab E but no longer have access to the Google account? The first thing to determine is whether you simply want to erase the tablet or whether it has already been reset and is now stopped at Verify your account. Those are two different problems.
Recovery Mode can wipe a Galaxy Tab E without requiring you to sign in first, but it does not necessarily remove Factory Reset Protection (FRP). If Google verification appears afterward, the next step depends on your Tab E version, whether an older Google Keyboard route is still available, whether USB debugging was enabled beforehand, and whether you can verify ownership through Samsung.
⚠ Important: Use the methods below only with a Samsung tablet you own or are authorized to manage. A factory reset erases local data. If you purchased a used Tab E and the previous owner’s Google account is still attached, asking that owner to remove the account is usually the most direct route.
Table of ContentsHide
Quick Answer: Can You Factory Reset Samsung Tab E Without Google Account?
Samsung Tab E Factory Reset vs FRP Bypass: What’s the Difference?
Before You Reset: Check Your Samsung Tab E Situation
Which Samsung Tab E Method Should You Choose?
5 Ways to Reset Samsung Tab E Without Google Account or Handle FRP
Method 1: Samsung Tab E FRP Unlock with DroidKit
Method 2: Galaxy Tab E FRP Bypass Without PC via Google Keyboard
Method 3: Use ADB with Samsung Tab E
Method 4: Factory Reset Samsung Tab E via Recovery Mode
Method 5: Ask Samsung Support for Official Help
What If Samsung Tab E Still Asks for Google Account After Reset?
Samsung Tab E Factory Reset Without Google Account FAQs
Sum It Up
Quick Answer: Can You Factory Reset Samsung Tab E Without Google Account?
Yes. You can factory reset a Samsung Tab E without signing in to Google first, particularly by using Recovery Mode. The important limitation is that factory reset and FRP removal are not the same thing.
If FRP was active before the reset, the tablet may reboot to the Android setup process and display Verify your account. At that point, wiping the tablet again usually does not solve the Google verification problem.
Your best path depends on what you see now:
- If the Tab E still opens normally, remove the Google account before resetting whenever possible.
- If you only need to erase an inaccessible tablet, Recovery Mode can perform the reset.
- If the device has already been reset and asks for the previously synced account, you are dealing with FRP rather than a normal factory-reset problem.
- If an older Google Keyboard route still appears, you can evaluate the no-PC method below.
- If USB debugging was never enabled, skip ADB instead of spending time trying to make it detect a locked tablet.
Using another Galaxy Tab model? The Samsung tablet FRP bypass guide organizes the available routes by Galaxy Tab scenario. For Samsung phones and the broader Galaxy FRP topic, see the Samsung FRP bypass guide.
Samsung Tab E Factory Reset vs FRP Bypass: What’s the Difference?
A factory reset erases locally stored user data and returns the Galaxy Tab E to its setup state. FRP is a separate Google account verification mechanism that can remain active after that reset.
That means the search for Samsung Tab E factory reset without Google account usually comes from one of two situations:
- You have not reset the tablet yet and want to erase it without logging in.
- You already erased the tablet and now cannot pass Google verification.
| Action | What It Does | What Happens to FRP? |
| Factory reset | Erases local user data and settings | FRP may still require the previously synced Google account |
| Google account removal before reset | Removes the account from an accessible tablet before wiping it | Helps avoid being unexpectedly stopped by that account during setup |
| FRP method after reset | Addresses the Google verification stage | Result depends on the tablet, Android build, security patch, and method |
| Samsung Support | Provides an official ownership-verification route | Availability depends on Samsung’s verification process |
The distinction matters because repeating Wipe data/factory reset will not turn an FRP problem back into a simple reset problem. If the setup screen says Verify your account, choose your next step based on that screen instead.
Before You Reset: Check Your Samsung Tab E Situation
Galaxy Tab E is an older tablet family, and the screen sequence shown in older tutorials may differ between variants, Android versions, firmware builds, and security patches. Before following any method, check what information you can still access.
| Check | Why It Matters |
| Can you still enter the normal Settings app? | If yes, remove the Google account before factory resetting when possible. |
| Is the tablet already on Verify your account? | If yes, another ordinary factory reset is unlikely to address the actual FRP screen. |
| Does your setup keyboard expose the same menus shown in the Google Keyboard method? | If not, the older no-PC route does not match your current firmware. |
| Was USB debugging enabled before the tablet became inaccessible? | If not, ADB is generally not a useful route for this situation. |
| Do you have the model number, serial number, and proof of purchase? | Those details are useful if you decide to contact Samsung Support. |
Before wiping an accessible tablet: If you can still open Settings and manage the Google account normally, remove the account first and then perform the reset. This is different from trying to solve FRP after an unauthorized or unexpected reset.
Which Samsung Tab E Method Should You Choose?
Do not choose a method only because it appears first in a tutorial. Match it to the state of your Tab E.
| Your Situation | Recommended Route | PC Needed? | Main Limitation |
| The tablet still works and you only plan to erase it | Remove the Google account first, then reset from Settings | No | Requires access to the normal tablet settings |
| The tablet is inaccessible and you only need a factory reset | Recovery Mode | No | The reset can still be followed by Google verification |
| The tablet already shows Verify your account and you want a no-PC route | Google Keyboard | No | The required menus may be missing on your firmware |
| USB debugging was enabled and the computer was already authorized | ADB | Yes | ADB does not become available simply because you connect a locked tablet |
| You are already at Google verification and want a guided computer-based route | DroidKit | Yes | Device and system support must match the workflow offered by the software |
| You have proof of ownership and prefer official assistance | Samsung Support | No | Samsung may request purchase or ownership information |
If your Tab E is already stuck at Google verification, compare the current Samsung FRP tool options before choosing a computer-based solution.
5 Ways to Reset Samsung Tab E Without Google Account or Handle FRP
The five routes below do not all do the same job. Recovery Mode is primarily a reset method. Google Keyboard and DroidKit address post-reset FRP scenarios. ADB has strict prerequisites, while Samsung Support is the ownership-verification route.
Method 1: Samsung Tab E FRP Unlock with DroidKit
DroidKit is relevant when the Tab E has already been reset and now stops at Google verification, especially when the Google Keyboard screens shown in older tutorials are missing and ADB was never available.
Consider this route when:
- The tablet displays Verify your account after the reset.
- The Google Keyboard route does not match the menus on your Tab E.
- USB debugging was not enabled beforehand, so ADB is not an option.
- You have a Windows PC or Mac and prefer on-screen instructions over manually navigating older setup menus.
Check the device and system choices shown by DroidKit before proceeding. The workflow presented by the software should match your Samsung tablet scenario.
Step 1. Download and install DroidKit on your Windows or Mac computer, then open it and choose FRP Bypass.
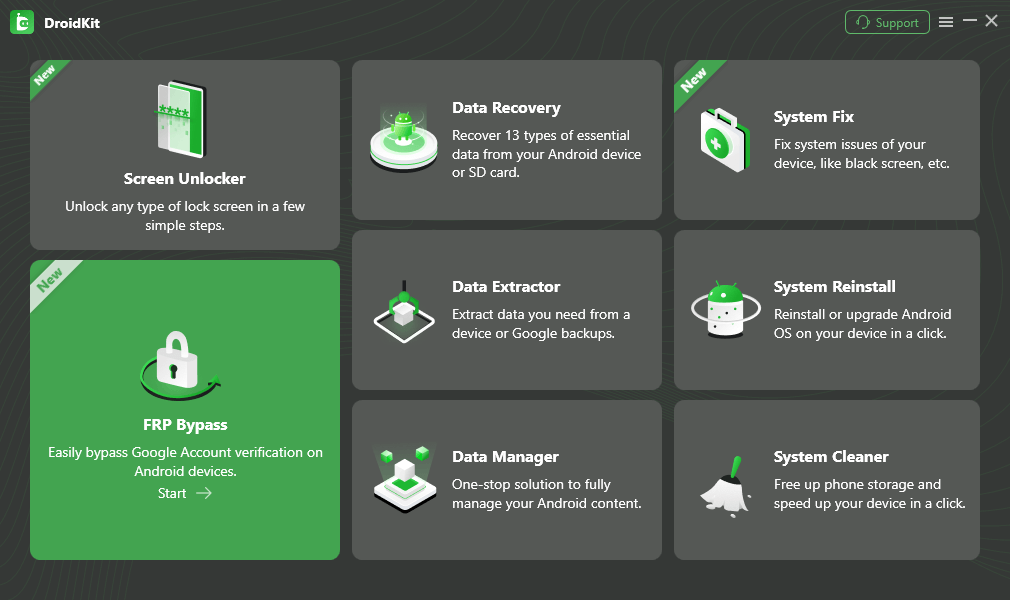
Choose DroidKit FRP Bypass
Step 2. Connect the Samsung Tab E to the computer with a USB cable and click Start.
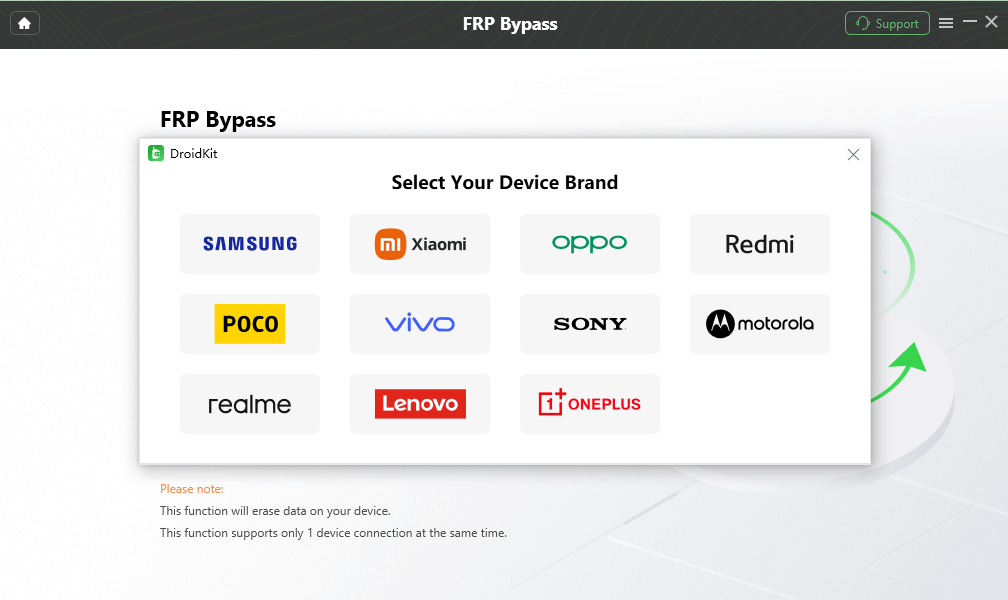
Select Samsung
Step 3. Wait while DroidKit prepares the required configuration information. When prompted, click Start to Bypass.
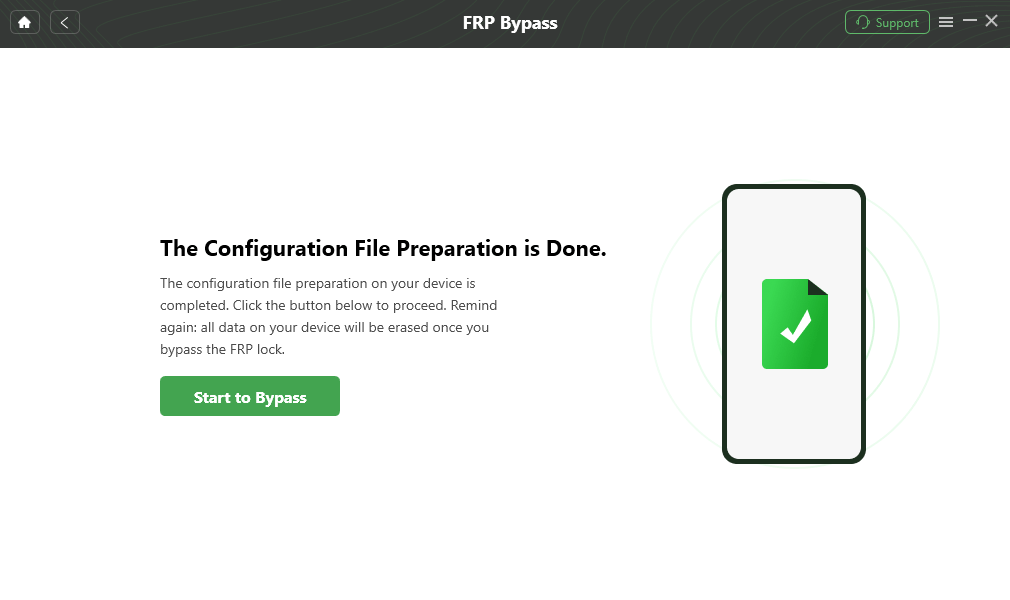
Click Start to Bypass
Step 4. Select the device or system information requested on screen. Make sure the option you choose corresponds to your tablet before continuing.
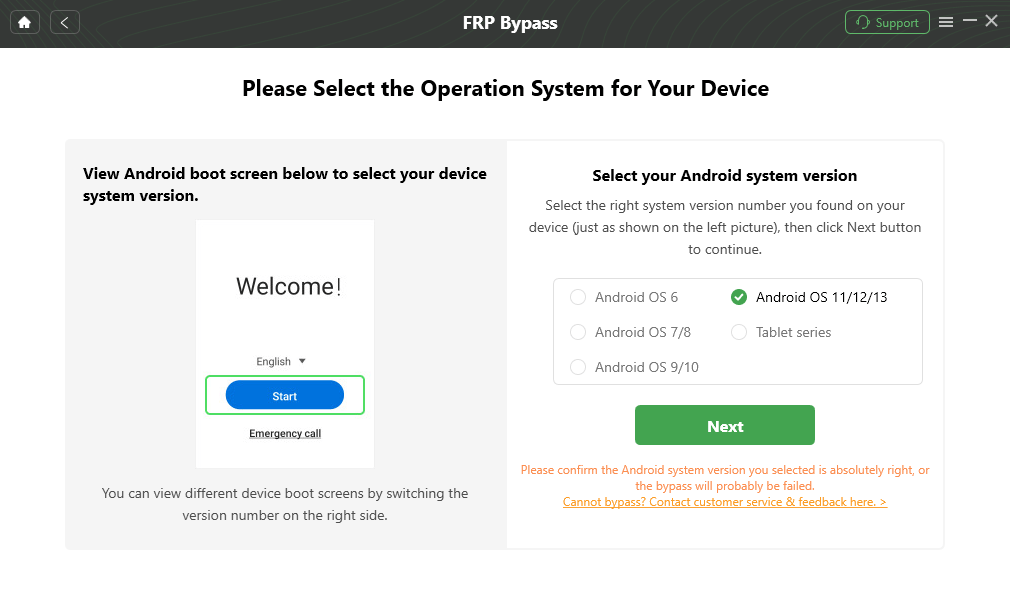
Select the Requested System Information
Step 5. Follow the instructions displayed by DroidKit for the selected Samsung route and complete the requested device settings.
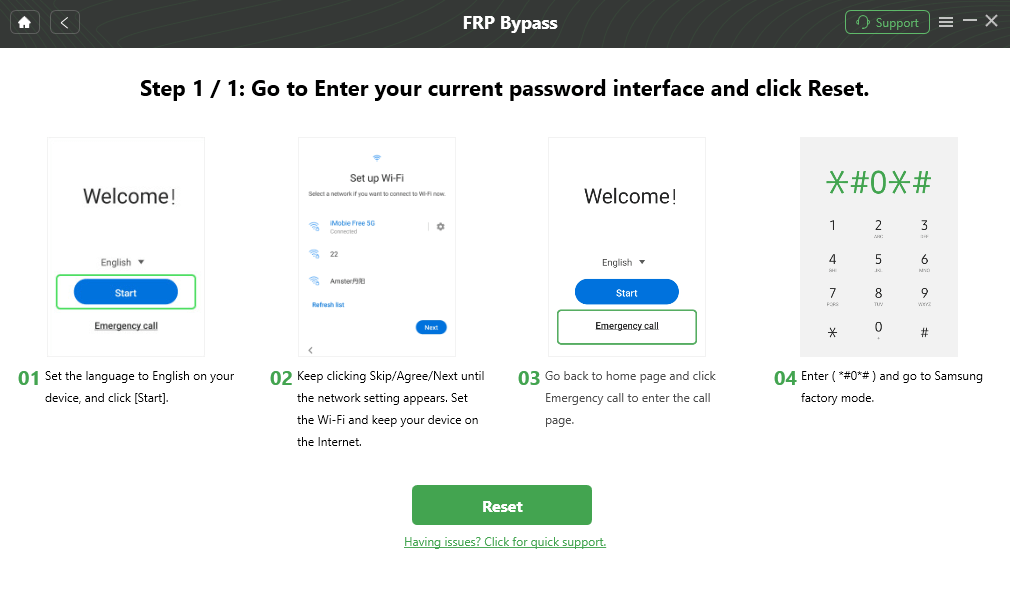
Follow the On-Screen Samsung Instructions
Step 6. Allow the software to complete the process. The tablet may restart during the workflow.
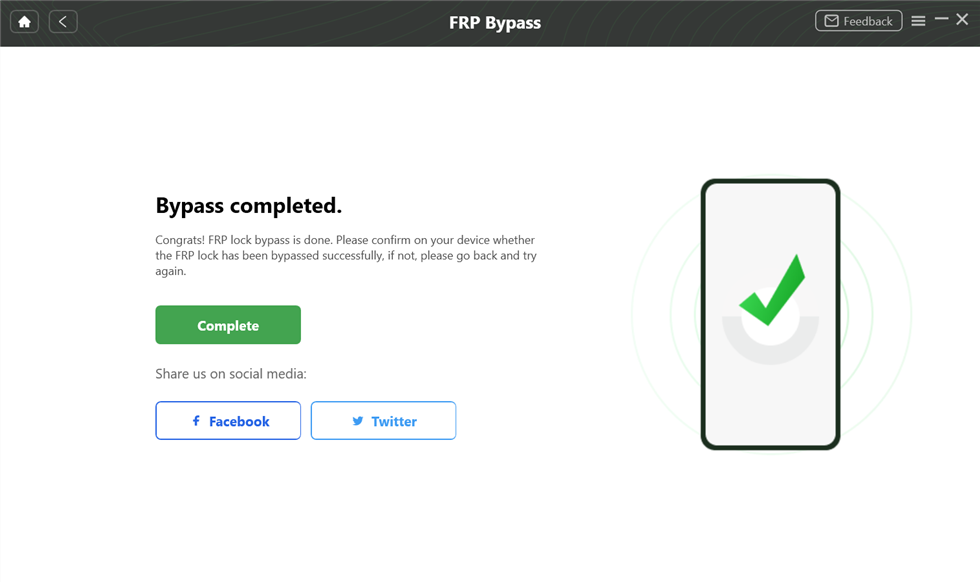
FRP Process Complete
Why this route belongs here: If Recovery Mode has already wiped the Tab E, repeating that reset will not resolve the Verify your account screen. DroidKit is intended for the separate FRP stage rather than the initial act of erasing the tablet.
Method 2: Galaxy Tab E FRP Bypass Without PC via Google Keyboard
Some older Galaxy Tab E setup environments expose Google Keyboard menus that can lead into additional settings. This is why the Google Keyboard method appears in older Samsung tablet FRP guides.
The key question is not simply whether your device is a Tab E. The method is useful only when the same keyboard settings, Help & Feedback, search, and Developer options path is actually present on your firmware.
Access the Google Keyboard Settings
Step 1. Turn on the Tab E, connect it to Wi-Fi, and reach the Google verification screen.
Step 2. Tap the text field so that the on-screen keyboard appears.
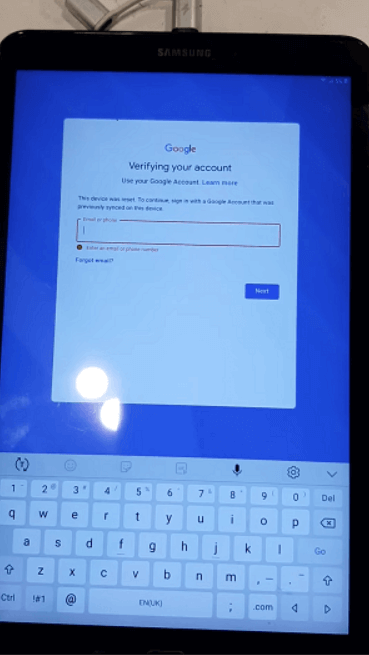
Open the Keyboard
Step 3. On versions that support the older route, press and hold the @ key to check whether the keyboard Settings menu appears.
Step 4. If available, open Google Keyboard Settings, tap the three-dot menu, and choose Help & Feedback.
Check Whether the Settings Route Still Exists
Step 1. Open the relevant keyboard help page and check whether selecting text still exposes Web search.
Step 2. If the route opens Settings, go to About phone or About tablet.
Step 3. Find Build number and tap it seven times if your firmware allows access to Developer options.
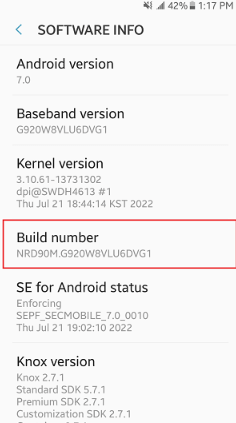
Find Build Number
Check OEM Unlocking
Step 1. Return to Developer options and check whether OEM Unlocking is present.
Step 2. If the required option is available as part of this older route, follow the confirmation shown on the device.
Step 3. Restart the tablet and check whether the setup behavior has changed.
Stop point: If holding the @ key does nothing, Help & Feedback is absent, Web search cannot reach Settings, or the expected Developer options are unavailable, the tutorial does not match your Tab E firmware. Repeating the same sequence is unlikely to change those menus.
Method 3: Use ADB with Samsung Tab E
ADB is often mentioned in older Android reset tutorials, but it has an important prerequisite: USB debugging must already have been enabled, and the computer normally needs to have the required authorization.
Connecting a Tab E that is already locked at setup does not automatically turn ADB on. For that reason, this is not a general FRP bypass route.
Step 1. Connect the Tab E to the previously authorized computer.
Step 2. Open Command Prompt or Terminal and check whether ADB can actually see the device:
adb devices
Step 3. If the tablet appears as an authorized device and your goal is to reach Recovery Mode, you can use:
adb reboot recovery
Step 4. Once Recovery Mode opens, follow the reset controls described in Method 4 if you intend to erase the tablet.
Important: Rebooting into Recovery Mode with ADB does not remove FRP. If the tablet is already at Google verification and ADB cannot see an authorized device, skip this method.
Method 4: Factory Reset Samsung Tab E via Recovery Mode
Recovery Mode is the relevant method when your main goal is to erase the Tab E without entering the normal Android Settings app. It should not be described as a guaranteed Google-account-removal method.
Step 1. Power off the Samsung Tab E.
Step 2. On Tab E variants with a physical Home button, press and hold Volume Up + Home + Power to enter Recovery Mode. Button behavior can vary by model, so follow the combination that corresponds to your tablet.
Step 3. Use the Volume buttons to highlight Wipe data/factory reset, then press the Power button to select it.
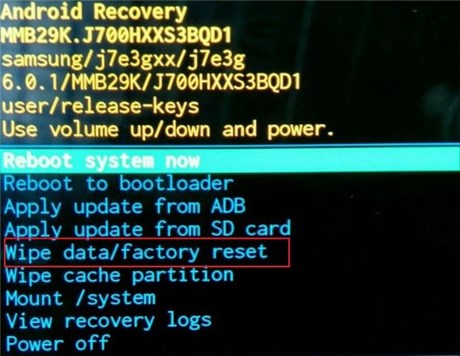
Select Wipe Data/Factory Reset
Step 4. Confirm Delete all user data or the equivalent factory-reset option shown on your recovery screen.
Step 5. Wait for the wipe to complete, then choose the reboot option.
What to expect next: If the Tab E was protected by FRP before you performed the recovery reset, setup may still ask for the Google account previously synced with the device. That does not necessarily mean the factory reset failed; it means the FRP stage remains.
Method 5: Ask Samsung Support for Official Help
If you own the Tab E and can document that ownership, Samsung Support is the official route to investigate when you cannot complete Google verification yourself.
Step 1. Locate the Tab E model number and serial number.
Step 2. Prepare available proof of purchase or other ownership information.
Step 3. Visit Samsung Support or the Samsung support site for your country or region.
Step 4. Explain that the tablet was factory reset and is now asking for the previously synced Google account.
Step 5. Follow the verification or service procedure Samsung provides for your location and device.
What If Samsung Tab E Still Asks for Google Account After Reset?
If the Tab E completes the wipe but then displays Verify your account, stop treating the issue as a failed factory reset. FRP is now the part of the setup process preventing you from continuing.
| What You See | What It Usually Means | Next Step |
| You know the previously synced Google account | The tablet is asking for normal FRP verification | Use the account that was previously associated with the device |
| This is a second-hand Tab E | The former owner’s account may still be associated with the tablet | Ask the previous owner to remove the account or assist with verification |
| The @ key does not open Google Keyboard settings | The older no-PC menu path does not match your firmware | Stop repeating the keyboard steps and choose another route |
| Help & Feedback or Settings access is missing | The manual path shown in older guides is unavailable | Evaluate a different FRP option or Samsung Support |
adb devices does not show an authorized tablet |
ADB prerequisites were not established beforehand | Do not treat ADB as an available FRP route |
| Recovery Mode successfully wiped the tablet but Google verification returned | The reset worked, but FRP remained active | Move to account verification, a suitable FRP route, or Samsung Support |
For a deeper explanation of why Android can continue requesting an old account after a wipe, see the guide to a previously synced Google account after reset.
If the Tab E is already at this stage and neither the Google Keyboard route nor ADB prerequisites match your device, repeatedly factory resetting it does not address the verification screen. A computer-based Samsung FRP workflow such as DroidKit is one option to evaluate for a supported device; otherwise, use Samsung’s ownership-verification route.
Samsung Tab E Factory Reset Without Google Account FAQs
Can I factory reset Samsung Tab E without a Google account?
Yes. Recovery Mode can erase a Galaxy Tab E without requiring you to sign in to Google first. However, the tablet may still ask for the previously synced Google account during setup if FRP was active before the reset.
Can I bypass FRP on Galaxy Tab E without a PC?
An older Google Keyboard route may still appear on some Tab E software versions, but the deciding factor is whether your device actually exposes the required keyboard Settings, Help & Feedback, search, and Developer options path. If those menus are missing, the no-PC instructions do not match your firmware.
Will Recovery Mode remove Google verification on Samsung Tab E?
Not necessarily. Recovery Mode performs the wipe itself. Google verification can still appear afterward because FRP is separate from the act of erasing local data.
Why does my Samsung Tab E still ask for the previous Google account after reset?
The tablet is likely at the FRP verification stage. If the previously synced account is available, use it during setup. For a second-hand Tab E, ask the former owner to remove the account. If neither option is available, evaluate a method that matches the tablet’s actual software environment or contact Samsung Support with proof of ownership.
Can ADB reset Samsung Tab E without a Google account?
ADB is useful only when USB debugging and the required computer authorization were established before the tablet became inaccessible. An already locked Tab E will not normally become ADB-ready simply by connecting a USB cable. Even when ADB can reboot the device into Recovery Mode, the resulting factory reset does not itself remove FRP.
Does another factory reset remove FRP if the first reset did not?
Usually, repeating the same wipe does not change the underlying situation. If the first factory reset completed and setup now shows Verify your account, your problem has moved from data erasure to FRP verification.
Can these Tab E steps be used on Samsung Tab A or Tab A8?
The basic reset concept may be similar, but FRP behavior, Android versions, button combinations, setup screens, and available manual routes can differ by Galaxy Tab model. Use a guide written for the specific tablet whenever one is available.
Sum It Up
For Samsung Tab E, the most important distinction is when you are trying to solve the problem. If you have not reset the tablet yet and can still enter Settings, remove the Google account first. If you only need to erase an inaccessible tablet, use Recovery Mode. If the wipe has already happened and the screen now says Verify your account, repeating the reset does not address the FRP stage.
From there, use only the route whose prerequisites match your Tab E. The Google Keyboard method depends on older menus still being present. ADB depends on debugging and prior authorization. Samsung Support is the ownership-verification route. If the tablet is already at FRP verification and those manual prerequisites are unavailable, you can evaluate DroidKit’s computer-based FRP workflow for a supported Samsung device.
More Related Articles



Joy Taylor is a seasoned technical writer with over a decade of experience in mobile technology. At iMobie, she specializes in producing in-depth content on iOS data recovery, iPhone unlocking solutions, and iOS troubleshooting.
Product-related questions? Contact Our Support Team to Get Quick Solution >
