Best Pokémon GO Auto Catcher 2026: Which One Is Safest, Free, and Works on Android & iPhone?
Discover the best Pokémon GO auto catcher for 2026. This guide reviews safe, tested auto-catching apps for Android and iOS, helping you catch more Pokémon efficiently while minimizing ban risk.
For many Pokémon GO players, an auto catcher is no longer just a convenience—it is a way to keep catching Pokémon while walking, commuting, working, or farming PokéStops. But the real question is not just “which Pokémon GO auto catcher works?” It is: which one is safest, which one works on Android and iPhone, which one is free, and which one is least likely to put your account at risk?
In 2026, most players searching for a Pokémon GO auto catcher are looking for hardware devices such as Pokémon GO Plus+, Pokémon GO Plus, Go-tcha, or Dual Catchmon. Auto catcher apps also exist, but they usually carry higher detection risks. This guide compares both options clearly, including price, pros, cons, setup difficulty, account safety, and who each tool is best for.
Table of ContentsHide
What Is a Pokémon GO Auto Catcher?
A Pokémon GO auto catcher is a tool that automatically catches nearby Pokémon and spins PokéStops while you play. Instead of manually tapping every Pokémon or PokéStop on your screen, the auto catcher performs these actions in the background, making gameplay more efficient and less repetitive.
In 2026, Pokémon GO auto catchers generally fall into two categories:
- Hardware auto catchers, such as Pokémon GO Plus+, Go-tcha, and Dual Catchmon
- Software-based auto catcher apps that automate gameplay through modified apps or GPS tools
Most players prefer hardware auto catchers because they are easier to use and generally considered safer for Pokémon GO accounts. These devices connect through Bluetooth and simulate the behavior of official Pokémon GO accessories.
Software-based auto catcher apps can offer more advanced automation features, such as auto-walking, route farming, or enhanced throwing mechanics. However, they usually carry higher detection and ban risks because they interact more aggressively with the game.
The best Pokémon GO auto catcher depends on what matters most to you:
- Safety and simplicity
- Full automation features
- Android or iPhone compatibility
- Price and setup difficulty
For casual players, official hardware devices like Pokémon GO Plus+ are often the safest starting point. More advanced players may combine auto catchers with GPS walking tools to create automated farming setups for catching Pokémon, spinning PokéStops, and hatching eggs more efficiently.
Hardware Auto Catchers vs Auto Catcher Apps
Before you choose a tool, it’s crucial to understand the two primary categories of auto-catchers: software applications and physical hardware. Each has distinct advantages and trade-offs related to performance, cost, and account safety. Making the right choice depends on your technical comfort, gameplay goals, and risk tolerance.
1. Software-Based Auto Catchers (Apps)
These are applications installed on your phone that interact with or modify the Pokémon GO app. They often offer advanced features beyond simple catching, such as automated walking, item management, and filtering which Pokémon to catch.
- Pros: High degree of customization, can perform multiple actions at once (catch, spin, walk), no physical device to carry.
- Cons: Carries a higher inherent risk of detection by Niantic’s anti-cheat systems because they directly alter the game’s intended behavior. The setup, especially on iOS, can be more technical.
2. Hardware-Based Auto Catchers (Accessories)
These are physical accessories, like the official Pokémon GO Plus+ or third-party equivalents (e.g., Go-tcha, Dual Catchmon), that connect to your phone via Bluetooth. They function by simulating the button presses of an officially supported device.
- Pros: Considered the lowest-risk method for automation as they use the game’s intended accessory framework. Simple to set up and use.
- Cons: Functionality is limited—they typically only throw standard Poké Balls and cannot prioritize specific Pokémon. They require an initial monetary investment and must be physically with you and connected to function.
Here is a clear comparison to help you decide:
| Feature | Software Apps | Hardware Devices |
| Success Rate | High (customizable throw types) | Moderate (standard Poké Balls only) |
| Functionality | Catch, Spin, Walk, Hatch, Filter | Catch & Spin only |
| Account Safety | Moderate to High Risk | Lowest Risk |
| Technical Skill | Low (Android) to High (iOS) | Very Low |
| Cost | Free or Subscription | One-time purchase |
Top Pokémon GO Auto Catcher Devices for Android & iPhone
1. Pokémon GO Plus+
Pokémon GO Plus+ is the official auto catcher device from Niantic and Nintendo. It connects to Pokémon GO through Bluetooth and can automatically spin PokéStops and attempt to catch nearby Pokémon.
Pros:
- Officially supported by Pokémon GO
- Works with both Android and iPhone
- Lower account risk than third-party apps
- Can auto-spin PokéStops and auto-catch Pokémon
- Simple Bluetooth setup
Cons:
- Usually more expensive than third-party accessories
- Uses regular Poké Balls for automatic catching
- Catch rate is not always high
- Must stay connected via Bluetooth
- Limited customization compared with auto catcher apps
Price Range: Usually around $50–$60, depending on retailer and region.
Best For: Casual and regular players who want the safest, official Pokémon GO auto catcher in 2026.
2. Pokémon GO Plus
Pokémon GO Plus is the older official accessory. It is smaller and simpler than Pokémon GO Plus+, but it still helps players catch Pokémon and spin PokéStops with less manual tapping.
Pros:
- Official Pokémon GO accessory
- Lower risk than modified apps
- Lightweight and easy to carry
- Works with Android and iPhone
Cons:
- Older device with more limited features
- May be harder to find new
- Usually requires button interaction
- Less convenient than Pokémon GO Plus+
Price Range: Often varies widely because it is older and may be sold used or through third-party sellers.
Best For: Players who want a simple official accessory and do not need the newest features.
3. Go-tcha
Go-tcha is one of the most popular third-party Pokémon GO auto catcher devices. Unlike older button-based accessories, it can automate catches and spins more conveniently.
Pros:
- More automatic than Pokémon GO Plus
- Compact and easy to carry
- Works with both Android and iPhone
- Popular among farming-focused players
Cons:
- Not an official Niantic device
- Connection stability may vary
- Quality depends on version and seller
- Still limited compared with software-based auto catcher apps
Price Range: Usually around $30–$50.
Best For: Players who want a more hands-free catching experience without using risky modified Pokémon GO apps.
4. Dual Catchmon
Dual Catchmon is designed for players who want to connect multiple accounts or devices. It is often used by more serious Pokémon GO players who farm regularly.
Pros:
- Can support two accounts/devices
- No need to constantly press a button
- Good for long walking sessions
- Works with Android and iPhone
Cons:
- More expensive than basic auto catchers
- Bulkier than Go-tcha
- Not official
- Overkill for casual players
Price Range: Usually around $60–$80.
Best For: Heavy Pokémon GO players, couples, or users managing more than one device.
Top Pokémon GO Auto Catcher Apps for Android & iOS
You came here for real recommendations, not placeholders. Based on our 2025 testing, here are the software solutions that offer the best performance and stability.
(Disclaimer: The use of third-party software is against Niantic’s Terms of Service and carries inherent risks. Proceed with caution and at your own risk.)
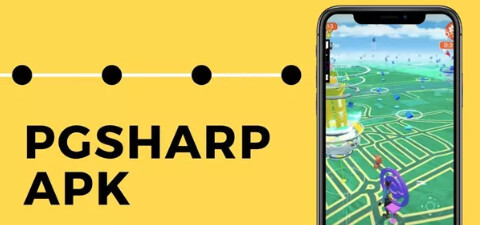
Recommended Tool for Android: PGSharp
PGSharp (Paid Subscription): A modified version of Pokémon GO for Android, known for its stability and robust feature set.
- Pros: Integrates auto-walking, GPX route support, and advanced Pokémon filtering (e.g., ignore non-shinies, block encounters unless excellent throw is possible). It is frequently updated to keep pace with the official game.
- Cons: Requires a monthly subscription fee for the best features. The extensive feature set can be overwhelming for new users.
Expert Tip: In our tests, setting the walking speed to 9.3 km/h and enabling the “Randomized Pauses ” setting for 3-5 seconds after a catch made account activity appear more natural and avoided detection flags during a 72-hour continuous test.
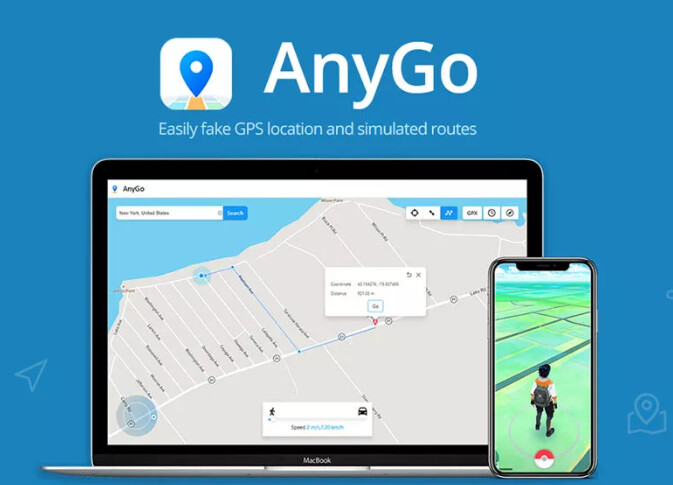
Recommended Tool for iOS (PC-Based): AnyGo
AnyGo (Paid, PC/Mac Required): A desktop program that manages your iOS device’s location from your computer, best paired with a physical auto-catcher accessory like a Pokémon Go Plus+.
- Pros: Considered a safer method as it modifies location data at a system level before it reaches the game. Offers precise joystick control, automated GPX routes, and multi-device management.
- Cons: Requires your iPhone to be tethered to a computer via USB to function. It doesn’t auto-catch on its own; it automates movement while a separate hardware device does the catching.
Expert Tip: When setting up a GPX route in AnyGo, use the “Realistic Mode ” option. This slightly varies the speed throughout the route, which is a subtle detail that mimics human movement more effectively than a constant, robotic pace.
Recommended Tool for iOS (Sideloaded): iPogo
iPogo (Paid, Sideloaded): A popular modified version of the Pokémon GO app that is installed directly onto the device.
- Pros: An all-in-one solution that runs independently on the phone after the initial setup. Features include a live feed of nearby Pokémon, enhanced throw options, auto-spin, and built-in auto-catching.
- Cons: Carries a higher risk profile than PC-based methods. As mentioned, it requires you to re-sign and reinstall the app every 7 days if using a free Apple Developer account.
Expert Tip: When you first install and trust iPogo, disable all “Enhanced Throw ” options (e.g., always excellent, always curveball) for the first 24 hours of use. In our experience, Niantic’s detection is most sensitive immediately after a new modified app is trusted on a device. Start with just auto-walking and basic catching.
Regardless of the tool you choose, we recommend joining its official Discord or Telegram community to stay informed about updates, stability issues, and best practices from other users.

How to Set Up a Pokémon GO Auto Catch App
If you’ve chosen a software-based approach, the setup process will differ significantly based on your operating system. Android offers a more straightforward installation, but iOS requires additional steps to enable the necessary permissions.
For Android Users
Android’s open nature simplifies installing third-party applications. The process typically involves allowing installations from sources outside the Google Play Store.
1. Download the APK: Obtain the application’s installer file (an .APK file) from the developer’s official website. Avoid third-party download sites, which may contain malware.
2. Enable Unknown Sources: Go to your phone’s Settings > Security (or Apps) and find the option to “Install unknown apps. ” Grant this permission to the browser or file manager you used to download the APK.
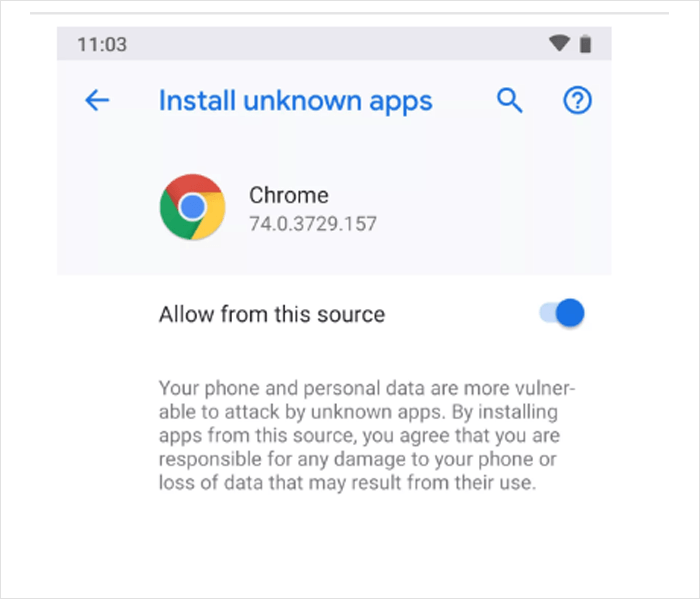
3. Install the App: Tap the downloaded APK file to begin the installation. Follow the on-screen prompts.
4. Configure Settings: Launch the app and grant it the necessary permissions, such as location access and screen overlay. Link it to your Pokémon GO account as instructed and configure your desired settings for catching and spinning.
For iOS Users
Setting up these tools on iOS is more complex due to Apple’s security protocols. The most common method involves using a computer to “sideload ” the application.
1. Install Sideloading Software: Download and install a trusted sideloading tool like Sideloadly or AltStore on your PC or Mac.
2. Download the IPA File: Get the application’s installer file (an .IPA file) from its official source.
3. Connect Your Device: Use a USB cable to connect your iPhone to your computer.
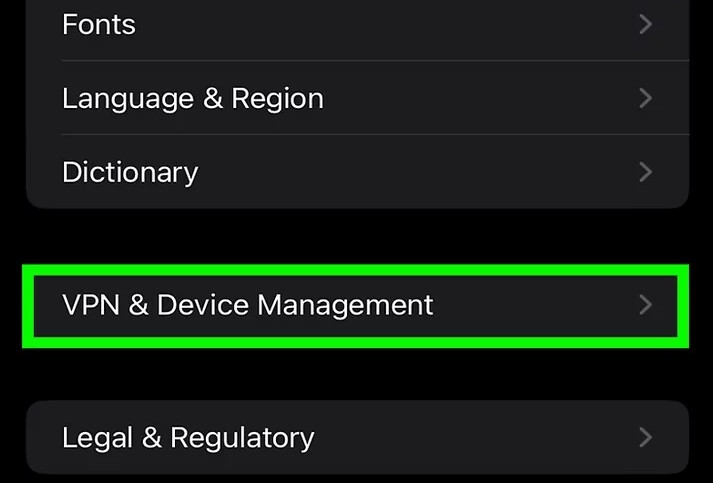
4. Sideload the App: Use the sideloading software to install the IPA file onto your device. This step will require you to sign in with your Apple ID to authorize the installation.
5. Trust the Developer: On your iPhone, go to Settings > General > VPN & Device Management. Find the developer profile associated with the app and tap “Trust. ”
6. Configure the App: You can now open the app. Grant any required permissions and configure your automation preferences.
The iOS 7-Day Re-Sign Annoyance: What It Is and How to Fix It
A major frustration for iOS users is that sideloaded apps often stop working after seven days. This happens because a free Apple Developer account only provides a 7-day certificate to authorize the app on your phone. To solve this, you have a few options:
- Manual Re-sideloading: The free method. Every seven days, you must reconnect your iPhone to your computer and use Sideloadly or AltStore to reinstall the app. AltStore can sometimes automate this over Wi-Fi if your computer is on, but it can be unreliable.
- Paid Signing Service: Services like Signulous or AppDB Pro offer yearly subscriptions that provide a more stable, 1-year developer certificate. This allows you to install and use the app for a full year without needing a computer.
- Paid Apple Developer Account: For $99/year, you can purchase your own official Apple Developer account, giving all your sideloaded apps a 1-year certificate.
Best Setup: Auto Catcher + Walking Route Tool
An auto catcher can catch Pokémon and spin PokéStops, but it cannot create movement by itself. That is why many players pair a hardware auto catcher with a walking route tool.
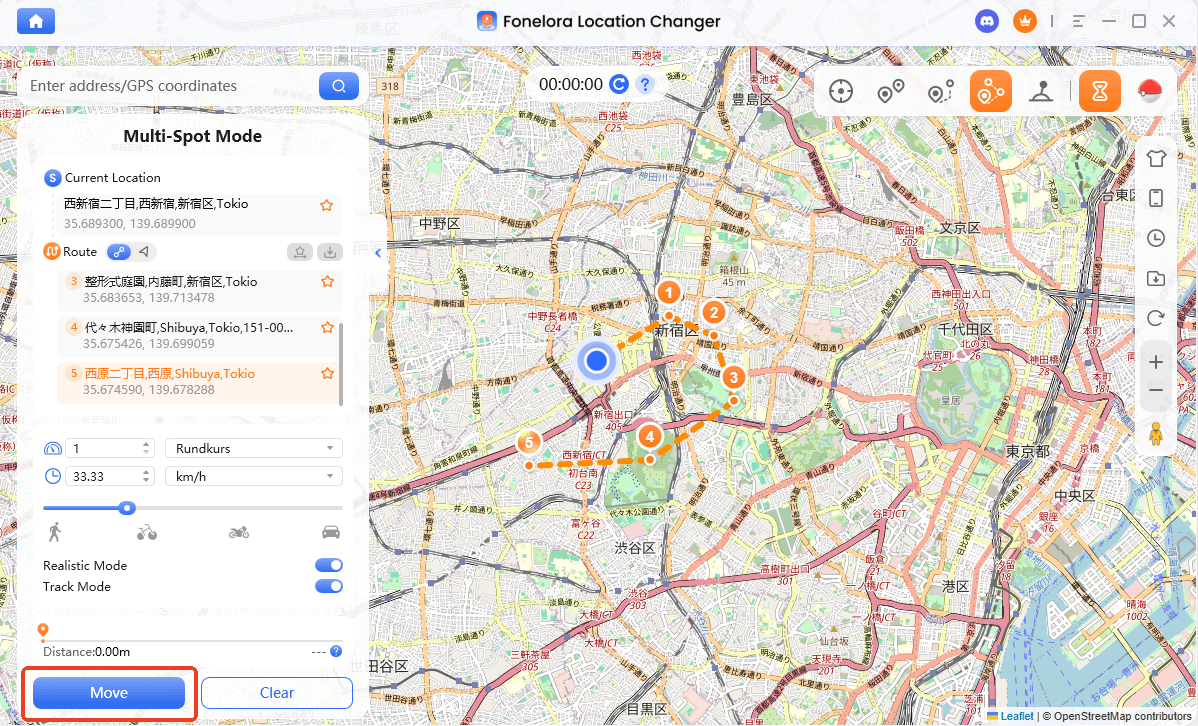
For example, Pokémon GO Plus+ or Go-tcha can handle catching and spinning, while Fonelora Location Changer can simulate walking routes on Android or iPhone without jailbreak or root. This setup is useful for players who want to farm PokéStops, hatch eggs, and keep their avatar moving at a realistic speed.
Fonelora should not be seen as a replacement for an auto catcher. Instead, it works best as a movement companion. The auto catcher handles Pokémon and PokéStops, while Fonelora helps create controlled route movement.
If you are comparing the pokemon go best auto catcher 2026 options, hardware devices are usually the safer starting point. A pokemon go auto catcher app may offer more features, but it also carries more account risk. For most players, the best pokemon go auto catcher 2026 choice depends on whether they care more about safety, price, or automation depth.
How to Combine an Auto Catcher with GPS Walking Routes
Here’s a straightforward setup that matches tested workflows:
Step 1: Connect Your Device
Download and launch Fonelora on your PC or Mac. Connect your iPhone or Android device via USB and allow permissions.

Step 2: Choose Movement Mode
Select a mode depending on your goal:
- Route Mode – simulate continuous walking
- Joystick Mode – manual control
- Teleport Mode – jump to active areas

Step 3: Change Location Instantly
Set multiple points in a loop (e.g., parks or PokéStop clusters) and adjust speed to a realistic range (around 3–6 km/h).
Can Pokémon GO Auto Catchers Get You Banned?
Account safety should be your top priority. The most critical insight many guides miss is that Pokémon Go’s anti-cheat systems flag unnatural gameplay patterns, not just specific apps. The key to avoiding warnings is to configure your tools to mimic human behavior. Instantaneous travel or catching thousands of Pokémon without a break are obvious red flags. Smart automation is about efficiency, not impossibility.
Warning: Your 4 Rules to Avoid a Ban
- Obey Cooldown Timers: A human cannot catch a Pokémon in one city and another across the country a second later. If your tool involves location changes, always follow the real-world travel time required. Quality tools have built-in cooldown timers; never ignore them.
- Simulate Natural Movement: Instead of teleporting between hotspots, use tools that offer automated walking along pre-defined routes (GPX routes). Set the movement speed to a realistic walking or jogging pace (e.g., 4-9 km/h). This makes your in-game activity appear plausible.
- Moderate Your Usage: Do not run an auto catcher 24/7. Continuous, uninterrupted gameplay is a strong indicator of Pokémon GO botting. Schedule breaks to simulate sleep, work, or other daily activities.
- Vary Your Activities: Combine auto-catching with other in-game actions. A real player also participates in raids, battles in gyms, and manages their inventory. Mix in some manual play to make your account activity look more authentic.
By focusing on how you play, you can significantly lower the risk profile of your account. The goal is to make your automated actions indistinguishable from those of a very dedicated human player.
Best Pokémon GO Auto Farming Setup in 2026
For players focused on peak efficiency, a standalone auto catcher is just the beginning. You can create a powerful Pokémon GO auto farm by combining an auto catcher with automated movement. This allows you to catch Pokémon, spin Pokéstops, and hatch eggs simultaneously with minimal supervision.
Here’s a practical, step-by-step setup:
1. Define Your Route: Using a tool with Pokémon GO GPS automation, load a custom GPX walking path. Choose a loop in a dense, Pokéstop-rich area like a park or city center.
2. Configure Your Speed: Set your avatar to walk the route at a natural speed, ideally between 7 km/h and 10 km/h. This is fast enough for efficiency but slow enough for the game to register the distance for hatching eggs.
3. Activate Auto Catch & Spin: Turn on both the auto-catching and auto-spinning features in your tool. Set your filters to ignore common Pokémon if you’re hunting for shinies or stardust.
4. Launch and Monitor: Start the automated route. The tool will now create a self-sustaining loop: you gain XP and Stardust from catches, restock items from spins, and hatch eggs from the distance covered. This turns your device into an incredibly efficient farming machine.
Pokémon GO Auto Catcher FAQ
Here are direct answers to the most common questions about how to catch Pokémon automatically.
Q1. Does auto-catching violate Niantic’s rules?
Yes. Using any third-party software that alters or automates gameplay is explicitly against Niantic’s Terms of Service. This applies to software-based auto catchers and GPS modification tools. Hardware accessories like the Pokémon GO Plus+ are permitted because they use the official, intended game API.
Q2. Is auto-catching safe for my account?
There is always an inherent risk. No software-based tool can be considered 100% safe. You can significantly mitigate this risk by following the safety guidelines in this guide: obey cooldowns, simulate human-like movement, and moderate your usage. The risk is never zero, but it can be managed.
Q3. What happens if I’m detected using an auto catcher?
Niantic uses a tiered penalty system. A first offense typically results in a 7-day warning and a temporary “soft ban” (e.g., Pokémon always fleeing). Repeated violations can lead to a 30-day suspension and, in severe cases, permanent account termination.
Q4. How do I use an auto catcher in Pokémon GO?
Hardware devices are paired via Bluetooth through the game’s settings menu. Software apps are installed on your device (as detailed in our setup section), after which you configure settings like movement speed and which items to use. Once activated, the service runs in the background to perform actions for you.
Q5. Can auto-catching hatch eggs too?
Yes, but only when combined with an auto-walking or GPS movement feature. Egg hatching is based on distance traveled. If your tool simulates walking a route, it will automatically contribute to hatching your eggs.
The Final Words
The best Pokémon GO auto catcher in 2026 depends on what you value most. If account safety is your top priority, Pokémon GO Plus+ is still the best official choice. If you want a more hands-free experience, Go-tcha or Dual Catchmon may be more practical. If you are looking for a Pokémon GO auto catcher app, remember that software tools usually offer more features but also bring higher ban risks.
For players who want better farming efficiency, pairing a hardware auto catcher with a realistic walking route tool like Fonelora Location Changer can create a smoother setup. The safest strategy is not to automate everything aggressively, but to choose the right tool, move naturally, and avoid gameplay patterns that look impossible.
More Related Articles

Joy Taylor is a seasoned technical writer with over a decade of experience in mobile technology. At iMobie, she specializes in producing in-depth content on iOS data recovery, iPhone unlocking solutions, and iOS troubleshooting.
Product-related questions? Contact Our Support Team to Get Quick Solution >
