How to Organize Photos on iPhone iPad
If you are looking for ways on how to organize photos on your iPhone or iPad, we have got some great ideas to help you do it on your devices. Your photos will then be in a much organized manner and you will be able to find them with ease.
With the iPhone’s increasingly high-definition camera and more freedom in photography, more and more people are taking photos to document their lives. This is great fun. But the annoying thing that soon arises is that the thousands of photos on your phone are all jumbled together and when you want to find a particular photo, it usually takes a lot of time to find it.
But no worries, here we list out some ways for you to organize photos on your iPad and iPhone. And also we’ll show you how to organize iPhone photos by date, how to organize photos on iPhone without duplicates and how to move photos into albums on iPhone.
Tip 1. Create a New Album and Add your Photos to It
One of the easiest and best ways to organize your photos is to put them into relevant albums. An album usually consists of a group of similar photos and you can create one pretty easily in the Photos app on your iPhone and iPad. The following is how you do it.
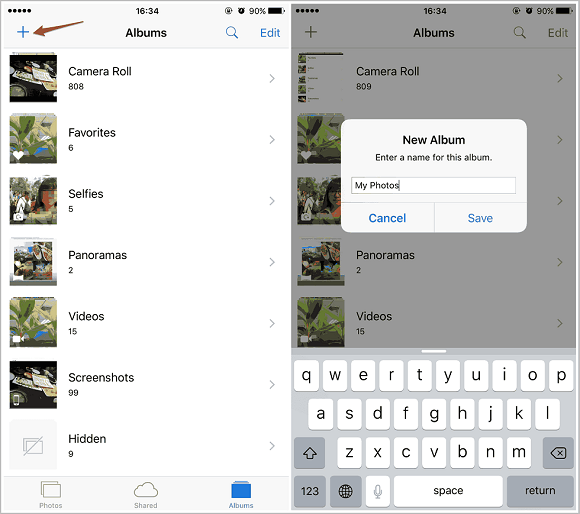
Step 1. Launch the Photos app on your iPhone or iPad.
Step 2. Tap on the Albums option at the bottom menu bar.
Step 3. Tap on the + sign in the top-left corner to add a new album.
Step 4. Select New Album and continue.
Step 5. Enter a name for the new album and tap on Save.
Create A New Album
Step 6. It will then ask you to select the photos that you would like to add to your newly created album. Choose the photos and then tap on Done at the top-right corner.
You can add as many photos as you want to your albums, and later when you want to view them, you can open the relevant album and you should see your photos.
Tip 2. Add your Photos to an Existing Album
If you have already created the required albums, then adding photos to them is like walking in the park. All you need to do is choose the photos to be added to your albums and tap on an option. All your chosen photos will move to the selected photo album.
Step 1. Open the Photos app on your device.
Step 2. Tap on the photo that you want to add to an album.
Step 3. When the photo opens in full-screen, tap on the share icon in the lower-left corner and choose to Add to Album.
Step 4. Tap on the album you want to add the photo to and it will be added.
Tip 3. Create a Shared Photo Album
A shared album lets you keep your own photos as well as other chosen people’s photos on your device. They can add their photos and share them with you with this album type. You can create it in a similar way as a normal album.
Step 1. Open the Photos app.
Step 2. Tap on Albums at the bottom.
Step 3. Tap on the + sign in the top-left corner.
Step 4. Select New Shared Album on your screen.
Step 5. Invite the people who you want to be able to collaborate on this album.

Add People to the Shared Album
Tip 4. Add your Photos to Favorites
One of the organizational features of Photos is to help you mark your photos as favorites. When you mark a photo as a favorite, it goes into an album called Favorites where you can see all of your marked photos. It is a good way to keep your favorite photos aside from all other photos on your device.
Step 1. Launch the Photos app.
Step 2. Open the photo you want to mark as your favorite.
Step 3. Tap on the heart icon at the bottom and it will turn solid blue.

Add A Photo to the Favorites Album
Step 4. Your photo should be added to the Favorites album.
Currently Favorites albums cannot be deleted because these are created automatically by the device itself to organize the Photo application.
Tip 5. Upload Photos to iCloud
If you have gathered just too many photos on your device, you can actually move some of them over to your iCloud account. Your photos will continue to sync with your device, though, and you will have access to all of them at any point in time.
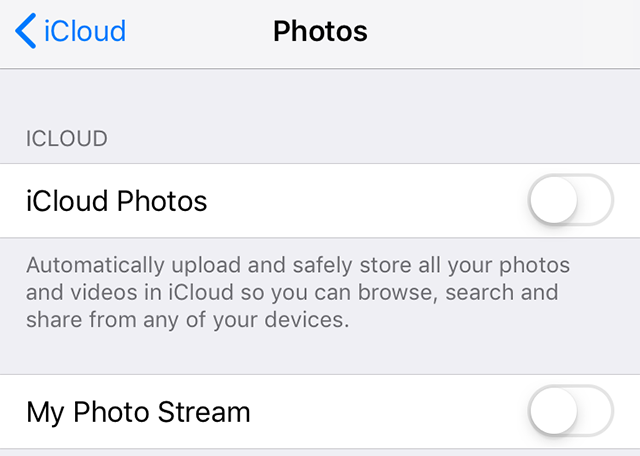
Step 1. Launch the Settings app on your iPhone or iPad.
Step 2. Tap on your name banner at the top.
Step 3. Select the iCloud option.
Step 4. Tap on the Photos option.
Step 5. Turn on the option that says iCloud Photos.
Turn on iCloud Photo
Tip 6. AirDrop Photos to Your Other iPhone/iPad or Mac
If you have multiple iOS devices or you have a Mac, you can transfer some of the unwanted photos from your primary device to your other devices. This way, your main phone alone is not cluttered and your secondary photos can be stored on your other phones.
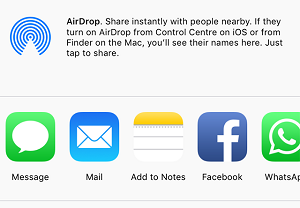
Step 1. On your other device, pull up the Control Center and enable the AirDrop feature.
Step 2. On your main phone, open the Photos app and select the photo you want to send to your device.
Step 3. Tap on the share icon in the lower-left corner and choose your other AirDrop device on the list.
Airdrop Photos to iPhone/iPad or Computer
Step 4. Your photos will begin to transfer to your other device.
Tip 7. Delete Unwanted and Duplicate Photos
Often, you may encounter problems, such as how to delete unwanted photos or how to organize photos on iPhone without duplicates. And now you can get rid of the unwanted or duplicate photos on your device and that will help keep your photos organized.
Step 1. Access the Photos app on your device.
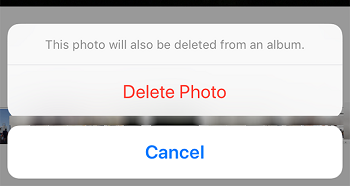
Step 2. Select the photo you no longer need.
Step 3. Tap on the delete icon in the bottom-right corner.
Step 4. Choose Delete Photo in the prompt on your screen.
Delete Duplicate or Unwanted Photos
Step 5. The photo will be deleted and removed from your gallery.
Tip 8. Delete Unwanted Photo Albums
Like unwanted photos, you may also have unwanted albums on your device. You can get rid of them as well by deleting them from your iPhone. This way, you will have a better organized list of photo albums on your device.
Step 1. Launch the Photos app.
Step 2. Tap on Albums at the bottom.
Step 3. Tap on the See All option to view all the available albums.
Step 4. Select the Edit option in the top-right corner.
Step 5. You will see a red icon on each of your photo albums. Tap on it for the album you want to delete.
Step 6. Select Delete Album from the prompt on your screen.
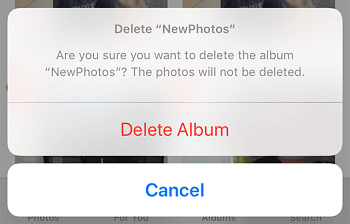
Delete an Unwanted Album
Tip 9. Restore Deleted Photos
If you have mistakenly deleted any photos on your device, you can get them restored from the same Photos app. The restored photos will then again become available in the Photos app on your iPhone or iPad.
Step 1. Open the Photos app on your device.
Step 2. Tap on Albums at the bottom.
Step 3. Scroll all the way down and select the option that says Recently Deleted.
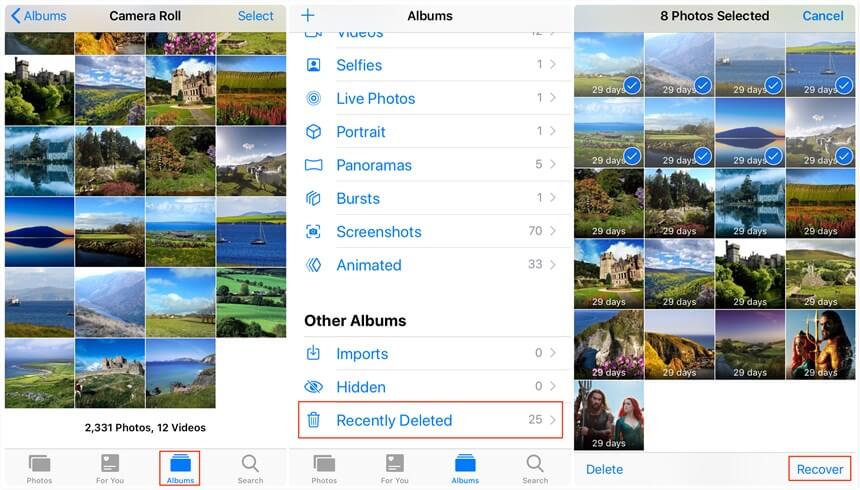
Recover Recently Deleted Photos
Step 4. Choose the photo you want to restore and tap on Recover in the bottom-right corner.
Step 5. You can view the photo in the Photos app.
If you don’t find the photos you want to recover in Recently Deleted, then you can recover them from your device, iTunes and iCloud.
Tip 10. Fully Manage Your Photos on iPhone
Although iPhone and iPad are a great device to take photos of and organize them, they cannot really beat the organizational features that an actual computer provides. A better way to organize your photos is to move them to your computer and keep them in relevant folders.
If there are a number of photos to be copied from your device to your computer, AirDrop may not be an ideal solution. In that case, you can use an app like AnyTrans that helps you easily transfer files between your iOS devices and your computer.
- Support for managing photos by date. You can choose the time you want to view the photos.
- Support for converting photos to formats including pdf, jpg, etc.
- Offers you the ability to manage, edit, upload and delete iPhone photos.
- Superfast speed makes you transfer 500 photos in 30 seconds.
Free Download * 100% Clean & Safe
Part 1. Transfer Photos from iPhone to Computer
The following shows how to use it to copy photos from your device to your computer.
Step 1. Download and install the AnyTrans on your computer.
Step 2. Connect your device to your computer via a USB cable.
Step 3. Click on the More option in the app.
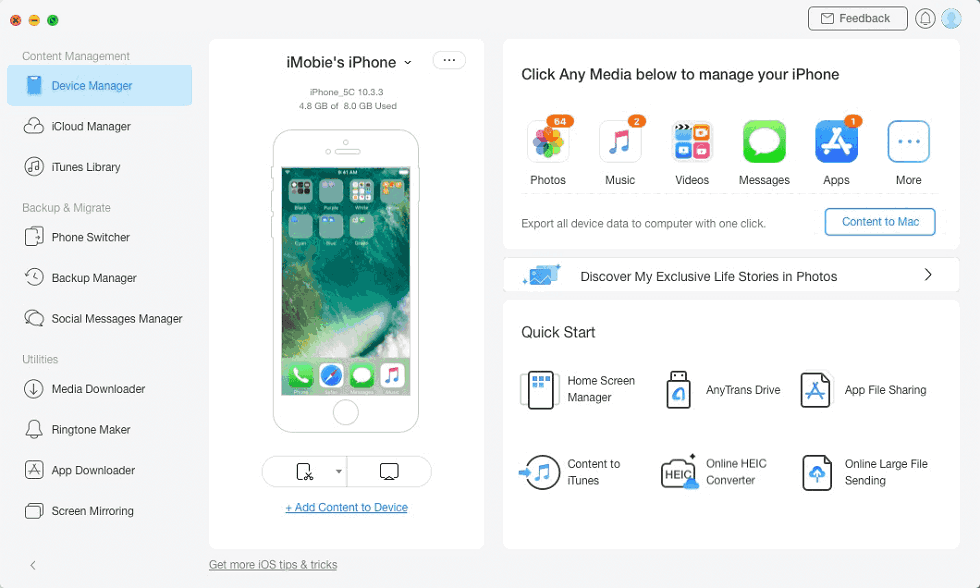
Open AnyTrans and Choose Photos
Step 4. Select the photos you would like to copy to your computer and click on To Computer at the top.
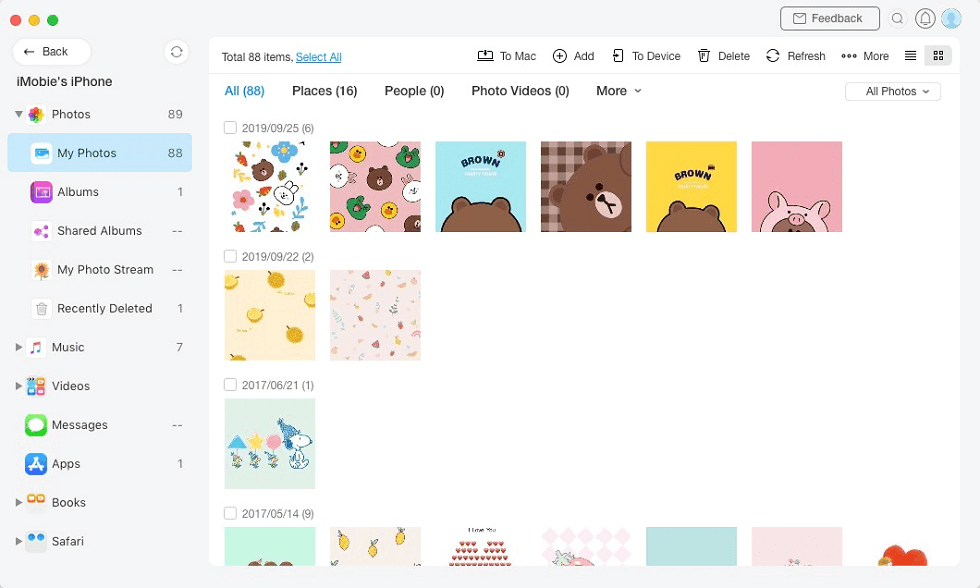
Choose Photos You Want to Transfer
Step 5. Your photos will be transferred to your computer.

Transfer Photos to Computer Successfully
Part 2. How to Delete, Upload, Add Photos
1. If you’d like to delete some photos, no worries, AnyTrans can do it for you. Please select the photo you want to delete and then click delete button. Of course, if you want to delete all the photos on this album, you can do so by clicking on Select All.
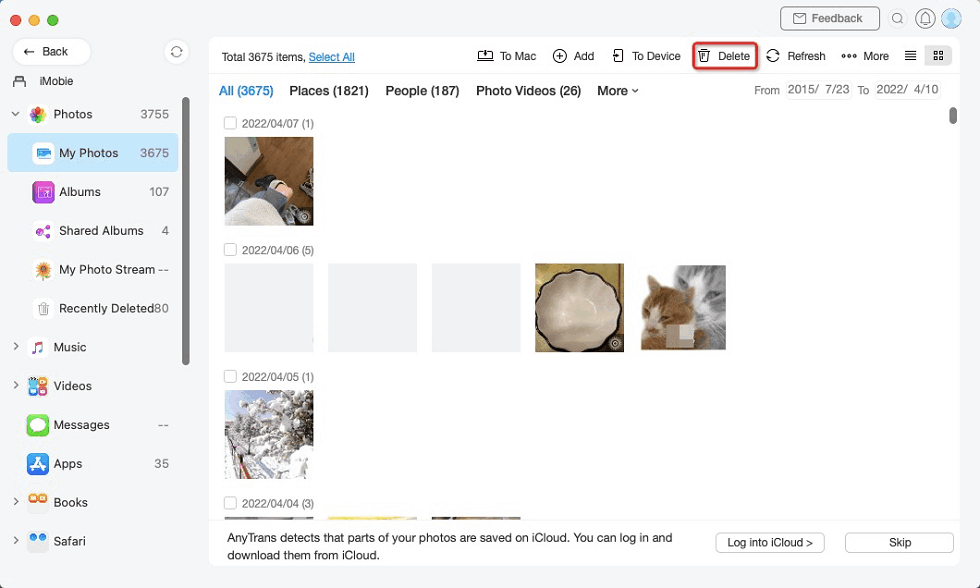
Delete Unwanted Photos
2. At the same time, if you want to upload photos to iCloud, that’s easy to do. After choosing photos, please click To iCloud button to upload these photos.
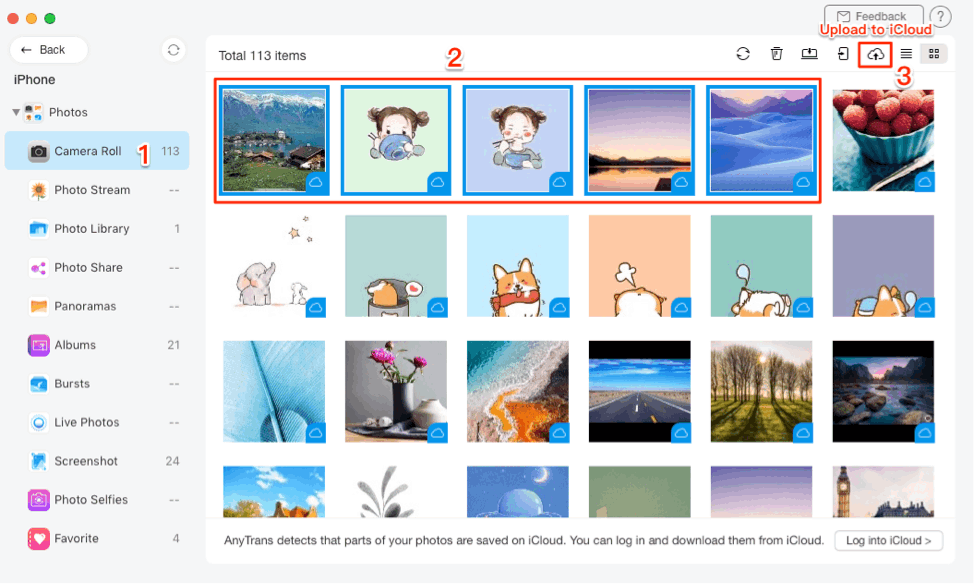
Upload Photos to iCloud
3. Refer to add photos from computer to your device, you just need to select add in the toolbar to add the photos you want from your computer to your device.
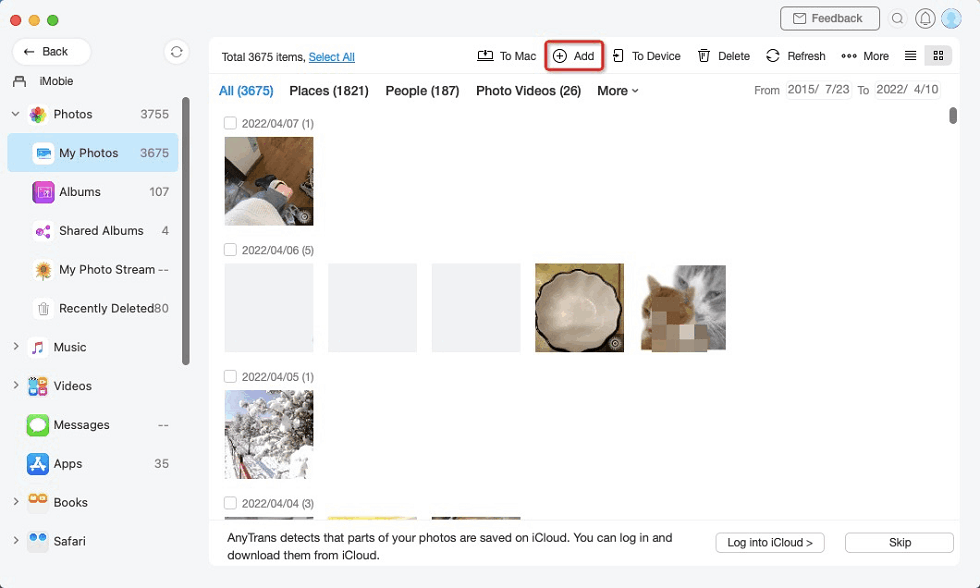
Add Photos from Computer to iPhone
As you can see, AnyTrans is a great photo organizer app for iPhone and iPad. It gets the job done without much hassle and pretty quickly. In addition to this, AnyTrans can help you manage your contacts, message and other data.
Free Download * 100% Clean & Safe
Conclusion
It is worth learning how to organize photos on an iPhone and iPad as this keeps you from getting your gallery cluttered and makes it easier to find the photos you want. We hope the guide teaches you how to do it using several features available on these devices.

Senior writer of the iMobie team as well as an Apple fan, love to help more users solve various types of iOS & Android-related issues.
Product-related questions? Contact Our Support Team to Get Quick Solution >
