[Full Guide] How to Flash and Reinstall Android OS in 3 Ways
Do you want to flash your phone and reinstall Android OS? You are at the right place! Read this post to know how to reinstall Android OS on phone using PC in a couple of minutes.
iMobie DroidKit – Reinstall Android OS on Mobile & Tablet
With iMobie DroidKit, you can flash and reinstall Android OS with no complicated operations. It automatically finds the right official ROM for your device and installs it securely from your Windows PC or Mac.

Android devices are known for their flexibility and perfect performance. However, sometimes the Android version that comes with your device may not meet your expectations. In such cases, forcing Android to update and reinstall the new OS can help you achieve a cleaner, smoother, and more personalized experience. In this guide, we’ll show you how to reinstall Android OS safely and easily in 3 ways.
Why Do We Need to Reinstall Android OS?
Reinstalling the Android OS is often necessary when your device encounters serious issues such as system glitches, malware infections, boot loops, or failure to turn on. Many users also choose to reinstall the OS when their phone starts to slow down, experiences compatibility problems after an update, or needs to be rolled back to a more stable version. In addition, reinstalling Android can help replace the manufacturer’s heavily customized interface with a clean stock version or unlock additional features through a custom ROM.
Make sure to back up all your important data to prevent any potential loss before flashing and reinstalling the Android OS. A complete backup ensures you can quickly restore everything once the process is complete. You can get AnyDroid to back up and manage Android data with ease.
How to Reinstall Android on Phone Through PC [100% Work]
As a powerful Android toolkit, iMobie DroidKit allows you to reinstall or update the Android OS on your phone without root. Whether your Android is stuck in recovery mode, sluggish, or running a faulty system, DroidKit can help you install a clean version of Android by automatically matching and downloading the correct firmware package for your device. With just a few clicks, you can safely reinstall or upgrade your Android system and get your phone back to normal quickly. Except for Android OS reinstallation, DroidKit also supports unlocking the screen without a password, fixing system issues, and bypassing FRP on Android phones.
Key Features of DroidKit:
- Match a secure official ROM for your device automatically.
- All Samsung phones & tablets with Android OS 6 to 15 are supported.
- No device root is required. No risk of being infected with viruses or malware.
- Fix many system issues after reinstalling the Android OS.
Free Download * 100% Clean & Safe
Here’s how to install Android OS in mobile through PC:
Step 1. Get iMobie DroidKit installed and launched. Choose Reinstall/Upgrade OS.
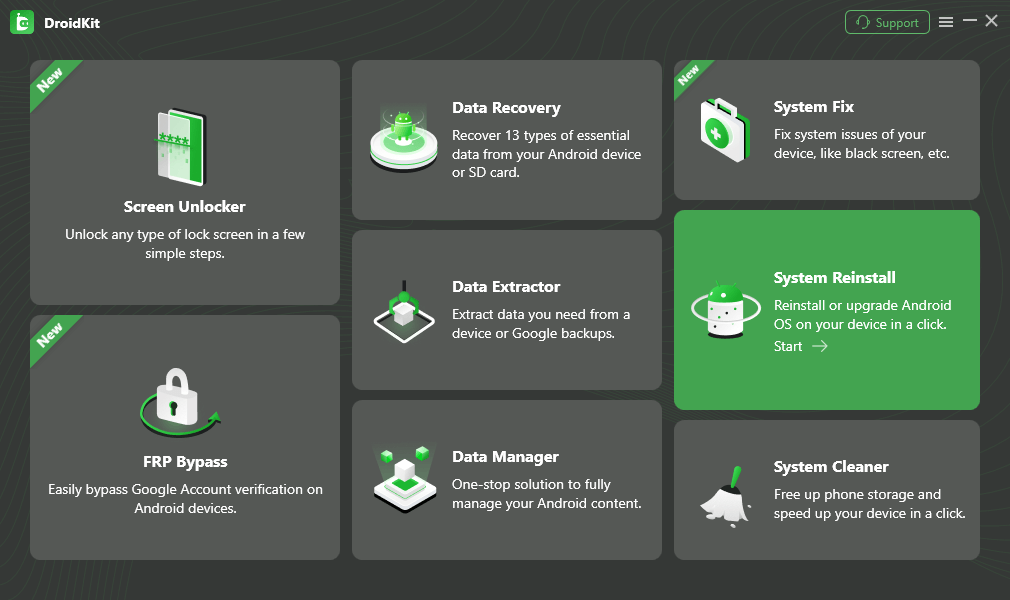
Click on Reinstall/Upgrade OS
Step 2. Tap on the Start button.
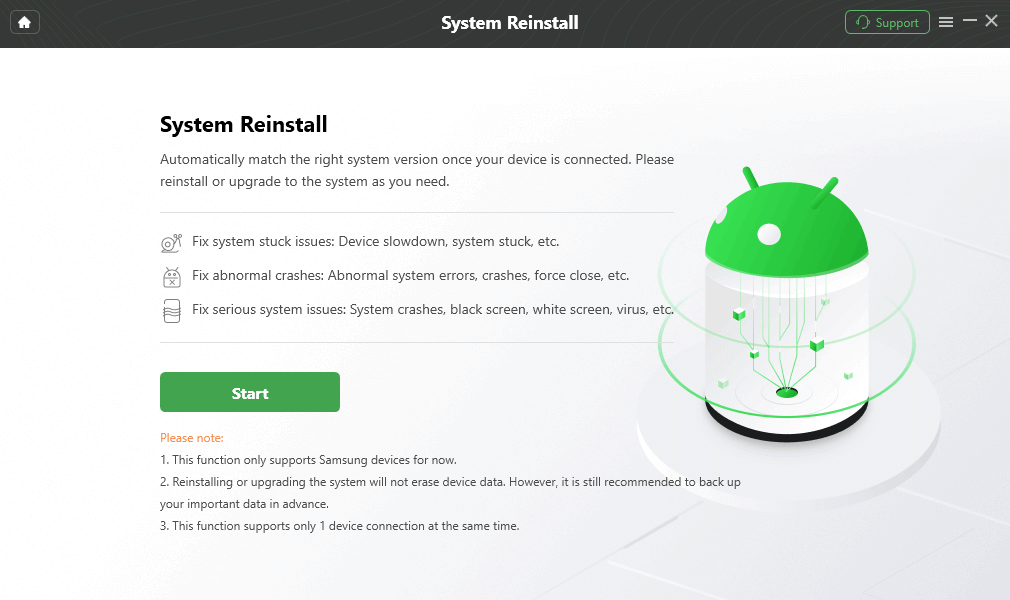
Connect your Phone and Start
Step 3. Select and Download a firmware version, then click Start to Reinstall.
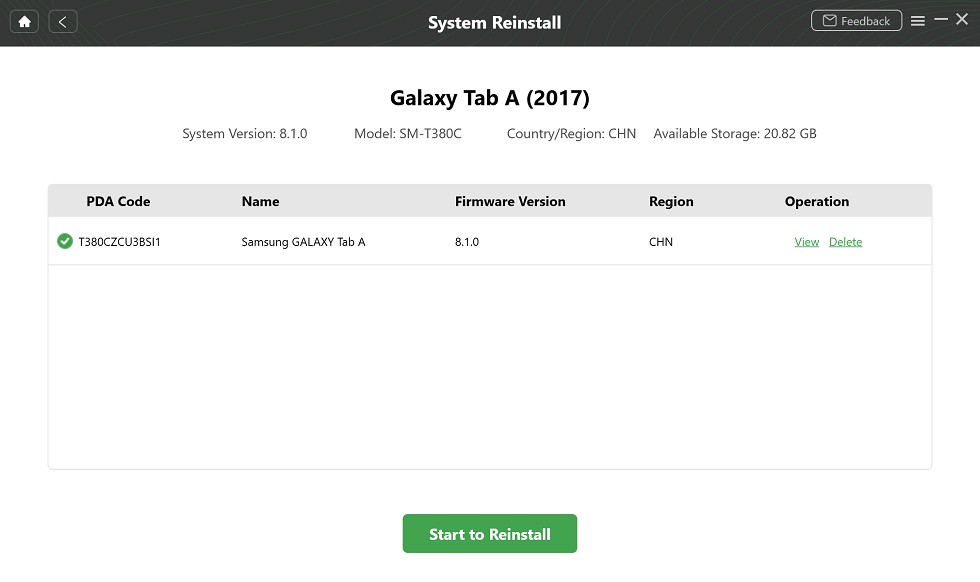
Select Samsung Version
Step 4. Follow the on-screen instructions to put your phone in Download mode. Then DroidKit will start the reinstall process immediately till the Completed page shows.
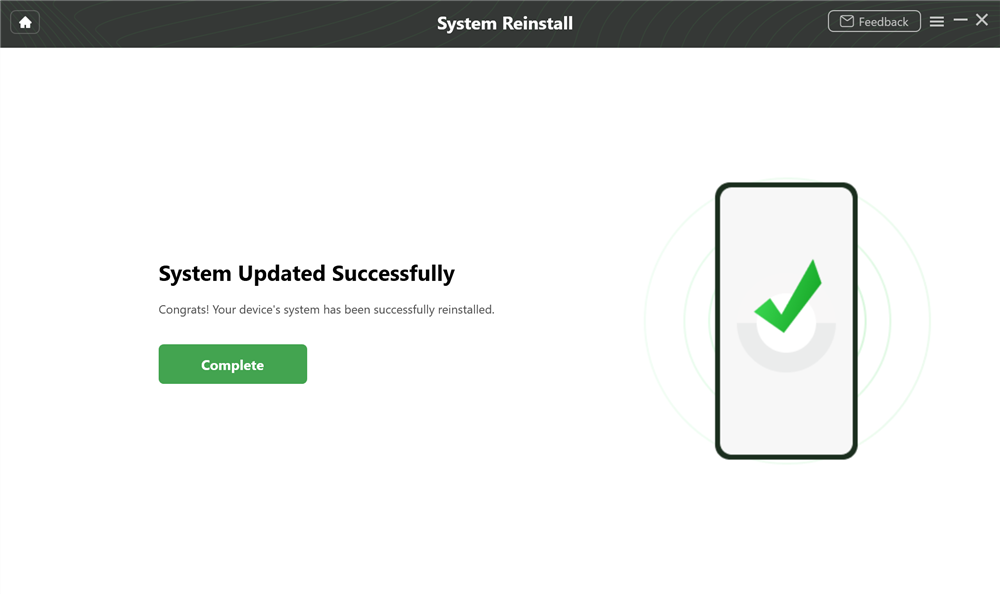
System Updated Successfully
How to Reinstall Android OS by Flashing the ROM
Flashing a ROM is also a solution to reinstall the Android OS. It allows you to replace a corrupted or outdated system, upgrade to a new version, or switch to a clean stock Android experience. This method is more advanced, but it comes with some risks. It requires technical knowledge, and the wrong ROM may permanently damage your phone.
Here are the steps to reinstall Android on phone by flashing the ROM:
Step 1. Go to Google Chrome and search for Enable Bootloader with the model number of your device. Here, you will get the guidelines, and then you have to flash a custom recovery. For this, you have to again search on Google Chrome for Flash a Custom Recovery with the model number of your device. Simply follow a good tutorial!
Step 2. Now, back up all the data and files on your device to avoid any sort of inconvenience that you may face if something goes wrong.
Step 3. Now, find out a good Android ROM that perfectly matches your device. Simply download it by searching for it on Google Chrome. Get the Android ROM downloaded on your PC and connect your Android device to transfer the downloaded ZIP file.
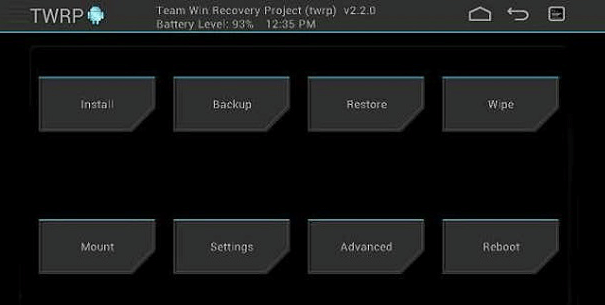
Download ROM of Your Choice
Step 4. Once it gets downloaded, reboot the Android device and enter Recovery Mode.
Step 5. Click on Install ROM from the SD card files and select the path where you downloaded the ZIP file.
Step 6. Flash ROM will now start, and you can even wipe the data if necessary.
Step 7. After the Flash process gets completed, restart your Android device with a new ROM. You even have to download and reinstall the Google apps also after performing flash ROM.
Further Reading: How to Backup Android Phone (4 Quick Ways) >
How to Reinstall Android OS via Hard Reset
Another way to reinstall the Android OS is by performing a hard reset and using the SDK Tool. This method restores your device to its original factory settings and can help resolve system crashes, boot loops, or serious performance issues. By combining a hard reset with tools like ADB and SDK, you can initiate a fresh system installation even when your device isn’t functioning normally.
Here are the steps to reinstall Android on phone by a hard reset:
Step 1. Enable the Developer Mode on your Android device by following the steps:
- Go to the phone’s Settings and click on About Phone > Device Information.
- Now, tap on the Build Number option continuously until the notification No need, you are already a developer pops up on your screen. This will now add extra features to the Settings menu of your device.
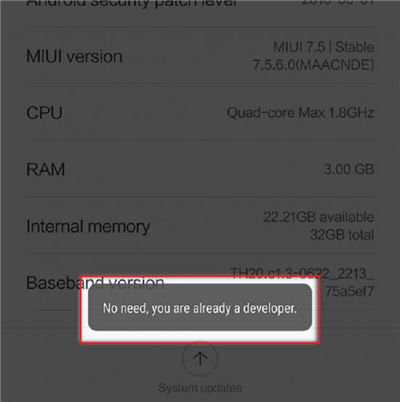
Enter Developer Mode
Step 2. Once you have entered the Developer Mode, it’s now time to enable USB Debugging. For this, you need to:
- Go to Settings on your Android device and open Developer Options.
- Here, navigate to the Debugging> USB Debugging option and enable it.
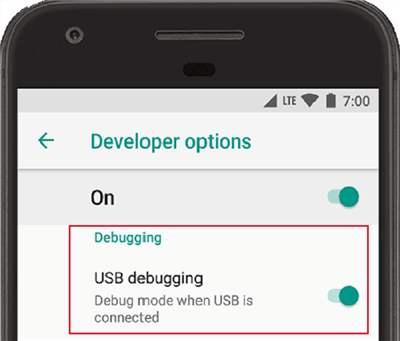
Enable USB Debugging
Step 3. Now, install the SDK Tool on your computer system and get the applicable drivers downloaded.
Step 4. Simply connect your Android device to the PC by using a USB cable.
Step 5. After connecting your device to your PC, open the SDK Tool on your PC and follow the instructions below:
- Go to Start Menu and enter cmd. Click on Command Prompt to open it.
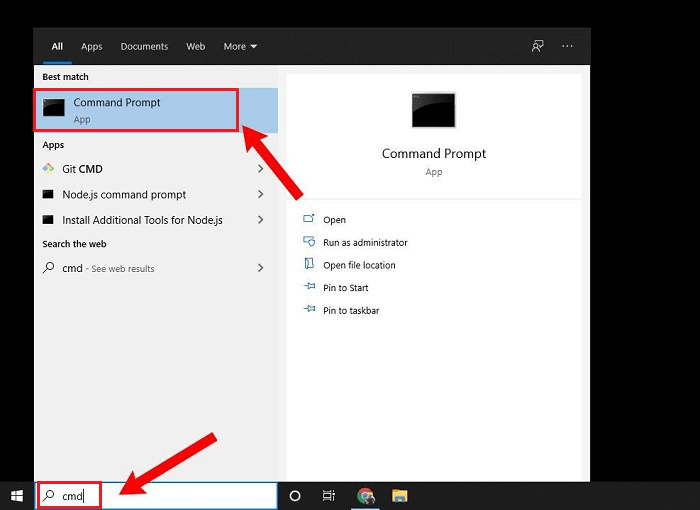
Open Command Prompt
- Now, type the location of the Android SDK Platform like:
cd C:\users\Hemangini\AppData\Local\Android\android-sdk\platform-tools and press Enter.
- Again, type the command ADB reboot recovery to restart your Android device in Recovery Mode.
- Finally, disconnect your device from the PC, and you will now be able to remove the password or perform the factory data reset in order to reinstall the Android OS.
This is all about how to reinstall Android OS in a hassle-free manner! Make sure to follow the steps accurately to avoid any sort of mishap.
Bonus Tip: How do I Fix A Corrupted Android Phone?
If you have downloaded a handful of apps on your Android device involving a custom Android OS, your device may become corrupted and stop functioning properly. This can result from file corruption, unstable apps, or system conflicts. To restore your Android device to normal operation, performing a hard reset is one of the most effective solutions. Follow the steps below to get started.
Step 1. Power OFF your Android device.
Step 2. Now, long-press the Power button and Volume Down button simultaneously.
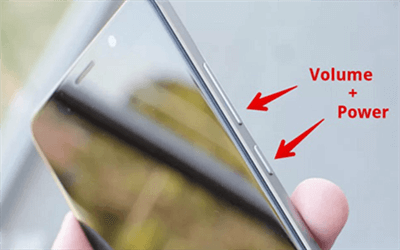
Put your Device into Recovery Mode
Step 3. Use the Volume Down button to navigate to the Recovery Mode option and press the Power button to confirm.
Step 4. Your Android device will now restart and show an Android robot in trouble on the screen.
Step 5. Here, long-press the Power button and press the Volume Up button while still holding the Power button.
Step 6. Now, use the Volume buttons to highlight the Wipe Data/Factory Reset option and press the Power button to confirm.
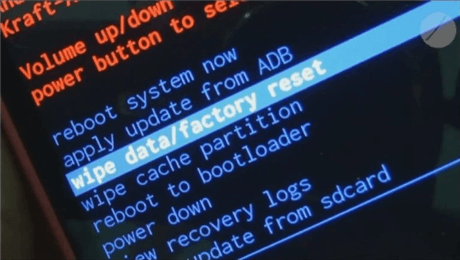
Select the “wipe data/factory reset” Option
Step 7. Finally, confirm by selecting Yes, and once done, select Reboot System Now. Then you have successfully performed a hard reset on your Android device.
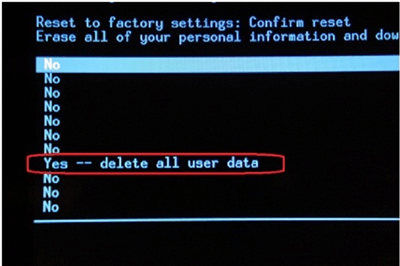
Confirm to Delete All the Data
FAQs About How to Reinstall Android
Q1. How Do I Restore My Android to Factory Settings?
Restoring Android to factory settings may help you fix a frozen screen and other system problems, or unlock a phone without a password. Because all phone settings and phone data will be wiped. To restore Android phones:
- Open the Settings app.
- Find the Backup and reset option.
- Choose Factory data reset.
- Tap on RESET DEVICE.
- Tap on ERASE EVERYTHING to confirm.
Q2. How to Reinstall Android Without Losing Data?
To reinstall Android without losing data, use tools like DroidKit or ADB sideload with an option that preserves user data. Also, ensure you back up your data beforehand to restore it after the reinstall process.
Q3. How to Install Android OS in Mobile Through PC?
To install the Android OS on a mobile phone through a PC, you need to download the official firmware and use tools like Odin. First, enable USB debugging and OEM unlocking on your phone, connect it to your PC via USB, and boot into Fastboot or Download Mode. Then, use Odin to flash the firmware files. For an easier solution, you can download DroidKit to flash and reinstall Android OS on your Android within a few clicks.
The Bottom Line
With these solutions above, you will be able to reinstall Android OS on your Android device to get your device updated with the latest version. Considering security and ease of use, iMobie DroidKit should be the best choice. Within a few clicks, you can install a new android os on a mobile through a PC by using DroidKit. Reinstall the Android OS on your Android via DroidKit now!
Free Download * 100% Clean & Safe
More Related Articles


Roger Smith is a senior technical writer with years of experience in providing Android solutions. He loves to help users solve various problems such as Android unlock, Android data recovery, and Android system repair.
Product-related questions? Contact Our Support Team to Get Quick Solution >
