Vivo FRP Bypass 2026: Easy Share & Tool Methods
Vivo FRP bypass depends on more than the Android version. Check the exact model, Funtouch OS build and whether TalkBack, browser access, EasyShare, app installation or a supported PC workflow is actually available before choosing a method.
If your Vivo phone asks for a Google account that was previously synced with the device after a factory reset, Factory Reset Protection (FRP) is active. The right Vivo FRP route depends on more than the Android version shown in a tutorial: the exact phone model, Funtouch OS build, security patch, Setup Wizard and available entry points all matter.
EasyShare is still a real Vivo file-transfer and Phone Clone feature, but that does not make EasyShare itself an FRP bypass function. A legacy FRP route may depend on TalkBack opening, a browser handoff working, EasyShare transferring an app, Android allowing that app to be installed, and a system activity such as Factory Test still being exposed.
This page is the live Vivo-level starting point for those decisions. For Android-wide FRP methods and other brands, use the Android FRP bypass guide.
Before using a bypass method: If you can recover a Google account previously synced with the Vivo phone, use that account first. If the phone was bought second-hand, ask the previous owner to resolve the Google verification before trying manual or PC-based routes.
Table of ContentsHide
Quick Answer: Which Vivo FRP Route Fits Your Phone?
Choose by Account, Model & Setup Access
Vivo FRP Bypass by Model
Start with Google Account Recovery
Method 1: Check the Vivo EasyShare / Phone Clone Route
Why EasyShare, Activity Launcher or Factory Test Stops
Method 2: Check a Vivo-Compatible PC FRP Tool
Advanced Vivo Service Routes for Technicians
Diagnose a Failed Vivo FRP Route
Vivo FRP Bypass FAQs
Choose the Vivo FRP Route by Its Prerequisites
Quick Answer: Which Vivo FRP Route Fits Your Phone?
Do not choose a Vivo FRP method only from labels such as “Android 12 method” or “Android 15 tool.” Start with what the phone can actually verify or open.
| Your Vivo Situation | First Direction | Main Check |
| You know a Google account previously synced with the phone | Recover and use that Google account | No bypass route is needed if normal ownership verification can be completed. |
| You bought the Vivo phone second-hand | Contact the previous owner | Resolve the account relationship before treating the problem as tool compatibility. |
| TalkBack and the required browser handoff both appear | Evaluate the matching no-PC route | Every later checkpoint must still match your Setup Wizard. |
| EasyShare / Phone Clone is available | Check app-transfer and app-installation access separately | Transferring an APK does not guarantee Android will install or launch it. |
| Activity Launcher opens and Factory Test is present | Continue only with the device-specific legacy route | Do not substitute unrelated system activities if the expected one is missing. |
| The first required manual screen is missing | Stop that manual route | Repeating later steps cannot restore a missing Setup Wizard entry point. |
| You want a PC FRP tool | Check current Vivo compatibility first | Verify that the software matches the phone/device route and read the data-loss notice. |
Android version is still useful context, especially when comparing old tutorials with a newer Funtouch OS build, but it should not be used as a universal switch such as “Android 11/12 equals EasyShare” or “Android 13–15 equals PC tool.”
Choose by Account, Model & Setup Access
The table below helps eliminate unsuitable routes before you spend time downloading APK files or repeating an old Vivo tutorial.
| Route | PC Needed? | What Must Be Available | Stop When |
| Google account verification | No | Access to a Google account previously synced with the phone | Move to another route only when legitimate account recovery is unavailable. |
| TalkBack / browser route | No | Accessibility shortcut, required TalkBack menu, Assistant/YouTube or browser handoff | The first required menu or browser transition is missing. |
| EasyShare / Phone Clone route | No | A second phone, EasyShare, Phone Clone, app transfer and an accessible installation path | The transferred app cannot be installed or launched. |
| Activity Launcher / Factory Test route | No | Compatible APK plus the required Vivo system activity | Factory Test or the required engineering activity is not exposed. |
| PC FRP software | Yes | Currently supported Vivo route, USB connection and correct device/system selection | The program cannot match the phone or does not list an applicable Vivo workflow. |
| Technician service route | Usually | Exact chipset, service mode, loader/device support and model-specific documentation | The procedure relies on a generic test-point or loader that is not documented for the exact model. |
Best diagnosis rule: Stop at the first mismatch. A missing TalkBack menu, blocked browser, uninstalled transferred app or missing Factory Test activity is useful evidence that the specific tutorial does not match your Vivo build.
Vivo FRP Bypass by Model
Vivo Y- and V-series phones can expose different setup screens even when their Android versions look similar. Use a model-specific guide when it matches your device instead of forcing a general Vivo route.
- Vivo Y15 / Y15s FRP bypass guide — covers Y15-series Android and manual/tool scenarios.
- Vivo Y21 FRP bypass Android 11/12 guide — focuses on TalkBack, EasyShare and PC options for the Y21.
Keep this page as the broader Vivo decision guide. A model page should take priority once you have identified an exact device with its own live instructions.
Start with Google Account Recovery
FRP exists to require ownership verification after a reset. If the relevant Google account can be recovered, that is the most direct route and avoids compatibility questions involving TalkBack, EasyShare, APK files, USB drivers or technician software.
- You know the Google email and password: use that previously synced account during setup.
- You know the email but forgot the password: use Google’s account-recovery process from another device.
- You are unsure which account was previously used: review accounts and recovery details you control before installing bypass software.
- The phone belongs to a previous owner: ask that person to complete the verification or resolve the account relationship.
- You can prove ownership but cannot recover the account: contact Vivo support in your region and check the options available for your device.
For post-reset Google verification rather than a Vivo-specific manual method, see the Google account verification after factory reset guide.
If your problem is the normal Vivo lock screen rather than Google verification after reset, use the Vivo phone unlock guide instead.
Method 1: Check the Vivo EasyShare / Phone Clone Route
The Vivo EasyShare route is a legacy no-PC FRP sequence seen in tutorials for some Vivo builds. It normally combines TalkBack or another setup entry point with browser access, EasyShare Phone Clone, a transferred launcher/shortcut app and a Vivo system activity such as Factory Test.
EasyShare itself is a legitimate Vivo file-transfer feature. Vivo’s current EasyShare guidance still documents Phone Clone using an old phone, new phone, QR pairing and data selection. However, Vivo also notes that transferred apps might not be installed automatically because of permission limitations. That is a critical distinction for this FRP route.
In other words:
EasyShare connects → app transfers → app installs → app launches → required system activity exists
Each arrow is a separate compatibility checkpoint.
Requirements for This Legacy Route
- A Vivo device whose Setup Wizard still exposes the required TalkBack or browser route.
- A second unlocked Android phone.
- EasyShare / Phone Clone access.
- A launcher or shortcut APK from a source you can evaluate.
- Permission to install the transferred app on the locked Vivo phone.
- The required Vivo system activity still exposed by the current build.
APK safety: Do not use a random Activity Launcher, QuickShortcutMaker or FRP APK simply because a video links to it. A legacy method can fail because of a missing Android activity even when the APK itself installs successfully.
Step-by-Step: Check the EasyShare Route
Step 1. Power on the Vivo phone and continue through setup until Wi-Fi can be connected.
Step 2. Return to the initial setup screen and check whether the accessibility shortcut used by your device-specific tutorial is available. Some legacy guides use Volume Up + Volume Down to start TalkBack.
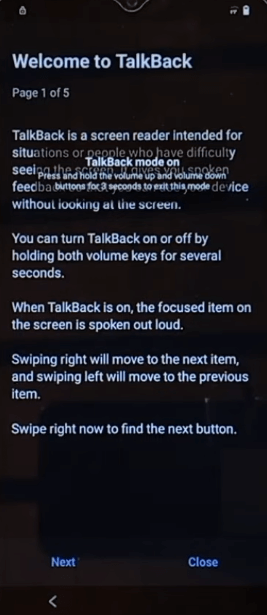
Check Whether the TalkBack Route Is Available
Step 3. If TalkBack starts, follow the gestures shown by the phone and check whether the menu expected by the same guide still exists.
Step 4. If the legacy sequence depends on Voice Command, Google Assistant or YouTube, continue only when that exact handoff is available.
Step 5. Check whether YouTube Terms of Service or another permitted link can open the required browser. If the browser does not open, stop the browser-dependent sequence.
Step 6. On the second unlocked Android phone, open or install Vivo EasyShare from a legitimate source and prepare the app required by your device-specific method.
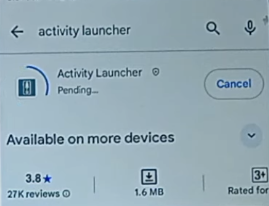
Prepare the App Required by the Device-Specific Route
Step 7. Continue only if the locked Vivo phone can reach the setup screen needed by your specific EasyShare / Phone Clone method. Do not use an unknown FRP download page simply to force a Settings shortcut that your phone does not expose.
Step 8. Open EasyShare / Phone Clone on both phones when that option is available. Select the appropriate old phone and new phone roles shown by the Vivo interface.
Step 9. Pair the phones with the QR-code workflow shown by EasyShare.
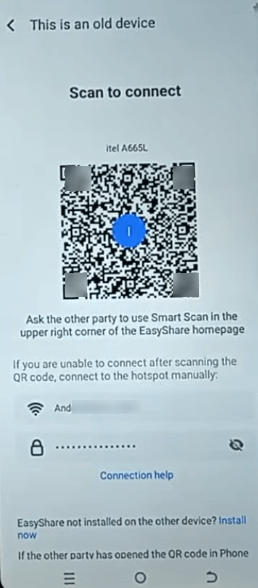
Pair the Phones with EasyShare / Phone Clone
Step 10. If the guide requires transferring only a launcher or shortcut app, select only that app rather than copying unrelated data.
Step 11. After transfer, check whether the app is actually installed. Vivo’s EasyShare documentation notes that transferred apps may require manual installation from Files > Apps because of permission limitations.
Step 12. If the Setup Wizard does not let you reach the transferred APK or Android’s package installer, stop. Successful transfer alone is not enough.
Step 13. If the app installs and launches, search only for the system activity required by the device-specific tutorial, such as a Factory Test or engineering activity.
Step 14. Continue only if that exact Vivo activity appears. If it is absent, restricted or crashes, the legacy route no longer matches the current build.
Step 15. If the device-specific method reaches the expected final system screen, follow the options visible on your Vivo phone. Do not substitute another engineering activity from a different model.
EasyShare is not the bypass itself. It is only one transfer step inside a longer legacy route. The method fails if app installation, Activity Launcher or the expected Factory Test activity is unavailable after the transfer.
Why EasyShare, Activity Launcher or Factory Test Stops
A failed EasyShare method is easier to diagnose when you record the exact checkpoint that stopped.
| Failure | What It Tells You | Next Decision |
| TalkBack shortcut does nothing | The accessibility entry point used by the tutorial does not match this setup environment. | Stop that TalkBack-based route. |
| TalkBack opens but Assistant/YouTube does not | The accessibility chain differs from the legacy guide. | Do not continue to later browser steps. |
| YouTube Terms does not open a browser | The external browser handoff is unavailable. | Stop the browser-dependent route. |
| EasyShare / Phone Clone is unavailable | The transfer route cannot be reached from the current setup environment. | Use model-specific guidance instead. |
| The app transfers but is not installed | EasyShare transfer succeeded, but Android installation permission or installer access is still required. | Check whether Files/Apps or the package installer can legitimately be reached. |
| The transferred APK cannot be opened | Setup restrictions or package compatibility prevent the app from launching. | Stop rather than downloading multiple modified copies. |
| Activity Launcher opens but Factory Test is absent | The required Vivo system activity is hidden, removed or not exposed on this build. | Reject the Factory Test route. |
| Factory Test opens differently from the tutorial | The model/Funtouch OS environment does not match the guide. | Do not select unrelated engineering functions. |
None of these failures proves that “all Android 13/14/15 Vivo phones block EasyShare.” It proves that the particular entry-point chain shown by the tutorial does not fit the phone in front of you.
Method 2: Check a Vivo-Compatible PC FRP Tool
If the account cannot be recovered and the manual route stops at TalkBack, browser access, app installation or Factory Test, you can evaluate a PC-based FRP workflow.
The important word is evaluate. A newer Android version is not, by itself, a reason to download a particular tool.
DroidKit Vivo FRP Compatibility
DroidKit’s current FRP Guide lists VIVO among its supported device families, together with Samsung, Xiaomi, OPPO, Motorola, Lenovo, Redmi, POCO, Realme, SONY and OnePlus, for Android 6 and above.
That is a feature-level Vivo support statement, but you should still let the current software match the connected device and select the correct route. Do not assume every Vivo model or Funtouch OS build uses an identical process.
Data-loss notice: DroidKit’s current FRP Guide states that its FRP Bypass function erases data on the device. Read that condition before starting or purchasing the workflow.
Use DroidKit here when:
- The legacy EasyShare chain does not match the phone.
- The transferred app cannot be installed or launched.
- The required Factory Test / engineering activity is missing.
- You want a PC-guided route and the current software can match the Vivo device.
- You understand and accept the data-erasure condition.
If you want to compare software before choosing, see the FRP bypass tool comparison.
How to Use DroidKit for a Supported Vivo FRP Scenario
Step 1. Download and install DroidKit on a Windows PC or Mac after confirming that the current FRP workflow is relevant to your Vivo phone.
Step 2. Launch DroidKit and choose FRP Bypass.
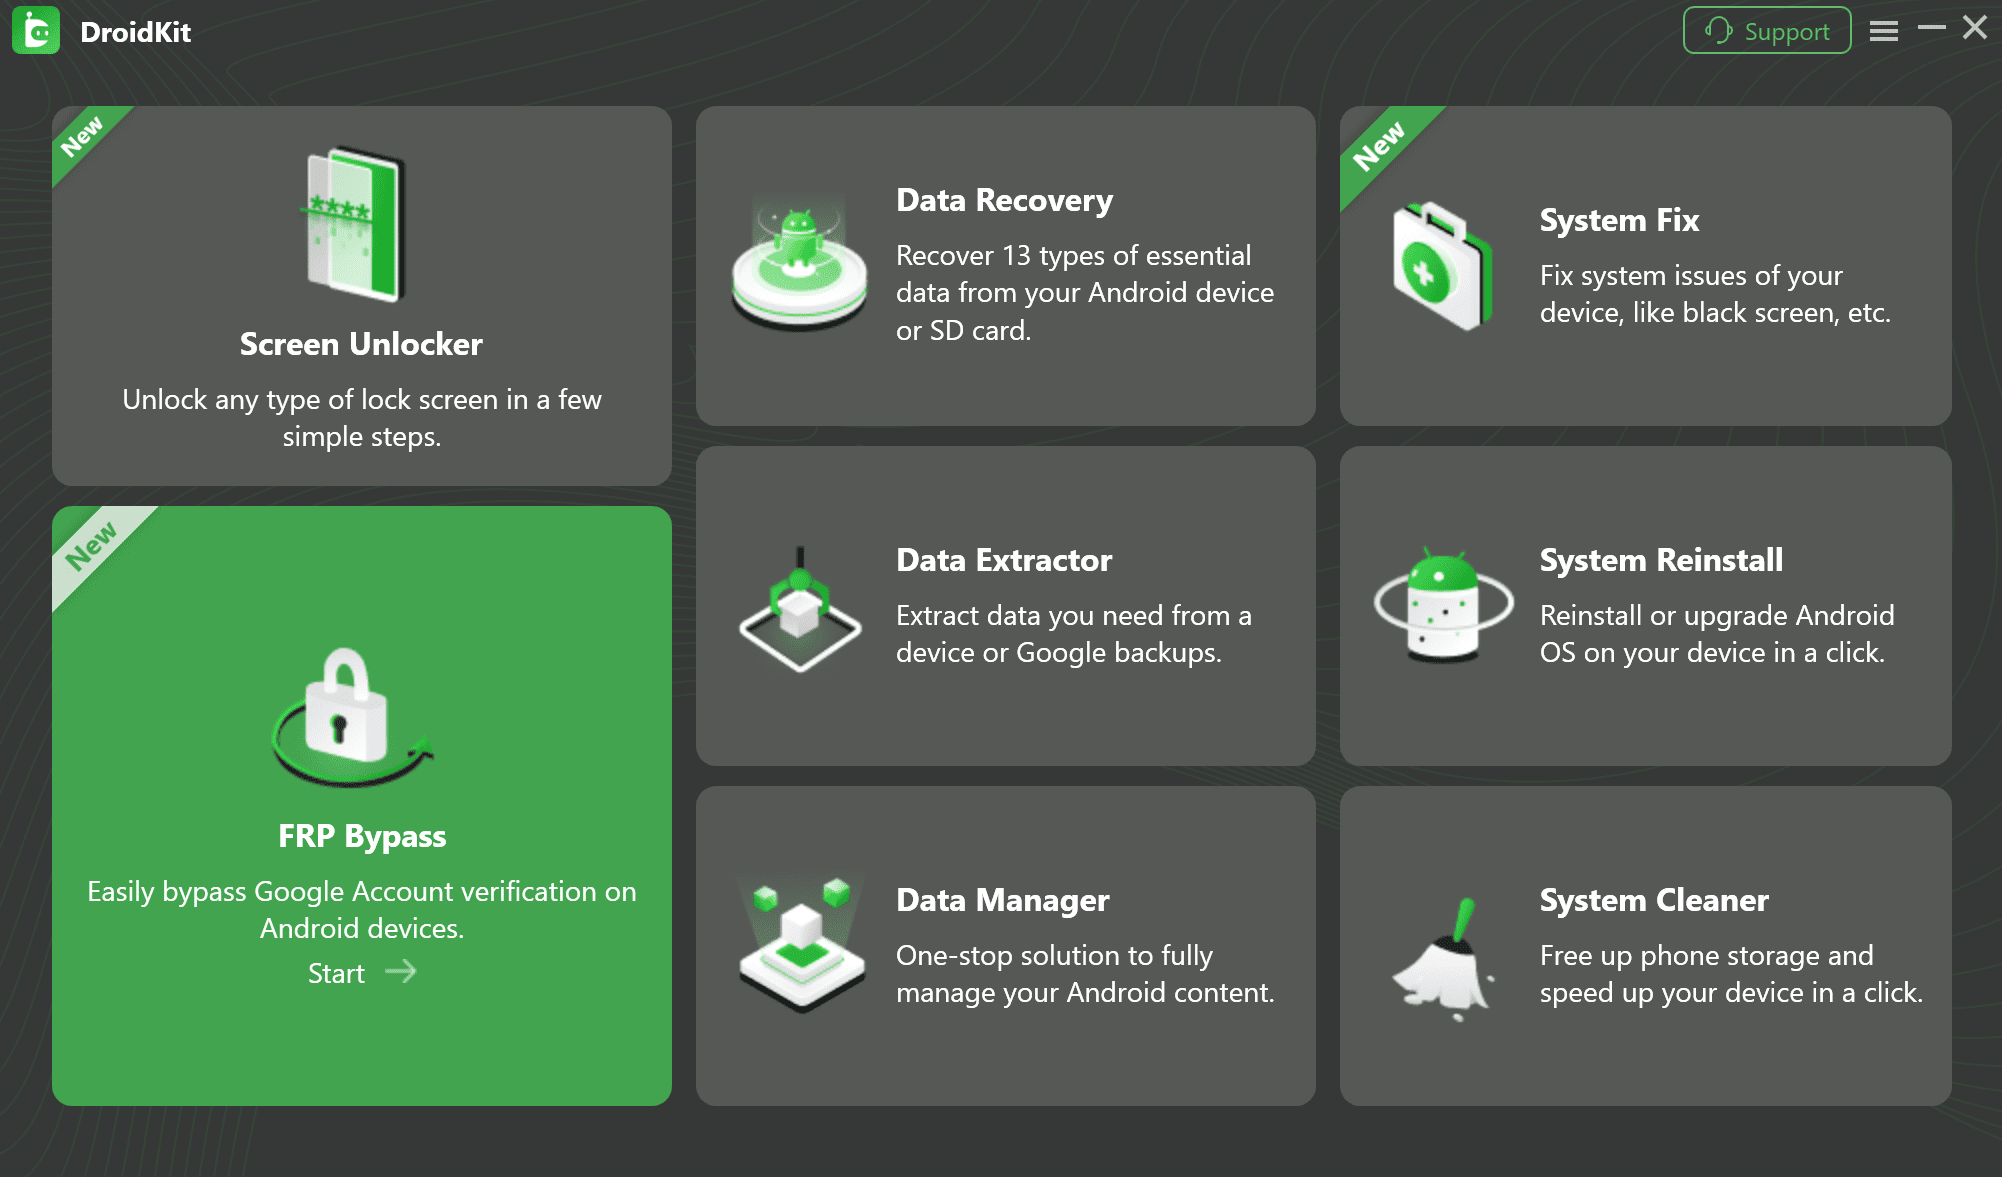
Choose FRP Bypass in DroidKit
Step 3. Connect the locked Vivo phone to the computer with a stable USB data cable.
Step 4. Follow the current device-matching prompts. Select the actual Vivo/device-system route shown for the phone rather than choosing another profile just to continue.
Step 5. When DroidKit is ready for the matched route, click Start as prompted and keep the phone connected.
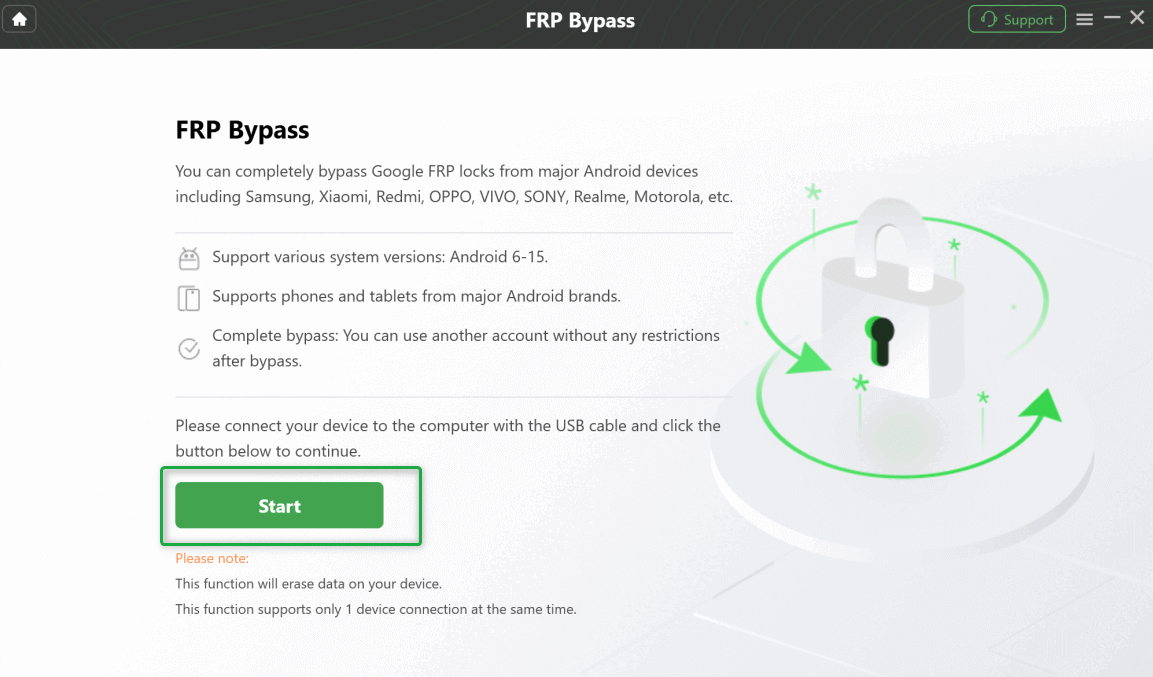
Start the Matched FRP Workflow
Step 6. Follow the device-specific instructions shown by the software. The required phone state can differ across Vivo devices.
Step 7. Keep the phone connected until the supported process finishes. Then follow the device setup shown afterward.
You can check the current DroidKit FRP Guide before starting so the latest device instructions and limitations take priority over an older Vivo tutorial.
Advanced Vivo Service Routes for Technicians
Some Vivo repair cases involve low-level MediaTek or Qualcomm service modes. These are technician workflows, not default alternatives when EasyShare fails.
| Technical Area | What a Technician Must Verify | Main Risk |
| MediaTek service route | Exact Vivo model, MTK chipset, BROM/Preloader state, loader/DA requirements and current procedure support | Using the wrong loader or device procedure can leave the phone unable to boot normally. |
| Qualcomm EDL | Exact model, chipset, EDL entry route, firehose/loader and supported operation | An EDL connection alone does not mean the selected FRP/service procedure is compatible. |
| Board-level test point | Exact motherboard revision and service documentation for that model | Shorting generic points from a similar Vivo model can damage hardware. |
| Firmware / service tool | Exact firmware, region/build and the intended operation | Reinstalling firmware should not automatically be treated as removing Google FRP. |
Technician rule: Do not apply a test-point location, EDL loader or MTK sequence from a similar-looking Vivo phone. Use model- and board-specific documentation for hardware-level work.
Diagnose a Failed Vivo FRP Route
When a Vivo FRP method fails, the failure point is more useful than the Android version alone.
| Issue | What It Usually Means | What to Check Next |
| TalkBack shortcut is unavailable | The accessibility entry point does not match the current Setup Wizard. | Stop the TalkBack route. |
| Assistant or YouTube cannot open | The expected accessibility/app handoff is blocked or different. | Do not continue into browser-dependent steps. |
| Browser does not open from YouTube Terms | The external browser transition required by the tutorial is unavailable. | Reject that browser-dependent sequence. |
| EasyShare cannot access Phone Clone | The transfer step is unavailable in the current setup environment. | Use the exact model/Funtouch guide or another route. |
| App transfers but does not install | EasyShare file transfer and APK installation are separate permission stages. | Check installer access instead of retransferring the same app. |
| Activity Launcher will not open | Package compatibility or Setup Wizard restrictions may block the app. | Stop the Activity Launcher route. |
| Factory Test is missing | The system activity expected by the old tutorial is not exposed. | Do not search for a random engineering substitute. |
| Secret dialer code does nothing | The code or engineering path does not apply to this Vivo build. | Stop the dialer-code method. |
| ADB says unauthorized or permission denied | The required debugging/authorization state does not exist. | Do not treat standard ADB as a universal post-reset FRP route. |
| PC does not detect the Vivo phone | Cable, driver, USB port or required device mode may be wrong. | Fix detection before deciding that the FRP feature is unsupported. |
| DroidKit cannot match an applicable Vivo route | Compatibility has not been established for the current device state. | Do not force another brand/device profile. |
| Google verification returns after restart | The attempted method did not resolve the FRP state. | Return to account recovery or another currently supported route. |
If you have already tried several routes, the FRP bypass not working guide can help separate APK, Setup Wizard, security-patch and PC-detection failures.
Vivo FRP Bypass FAQs
What is the best Vivo FRP bypass method in 2026?
There is no single best route for every Vivo phone. Use a previously synced Google account when it can be recovered. For a manual route, check whether the required TalkBack, browser, EasyShare, app-installation and system-activity checkpoints exist. A PC tool is relevant only when its current Vivo compatibility matches the phone.
Can I bypass Vivo FRP without a PC?
Sometimes, but no-PC compatibility depends on the actual setup screens. A TalkBack or EasyShare tutorial is only relevant when its complete chain exists on your Vivo build. If the first required menu or handoff is missing, stop that route rather than assuming another Android-version label will fix it.
What is Vivo FRP bypass EasyShare?
It is a legacy no-PC route that uses Vivo’s EasyShare / Phone Clone feature as one stage in transferring an app to the locked phone. EasyShare itself is a data-transfer feature, not an FRP bypass function. The route still depends on app installation, app launching and access to the required Vivo system activity.
Can EasyShare transfer Activity Launcher to a Vivo phone?
EasyShare can transfer apps through Phone Clone, but Vivo’s own guidance notes that transferred apps may not be installed automatically because of permission limitations. A successful transfer therefore does not guarantee that Activity Launcher can be installed or opened in the locked Setup Wizard.
Why did Activity Launcher transfer but not install?
The transfer and installation stages are separate. Android may still require installer access or permission to install the transferred package. If the locked setup environment does not expose that path, retransferring the same APK will not complete the method.
Why can’t Activity Launcher find Factory Test?
The Vivo system activity shown by an older tutorial may be hidden, removed or unavailable on your current model/Funtouch OS build. If the exact Factory Test or engineering activity is missing, stop that legacy route instead of launching an unrelated system function.
Does Android 13, Android 14 or Android 15 require a PC for Vivo FRP?
Not as a universal rule. Newer Android and Funtouch OS builds may change older setup entry points, but compatibility is determined by the exact device and route. Check the first TalkBack, browser, EasyShare or installer checkpoint before deciding whether a no-PC method applies.
Does DroidKit support Vivo FRP?
DroidKit’s current FRP Guide lists VIVO among its supported device families for Android 6 and above. The actual workflow still depends on current device matching and the route presented for the connected phone, so broad Vivo support should not be read as a guarantee for every model and build.
Will DroidKit Vivo FRP bypass erase data?
Yes. The current DroidKit FRP Guide states that its FRP Bypass function erases data on the device. A phone already at Google verification may also have lost local data during the factory reset that triggered FRP.
Is a Vivo screen lock the same as Google FRP?
No. A Vivo screen lock blocks normal access with a PIN, pattern or password. Google FRP appears after a factory reset and requests a Google account previously synced with the phone. Use the route that matches the screen you actually see.
What should I do with a second-hand Vivo phone that asks for the previous owner’s Google account?
Contact the previous owner first and ask them to resolve the Google verification or account relationship. A second-hand ownership issue should not automatically be converted into a search for APK files or hardware-level service methods.
Choose the Vivo FRP Route by Its Prerequisites
Vivo FRP bypass should not be reduced to “Android 11/12 equals EasyShare” and “Android 13–15 equals PC software.” The more reliable decision starts with the account, exact Vivo model and the first setup entry point required by the method.
For EasyShare, remember that Phone Clone transfer is only one checkpoint. Vivo itself notes that transferred apps may require separate manual installation, so a copied Activity Launcher APK does not prove that the route can proceed. If the installer, Activity Launcher or Factory Test screen is unavailable, stop that legacy sequence.
If a manual route does not match, a PC workflow such as DroidKit can be evaluated for a currently supported Vivo device. Check the device matching first and read the data-erasure notice before starting. For technicians considering MTK or Qualcomm service modes, use exact model- and board-level documentation rather than generic Vivo test-point instructions.
More Related Articles


Roger Smith is a senior technical writer with years of experience in providing Android solutions. He loves to help users solve various problems such as Android unlock, Android data recovery, and Android system repair.
Product-related questions? Contact Our Support Team to Get Quick Solution >
