Hisense FRP Bypass Tool: Choose by Android Version & Chipset
Hisense FRP removal is not one-size-fits-all: MediaTek models may require an MTK route, while Unisoc or Spreadtrum devices use different drivers and tools. Android version and security patch also determine whether TalkBack or SIM PIN methods are still available. Compare the options below before choosing a Hisense FRP bypass tool.
A Hisense phone can reach the Google verification screen after a factory reset when Factory Reset Protection (FRP) is active. Before looking for a bypass tool, first identify what you are dealing with: the exact Hisense model, Android version, security patch, and—especially for PC-based methods—whether the phone uses a MediaTek or Unisoc/Spreadtrum chipset.
That distinction matters because MTK and Unisoc phones do not use the same drivers or servicing tools, while TalkBack and SIM PIN routes depend more on the Android build and whether the required setup-screen shortcuts still exist. If you only need background on why the lock appears, see this FRP lock explanation. Use the methods below only for a Hisense phone you own or are authorized to service.
Table of ContentsHide
Quick Answer: Which Hisense FRP Method Should You Try?
Compare Hisense FRP Tools and Methods
Why Your Hisense Phone Is FRP Locked
Check Your Hisense Chipset First
Hisense MTK vs Unisoc FRP Methods
Hisense FRP Bypass Without a PC
PC-Based Hisense FRP Option
How to Use DroidKit for Hisense FRP Bypass
Why Hisense FRP Methods Fail
Hisense FRP Troubleshooting
Hisense FRP FAQ
Which Hisense FRP Method Should You Choose?
Quick Answer: Which Hisense FRP Method Should You Try?
Start with the least complicated route that matches your actual phone. If you can recover the Google account previously synced to the device, you may not need a bypass tool at all. If account recovery is not available, Android version and chipset become the main checkpoints.
| Your Hisense Situation | Route to Consider | Check Before Starting |
| You can recover the previously synced Google account | Google account recovery and normal activation | No third-party FRP tool may be necessary |
| The phone uses MediaTek | MTK-specific driver and servicing-tool route | Confirm the exact model and chipset before using MTK files or settings |
| The phone uses Unisoc / Spreadtrum | SPD / Unisoc driver and tool route | Do not use MediaTek tools on a Unisoc phone |
| You have no computer | TalkBack or SIM PIN route, if still exposed | These setup-screen routes are often removed by newer Android patches |
| You prefer on-screen PC instructions | A compatible guided FRP application | Check brand, model, Android version, and FRP support before starting |
| The same manual trick keeps failing | Diagnose the failure before trying another method | Your firmware or security patch may have closed that route |
Hisense-specific instructions are useful when the chipset determines the workflow. For Android-wide options that do not depend on a Hisense chipset, the Android FRP bypass guide covers the broader decision path.
Compare Hisense FRP Tools and Methods
There is no single Hisense FRP bypass tool that fits every model. The most important question is not simply whether a tool is “for Hisense,” but whether its connection method and instructions match your phone’s chipset, Android build, and current setup screen.
| Check First | If This Applies | Method to Consider | Main Limitation |
| Google account access | You know the account but forgot the password | Recover the Google account | You may need to complete Google’s recovery and verification process |
| Chipset | MediaTek / MTK is confirmed | MTK-specific workflow | Requires the correct drivers and model-specific instructions |
| Chipset | Unisoc / Spreadtrum is confirmed | SPD / Unisoc workflow | Requires a different driver and tool chain from MTK |
| Setup-screen access | TalkBack or notification shortcuts still appear | No-PC setup route | Behavior varies by Android version and security patch |
| Technical experience | You do not want to handle chipset tools or firmware files | Compatible PC-based FRP software | Device and Android compatibility must still be checked |
| Failure point | TalkBack, SIM PIN, or PC detection repeatedly fails | Troubleshoot the specific failure first | Repeating a patched or mismatched method will not change the result |
If the phone continues to ask for the previous account after several attempts, identify whether the problem is the account itself or a failed removal process. The Google account verification after reset guide explains that distinction in more detail.
Why Your Hisense Phone Is FRP Locked
FRP is associated with the Google account added to an Android phone. After certain factory resets, the setup process can request credentials for an account previously synced with the device.
On Hisense phones, the removal route can vary for several reasons:
- Different models use different chipsets, including MediaTek and Unisoc / Spreadtrum.
- Android versions and security patch levels can expose or remove older TalkBack, browser, notification, or SIM-based paths.
- PC utilities may require chipset-specific drivers and connection modes.
- Firmware, region, carrier, and exact model number can affect whether instructions written for another device apply.
For that reason, a search result labeled “Hisense FRP tool” is not enough information by itself. Confirm the phone first, then choose the tool or method.
Check Your Hisense Chipset Before Using an FRP Tool
The chipset is the key checkpoint before using MTK or SPD/Unisoc utilities. A model name and a chipset name are not interchangeable: two phones from the same brand can require completely different PC drivers and service tools.
How to Identify the Exact Hisense Model and Chipset
Step 1. Find the exact model number. Depending on what you still have access to, check the phone label, SIM tray area, original box, purchase record, or device documentation.
Step 2. Use the exact model number—not only a marketing family name—when checking the device specifications.
Step 3. Look for the processor or chipset field. MediaTek entries may be shown as MediaTek, MTK, Helio, or Dimensity, while Unisoc hardware may also appear under the older Spreadtrum naming.
Step 4. If different specification sources disagree, do not guess. Verify the regional or carrier variant before installing drivers or preparing firmware-related files.
Step 5. Once the chipset is confirmed, use only the matching workflow: MTK instructions for MediaTek hardware and SPD/Unisoc instructions for Unisoc or Spreadtrum hardware.
Important: Do not choose a flashing file, scatter file, PAC package, partition address, or service operation only because another Hisense model has a similar name. Those items can be model-specific.
The following chipset examples were already covered for this page and illustrate why checking the exact model matters:
| Hisense Model | Chipset | What It Means for the Tool Route |
| Hisense H60 | Unisoc T610 | Usually points to the Unisoc / SPD tool family |
| Hisense H50 | Unisoc T610 | Usually points to the Unisoc / SPD tool family |
| Hisense H50s 5G | MediaTek Dimensity 700 | Usually points to the MTK tool family |
| Hisense H40 | Unisoc SC9863A | Usually points to the Unisoc / SPD tool family |
| Hisense U60 / U60s | MediaTek MT6761 | Usually points to the MTK tool family |
| Hisense E60 | Unisoc SC9863A | Usually points to the Unisoc / SPD tool family |
| Hisense E50 / E50 Lite | Unisoc SC9863A | Usually points to the Unisoc / SPD tool family |
| Hisense E30 / E30 Lite | Spreadtrum / Unisoc SC7731E | Usually points to the Unisoc / SPD tool family |
| Hisense Infinity H12 | MediaTek Helio P22 | Usually points to the MTK tool family |
If your exact Hisense variant is not listed, verify its specifications before proceeding. Do not assume that an MTK tool works on a Unisoc phone or that an SPD utility works on MediaTek hardware.
Hisense FRP Bypass for MTK and Unisoc Chipsets
Chipset-based FRP servicing is the more technical path. It can involve USB drivers, device-detection modes, servicing applications, firmware packages, and model-specific instructions. A wrong package or partition operation can create problems beyond the original FRP lock.
Before continuing with either chipset route:
- Confirm the exact Hisense model and chipset.
- Use a stable Windows computer and USB cable.
- Download drivers and service tools from sources you trust.
- Do not substitute files made for another Hisense variant.
- Stop if the tool asks for a firmware or partition operation you do not understand.
Hisense FRP Bypass MTK: What to Know
On a MediaTek-based Hisense phone, the PC must first recognize the device through the appropriate MediaTek driver and connection mode. Users may encounter tools such as SP Flash Tool and other MTK servicing utilities, but the exact operation depends on the phone and firmware.
Step 1. Install the appropriate MediaTek USB driver from a source you trust. Restart Windows if the driver installation requires it.
Step 2. Prepare the servicing tool required by the instructions for your exact model. For background on the flashing utility itself, see the SP Flash Tool guide.
Step 3. If the instructions mention MTK authorization or Secure Boot, confirm that your phone and tool version match before proceeding. The MTK FRP tool review explains common tool considerations.
Step 4. Power off the Hisense phone and connect it in the mode required by the tool. If the PC never detects it, troubleshoot the driver, cable, USB port, and connection mode before doing anything else.
Step 5. Follow instructions written for the exact device variant. Do not guess an FRP address or use a scatter or firmware package from a different model.
MTK checkpoint: Device detection should be solved before any FRP-related operation. If Windows cannot identify the phone correctly, changing format settings or files is not a substitute for fixing the connection.
Hisense FRP Unisoc: Using SPD / Spreadtrum Tools
Unisoc and older Spreadtrum-based Hisense phones use a different PC tool chain. MediaTek drivers and MTK utilities are not interchangeable with SPD/Unisoc drivers and servicing applications.
Step 1. Install the required SPD / Unisoc USB driver for the computer.
Step 2. Prepare the servicing utility specified for your device. If the procedure requires a PAC firmware package, make sure the package belongs to the exact Hisense model and variant.
Step 3. Power off the phone, then connect it using the button combination required by the specific tool. Some workflows use a volume key during connection, but the correct key can vary.
Step 4. Wait for the tool to detect the phone. If detection fails, check the driver, cable, USB port, connection key, and device instructions before continuing.
Step 5. Use only the FRP-related operation documented for the device and tool. Do not perform a full firmware flash or partition change merely to experiment with an FRP method.
Hisense FRP Bypass Without a PC
No-PC Hisense FRP instructions usually depend on something still being reachable from Android’s setup process: an accessibility shortcut, browser path, notification panel, or SIM-related screen. Whether that entry point exists is determined more by the Android build and security patch than by the chipset.
Before trying a no-PC route: If the required TalkBack menu, browser path, notification access, or SIM shortcut never appears on your Hisense phone, that is a compatibility signal—not a reason to repeat the same gesture indefinitely.
Method 1: TalkBack FRP Method
Step 1. From the setup screen, connect the Hisense phone to Wi-Fi.
Step 2. Return to the relevant setup screen and try the accessibility shortcut available on the device. Some older Android builds use a Volume Up and Volume Down key shortcut for TalkBack.
Step 3. If TalkBack opens, check whether the menus and commands described for your Android build are actually present. Older instructions may refer to Google Assistant or a browser path that newer builds no longer expose.
Step 4. If the route reaches a browser, avoid unknown FRP APK mirrors and files that cannot be verified.
Step 5. If the necessary TalkBack or browser option is absent, treat the route as incompatible with the current setup rather than repeatedly trying the same sequence.
Method 2: SIM Card PIN Method
Step 1. Insert a SIM card with SIM PIN protection enabled.
Step 2. When prompted, enter the correct PIN for that SIM card.
Step 3. Follow the SIM-screen sequence described for the Android build you are using.
Step 4. Check whether the phone exposes a notification or settings entry after the SIM interaction.
Step 5. If no usable shortcut appears, the SIM PIN path does not match that firmware or security patch.
TalkBack and SIM PIN methods are attractive because they do not require a computer, but they are also highly dependent on setup-screen behavior. A method written for one Android release should not be assumed to work after a firmware or security update.
PC-Based Hisense FRP Option: When a Guided Tool Makes Sense
A PC-based application becomes more relevant when you have already identified that the Hisense setup screen does not expose the TalkBack or SIM route, or when you do not want to work with MTK/Unisoc drivers, PAC packages, scatter files, or low-level servicing settings.
DroidKit is one PC-based option that provides on-screen FRP instructions for supported Android scenarios. It does not remove the need to check compatibility: confirm that your Hisense device, Android version, and FRP situation are supported before starting.
When DroidKit May Fit This Hisense FRP Scenario
- The TalkBack or SIM PIN route needed by an older tutorial is missing on your phone.
- You want on-screen instructions instead of manually handling MTK or SPD servicing operations.
- You prefer not to download unknown FRP APK packages from third-party mirrors.
- You have a Windows or Mac computer and can connect the Hisense phone by USB.
Free Download * A computer is required for the FRP process.
How to Use DroidKit for Hisense FRP Bypass
Check DroidKit’s current FRP compatibility for your device before following the steps below.
Step 1. Download and install DroidKit on your Windows or Mac computer. Open the program and choose FRP Bypass.
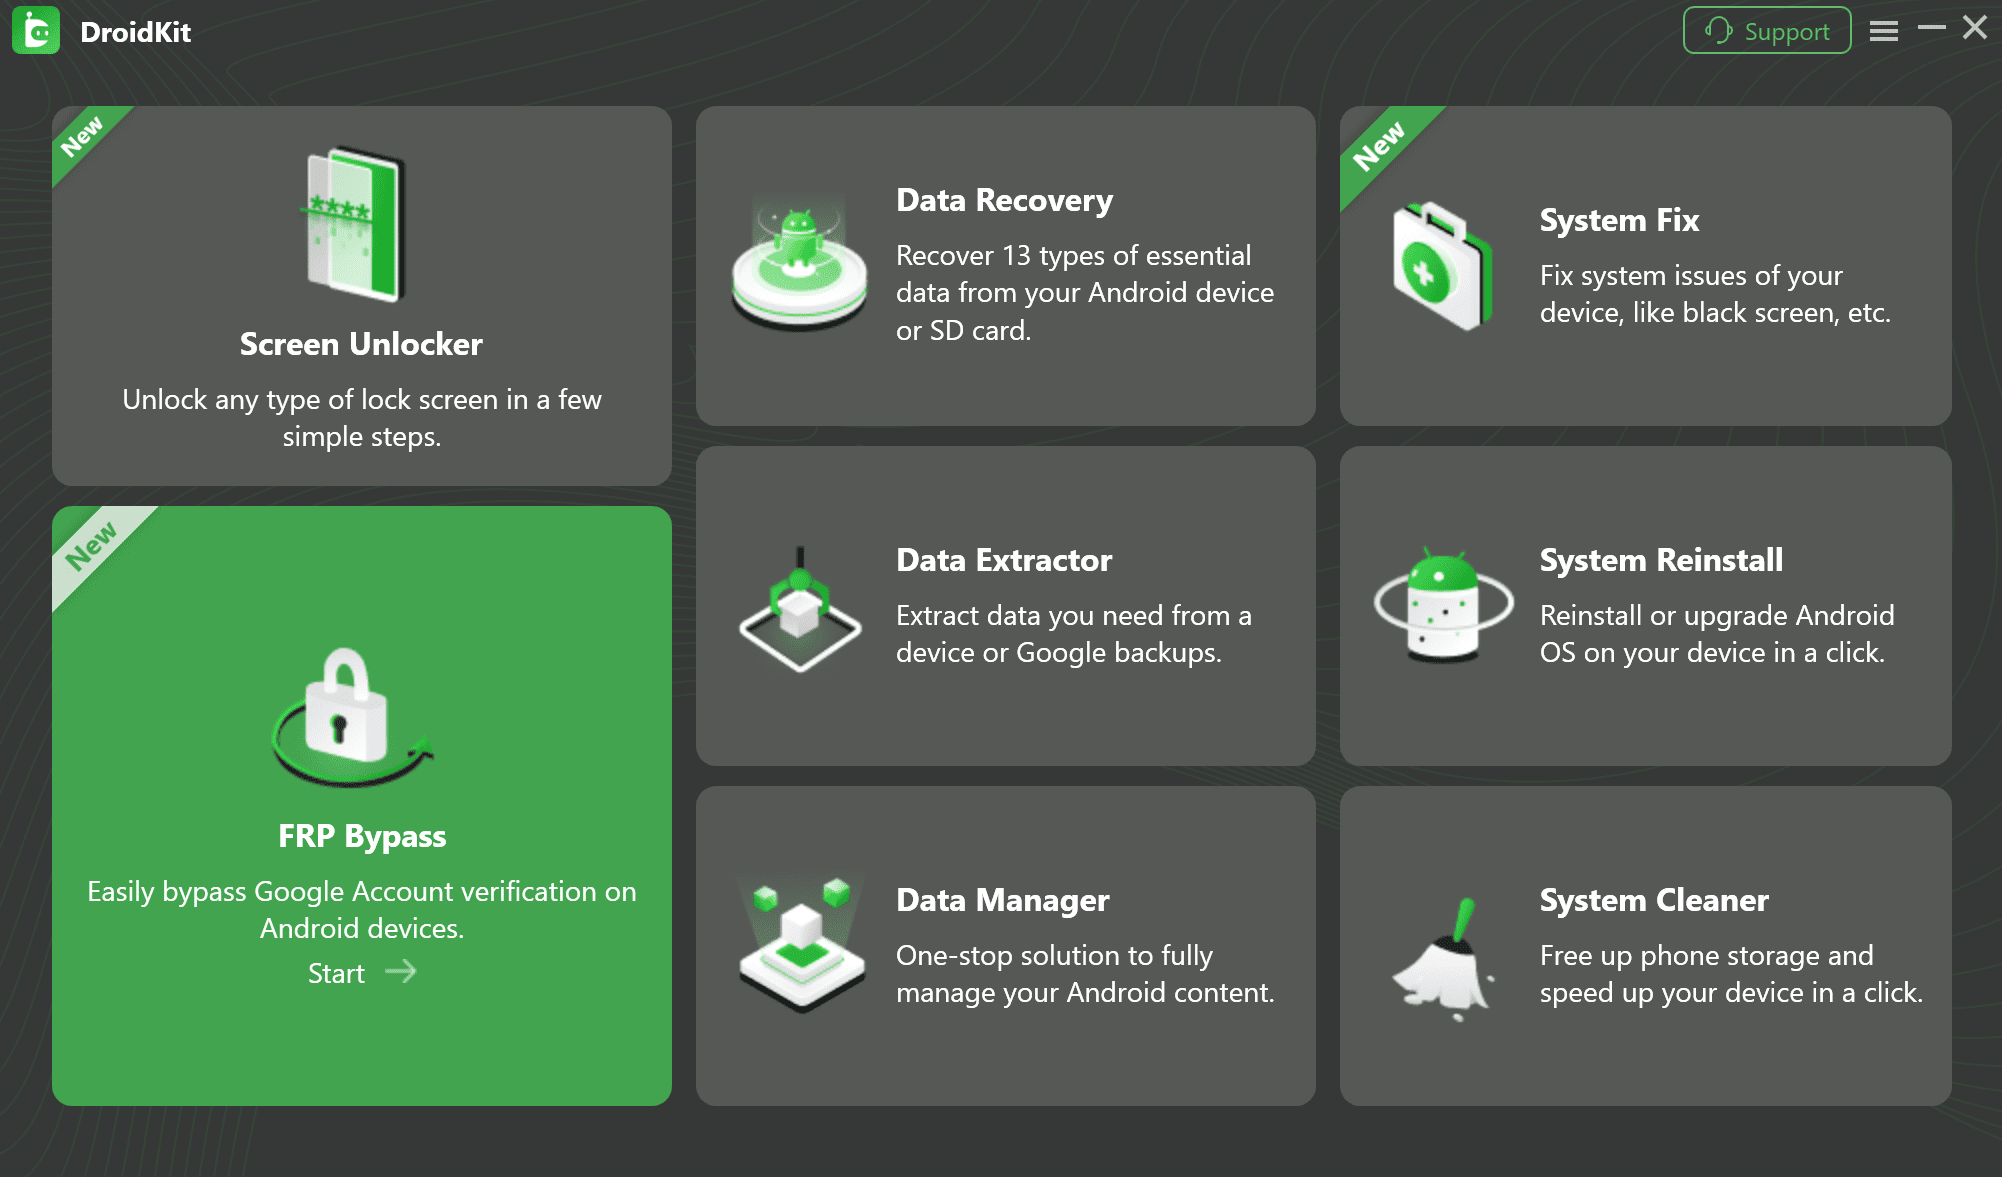
Select FRP Bypass from the home screen
Step 2. Connect the locked Hisense phone to the computer with a stable USB cable, then click Start.
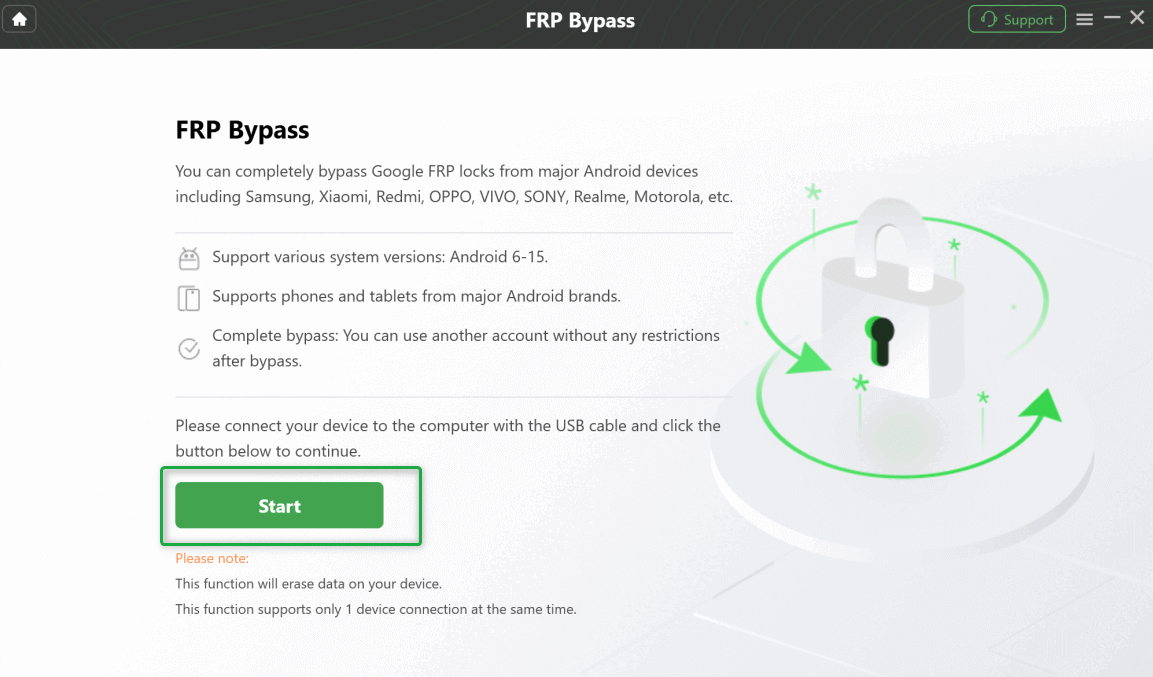
Click Start to continue
Step 3. Follow the on-screen instructions to select the device information requested by DroidKit and prepare the required configuration.
Step 4. Put the phone into the mode shown by the software. The exact instructions can differ by device, Android version, and FRP scenario, so follow the prompts displayed for your case.
Step 5. Keep the USB connection stable while the process runs. When DroidKit reports completion, restart the phone and check the setup screen.
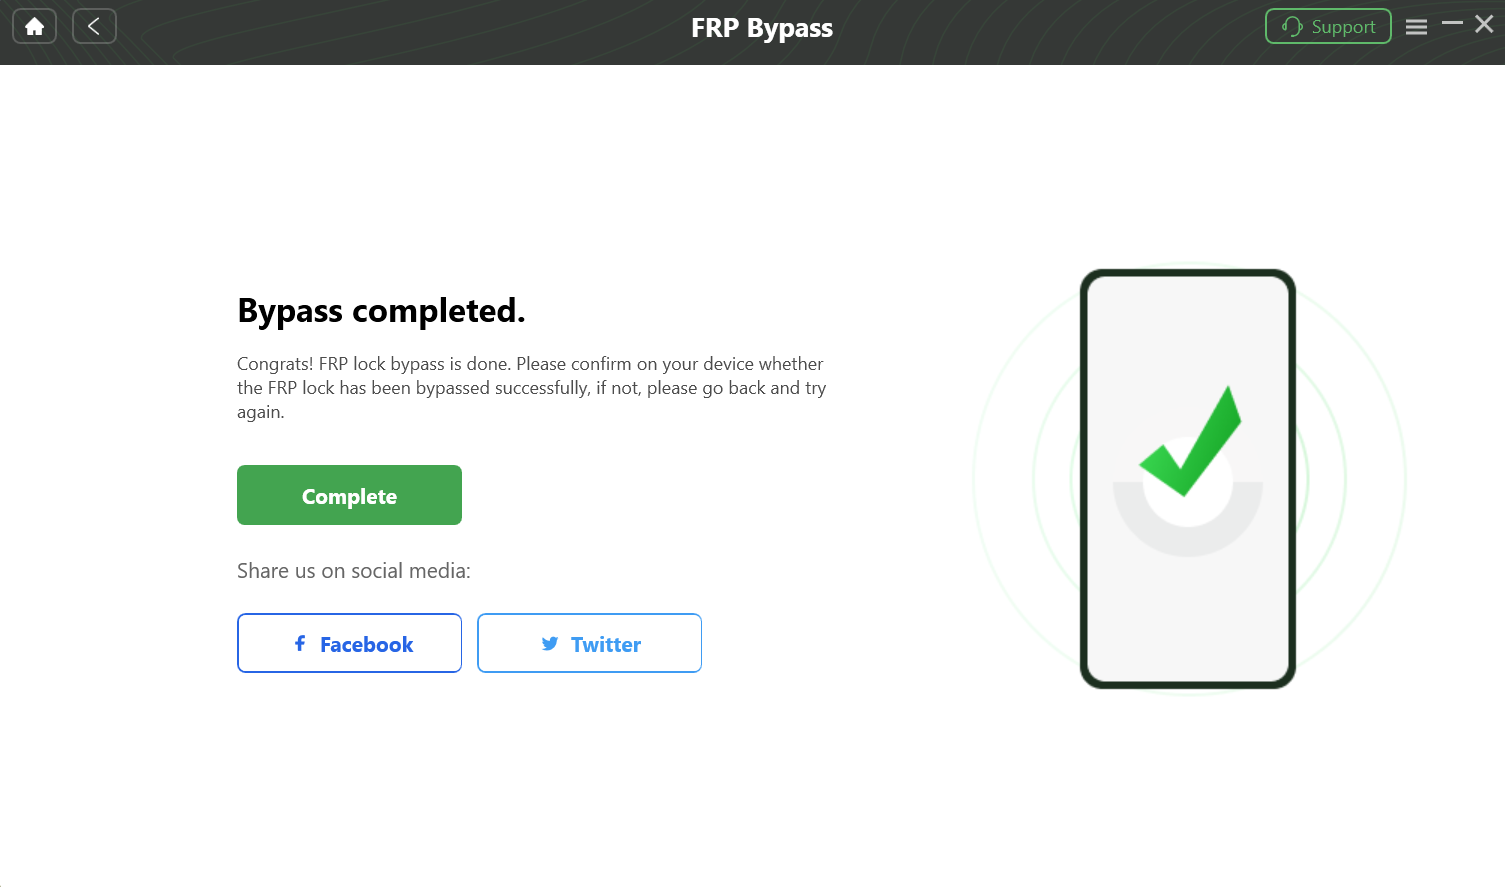
FRP bypass completion screen
Why Hisense FRP Methods Fail
When a Hisense FRP method fails, the failure point often tells you which assumption was wrong. A TalkBack path that never exposes the expected menu points to Android-build differences; an MTK tool that never sees the phone points to chipset, driver, connection-mode, or authorization issues.
Stop repeating the same instructions when you see signs such as:
- TalkBack opens, but the menu or browser path described by the tutorial does not exist.
- The SIM PIN sequence never exposes notification or settings access.
- Windows never detects the phone after the correct driver should have loaded.
- An MTK or SPD/Unisoc tool reports connection, authorization, or package errors.
- The phone restarts but still returns to Google verification.
- An APK is blocked, flagged by security software, or crashes immediately.
For failure patterns that are not specific to Hisense, use the FRP bypass not working guide to identify whether the problem comes from a patched Android route, driver issue, APK restriction, or incompatible method.
Troubleshooting Common Hisense FRP Errors
Use the failure itself to decide what to check next instead of immediately switching to another FRP utility.
| Problem | Likely Cause | What to Check Next |
| PC does not detect the Hisense phone | Driver, cable, USB port, or connection mode is wrong | Confirm the chipset first, reinstall the appropriate driver, change the cable or direct USB port, and retry the required connection mode |
| ADB or Fastboot command does nothing | The method assumes access or debugging that is not available from the FRP setup state | Do not base the entire route on ADB/Fastboot if the prerequisite was never enabled |
| MTK tool does not detect the phone | Wrong driver, wrong chipset, connection-mode issue, or device protection | Verify that the phone is actually MediaTek and solve detection before changing tool settings |
| SPD / Unisoc utility fails to connect | Wrong driver, connection key, package, or model instructions | Recheck the exact model and Unisoc/Spreadtrum workflow |
| TalkBack route opens the wrong screen | The tutorial was written for another Android build or patch | Check whether the required menu still exists on the phone instead of repeating the gesture |
| SIM PIN route exposes no settings shortcut | The setup behavior has changed | Treat the method as incompatible with that firmware and choose another route |
| FRP remains after reboot | The attempted process did not complete or did not match the device | Review the tool’s compatibility and the exact model/Android information before another attempt |
| Downloaded FRP APK will not install | Android restrictions, incompatible package, or unsafe/invalid file | Do not disable protections simply to install an unverified APK; use a trustworthy source or another method |
FAQs About Hisense FRP Bypass
Q1. What is the best Hisense FRP bypass tool?
There is no single tool that is best for every Hisense phone. A MediaTek model and a Unisoc model can need different PC drivers and servicing tools, while a newer Android security patch may remove a TalkBack or SIM route that still works on an older build. Choose only after confirming the exact model, Android version, and chipset.
Q2. How can I bypass FRP on Hisense without the previous Google account?
If the previous account cannot be recovered, available routes depend on the phone. MediaTek and Unisoc devices use different PC workflows; some older Android builds may still expose TalkBack or SIM PIN paths; and compatible PC-based FRP software is another option. These methods are intended for devices you own or are authorized to service.
Q3. Can I bypass FRP on a Hisense phone without a PC?
Only in scenarios where the setup process still exposes the required no-PC entry point. If TalkBack cannot reach the expected menu, the browser path is missing, or the SIM PIN sequence never exposes notifications or settings, that particular route does not match your Android build.
Q4. How do I know whether my Hisense phone is MTK or Unisoc?
Find the exact model number from the device, box, purchase record, or other available documentation, then verify the processor specification for that exact variant. MediaTek hardware may appear under MTK, Helio, or Dimensity naming; Unisoc devices may also be described as Spreadtrum. Do not choose a chipset tool from the brand name alone.
Q5. Can I use SP Flash Tool for Hisense FRP?
SP Flash Tool belongs to the MediaTek tool ecosystem, so it is relevant only when the Hisense device is actually MediaTek-based and the model-specific procedure calls for it. It should not be used as an equivalent tool for a Unisoc/Spreadtrum phone.
Q6. Why did a Hisense FRP method stop working after an Android update?
Setup-screen behavior and Android security restrictions can change with firmware and security patches. If an older TalkBack, browser, notification, SIM, or APK route disappears after an update, the instructions may no longer match that software build.
Q7. Can I download an FRP APK for a Hisense phone?
Older tutorials sometimes rely on APK installation, but the package must still be compatible with the Android version and come from a source you trust. If Android blocks the package, a security product flags it, or the APK immediately crashes, do not keep installing repackaged copies from unknown mirrors.
Q8. What should I do if my Hisense phone is not detected by an FRP tool?
First confirm whether the phone is MTK or Unisoc. Then check the corresponding USB driver, cable, USB port, required connection mode, and exact model instructions. Detection problems should be solved before changing firmware files, format settings, or partition operations.
Which Hisense FRP Method Should You Choose?
The most useful Hisense FRP checkpoint is the one users often skip: identify the exact phone before choosing the tool. MediaTek and Unisoc models belong to different PC workflows, while TalkBack and SIM PIN routes are determined largely by the Android build and security patch.
If the phone is MTK or Unisoc and you are comfortable with drivers and model-specific servicing instructions, follow only the workflow written for that chipset and device. If the setup-screen shortcuts are gone and you do not want to work with scatter files, PAC packages, or low-level servicing utilities, check whether a PC-based FRP application such as DroidKit supports your Hisense scenario before starting.
Free Download * A computer is required for the FRP process.
More Related Articles


Roger Smith is a senior technical writer with years of experience in providing Android solutions. He loves to help users solve various problems such as Android unlock, Android data recovery, and Android system repair.
Product-related questions? Contact Our Support Team to Get Quick Solution >
