How to Transfer Photos from Android to Flash Drive Simply and Easily
How to transfer photos from android to flash drive? This guide will tell you some easy ways to transfer photos from Android phone or tablet to flash drive without computer or OTG.
Android Transfer Tips
Export Data from Android
Import Data to Android
I have put photos taken on my phone into an album. Now, I need them on my laptop. I have a USB that is double-ended. One end fits into the phone, the other into the laptop. I just need to figure out how to move the album to the USB, so I can then move the album to the laptop.
If you also need to move a photo album on your phone to a USB flash drive or memory stick, here you are in the right place. This post will share how to transfer photos from Android to flash drive in some efficient ways. You can also transfer files from phone to computer directly. Besides, some users may face the file transfer option not showing on Android and cannot move files to a flash drive or computer successfully. You will also get answers here. Keep reading to learn more.

Transfer Photos from Android to Flash Drive
How to Transfer Files from Phone to USB without Computer
Can I transfer pictures from my phone to a flash drive? Yes, of course. You can transfer photos from phone to USB stick without computer via OTG connection. OTG is the abbreviation of On The Go adapter, which helps you to connect USB flash driver to your phone. So you can access internal storage and transfer photos from internal storage to your USB sticks. Besides, you can transfer photos between phone and camera with the help of OTG. Here is how to transfer photos from phone to USB stick without computer.
- Insert your USB-C charging port to OTG adaptor, use it to connect your phone and USB flash drive.
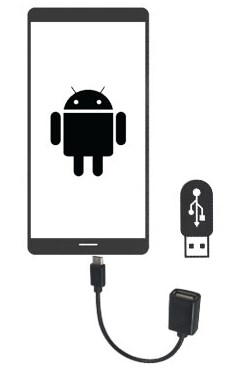
Connect Phone to USB with OTG
- Open My Files app on your phone, click Images, or Videos or Audio.
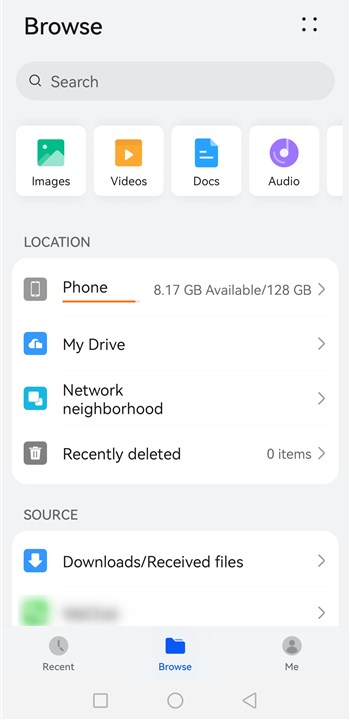
Select Images
- Open Images folder and long-press the photos that you want to transfer.
- Tap on Copy, then back to My Files main screen and click USB storage.
- Choose Copy here, and photos will be pasted to USB flash drive.
- After finished, you need to swipe down notification panel to UNMOUNT your USB safely.
However, if you don’t want to use OTG, how to transfer photos from Android to a flash drive? Just go to the next part to find the answer.
Transfer Files from Android to USB Flash Drive without OTG
OTG allows you to connect your phone to USB flash drive easily. However, this way requires you to select photos one by one, click copy and move to step by step. If you don’t want to use OTG way or even don’t get an OTG connector, how to transfer pictures from Android phone to USB flash drive?
DroidKit – Android Phone Toolkit provides you with Data Manager mode to transfer files from Android devices to flash drive or vice versa. All data types are supported, like photos, videos, messages, contacts, and more. You can freely preview and select files to transfer. Or, for convenience, DroidKit also allows you to transfer all of them in 1 click. No skills or roots are needed.
Besides, as a complete Android solution, DriodKit can also help you transfer data from Android to PC/Android, fix various Android system issues like Samsung black screen, etc., bypass FRP lock, unlock screen lock, etc. You can now preview the steps of how to transfer photos from Android to flash drive.
Step 1. Download DroidKit and Choose Data Manager
Get DroidKit installed on your computer. Open it and locate Data Manager from the home page. Choose Device Manager mode in it.
Free Download * 100% Clean & Safe
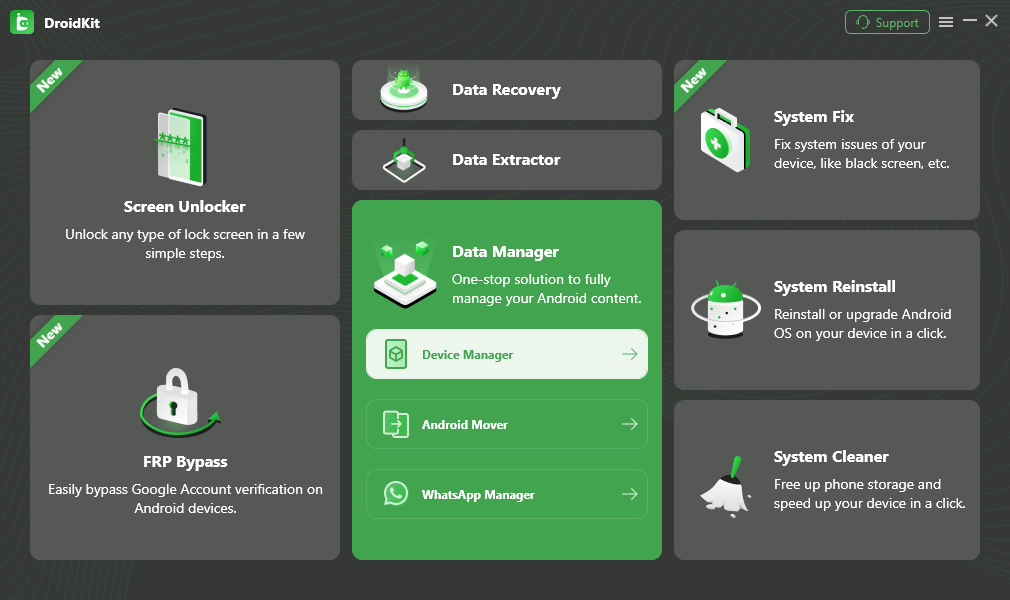
Choose the Device Manager
Step 2. Connect Phone and USB
Connect your phone to computer via USB cable, also connect USB flash drive to computer. Click Start.

Your Device Connected Successfully
Step 3. Select Photos & Videos
When you click Export Content, you will get data types as below. Select Photos, Videos or Audio and continue.
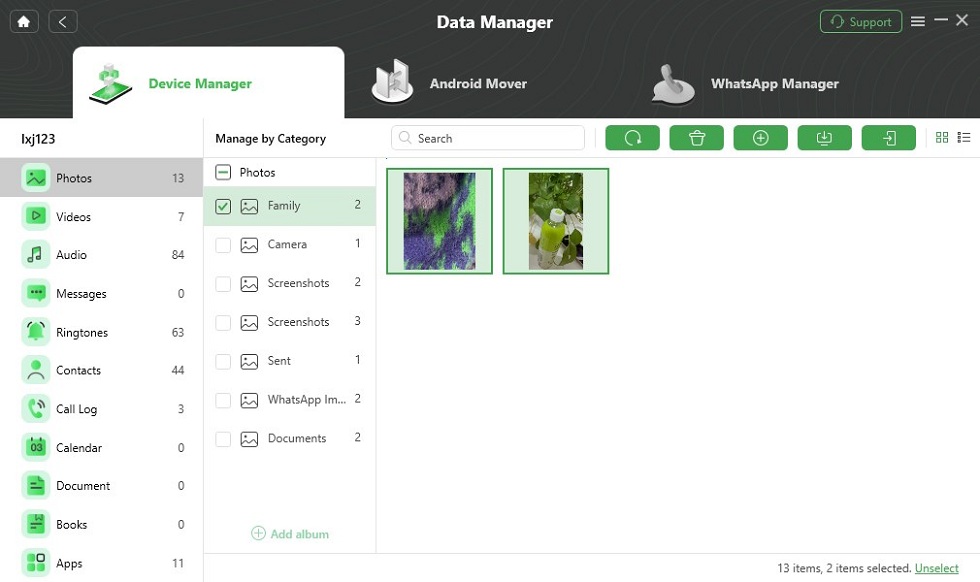
Choose Data You Want to Transfer
Step 4. Move Photos to USB Flash Drive
Confirm your USB flash drive folder as export path and it will start transferring process automatically. After transfer complete, you will get the complete page below. You can check your flash drive folder now.
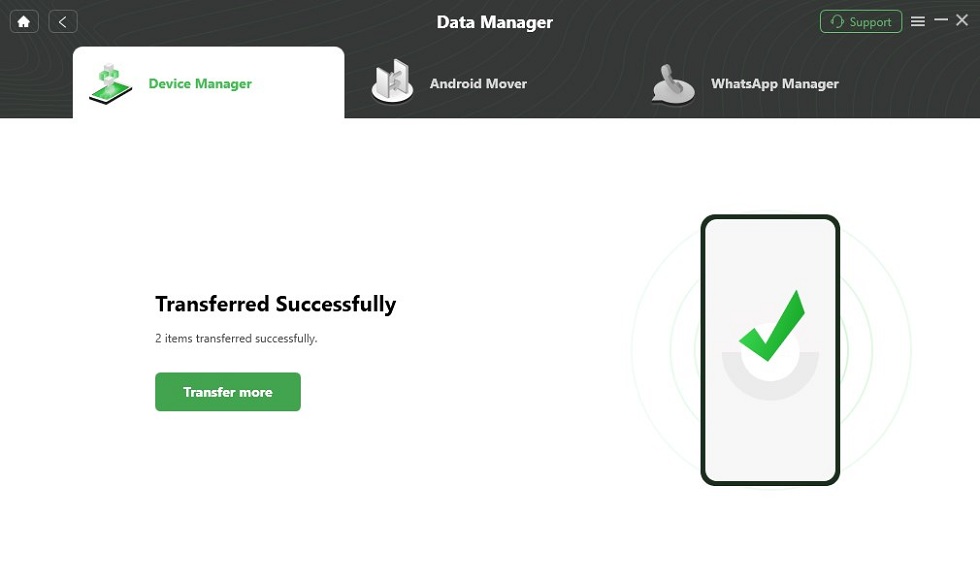
Data Transferred Successfully
Note: When you connect your phone to computer via USB cable, you need to choose Use USB to transfer files. Or, computer may not connect your phone to transfer files.
How to Transfer Photos from Android to Flash Drive from Laptop
How to transfer photos from phone to USB using a laptop? AnyDroid is one all-sided Android data management tool, which can help you take complete control of your Android phone/Android tablet content. It can help you transfer photos from Android to USB via laptop. Here are some of its key features:
How about giving it a try? It supports all Android phones and Android tablets and works well on both PC and Mac computers. Download it now and follow the steps below to see how to transfer photos from phone to USB stick.
- All photos are supported. It will list all your Android device pictures, whether photos taken with the phone’s camera, or pictures downloaded from the browser.
- Quickly find the pictures. All pictures are organized in different folders, which lets you easily find the photos you want to transfer.
- Ensure the picture quality. Copy the original pictures instead of the compressed ones.
- Fast transfer speed. Available to transfer 1500+ pictures in 3 minutes.
- iOS & Android phone to Android. Available to change iOS or old Android to new Android quickly and easily.
How about giving it a try? It supports all Android phones and Android tablets and works well on both PC and Mac computers. Download it now and follow the steps below to move photos from Android to a flash drive.
Free Download * 100% Clean & Safe
Steps to Transfer Photos from Android to Flash Drive
Step 1. Launch AnyDroid > Connect your Android phone via WiFi connection or USB connection. Choose Device Manager > Content to Computer.
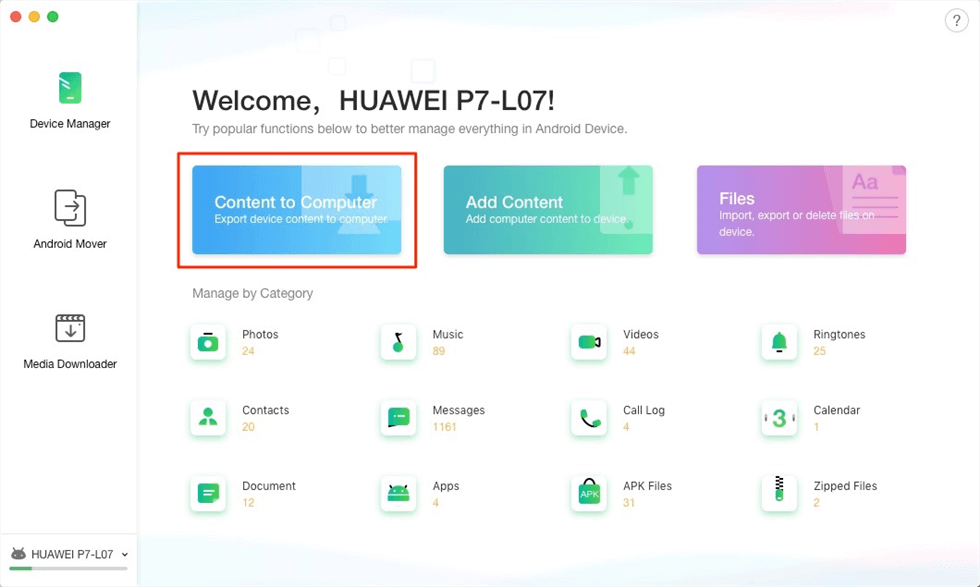
Choose Content to Computer
Step 2. Choose the photos > Click the setting button to change your flash drive as destination > Click Next to start transferring.
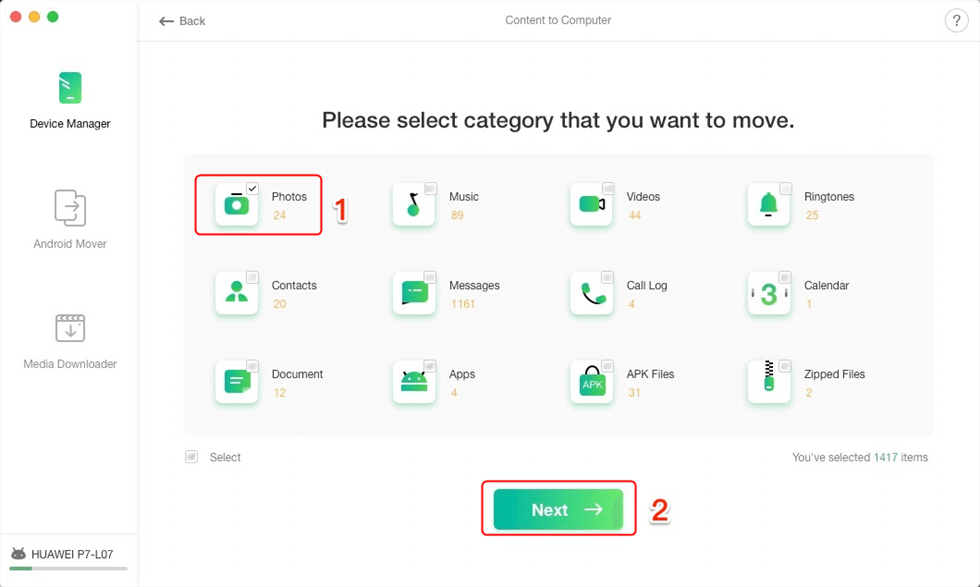
Select Photos Category
Step 3. Connect USB flash drive to computer. Drag and drop photos from computer to your flash drive.
Apart from managing Android photos, AnyDroid also enables you to manage personal data such as contacts, call logs, and messages. Media data such as videos, music, and ringtone are available for you to manage. Once get AnyDroid, you will get full authority on your mobile phone.
How to Transfer Photos from Android to Flash Drive Wirelessly
If there is no USB cable available or your Android cannot be recognized by your computer, then you can try the AnyDroid app on your Android to transfer photos from Android to flash drive wirelessly Before we start, please make sure:
- Install AnyDroid App on your Android phone.
- Make sure your Android phone is connected to Wi-Fi, and cellular data would not work in the following steps.
If you have done all mentioned above, here we go to the detailed steps: Step 1. On your computer: Plug your USB flash drive to computer and you will see a QR Code.
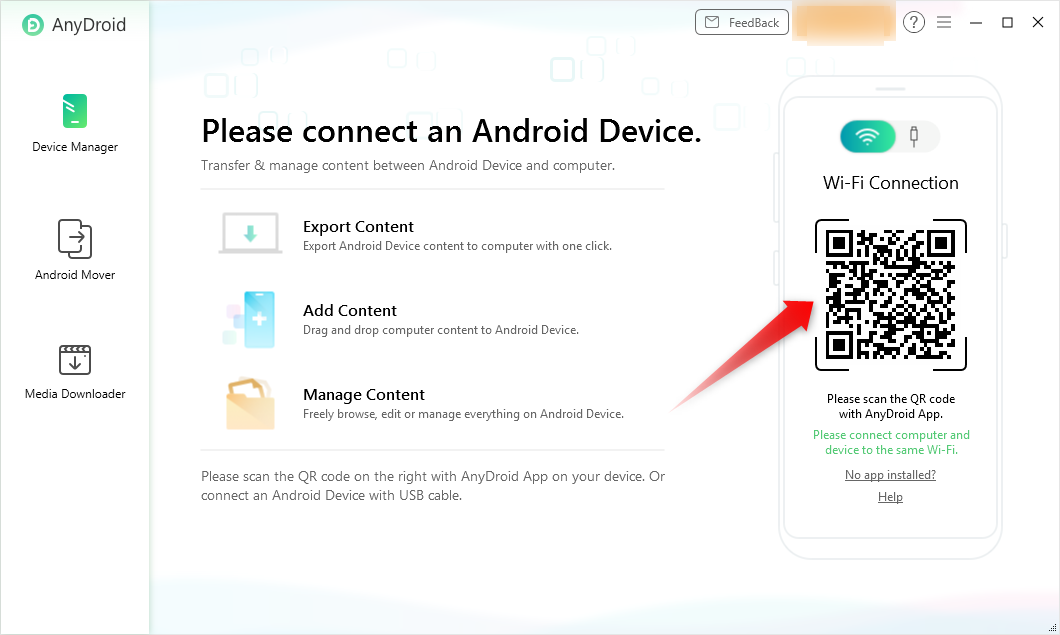
Connect Android with Computer Wirelessly
Step 2. On your Android phone: Open AnyDroid app, and tap on the Scan button to scan the QR code on your computer.
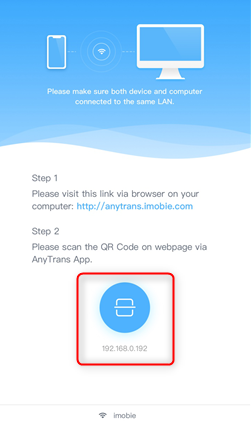
Scan QR Code from your Phone
Step 3. Then all your photos will show up on your computer. Select the photos you want to transfer and click on “Download” button to transfer photos from Android to flash drive wirelessly.(Set your flash drive as export path)
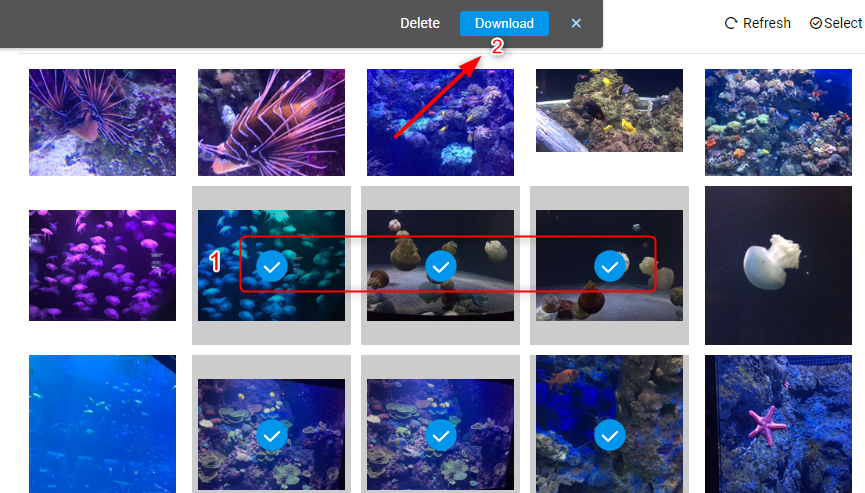
Transfer Photos from Android to Flash Drive Wirelessly
The Bottom Line
No matter it’s not available for using OTG adaptor or computer, you can solve how to transfer photos from Android to flash drive successfully. As you can see, DroidKit can help you transfer your files without effort. Besides photos, it can also help you transfer videos, music, contacts, messages, etc. Just give it a try by yourself!
Free Download * 100% Clean & Safe

Joy Taylor is a seasoned technical writer with over a decade of experience in mobile technology. At iMobie, she specializes in producing in-depth content on iOS data recovery, iPhone unlocking solutions, and iOS troubleshooting.
Product-related questions? Contact Our Support Team to Get Quick Solution >
