How to Clear RAM on iPhone X
Clearing RAM on iPhone X isn’t as simple due to the absence of Home Button. So, in this article, we will show you detailed steps about how to clear iPhone X RAM.
Common iPhone Tips
iPhone Backup Tips
iPhone Cleanup Tips
iPhone X has a decent 3GB of RAM, which should be sufficient for apps and services to work flawlessly and there should be no problems occurring like the earlier models, which have a maximum of 1GB of RAM. But if you ever feel like your iPhone X is getting sluggish, then you should clear iPhone X RAM to force close the background apps that may be eating up the RAM needlessly, and release it for other apps and services. In this post, we will tell you how to clear RAM on iPhone X.
How to Clear RAM on iPhone X
The easiest way to clear iPhone X RAM is by force restarting the device. But that will close all apps that you may be working with. Moreover, you will need the device to restart and this will waste so much of your time. So, if you want an alternative on how to clear iPhone X RAM, here, you will get the best solution to the problem.
Step 1. Go to Settings > General > Accessibility > AssistiveTouch > and slide the toggle to ON position. It will display a gray and white circle on your iPhone X screen.
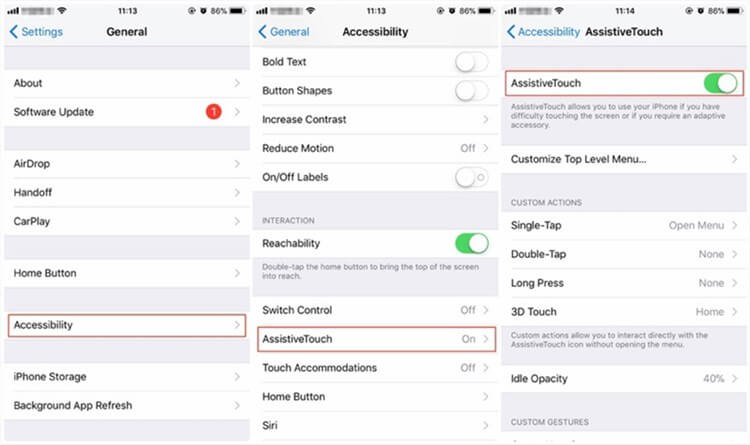
How to Clear RAM on iPhone X – Step 1
Step 2. Now, go to Settings again > Tap General > Drag down and tap on the Shutdown button. It will display the “Slide to power off” interface.
Step 3. Tap on the AssistiveTouch button > Press and hold the Home button from the options displayed for a few seconds until the screen turns black and then white. You will be returned to the Settings and the RAM on iPhone X will be cleared up.
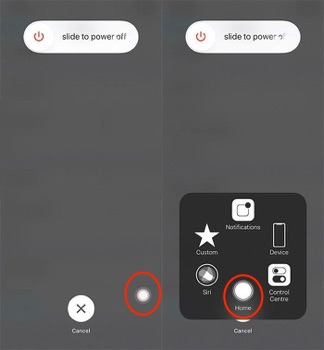
How to Clear RAM on iPhone X – Step 3
When you clear iPhone X RAM, all apps in the App Switcher will also be refreshed. You will be redirected to their initial homepage when you go to those apps.
The Best Way to Fix iPhone X Getting into Trouble
Even Apple had expanded the RAM space for iPhone X, it would also get sluggish years later. It’s not an issue but quite annoying. The method we mentioned above is useful for most iPhone X users. Somehow, many users have reported their iPhone X got stuck in the Apple white logo after this. This is unexpected. But iPhone getting into the problem is also very common. Therefore, in the following part, we’ll recommend a professional iPhone issue troubleshooter, AnyFix, Which supports various fixes to solve iTunes/iOS system issues. like iPhone sticking on a black screen, iTunes error 14, and so on.
The following steps will give a clear and quick tutorial to fix the iPhone X issue.
Step 1. Download AnyFix and start it on your computer > Connect your iPhone X to the computer > Choose the iOS System Repair.
Free Download * 100% Clean & Safe
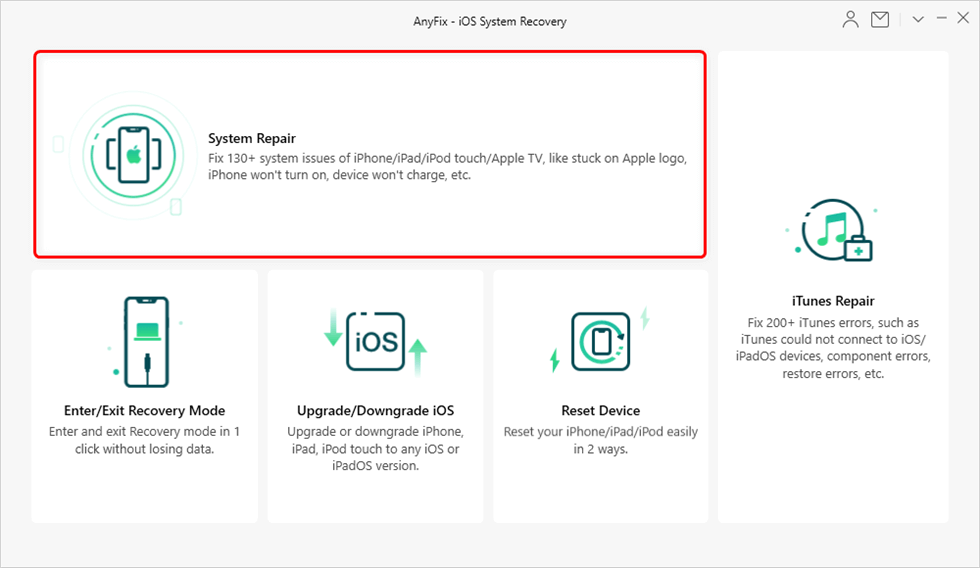
Tap on System Repair
Step 2. Following the guide, choose the 50+ iPhone Problems > Click on the Start Now to continue.
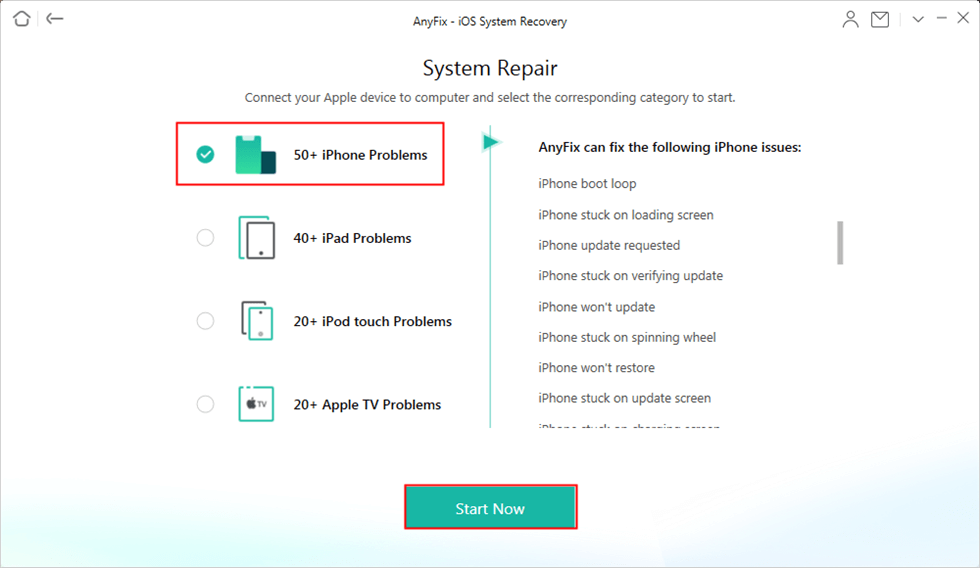
Select iPhone Problems
Step 3. In this step, you can choose one repair mode to repair the iPhone. Generally, we recommend you to choose the Standard Repair which won’t risk any data loss.
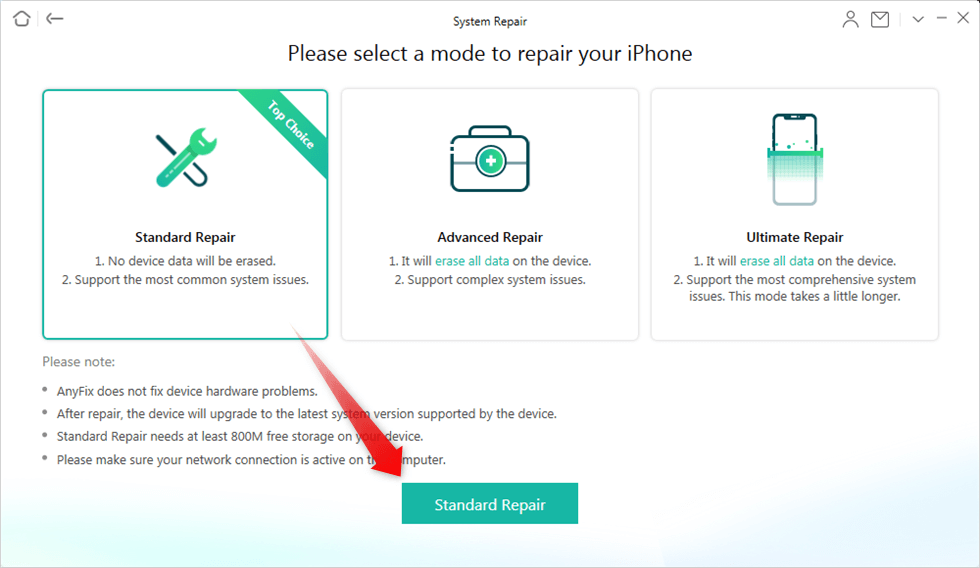
Choose Standard Repair Mode
Step 4. Put your iPhone X into recovery mode > It will lead you to download a firmware file on your computer > After the download is finished, click on Fix Now.
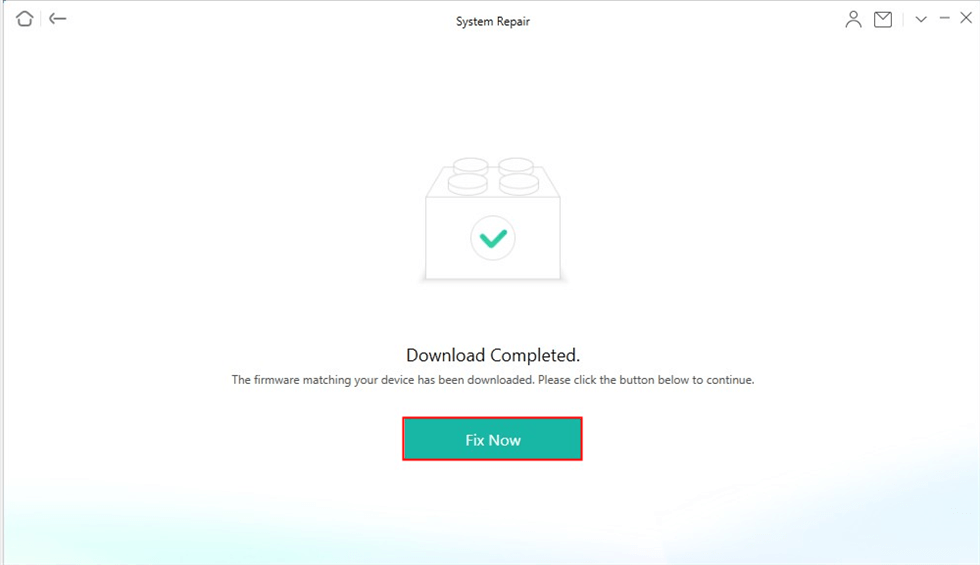
Firmware Download Completed
Step 5. Wait a moment, once it finished the repair, you can get your iPhone back to normal.
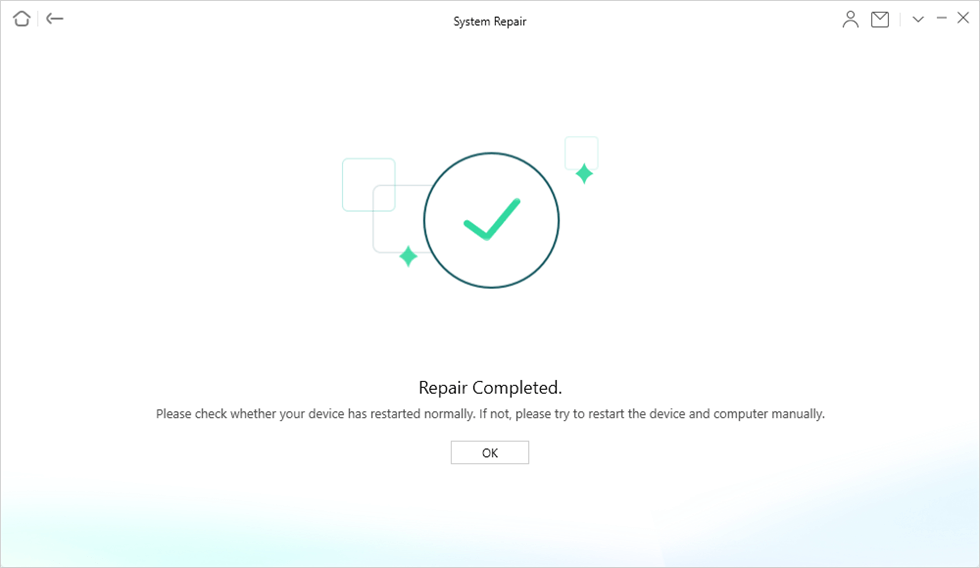
System Repair Completed
Well, now you can use your iPhone as usual. AnyFix can solve over 130 system issues for Apple’s equipment and over 200 iTunes errors. If your device gets into any problems, you can give AnyFix a try. It won’t let you down.
How to Recover Deleted App Data from iPhone X
If you mistakenly deleted some important app data on your iPhone X, then here’s the way to get them back effortlessly. When you delete an app on the device, the app data doesn’t get deleted until being overwritten by newly generated data. Also, these deleted app data will be marked as deletion and become invisible to you. To recover the app data, you just need to find these hidden files.
However, it is almost impossible to find these marks, unless get help from some professional iOS data recovery software. PhoneRescue for iOS is just the exact one, which has helped millions of iOS users recover deleted or lost app data successfully.
It supports recovering deleted app documents, app photos, app audios, app videos, etc. Also, you can preview and selectively recover the data you wanted most. Besides app data, it also supports recovering deleted photos, messages, contacts, videos, ringtones, notes, etc. Now, let’s check its detailed steps on iPhone X app data recovery.
Step 1. Free Download PhoneRescue for iOS on your Mac/PC firstly > Connect your iPhone X to the computer via USB cable.
Free Download * 100% Clean & Safe
Step 2. Choose Recover from iOS Device mode > Click on Right Arrow to continue.
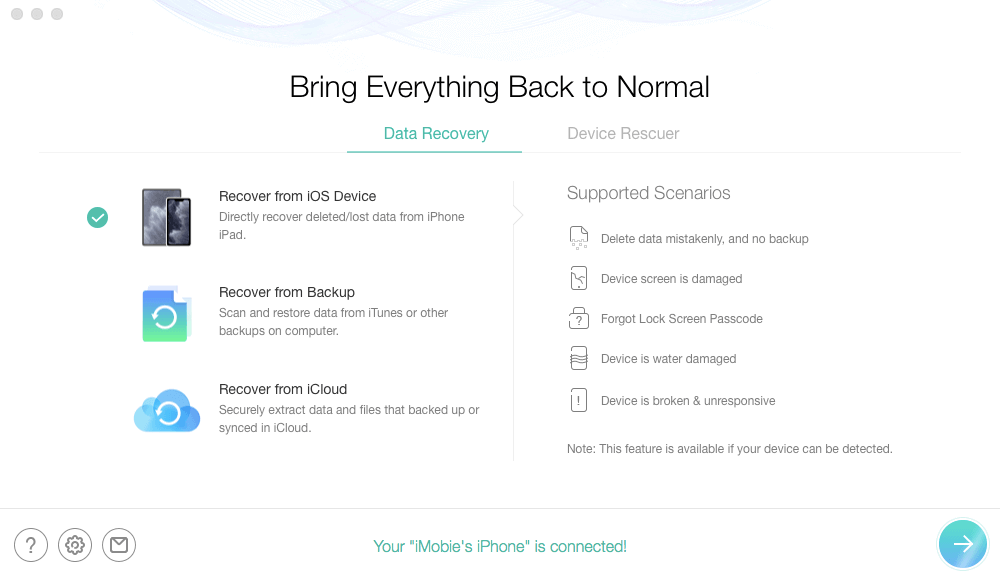
Recover from iOS without Backup
Step 3. Scroll the screen down and check the app data you want to recover > Click OK button to scan those app data. If you want to recover other data like photos, messages, etc. at the same time, just check the file categories.
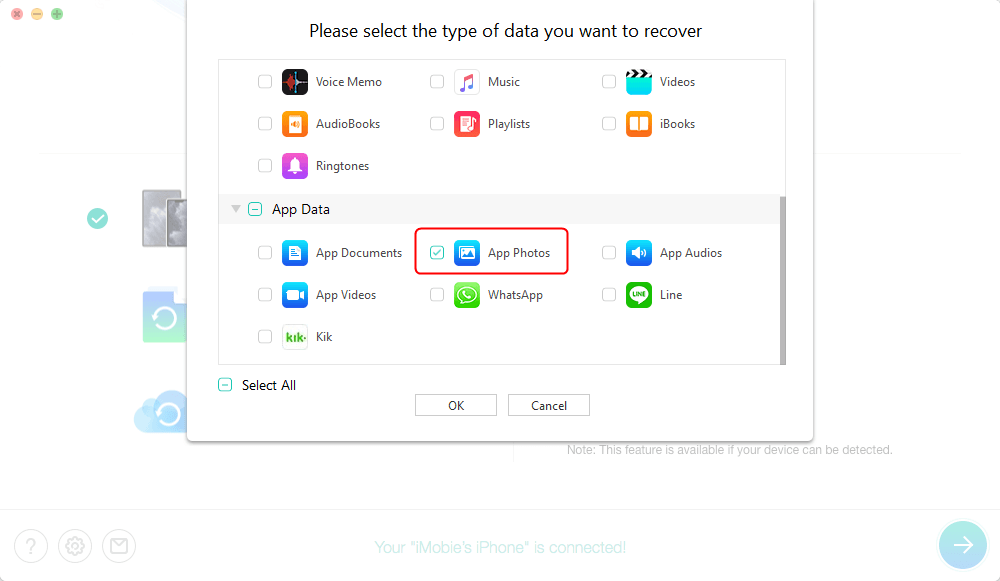
Click App Photos and Scan Snapchat Photos
Step 4. Preview and select the app data you prefer > Click on To Computer or To Device button to get them back now.
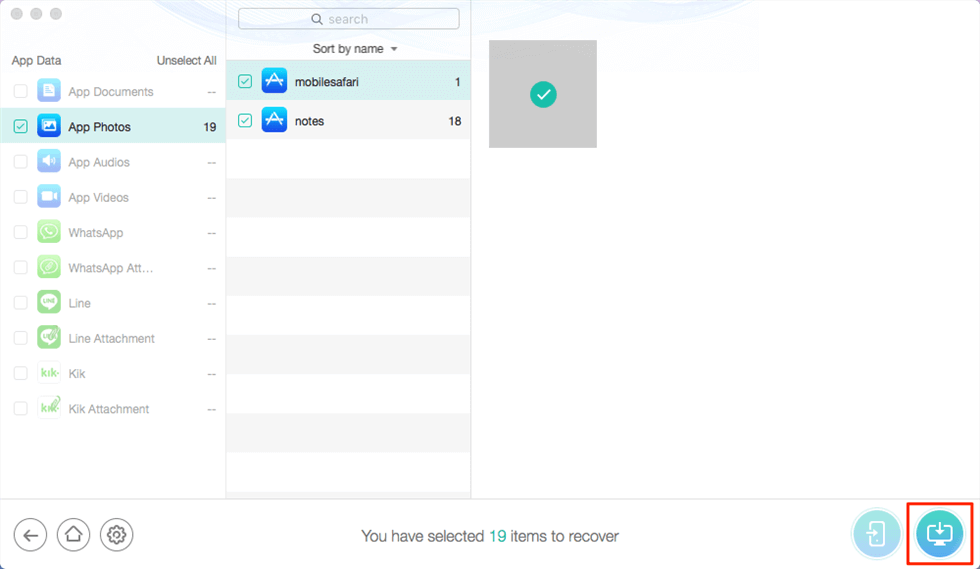
Preview and Recover App Data – Photos
Hot Topic: What to Do if You Forget Your iPhone/iPad Password >
The Bottom Line
Since iPhone X doesn’t have a Home button, you need another way to clear iPhone X RAM. In the article above, we have shown you how to clear RAM on iPhone X even without the physical Home button. If you have any other trouble when clearing iPhone X RAM, feel free to leave your comments below and we will reply to you soon.

Member of iMobie team as well as an Apple fan, love to help more users solve various types of iOS & Android related issues.
Product-related questions? Contact Our Support Team to Get Quick Solution >
