How to Fix Unable to Activate Touch ID on this iPhone/iPad
If your iPhone says unable to complete Touch ID setup or Touch ID stops working on iPhone? This guide collects the most common solutions to help you out.
Common iOS Issues & Tips
Siri Issues & Tips
iPhone Screen Issues
WiFi & Battery Issues

Touch ID Not Working on iPhone
Touch ID is a way to secure your iPhone or iPad and make purchases in the App Store or iTunes Store. It was first introduced on iPhone 5s. Touch ID has been applied on every subsequent iPhone, including iPhone SE (2nd generation) until it was replaced with Face ID on iPhone X or later. And for iPad series, Touch ID has been used on iPads since the iPad Air 2 until iPad Pro (1st generation and 3rd generation).
However, many iPhone users reported that they failed to activate Touch ID after iOS update, or fingerprint is not working at all. So to help more people solve this problem, here in this guide, we will show you how to fix Touch ID failed issues which will work on your iPhone 5/6/7/8.
Also Read: How to Get into a Locked iPhone without Passcode >
Why Is My Touch ID Not Working
Touch ID not working is most likely to happen because your fingers or fingerprints are not clean when touching the Home button. Or, the touch ID may scan failed while you are using a case or screen protector and the home button is covered. Besides, if one fingerprint is not working, maybe you need to re-add another one. What’s more, if your touch ID hardware is broken, maybe you need to go to an Apple store or contact Apple Support.
Touch ID not working may cause you unable to activate touch id on your iPhone or iPad. So, read the following methods to fix the touch ID not working issue.
Fix Touch ID Not Working Issues on iPhone/iPad [7 Ways]
1. Turn off the Touch ID Features then Back on
Go to Settings > Touch ID & Passcode > Enter your Passcode. Then turn off the iTunes & App Store. Reboot your iPhone or iPad. Go back to Touch ID & Passcode in Settings and turn the iTunes & App Store back on. Tap on Add a Fingerprint to add another fingerprint.
2. Remove and Re-add Fingerprints
Go to Settings > Touch ID & Passcode > Enter the passcode of your device > Scroll down to find fingerprints > Tap on the fingerprint, which you want to delete > Then tap on Delete Fingerprint. Repeat this until all your fingerprints are removed > Tap on Add a Fingerprint > Follow the on-screen instructions to set up a new fingerprint.
3. Fix Touch ID Not Working Issues Directly with Professional Repair Tool [Safe & Easy]
If your Touch ID not working is not caused by a hardware problem, you can try AnyFix – iOS system recovery. It can fix 150+ iOS / iPadOS / tvOS issues, covering almost all system issues you may encounter. So when you faced Touch ID failing to activate, fingerprint scanner not working, or other issues. AnyFix has the opportunity to help you out by fixing the corrupted system causing your iPhone touch ID not working issiue .
AnyFix is a highly sophisticated iOS repair system that powers the mind-blowing features required to rescue your iPhone from over 150+ issues without compromising it. This software helps you clear glitches, and bugs distorting the operations of your iOS system professionally by simply installing the most recent firmware package.
Key Features:
- Committed to fixing over 150+ iPhone, iPod, and iPad-related issues without damaging your system.
- It offers 3 repair modes to ensure you can fix the system problem with the highest success rate.
- Suitable for managing iTunes errors, including error 4000, error 10, and many others.
- Easily switch between old and new iOS with minimal stress.
- Offers standard, advanced, and ultimate repair modes as you need to fix your device.
Free Download * 100% Clean & Safe
How to Fix Touch ID Not Working Issues with AnyFix:
Step 1: Download and install the latest version of AnyFix on computer. Then launch AnyFix and you will see the interface as below. Then tap on System Repair.
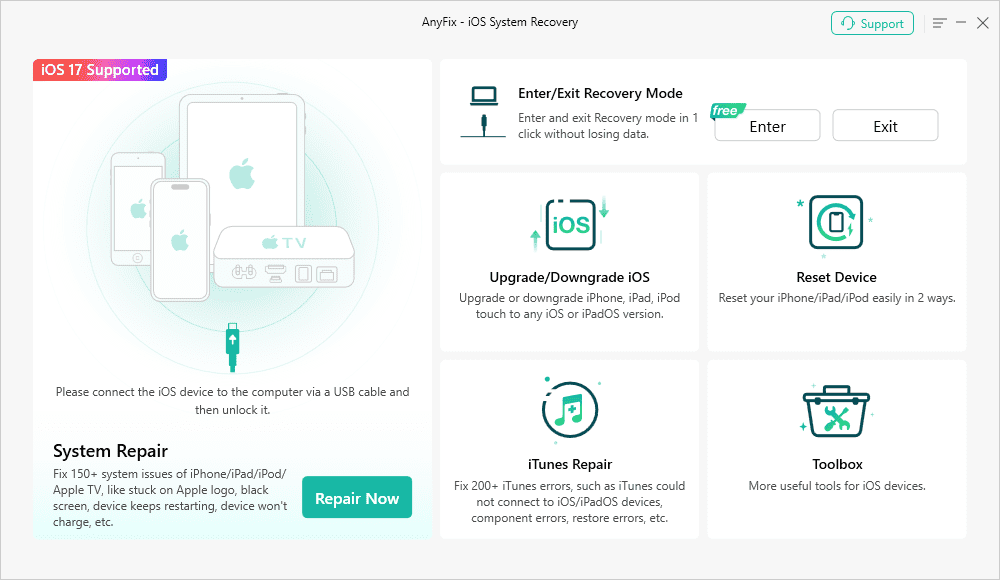
Click on System Repair
Step 2: Next, connect your iPhone with a USB cable. Then choose the corresponding category – iPhone Problems and tap on Start Now.

Choose iPhone Problems and Click on Start Now
Step 3: Select a mode to repair your iPhone. Here we take Standard Repair as an example, which can help you fix the most common issues and no data loss.
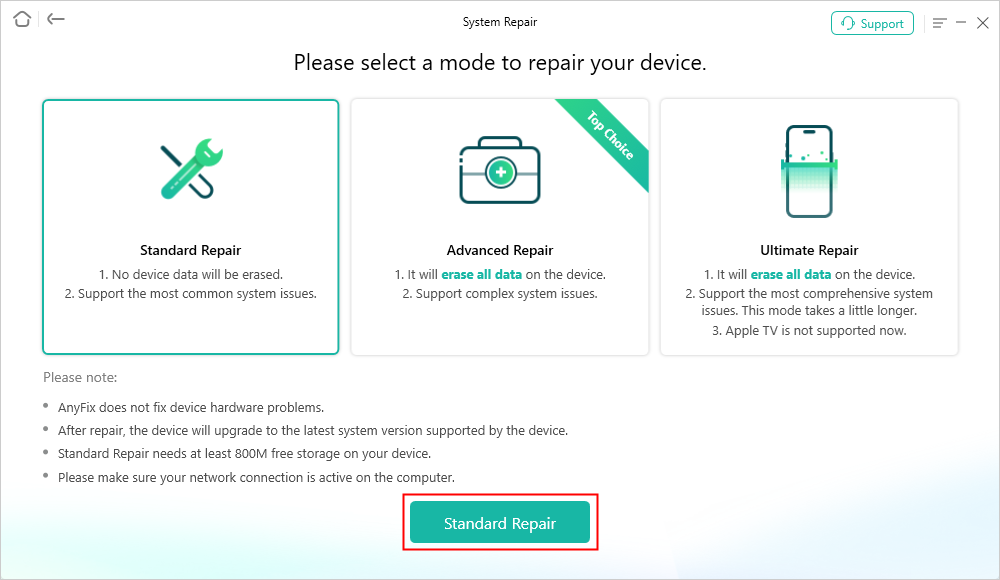
Choose Standard Repair
Step 4: AnyFix will check your iPhone model and you need to click Download to get a matching firmware. When the download finished, just tap on Start Stardard Repair. It will ask you to enter recovery mode if you didn’t enter before. Now, follow the steps on the interface to put your iPhone in recovery mode.
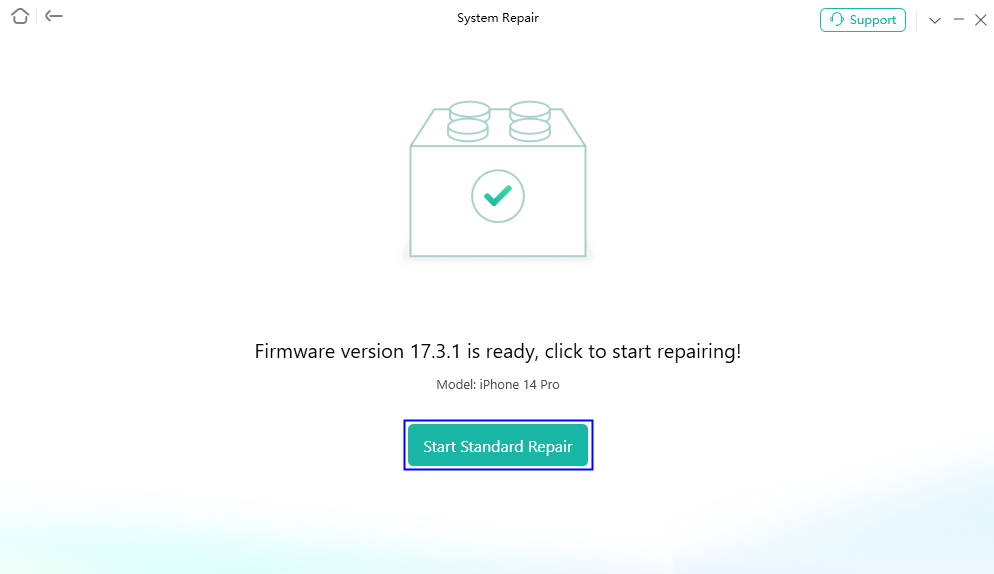
AnyFix System Repair Firmware Finish Downloading
Step 5: Once your iPhone entered recovery mode, AnyFix will automatically start to repair your device. Wait a while and when the recovery process is completed, you will see the completed page.
Free Download* 100% Clean & Safe
4. Cover the Home Button Completely
Make sure the fingerprint sensor works by covering the Home button completely with your finger, touching the surrounding metal ring. While Touch ID is scanning your finger, you shouldn’t tap or move around too quickly. And If you’re using a phone case or protective one, make sure it doesn’t cover the Home button or the surrounding ring. Or, you can remove your phone case or screen protector and try again.
5. Make Sure both your Finger and Home Button are Dry
If your finger is sweat or there is liquid on your iPhone, you need to wipe both your finger and your home button.
6. Force Restart your iPhone or iPad
If the Touch ID still not working, you need to try to force restart iPhone/iPad. To force restart the device with Touch ID: Hold down Wake/Sleep button until the Apple logo appears > Slide to power off.
7. Unlock iPhone without Pressing Home Button
If you don’t like this “Press home button to unlock” feature, you can also open your iPhone with “Rest Finger to Open” and “Raise to Wake”, which allows you to unlock iPhone with Touch ID (Fingerprint) without pressing the home button.
- To enable Rest Finger to Open: Settings > General > Accessibility > Home Button > Toggle Rest Finger to Open to ON.
- To enable Raise to Wake: Settings > Display & brightness > Toggle Raise to Wake to ON.
Fix Unable to Activate Touch ID on iPhone/iPad
If your iPhone/iPad says failed – unable to complete Touch ID setup or unable to activate Touch ID, then you can try the following methods to fix the issue:
Tip 1. How to Activate Touch ID on iPhone
First, make sure that the Touch ID sensor and your finger are clean and dry when you activating the Touch ID. And follow the steps below:
- Launch Settings app.
- Click Touch ID & Passcode and enter your passcode.
- Tap on Add a Fingerprint (put your finger on the Touch ID sensor steadily and do not move your finger around when touching).
- Let your finger go until you feel a quick vibration or until you’re asked to let it go.
- Follow the on-screen instructions to finish.
Tip 2. Make Sure your Finger Surface Gets Scanned
During the registration process, make sure your finger surface gets scanned and try a different angle.
Tip 3. Turn Passcode Off and then On
Go to Settings > Touch ID & Passcode > Click Turn Passcode Off > Restart your iPhone > Set up Touch ID again via Settings.
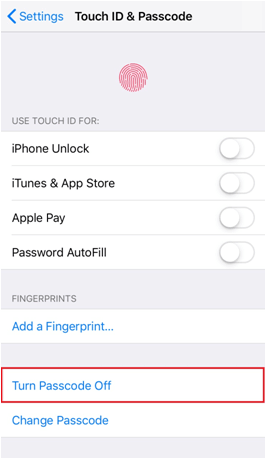
Turn Passcode Off
Tip 4. Sign out Apple ID and then Sign in
Go to Settings > Tap [your name] > Tap on Sign out > Then sign in again and try to use Touch ID.
Tip 5. Try to Reset the Device
If a restart does not help try a restore. First backup your device to avoid data loss. Then connect your iDevice to computer and launch iTunes > Click on the device button and choose Summary > Tap on Restore iPhone.
Based on the former iOS 8/9/10/11 update experience, there are various types of issues or bugs you may meet when downloading iOS 12, for instance, iPhone frozen during the update, Wi-Fi not working after updating, or iMessage problems, etc.
The Bottom Line
If you meet any other new issues with Touch ID on your iPhone or iPad, you can share it with us in the comment section. And any suggestions or fixes for Touch ID failed are welcomed. In case that you may lose some important iOS content when updating to the new iOS, we provide you with three ways to retrieve lost data on iPhone/iPad.
If you prefer a way to easily solve this problem without any data loss, AnyFix is worth a try!
AnyFix – iOS System Recovery Tool
- Fix iPhone/iPad/iPod Touch system problems, like iOS stuck, frozen, etc.
- Fix 200+ iTunes errors, including iTunes update, restore, sync, etc.
- Three Repair Modes for system recovery to improve the success rate.
- Free to update iOS or 1-click to reset device.
Free Download100% Clean & Safe
Free Download100% Clean & Safe
Free Download * 100% Clean & Safe
More Related Articles

Senior writer of the iMobie team as well as an Apple fan, love to help more users solve various types of iOS & Android-related issues.
Product-related questions? Contact Our Support Team to Get Quick Solution >
