How to Transfer iTunes Library to New Mac
Get a new Mac but don’t know how to transfer your iTunes library from the old computer to the new one? Well, this article can help you out with two simple solutions on how to transfer iTunes library to new Mac.
Common iTunes Tips
iTunes Music Management
iTunes Library Transferring
Fix iTunes Issues
Q: How to transfer iTunes library to my new Macbook? I would like to move my entire iTunes Library from my Windows PC to an external hard drive and I’d like to keep it there because it won’t fit onto my new Macbook Air. I am happy to plug this in whenever I wish to use my iTunes Library.
–A User from Apple Community
With a large iTunes library, it would not be an easy case for you to transfer it to your new Mac. Transfer data between two computers can be pretty annoying. With diverse genres of content in your iTunes library, it would be nice if you can find a good tool to transfer it simply and quickly.
And to help you out, in this article, we shall render you efficient methods on how to transfer iTunes library to new Mac.
How to Transfer iTunes Library to New Mac via External Hard Drive or USB Drive
Step 1. To find the location of your iTunes media folder, launch iTunes on your old computer > Then click “Edit” (PC) or “iTunes”(Mac) on the menu bar > Preferences > Advanced > Here you will see the “iTunes Media folder location” in your computer.
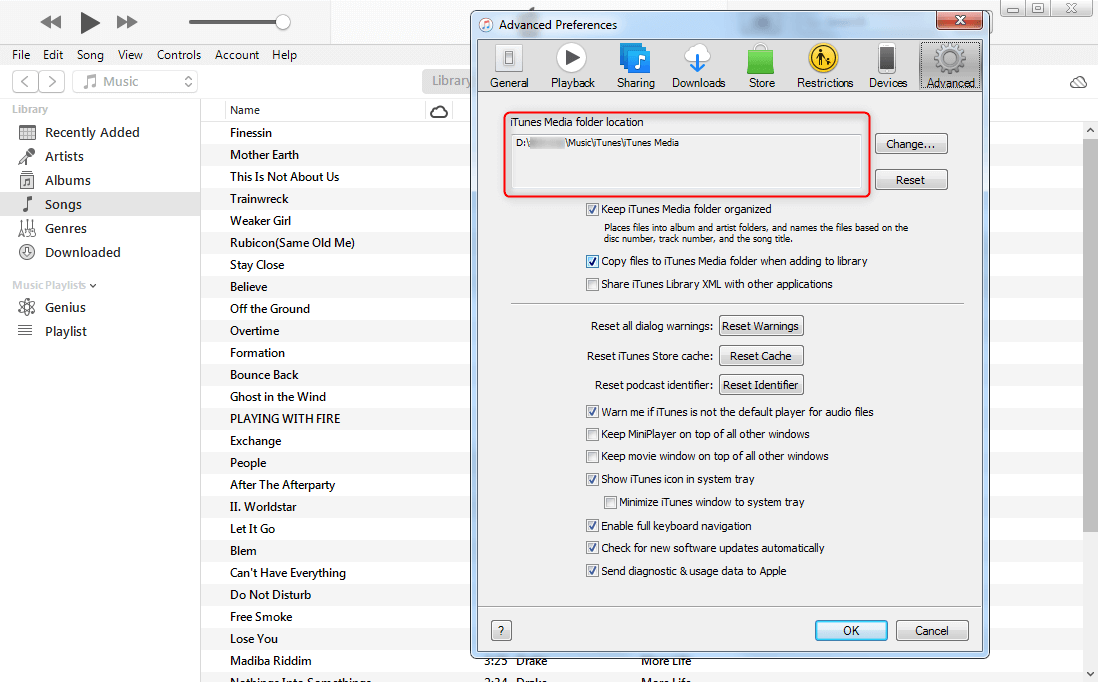
Find iTunes Media Folder Location
Step 2. Then click File > Library > Organize Library > Check the box named as “Consolidate files” > Click OK.
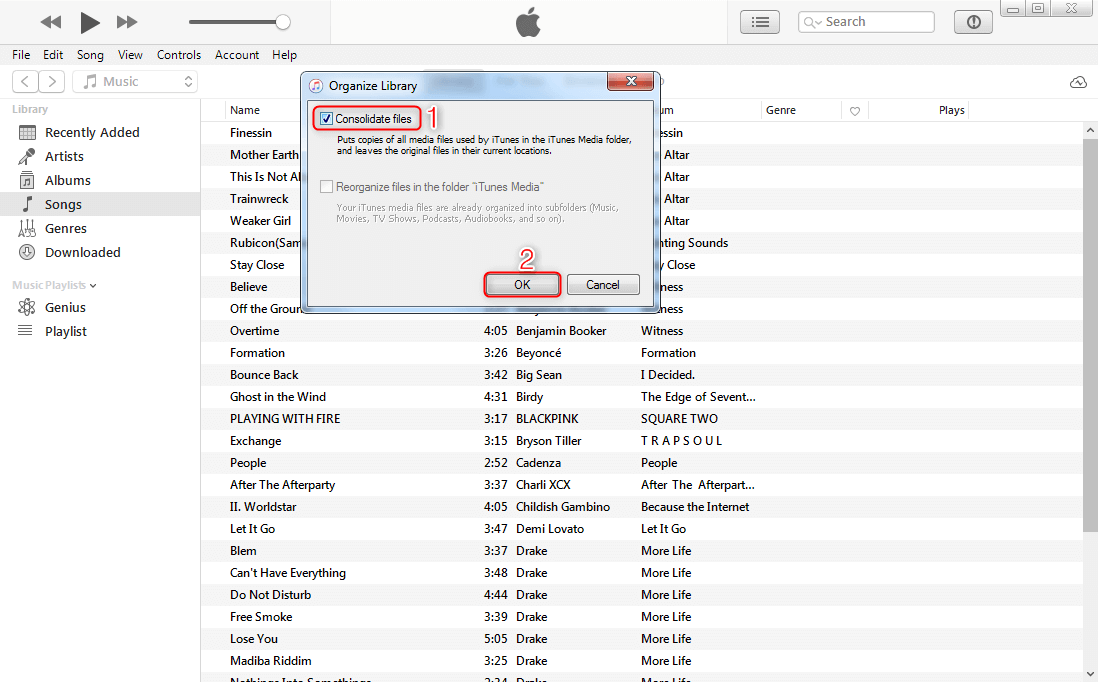
Organize Library as Consolidate Files
Step 3. Quit iTunes > Connect your external hard drive or USB drive to the computer > Open the iTunes media folder from the location in step 1 > Drag the folder to the external hard drive/USB drive.
Step 4. Open iTunes > Then click “Choose Library” in the pop-up window > Select the iTunes library folder in your external hard drive.
Step 5. On your new Mac, connect your external drive to Mac > Click Finder on your new Mac > Choose the Music folder > Then drag the iTunes library folder in the external drive to the Music folder in new Mac.
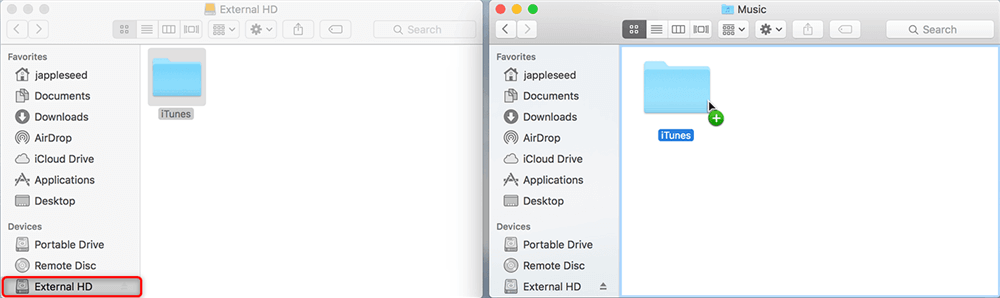
Drag iTunes Library Folder to New Mac
Step 6. Launch iTunes on your new Mac > Hold down the Option key while opening iTunes > Click “Choose Library” in the pop-up window > Select the music folder in your local hard drive > Choose the iTunes library folder > Click Open.
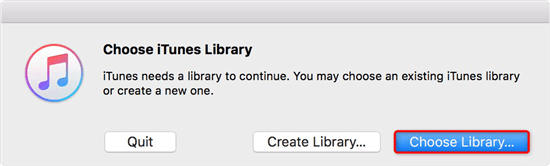
Choose an Existing iTunes Library on New Mac
If you do have iPod classic, iPod nano, or iPod shuffle, you can also use it as a hard drive in iTunes on Mac. Connect the iPod to your computer > Click the device icon on your iTunes > Summary > Select “Enable disk use” > Click Apply.
How to Transfer iTunes Library to New Mac via AnyTrans
Besides manually moving your iTunes library to a new Mac, there is an easier and quicker way for you to achieve it – AnyTrans. It is a professional iOS data manager that allows you to simply transfer your iOS data from one device to another.
- Transfer media content selectively or wholly from iTunes to your computer or another iDevice without hassle.
- Transferring music speedily. AnyTrans supports you to transfer more than 1000 songs in minutes.
- Manage and transfer almost all your iOS data like contacts, photos, ringtones, music, calendar, from one iDevice to another, or from iDevice to computer and vice versa.
- No leak or loss of data. AnyTrans assures that all the data in the process of transferring would not be leaked or lost.
AnyTrans – iTunes Music Transfer
Want to transfer your iTunes library to another Mac simply and quickly? You can easily achieve it with this helper – AnyTrans. It can help you transfer your media content from iTunes to an iDevice or computer without hassle.
Download AnyTrans now on your Mac and follow the below steps to know how to transfer the iTunes library to a new Mac.
Step 1. Launch AnyTrans > Connect your iDevice to the new Mac.
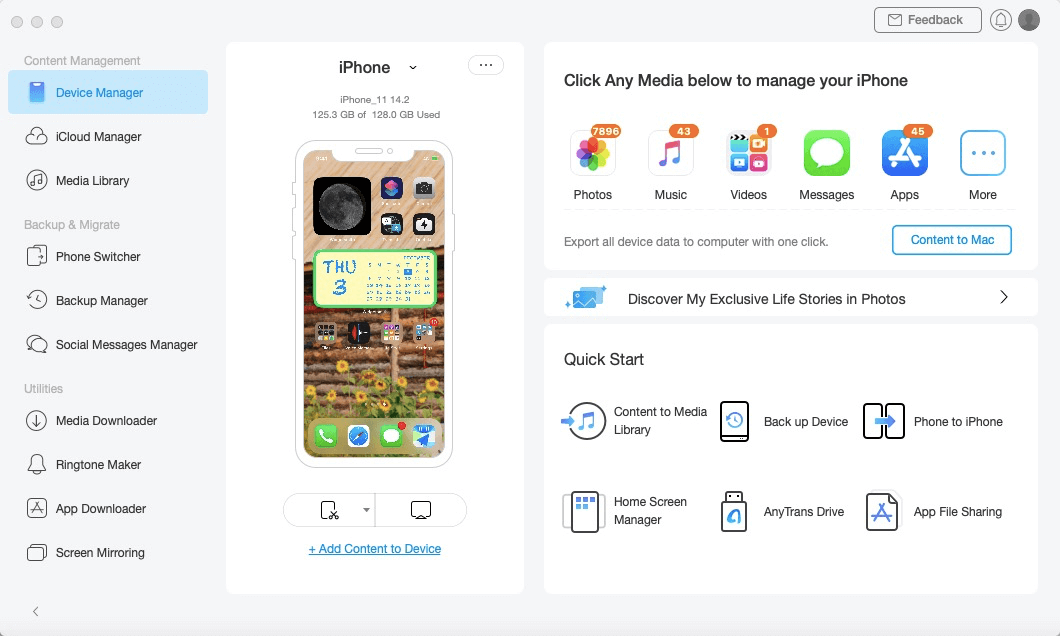
Connect iPhone with AnyTrans Mac Version
Step 2. Choose iTunes Library on the left main menu > Select the Files you want to transfer > Click To Mac button.
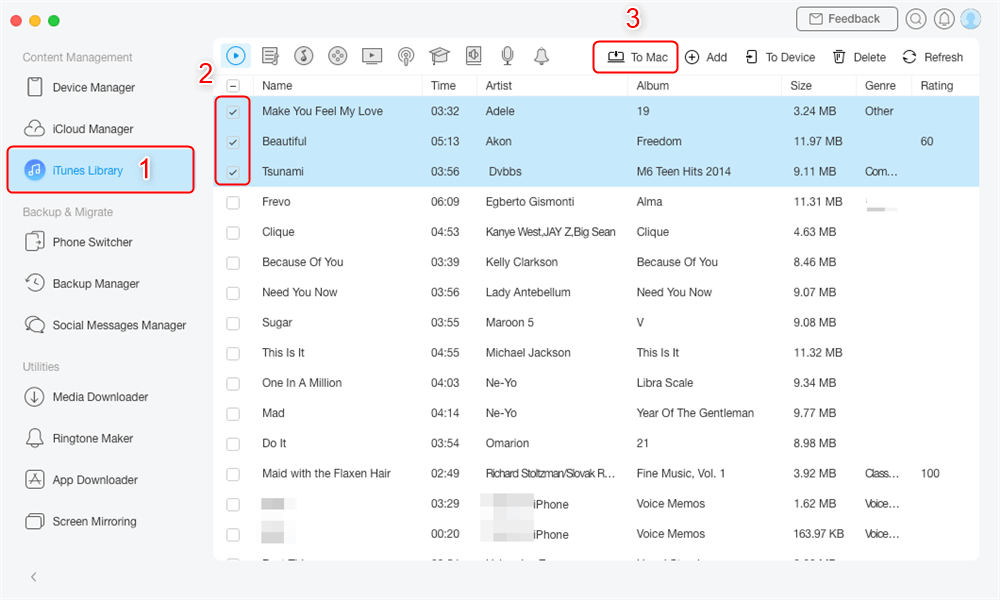
Select Files in iTunes Library and Send to Mac
The Bottom Line
Those are the two methods on how to move the iTunes library to a new Mac. As you can see, with the help of AnyTrans, you can manage your iTunes library or iPhone data easier than ever. You can also back up your iOS app and restore them to your iDevices at any time. Download it now and enjoy your free trial!

Senior writer of the iMobie team as well as an Apple fan, love to help more users solve various types of iOS & Android-related issues.
Product-related questions? Contact Our Support Team to Get Quick Solution >
