Why is iTunes So Slow? Quick Solutions Here
If iTunes has slowed without any apparent reason on your computer, you might be wondering why is iTunes so slow. There could be various reasons behind the issue and this guide aims to help you speed-up iTunes on your computer.
Common iTunes Tips
iTunes Music Management
iTunes Library Transferring
Fix iTunes Issues
AnyFix – iOS System & iTunes Repair Tool
AnyFix can solve 200+ iTunes errors. When you get alert messages like iTunes won’t recognize iPhone, won’t open, or iTunes is slow, etc. Try AnyFix to fix iTunes errors by simply clicking a button.

There is no doubt that iTunes is one of the best media organizer apps available out there. If you are a music lover, you have likely used the app at least once in your life. If you are someone who uses Apple devices, then iTunes is likely your go-to app for all your media needs.
Over time, it happens that iTunes slows down,especially after your iPhone update to the new iOS. If you are experiencing this slowdown issue with iTunes on your computer, then you are not alone. Luckily, there are a few ways to speed up the app and the following guide answers your “how can I speed up iTunes” question.
Part 1. Why is iTunes so Slow?
Why does iTunes take so long to open? In most cases, there is no apparent reason why the app has slowed down. The following are some possible reasons why iTunes is slow, and you may find a solution to fix this issue.
- A large number of accumulated junk files are generated when iTunes is running.
- Problems related to Apple components will also slow down iTunes.
- Automatic synchronization and automatic download are not turned off.
Part 2. How to Speed up iTunes [11 Tips]
If you are unsure of the reason, you can try out the following ten tips and see if they bring any positive impact on the performance of iTunes on your computer.
Tip 1. Update the iTunes Version on Your Computer
When you use a computer, one of the important things you should continually be doing is keeping all of your apps up to date. This includes iTunes, as well as older versions, often have issues in them. The newer versions of the app fix those issues and let you enjoy a bug-free and smooth experience with the app.
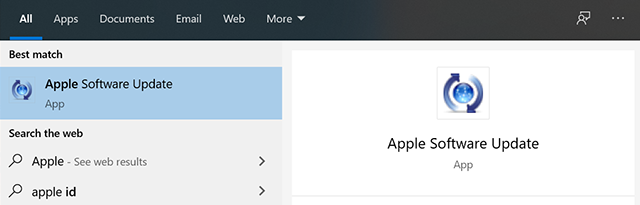
Update the iTunes app
There are two ways to update iTunes on your computer. Either you can head over to the Apple website and download and install the app on your computer, or you can use the Apple Software Update tool on your computer to update the app. Both will do the same job.
Tip 2. Keep Files Only on the Cloud
One of the things iTunes lets you do is purchase and download music from Apple’s cloud service. Your downloaded tracks then get stored on your local storage and iTunes fetches them from there to play for you.
However, if you do not use all of those tracks, you might want to keep some of those only on the cloud and not in iTunes on your computer. This way, you reduce the clutter of the iTunes’ interface which should help boost its performance on your computer.

Remove cloud files from iTunes
To remove a song from iTunes and keep it on the cloud, all you need to do is right-click on your song and select Remove Download.
Tip 3. Reset iTunes Cache
iTunes is an application, and like other apps, it also stores cache files on your computer. These files serve the app with required information quickly but at the same time, they also create a load on your system, which results in iTunes slowing down on your machine.
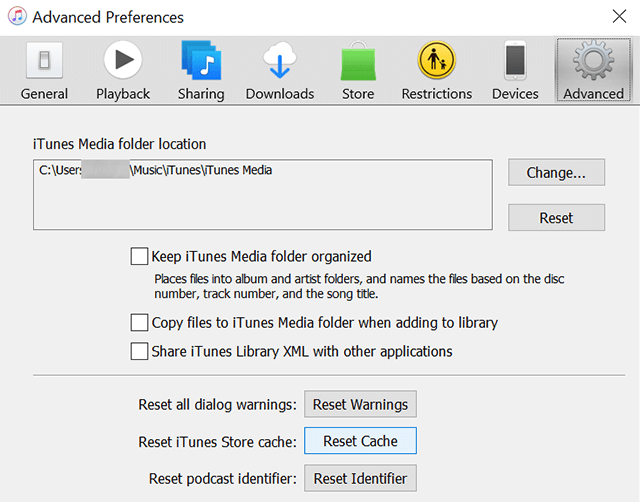
Reset the iTunes cache
If that is the case, then you can easily fix it by resetting the cache for the app. To do it, launch the iTunes app, click on the Edit menu at the top, select Preferences, head to the Advanced tab, and click on Reset Cache.
Tip 4. Disable iTunes Automatic Sync
In order to keep your content in sync with your devices all the time, iTunes offers you an option where it automatically syncs the contents of your devices as soon as you attach them to your computer. This puts a load on the app and sometimes causes the app to slow down.
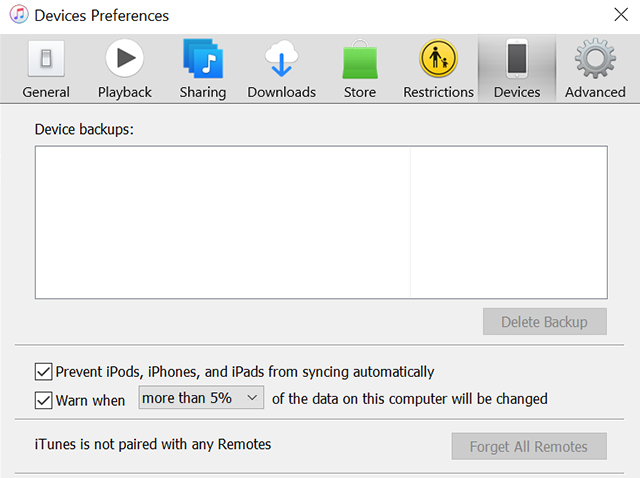
Prevent iTunes auto-sync
The issue can actually be easily fixed by disabling the automatic sync option. While iTunes is open on your computer, click on the Edit menu and select Preferences. Then, choose the Devices tab and tick-mark the box that says Prevent iPods, iPhones, and iPads from syncing automatically.
Tip 5. Use An iTunes Repair Tool
If the above methods can’t speed up your iTunes, you can try a professional iTunes issues troubleshooter to get the slow issue solved. As one of the top iTunes repair programs, AnyFix – iOS System Recovery will be the best choice since it can fix 200+ iTunes errors without the tech skills required. Additionally, the repair process is super simple. Only 4 steps will solve the issue.
AnyFix – iOS System Recovery
- It provides a 1-click solution to fix iTunes issues.
- It can also fix 200+ iTunes errors without any data loss.
- It supports downgrading or updating the iOS system without effort.
- Introducing the latest iOS upgrade.
Free Download100% Clean & Safe
Free Download100% Clean & Safe
Free Download * 100% Clean & Safe
Step 1. Download AnyFix and install it on your computer. Run it on your computer > connect your iPhone to the computer, and click iTunes Repair on the right.
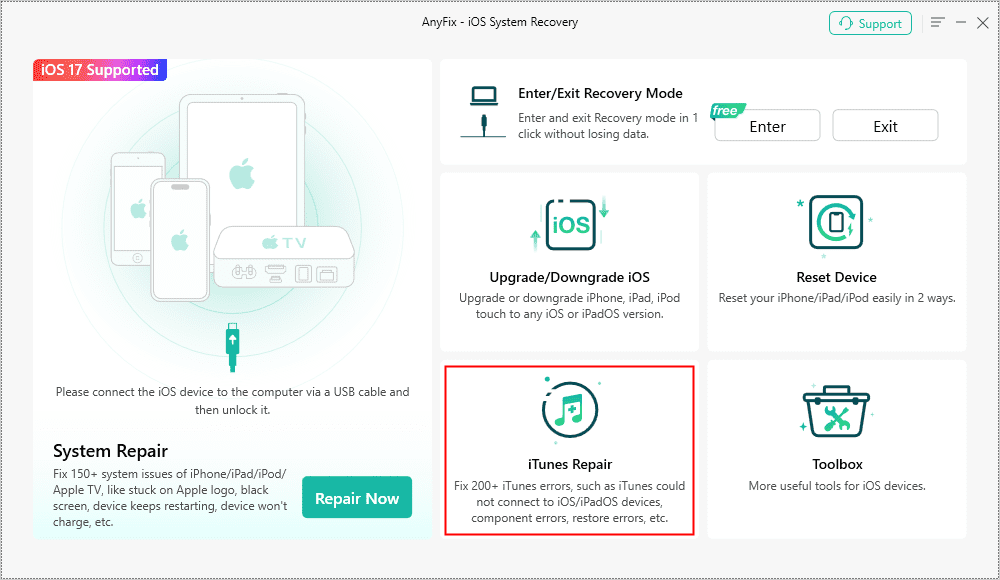
AnyFix iTunes Repair Option
Step 2. Select Other iTunes Errors and click Scan Now to fix your iTunes getting slow problem.
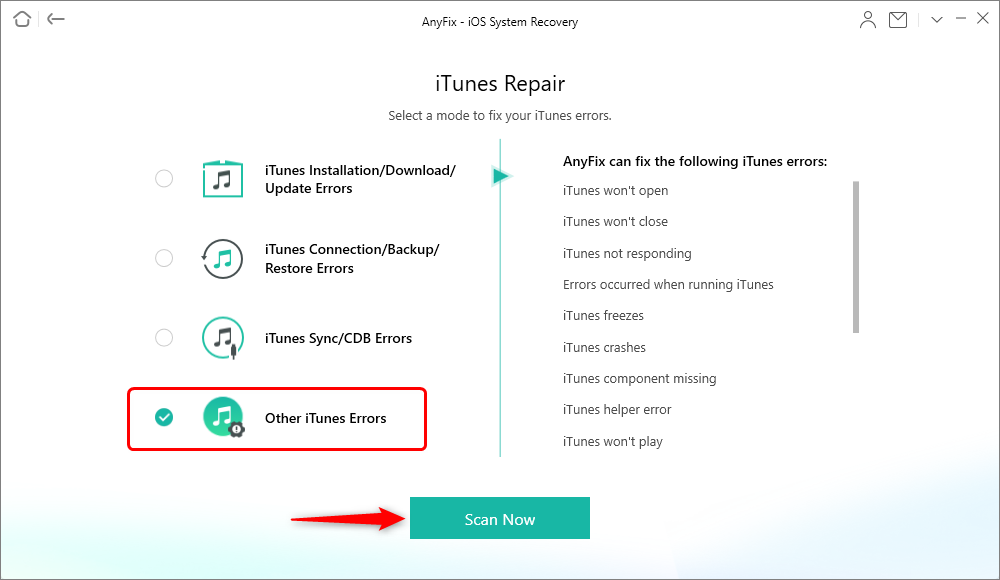
Choose Other iTunes Errors and Continue
Step 3. Continue the process, and it will take you some minutes to finish all the repair process. And in the end, you will see a repair completed interface.
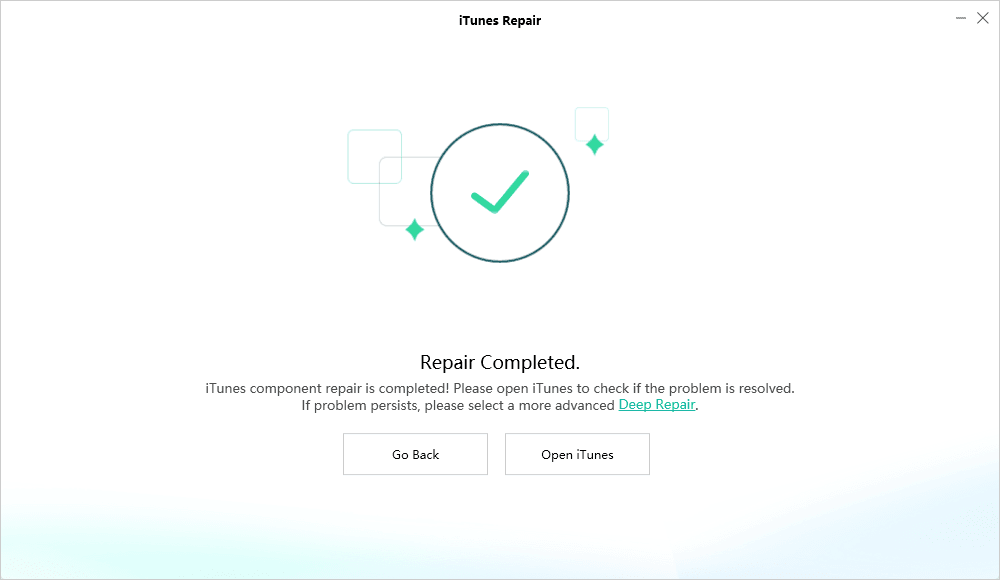
Repair Completed
Tip 6. Delete Smart Playlists in iTunes
iTunes allows you to create smart playlists and these playlists automatically update themselves when changes are made to your iTunes library. Since iTunes needs to update these each time there is a new change in your library, the app needs to use more resources and focus on that particular task, which can hinder its performance.

Delete a smart playlist
You can fix it by removing all the smart playlists you have ever created. You can do it by right-clicking on your smart playlists and choosing Delete from Library. The playlists will be removed.
If you cannot manage without smart playlists, then at least try to have a few of those as possible.
Further Reading: Why is iTunes So Slow on Windows 10 >
Tip 7. Turn Off Unnecessary Options in iTunes
Certain features come enabled by default when you install the iTunes app on your computer. Whether you use them or you do not, they continue to run and eat up your resources unnecessarily. A wise decision would be to turn these options off so they do not run anymore and slow down iTunes on your computer.
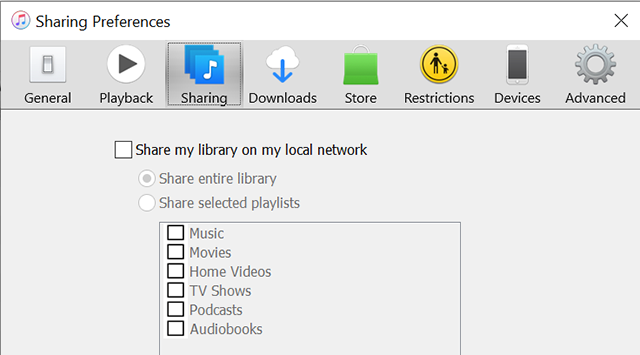
Turn off unwanted options in iTunes
There can be several options that you may have to turn off. So head to Edit followed by Preferences and remove tick-marks from all the features that you do not plan to use. An example would be the feature that lets you share your library on your network. If you do not use it, simply keep it turned off.
Tip 8. Turn Off Genius in iTunes
Genius is a feature you find in the iTunes app that lets you discover more music that is similar to your existing music. For example, if you like certain types of romantic music tracks, Genius will find and recommend those types of songs that you will like.
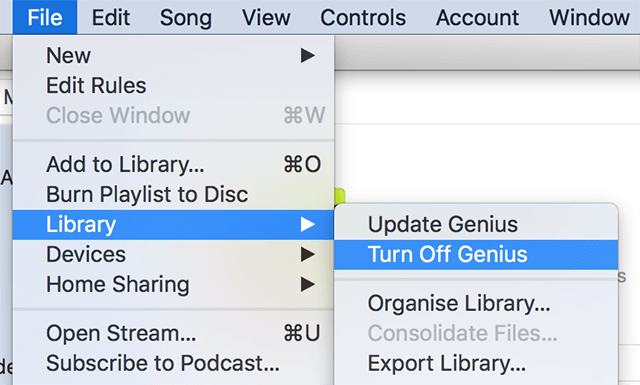
Disable Genius in iTunes
Since it continuously checks for similar songs, it keeps iTunes busy. If you do not use the feature, it is a good idea to disable it in the app. It can be done by clicking on the File menu, selecting Library, and clicking on Turn Off Genius.
Tip 9. Hide the Columns You Don’t Need
iTunes comes with a really great interface to help you view and manage your media files. The interface is customizable meaning you can add new items to it and also remove the ones you do not need. Often people end-up using the default interface that comes with a number of items that hardly anyone uses.
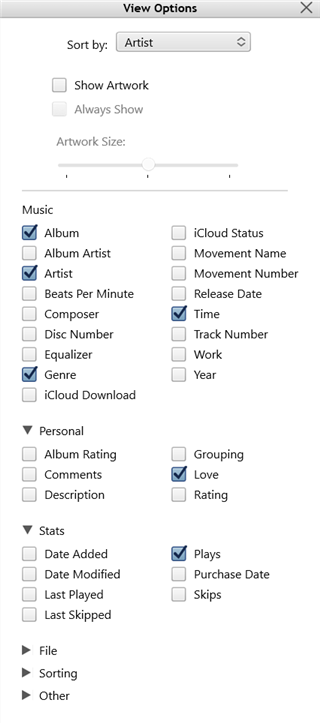
Customize iTunes viewing options
If you feel you will not be using certain columns on the iTunes interface, you can remove them from being shown on your screen. It helps save resources on your machine. It can be done by clicking on the View menu and selecting Show View Options. You can then enable and disable various columns to show or hide on your interface.
Tip 10. Create Folders for Your Playlists
iTunes shows your playlists in your left sidebar and you can access them by clicking on any of them. If you have a number of playlists, you will find that there is actually a mess that has been created in your sidebar. One of the ways to fix it is to put your playlists in a folder.
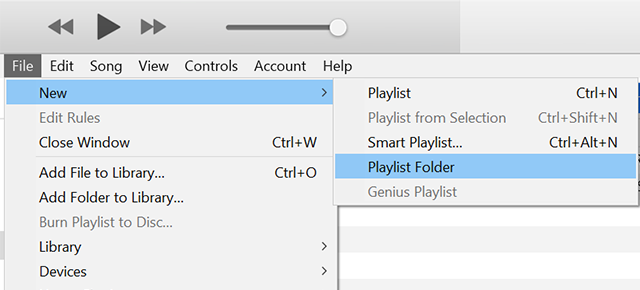
Make a playlist folder
By organizing your playlists into various folders, you will both make it easier for you to find the playlists you want and also put less strain on the app. A new playlist folder can be created by clicking on the File menu and selecting New followed by Playlist Folder.
Tip 11. Reinstall iTunes on Your Computer
If iTunes is still performing slower despite following all of the above methods, there might be an issue with the app itself. In that case, your best bet is to uninstall the app and then reinstall it on your computer. It will give a new chance to the app to create configuration and settings files from scratch.

Remove iTunes from your computer
Uninstalling iTunes is pretty easy. You can click on Uninstall a program in Control Panel and choose iTunes to be removed from your computer. It will get the task done for you. You can then download a new version of iTunes from its official website and install it on your machine.
Part 3. How to Manage iTunes with AnyTrans
Sometimes, the iTunes app just does not work the way you want and it could be due to the app’s own configuration. In that case, it is better you go for an alternate option rather than wasting your time on an app that will not respond.
AnyTrans is a great option when it comes to doing the tasks that you normally do with iTunes. The app lets you transfer your iTunes media to your iPhone and to standalone folders on your computer as well. It is an amazing tool to access your iTunes media when the iTunes app itself will not let you do it.
The following shows a demonstration of how you can use the app to transfer iTunes media from your computer to an iPhone.
Step 1. Download and install AnyTrans on your computer.
Step 2. Plug-in your iPhone to your computer using a USB cable.

Back Up and Restore iPhone via AnyTrans
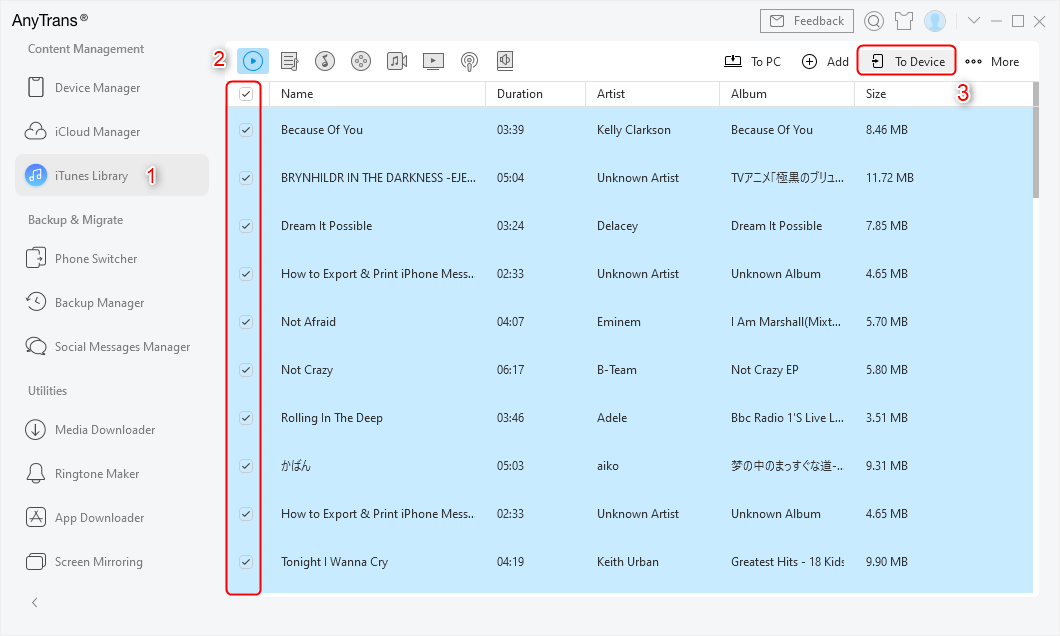
Step 3. Select iTunes Library from the left sidebar of the app.
Step 4. You will see all of your iTunes files displayed on the right-side. Select the ones you want to transfer to your iPhone and click on To Device at the top.
Add Your Playlist to iPhone with AnyTrans
The Bottom Line
“Why is iTunes on Windows so slow?” is a question that can have multiple answers and methods. Our guide above tries to explain to you as many methods as possible to help you get rid of the slower performance issue with iTunes on your computer. AnyFix may be your first choice, just download it and have a try!
Free Download * 100% Clean & Safe
More Related Articles

Joy Taylor is a seasoned technical writer with over a decade of experience in mobile technology. At iMobie, she specializes in producing in-depth content on iOS data recovery, iPhone unlocking solutions, and iOS troubleshooting.
Product-related questions? Contact Our Support Team to Get Quick Solution >
