How to Delete Music from iTunes Quickly
If you no longer wish to keep certain music tracks in the iTunes app on your computer, you can delete those songs from iTunes and they will no longer appear in your list. Deleting iTunes songs is pretty easy and here we show you how to do it.
Common iTunes Tips
iTunes Music Management
iTunes Library Transferring
Fix iTunes Issues
iTunes is one of the best apps to listen to and organize music tracks on your computer. It works on both Windows and Mac computers and lets you easily store and organize your music files the way you want.
As you add more and more songs to the app, eventually it has a large number of files in it. If you do not listen to any of those music tracks, it is a good idea to get them removed. This way, you regain the memory space that those songs had occupied and it also declutters your iTunes interface.
You can delete songs in iTunes on Windows, Mac, and even on your iPhone. This guide tells you how to do it.
You need to update your iTunes to the latest version before the start.
Part 1. Delete Songs from iTunes on Mac
Although Apple has done away with iTunes on the latest macOS versions, the app is still available on older versions of the operating system. If you still use one of the old releases of macOS, you have iTunes available for your Mac and you can indeed use it as you wish.
There are two scenarios when you may want to delete songs from iTunes on your Mac. You will either want to individually delete a song or you will want to delete a song from one of your playlists. There are ways to accomplish both of these and the following shows how.
Delete Individual Songs from iTunes on Mac
If there is one or several music tracks that are not necessarily a part of your playlists and you want to remove them, you can have them deleted individually in iTunes on your Mac. The app allows you to select any songs you wish to remove in your library and using it, you can choose the ones you want to get rid of and they will be deleted from your Mac machine.
The following are the steps on how you can delete songs in iTunes on a Mac.
Step 1. The first thing you will need to do is to launch the iTunes app on your Mac. Use your preferred way to do it.
Step 2. When the app launches, you want to head to the section that shows your music tracks. To do it, click on the dropdown menu at the top and select Music.
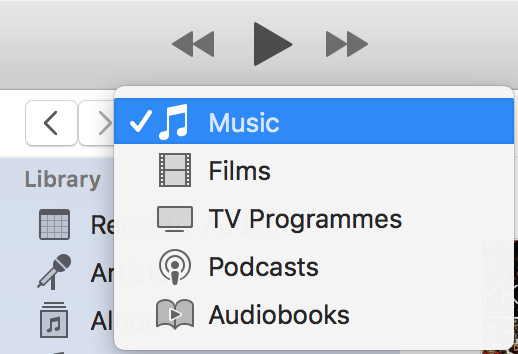
Select Music in iTunes
Step 3. On the following screen, you will find various options in the left sidebar. Click on the option that says Songs to view all of your songs stored in iTunes.
Step 4. Choose the songs you want to delete on the right-hand side pane. Press and hold down the Command key if you want to delete more than one song.
Step 5. Once you have made a selection, right-click on any one of those songs and select Delete from Library.
Step 6. You will see a prompt on your screen asking if you would really like to delete the song. Choose Move to Trash to delete the song for good.
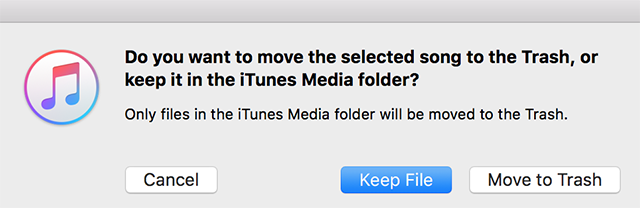
Move the Song to the Trash
Step 7. The song should be deleted and you might want to empty the Trash to ensure it is gone forever.
Delete Songs in a Playlist from iTunes on Mac
If you want to delete songs from one or multiple of your playlists, then you can do it as well from within the iTunes app on your Mac. Basically, what you need to do is choose the playlist you want to delete a song from and then actually remove the song. It is as easy as that. The following are the steps on how you can access your playlists and remove songs from them in iTunes.
Step 1. Open the iTunes app using your chosen method on your Mac.
Step 2. Click on the dropdown menu at the top and select the option that says Music. It lets you view your available music collection.
Step 3. On the following screen, you will find a section that says Music Playlists in the left sidebar. Under the section, you will find all of your playlists listed. Click on the one you want to delete a song from.
Step 4. You will then see all the music tracks that are part of your chosen playlist on the right-hand side pane. Right-click on the track you want to delete and select Delete from Library.
Step 5. Click on Remove Song on the following screen and continue.
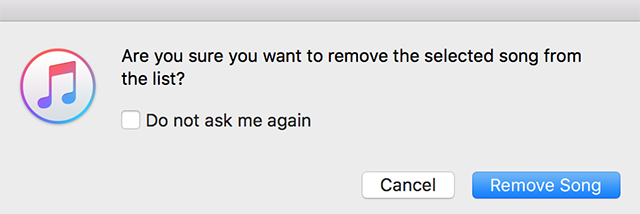
Remove the Song from Your Playlist
Part 2. Delete Songs from iTunes on PC
If you are an iTunes user on a Windows computer, you also have various ways to delete songs from the app on your computer. Since iTunes works pretty much the same way on PC as it does on a Mac, the steps to delete a song are quite similar. The following is how you remove a song of your choice from iTunes on a PC.
Step 1. Double-click on the iTunes shortcut on your desktop to launch the app. Alternatively, search for it in the Start Menu search and open it.
Step 2. Select Music from the dropdown menu available at the top to view your music files.
Step 3. Select Songs from the left sidebar.
Step 4. Choose the song you want to delete, right-click on it, and select Delete from Library.
Step 5. A prompt will appear on your screen. Select Delete Song and continue.
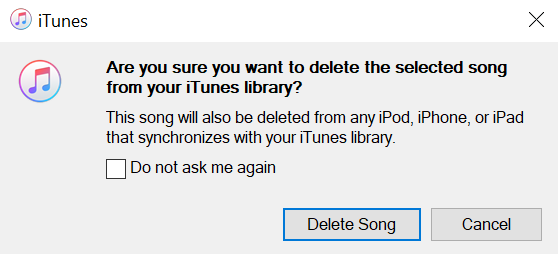
Delete An iTunes Song on PC
Your selected song will be deleted from iTunes on your PC.
Part 3. Delete Songs from iTunes on iPhone
iTunes is available for the iPhone as well, and if you want to delete a song from iTunes on your iPhone, then you can do it as well. If you have a number of unwanted songs sitting in iTunes on your phone, removing them will free-up the precious storage space of your device. The following is how to remove songs from iTunes on the iPhone.
Step 1. Launch the Music app from the springboard on your iPhone.
Step 2. Tap on Songs to view all the available songs on your phone.
Step 3. Select the song you want to delete by tapping and holding on it and select Delete from Library.
Step 4. You will be asked if you are sure you want to delete the song from your library. Tap on Delete Song to remove the song from your phone.

Confirm the Song Deletion Prompt
The song will no longer be available in iTunes on your iPhone.
Part 4. How to Manage Songs in iTunes with AnyTrans
iTunes is not the only way to manage your music files as there are now a number of third-party apps available to help you organize your music tracks. AnyTrans helps you perform many tasks related to iTunes on your computer.
It allows you to transfer music from iTunes to your iPhone and even from iTunes to a local folder or a USB flash drive attached to your computer. The following shows how you can use the app to transfer your iTunes music tracks to a USB flash drive. It should give you an idea of how the app overall works.
Step 1. Download and install AnyTrans on your computer.
Step 2. Plug-in your USB flash drive to your computer.
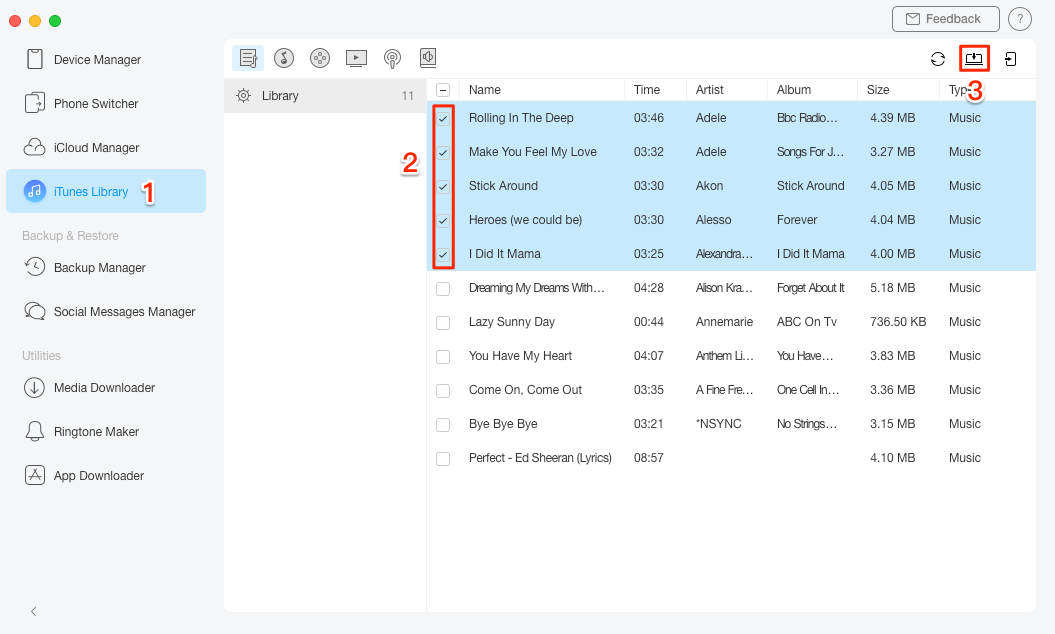
Step 3. Launch the app, select iTunes Library from the left sidebar, choose the songs you want to transfer, and click on Send to Computer.
Transfer iTunes Songs to A USB Drive
Step 4. Navigate to your USB drive storage and select it.
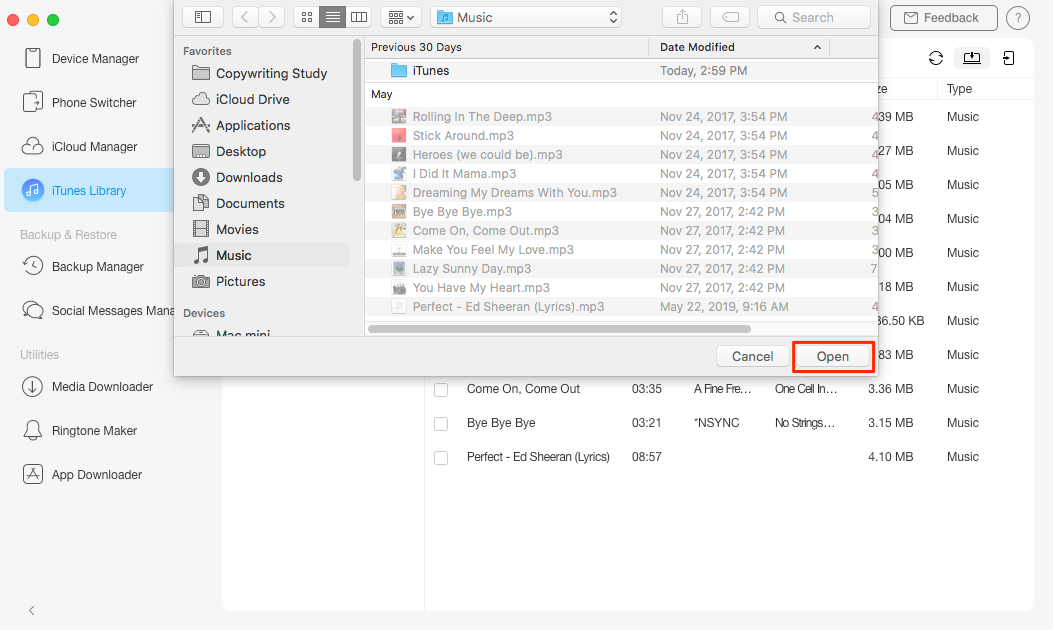
Choose Your USB Drive
The app will transfer your chosen songs to your USB flash drive.
Conclusion
Regardless of why you want to remove a song from iTunes, it is fairly easy to delete a song in iTunes on both PC and Mac computers. We hope our guide above helps you accomplish the task without any issues.

Senior writer of the iMobie team as well as an Apple fan, love to help more users solve various types of iOS & Android-related issues.
Product-related questions? Contact Our Support Team to Get Quick Solution >
