6 Ways to Fix Android Phone/Tablet Won’t Stay Connected to Wi-Fi
Your Android phone or tablet won’t stay connected to Wi-Fi? Need to fix the problem right now? Read the guide to find the key to the problem.
Android Issues & Fixes
Android System Issues
Android Apps Issues
When you are watching an interesting video from the Internet, playing an online game with friends, downloading applications, or updating the operating system for your Android phone or tablet, normally you are under a Wi-Fi network. But suddenly, your phone or tablet can’t find your Wi-Fi or WiFi connected but no internet access Android, so you have to stop what you are doing since Wi-Fi doesn’t work on your phone.
Don’t feel panic or upset. You are not the only user to encounter the same dilemma since not only Android phones or tablets – Samsung, Huawei, LG, but also iPhone or iPad are faced with Wi-Fi issues. Keep reading the post and you can find the best solution here.

Android Phone Won’t Stay Connected to Wi-Fi
Why Won’t Your Phone Stay Connected to Wi-Fi?
Why your Android won’t stay connected to Wi-Fi? Usually, there are several reasons for this issue.
- The unstable Wi-Fi connection.
- Faulty Wi-Fi network settings.
- Your Android Phone is stuck in the “Wi-Fi authentication” issue.
- The conflict between apps and your Android operating system.
Have learned “why my phone won’t connect to wifi”, you may want to figure out “how do I stop my WiFi from disconnecting?” Follow the steps and get a quick fix.
#1. Fix Android Phone WiFi Problem
No matter what the reason caused the Android device un-connected to WiFi, DroidKit – Android Phone Toolkit will fix the issue if it’s system-related issues. DroidKit is known for a powerful Android device issue troubleshooter. If your device is unable to start, freeze, or stuck in a boot loop, DroidKit would be the best bet to get your device back to normal.
How to get back Android device back to a WiFi connection? Follow the steps now.
Free Download * 100% Clean & Safe
Step 1. Free install DroidKit and double-click to open it on your computer > Click the Fix System mode in the middle of the window.
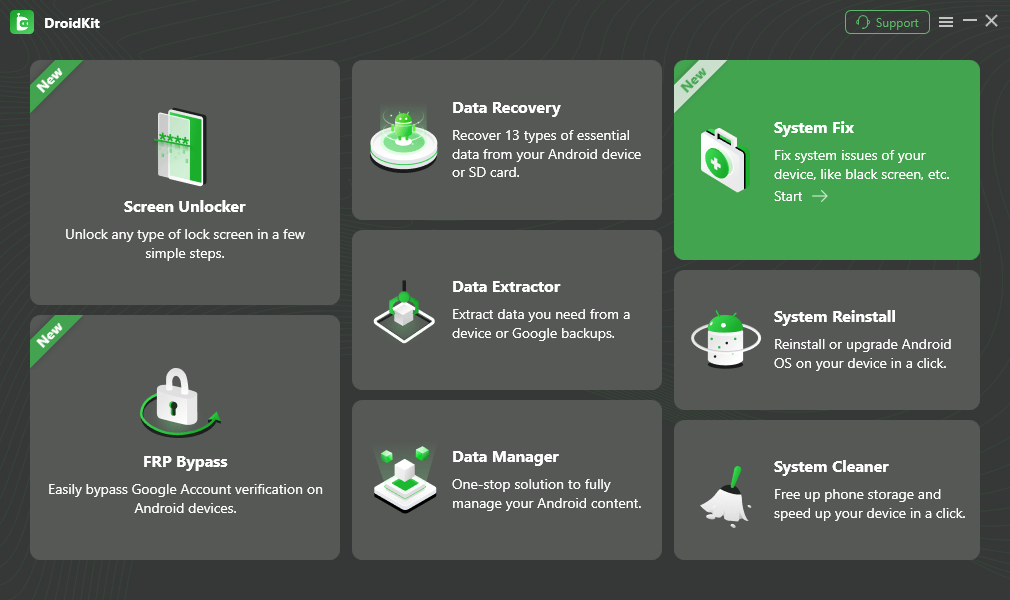
Click System Fix Function
Step2. There are some notes you need to know > Hit the Start button to initiate the process.
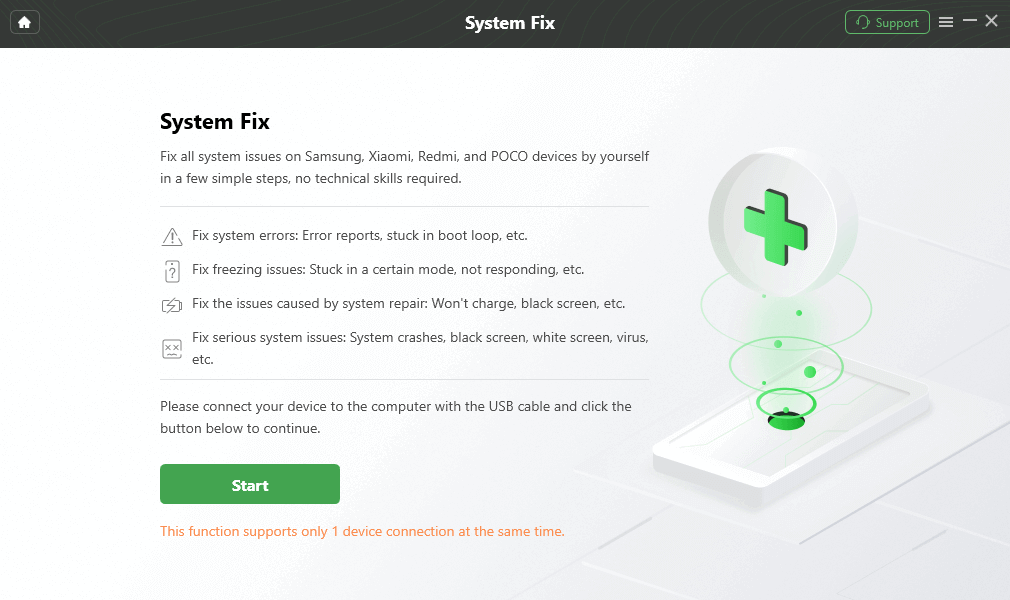
Start to Repair Android System
Step 3. DroidKit will automatically match the PDA code of your Android device > If you see the page below, click Download Now to get the firmware package > Use the package to get rid of the problem in minutes.
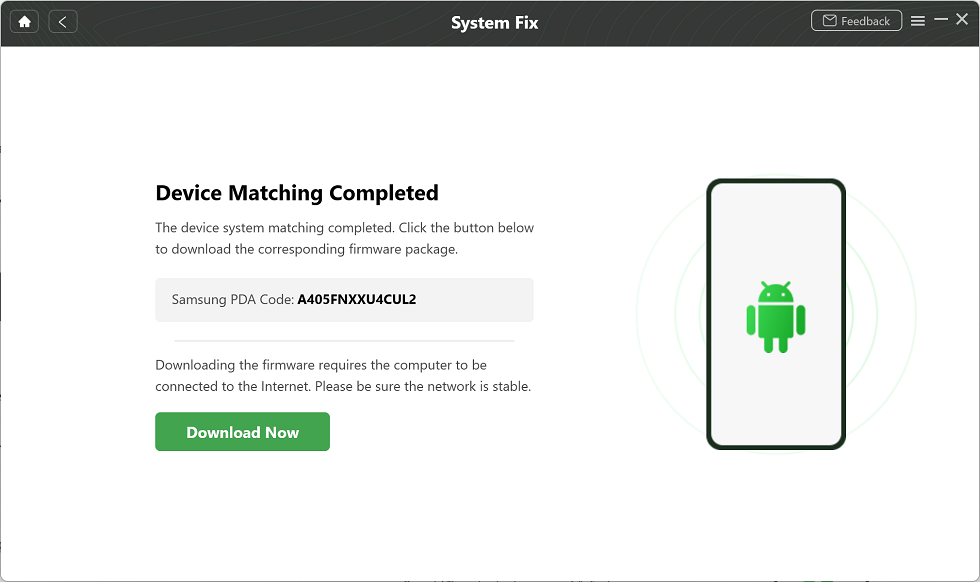
PDA Code Matched
Step 4. TWhen it finishes downloading the firmware package, just click on the Fix Now button to initiate the fixing process. The device system will start to get repaired. Wait for a few minutes, your Android phone will get back to normal condition.
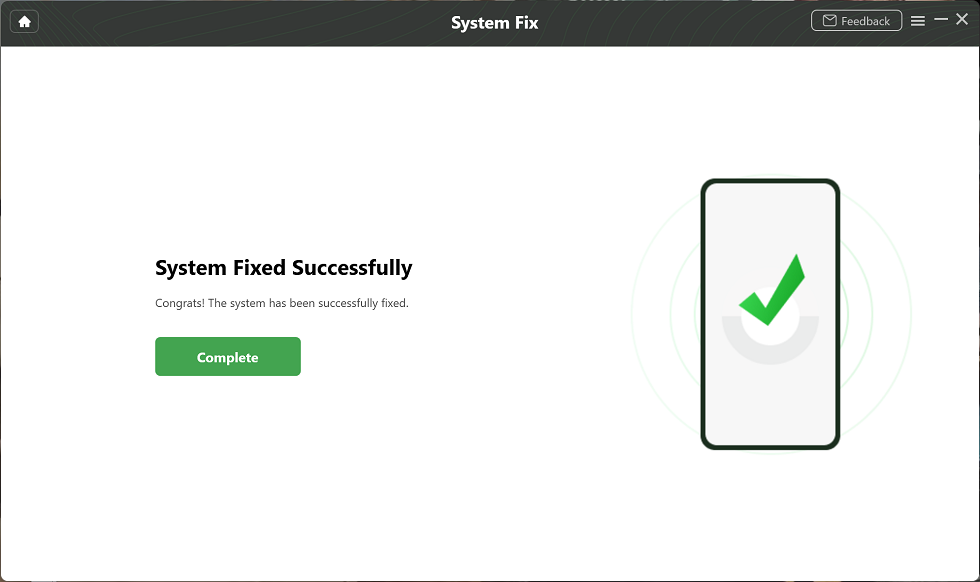
Completing the Repair Process
It won’t take a while to fix the bugs your device met. Once it gets restarted, you will find the problems are fixed.
#2. Strengthen Wi-Fi Signal
You can check to see if your home WiFi is too far from the router, or if there are physical obstacles blocking the signal path. Signal strength can be increased by moving closer to the router or removing obstructions.
#3. Update Wi-Fi Driver
If your Android Phone/Tablet Won’t Stay Connected to Wi-Fi, perhaps outdated or defective Wi-Fi drivers are hampering your device’s ability to maintain a stable connection.
Here are the simple steps to update your Wi-Fi driver:
Step 1: Check for operating system updates
Open your device’s Settings app and select About phone/device. Click Software Update/System Update to see if any updates are available. If an update is available, click Update Now to update it.
Step 2: Reset network settings
Find the System/General Management option in your device’s Settings app. Select Reset/Advanced options and click Reset network settings. Confirm and restart the device.
Step 3: Reconnect to the Wi-Fi network
Open your device’s Settings app and select Wi-Fi. Find the Wi-Fi network you want to connect to in the list and click on it. Enter your password (if required) and click Connect.
Step 4: Check connection stability
After connecting to Wi-Fi, make sure the connection is stable. If the problem persists, try restarting the device and reconnecting to the Wi-Fi network.
#4. Correct Router Configuration
A router misconfiguration or firmware glitch may cause your Android phone’s Wi-Fi connection to be unstable.
Here are simple steps to correct your router configuration:
Step 1: Access the router management interface
Enter your router’s IP address (usually 192.168.1.1 or 192.168.0.1) into your web browser. Enter your username and password to log in to the router management interface. If you’re not sure about your router’s login credentials, check your router’s manual or ask your network administrator.
Step 2: Verify Router Settings
Once logged into the router management interface, browse through the various settings options to ensure that Wi-Fi settings, security settings, etc. are configured correctly. Pay special attention to Wi-Fi channel and frequency band settings to ensure there is no interference with Wi-Fi networks around you.
Step 3: Update Router Firmware
In the router management interface, look for the Firmware Upgrade or Firmware Update option. If a firmware update is available, download and install the latest version of the firmware. NOTE: Before updating your router’s firmware, be sure to back up your router’s current configuration to prevent data loss.
Step 4: Restart your router
Once the firmware update is complete, restart the router to apply the new settings. Wait for the router to fully boot up and reconnect to your device. Test your Wi-Fi connection to make sure it’s stable.
#5. Resolve IP address Conflicts
IP address conflicts occur when multiple devices on the same network share the same IP address. This may disrupt network connectivity. To solve the problem of unstable WiFi connection on your Android phone, you need to restart your device and router to obtain a new IP address or manually assign a static IP address.
Here are simple steps to resolve IP address conflicts:
Step 1: Restart your device and router
First, turn off your device (including your phone, tablet, or computer) and your router. Wait about a minute and then restart them. After rebooting, the device and router will reacquire new IP addresses.
Step 2: Check the connection
After restarting your device and router, make sure they are reconnected to the network. Open the Wi-Fi settings on your device and make sure you successfully connect to your Wi-Fi network.
Step 3: Manually assign a static IP address
If you still have IP address conflicts after rebooting, you can try manually assigning a static IP address. First, open your device’s network settings and find the Wi-Fi network you’re currently connected to. Then, select Manual IP Address Settings and enter a unique IP address, subnet mask, and gateway information. Make sure the assigned IP address does not conflict with other devices and is within your network range.
Step 4: Retest the connection
After completing the above steps, retest whether your device is able to reliably connect to the Wi-Fi network. If the problem persists, try contacting your network administrator or technical support for further assistance.
#6. Uninstall the App Designed for Mobile Security
If you have installed an app that is designed for mobile security, you may face Wi-Fi not working on your Android phone. The conflict between your Android operating system and apps may also result in apps keeping crashing on your Android phone, Therefore, you are highly suggested to uninstall the app and reconnect Wi-Fi again.
For better management of your Android phones or tablets, you might need a professional Android file manager. AnyDroid is the one we want to recommend to you.
Download AnyDroid on your computer and manage the apps on your Android phone/tablet.
AnyDroid Overview
#7. Adjust Battery Optimization Settings
Some Android devices have battery optimization features that may interfere with Wi-Fi connections. These settings may limit background data usage or disable Wi-Fi to save battery life. Disable Wi-Fi battery optimization or whitelist affected apps to ensure uninterrupted connectivity.
The Bottom Line
If you have any other possible ways to fix the Android won’t stay connected to the Wi-Fi problem, welcome to share with us in the comments below. If you want to know more details about DroidKit, get it to have a free trial >
Free Download * 100% Clean & Safe
More Related Articles

Senior writer of the iMobie team as well as an Apple fan, love to help more users solve various types of iOS & Android-related issues.
Product-related questions? Contact Our Support Team to Get Quick Solution >
