How to Delete Voicemail on iPhone
How to delete all voicemails on iPhone? This guide shows you a safe way to clear voicemail from iPhone 12/11/Xs/XR/X/8/7/6s to protect your privacy.
iPhone Data Deleting Tips
Delete Media Files
Delete Personal Files
By nature, an iPhone is always in danger of getting damaged, lost or stolen. How about your important iOS data? To help you recover your lost or mistakenly deleted photos, messages and other data on your iPhone, we collected 5 top best iPhone Data Recovery Software and evaluate them carefully to provide valuable references for you.

Delete Voicemail
We receive voicemail messages every day through our iPhone. Sometimes, we are not aware of these voicemails pile up and eventually eat up our iPhone storage. However, it’s easy to clear out voicemail from the iPhone, so whether you just want to simplify the iPhone a bit, lose that lengthy weirdo message on your phone, or restore some additional storage capacity, you’ll find it just takes a moment or two to complete. What’s more important, you may want to permanently clear the voicemail on your iPhone to prevent personal info leaks. In this guide, we will offer you two ways to delete iPhone voicemail.
Part 1. How to Delete Voicemail on iPhone Directly
Step 1. Open the Phone app on the iPhone and tap on the “Voicemail” tab.
Step 2. Swipe left on the voicemail message, you will see “Delete” button when it appears, then tap on that to delete the message.
Or you can delete multiple Voicemails at once on iPhone:
Step 1. Open the Phone app on the iPhone and tap on the “Voicemail” tab.
Step 2. Tap on “Edit”. Use multiple touchpoints to tap on multiple red minus buttons simultaneously, and then tap on the red “Delete” buttons.
The above methods only delete voicemails from the Phone app, and it puts them into a recycle bin/trash where it can be recovered.
Remove deleted voicemail from iPhone permanently:
Step 1. Open the Phone app on the iPhone and tap on the “Voicemail” tab.
Step 2. Scroll to the bottom of the list of messages and tap “Deleted Messages.”
Step 3. Tap “Clear All” to remove from the iPhone all the voicemails that you had previously deleted.
While there are two things you need know, when deleting voicemails on iPhone directly:
1. Some users encounter such issues, like a grayed “Clear All”, which won’t allow you to delete all voicemail messages at once.
2. The manually deleted voicemail on iPhone can be found and got back with some professional iPhone data recovery. So how to delete all voicemails on iPhone completely? Please move to Part 2 below.
Part 2. How to Permanently Delete All Voicemail on iPhone 11/Xs/XR/X/8/7/6s
PhoneClean helps clean up your iPhone and protect your privacy in every possible way. The Private Clean feature allows clearing sensitive data like voicemail, call history, messages, and notes permanently. Plus, it scans the manually deleted contacts, notes, and messages and helps you completely remove the deleted items to make them unrecoverable. PhoneClean also finds & clear kinds of junk files from your iPhone/iPad/iPod touch to free up more space and optimize the system.
Step 1. Download PhoneClean and install it on your computer. Open it, and connect your iPhone to a computer via a USB.
Step 2. Select the Private Clean option, and click the Scan button.
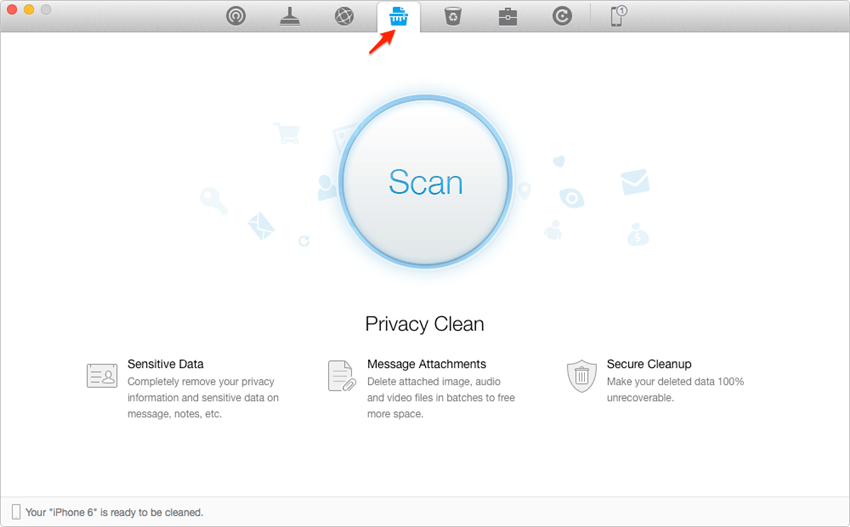
Delete Voicemail on iPhone
Step 3. Click Message Attachments and select Voicemail. Choose the items you want to delete and the back to the result page. Click the Clean button to clear the voicemail on iPhone permanently.

Click Message Attachments and select Voicemail
The Bottom Line
Just get a brand-new iPhone 8 (Plus)? PhoenClean will be your best helper to optimize and clean up your iPhone to make it work better. To learn more about the features of the newly updated PhoneClean, you can download it to have a try.
More Related Articles

Member of iMobie team as well as an Apple fan, love to help more users solve various types of iOS & Android related issues.
Product-related questions? Contact Our Support Team to Get Quick Solution >
