How to Backup Notes on iPhone/iPad
If you have your important information saved in the Notes app on your iPhone, then it is certainly a good idea to have these notes backed up. Follow the following guide for steps on how to backup notes on an iPhone.
iPhone Backup Tips
Backup iPhone Data
iPhone Backup Locations
Notes is one of the stock apps on your iPhone and iPad that lets you jot down your thoughts on your devices. The app is a go-to notes manager for millions of users, thanks to all the great features it provides to its users. Many users keep their personal as well as their professional notes stored in this app on their devices.
Since the app is where your important information is saved, you may want to consider backing it up regularly. Doing so will help you gain access to your notes when things go wrong on your device. There are several ways for iPhone notes backup and here we show you four of the best ways to backup notes on your iOS device.
Method 1. How to Backup Notes on iPhone/iPad via iCloud
iCloud lets you sync and store your iPhone/iPad notes on the cloud and it is easy to enable this option on your iOS-based device. However, be advised you are going to need a stable and active Internet connection as this uploads all the notes from your iPhone over to iCloud using your Internet connection. Once you have ensured you have the proper Internet connection, here is what you need to do.
Step 1. Launch the Settings app on your device.
Step 2. Tap on your name at the top, and select the iCloud option.
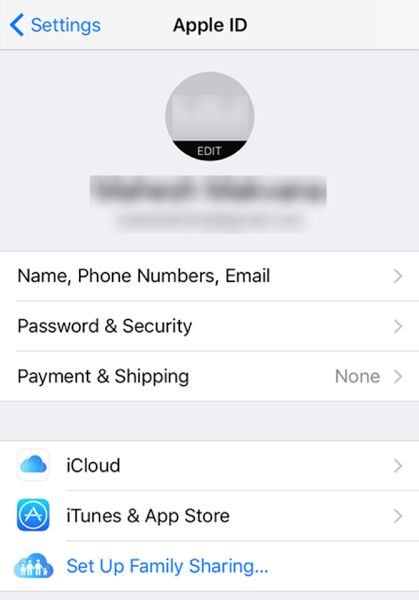
Access the iCloud Sync Options on iOS Device
Step 3. On the screen that follows, you will find many options to enable and disable.
Step 4. Turn on the Notes option and it will start syncing your iPhone notes with your iCloud account.
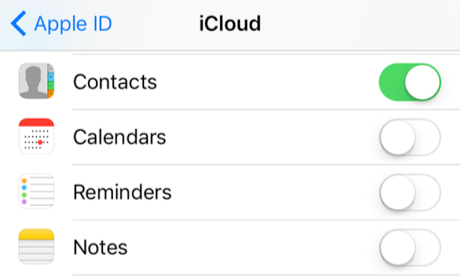
Enable Notes to Sync with iCloud Account
You now have a backup of your notes stored in your iCloud account. If you ever need to get these notes restored on your device, you can do so by signing-in to your iCloud account on your device.
Also, keep in mind syncing your notes to iCloud means you are making your notes available on all of your iCloud enabled devices. This means you will see your notes on your iPhone, iPad, and even on your Mac.
Method 2. Backup Notes on iPhone/iPad via iTunes
Creating any kind of backup has always been easier with iTunes. The only drawback of this app, though, is that it does not let you create selective backups. What that means is you cannot only make a backup of your notes. You must make a full backup of your device which includes your photos, videos, etc, to backup your notes.
Step 1. Install the latest version of iTunes and launch it on your computer.
Step 2. Connect your device to your computer, select your device in the app, click on the Summary option, and finally select the Back Up Now button.
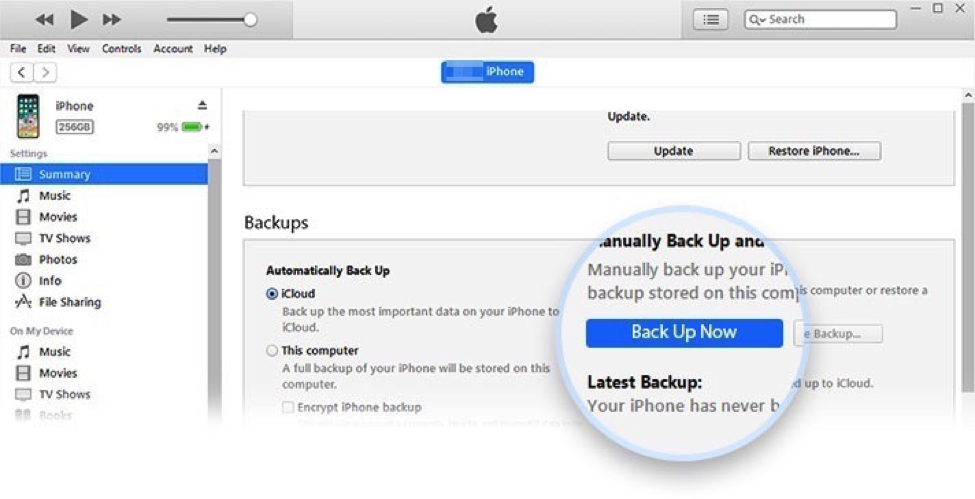
Backup Notes on iPhone/iPad via iTunes
It will create a full backup including your notes in iTunes on your computer. Be advised that in the future, if you need to restore your notes, you will not be able to do it. You will have to erase your device and then restore the full iTunes backup to regain access to your notes. The method works just fine except for this downside of it.
Method 3. Backup Notes on iPhone/iPad via AnyTrans
While you can certainly use the official backup options to make backups of your notes, not all of those methods are easy and convenient for users. Fortunately, you do not have to rely on those methods as there is an app named AnyTrans makes backing up notes much easier for you. AnyTrans, an application that allows you to backup notes as well as many other types of data saved on your iPhone and iPad.
AnyTrans – Backup iPhone/iPad Notes
- Backup over 3GB notes from iPhone within 32 SECONDS.
- Transfer Notes and its attachments, like images, videos, etc.
- Backup notes as printable and readable formats on computer.
- Allow you to view and edit notes on Mac/PC computer freely.
Free Download100% Clean & Safe
Free Download100% Clean & Safe
Free Download * 100% Clean & Safe
Step 1. Download AnyTrans on your computer and open it > Connect your iPhone to the computer via a USB cable.
Step 2. Choose “iPhone Manager” mode > Click on the “Content to Mac” option.
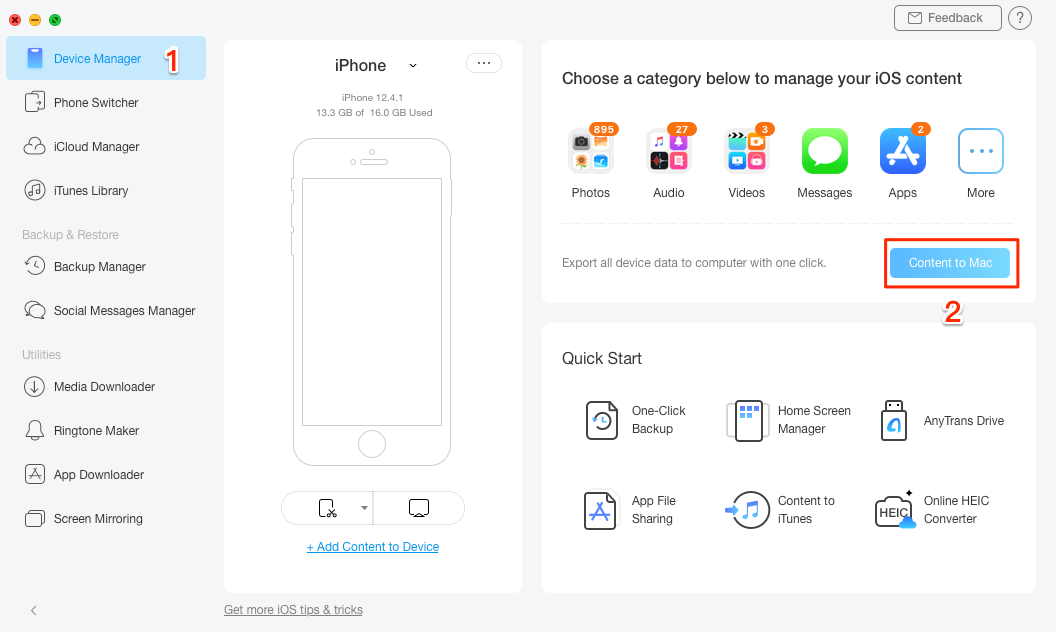
Backup iPhone Notes to Computer with AnyTrans – Step 2
Step 3. Scroll down the screen, uncheck the “Select All” button and check the “Notes” only > Set your export path > Click on the Next button to starting backing up your notes.
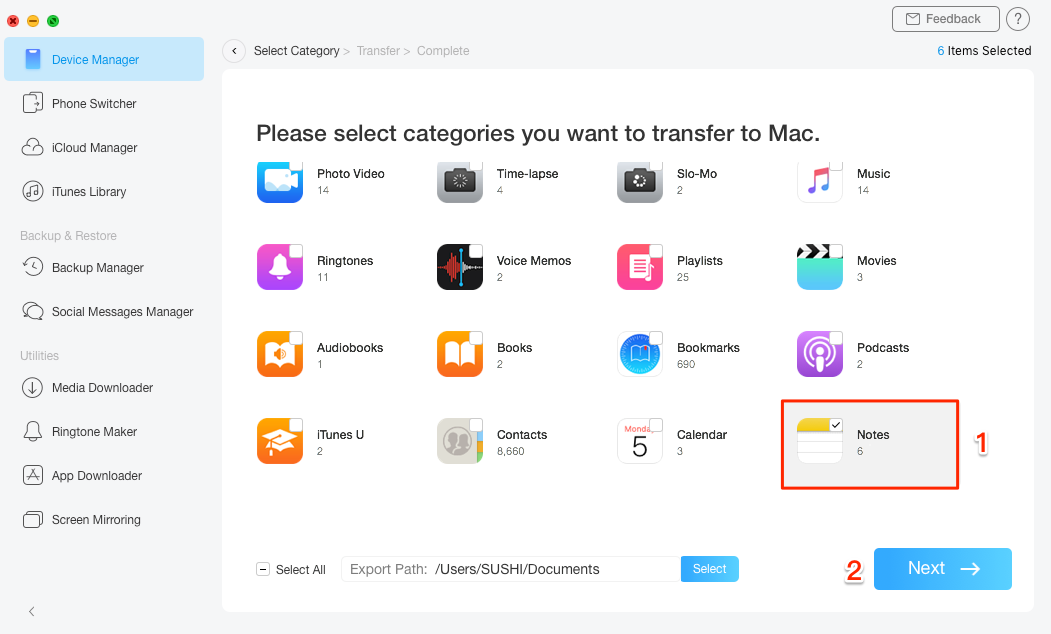
Backup iPhone Notes to Computer with AnyTrans – Step 3
Step 4. After the process completed, you will see the screen below. You can click on the View Files button to see the notes you just backed up directly.
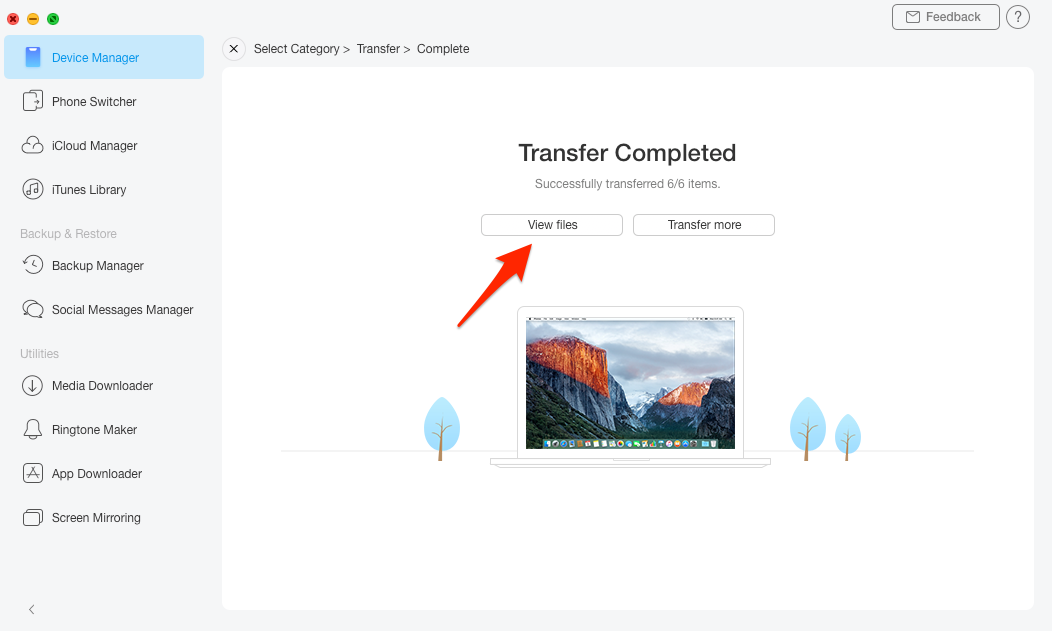
Backup iPhone Notes to Computer with AnyTrans – Step 4
Or you can go to your computer (here we take Mac for an example) > Open Finder > [the export path you set before] > AnyTrans-Export > Notes.
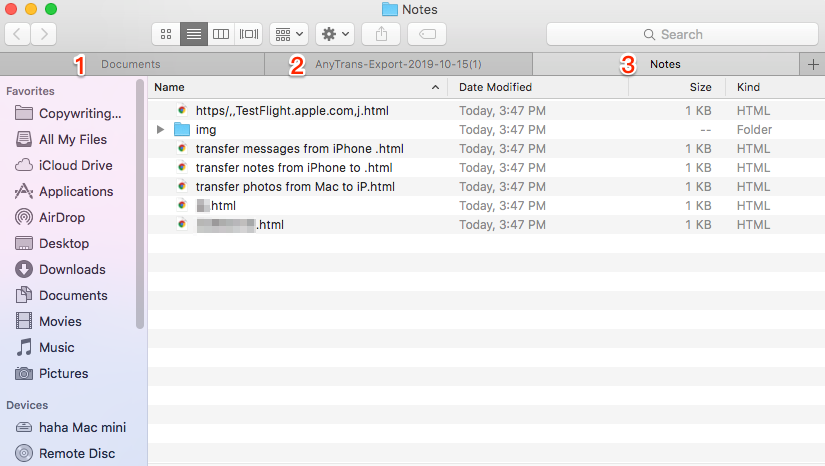
Check the Notes Backup on Mac
Method 4. Backup Notes on iPhone/iPad via Email
For any transfer task, the email method is usually only preferred when you have a few files to work with. If there are only a couple of notes to be backed up, you may use the email method to do it.
Step 1. Launch the Notes app on your iPhone/iPad.
Step 2. Find and open the note you want to back up. When the Notes app opens, tap on the share icon at the top-right corner of your screen.

Access the Share Option for Notes
Step 3. From the available sharing options, select the option that says Mail. Then, email yourself a copy of your note.
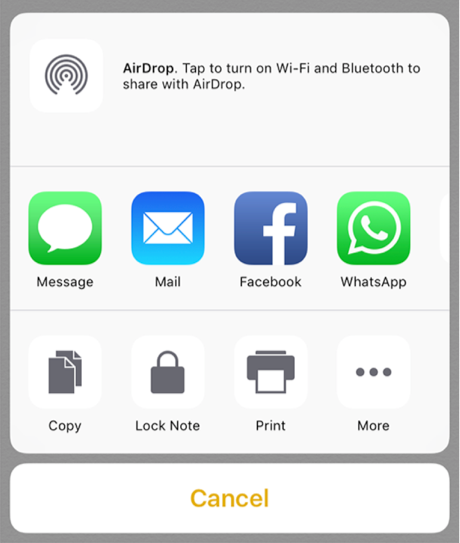
Send Notes to Yourself via Email
You now have a backup of your notes saved in the inbox of your email account. You can even download these notes from your inbox to your computer or to any other device for additional backups.
The Bottom Line
It is really important that you regularly back up the notes, and other files like photos, messages, contacts on your iPhone or iPad. That way you will have something to fall back on when things go wrong and you end-up erasing all the data on your devices.
More Related Articles

Work for iMobie team for 5 years as well as an Apple fan, love to help more users solve various types of iOS or Android related issues.
Product-related questions? Contact Our Support Team to Get Quick Solution >
