How to Fix iPhone 0xe80000a and 0xe8000084 Errors
Many users are faced with iTunes error 0xe80000a or 0xe8000084 error when they are seeking to connect iPhone/iPad/iPod to iTunes for an update. In this article, we provide you with 4 effective methods to fix this issue.
iTunes & iCloud Issues
iTunes Errors
iTunes Issues & Tips
Experiencing problems while updating your iPhone’s iOS with iTunes has become commonplace since a broad range of factors can cause an update to fail. Fortunately, most errors displayed by iTunes are caused by a software issue that can be easily resolved.
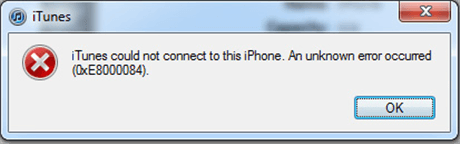
iPhone 0xe8000084 Error
Hence, you don’t have to be a tech geek in order to fix the iPhone 0xe80000 or 0xe8000084 errors, but you are going to need basic computer literacy. It is also worth noting that these two errors can show up on both Mac and PCs and that the actual steps you need to take to resolve them depend on the computer you are using.
Let’s take a look at the reasons behind iPhone 0xe80000 or 0xe8000084 errors. And please figure out what you can do if you keep seeing the iTunes could not connect to this iPhone 0xe80000 or 0xe8000084 message.
The Most Common Reasons Why Oxe80000 or Oxe8000084 Errors Occur
Although seeing either of these errors on the screen repeatedly can be frustrating, resolving them shouldn’t take more than a few moments of your time. Before you start looking for other solutions to this problem, you should first make sure that your iPhone is properly connected to your computer.
Check if the USB you are using to connect the two devices is faulty and try plugging the cable into another USB port in order to eliminate the chances that the problem is caused by a broken USB port.
Here are some of the most common reasons why you are seeing 0xe80000 or 0xe8000084 errors:
- The processes running in the background
- iTunes is wasn’t updated recently
- Compatibility issues between an iPhone and iTunes
- Some of the iTunes files are corrupted
Fixing this issue is easy, unless the USB ports on your computer are faulty, in which case you will have to repair your Mac’s or PC’s hardware in order to resolve this problem. Here are several ways to fix the iPhone 0xe80000 or 0xe8000084 error.
End All Tasks That Are Running in The Background
One or more background processes can be the reason why these errors keep showing up when you want to update your iPhone from iTunes you installed on a PC. Follow these steps to fix the problem.
Step 1: Press the CTRL+ALT+Del keys on your keyboard until the Task Manager window appears on the screen.
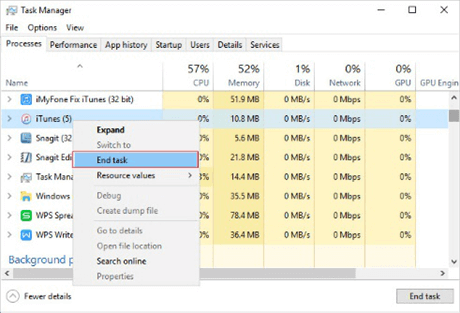
Task Manager Window
Step 2: Locate all processes that have Apple in their name, click on them to select them, and then click on the End Task button in the lower right corner of the window. Optionally, you can right-click on the process you want to end and choose the End Task option from the menu.
Step 3: In case you have trouble locating the AppleMobileDeviceService.exe file, you should use the Win+R keyboard shortcut and paste the following command into the Run window’s search box:
%ProgramFiles(x86)%\Common Files\Apple\Mobile Device Support\AppleMobileDeviceHelper.exe
Click on the OK button and proceed to close this application before launching iTunes to check if the problem was resolved.
Restart Your iPhone
In case you failed to sync, restore or update your iPhone with iTunes, try restarting both devices. The steps you will have to take to restart your iPhone depend on the model, so if you have an iPhone 7 or older you should hold the Sleep/Wake button until the ‘Slide to Power Off message appears on the screen.
Then simply drag the slider to the right and your iPhone is going to switch off. If you would like to restart an iPhone 8 or some of the more recent models you just have to press the Volume Up and Volume Down buttons briefly, before pressing and holding the Side button until the Apple logo appears on the screen.
Reinstall iTunes
Corrupt app components can often be the reason why 0xe80000 or 0xe8000084 errors occur. Reinstalling iTunes is the quickest way to get rid of this problem, although you can also try to remove just several components that usually cause 0xe80000 or 0xe8000084 errors.
If you would like to reinstall iTunes, you should make sure that the application is deleted from your computer along with all of its components, then download the latest version of this app and install it.
You should look for the following components if you don’t want to reinstall the iTunes app on your PC.
- Apple Software Update
- Apple Mobile Device Support
- Apple Application Support
- Bonjour
To remove any of these components you should click on the Start menu, then navigate to the Settings App and open the Apps & Features menu. Locate each of these components and delete them from your computer.
You should follow these steps to remove the iTunes components that might be causing the 0xe80000 or 0xe8000084 errors from a Mac computer.
Step 1. Open the Applications folder and right-click on iTunes.app file. Select the Get Info option from the menu and click on the Padlock icon before proceeding to insert your Admin details.
Step 2. Head over to the Sharing & Permissions menu, locate the Read & Write feature, and make sure it is set to Everyone. When done you should drag and drop the iTunes desktop icon to the Trash folder.
Step 3. Use the Spotlight search bar to bring up the Activity Monitor app, then locate the iTunes Helper through this app and delete it. Open the Library and go to the Preferences menu. Search for all files that have ‘com.apple.itunes in their name and delete them.
Repair iTunes with A Few Clicks
Fixing the 0xe80000 or 0xe8000084 errors by reinstalling iTunes or deleting some of its components from your computer can be tiresome. AnyFix – iOS System Recovery tool offers a simple solution as it allows you to repair iTunes and all files that may have gotten corrupted in just a few easy steps.
Free Download * 100% Clean & Safe
Step 1. Install and open AnyFix – iOS System Recovery on your computer > Select the iTunes Repair option after the app’s welcome window appears on the screen.
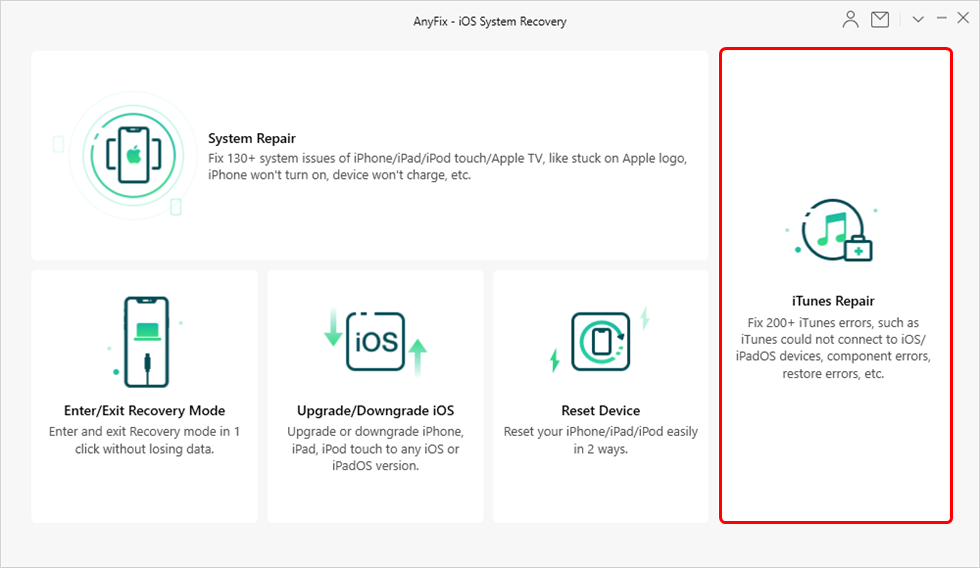
Click on iTunes Repair
Step 2. Once the iTunes repair window loads, you should select the iTunes Connection/Backup/Restore Errors option and click on the Scan Now button.
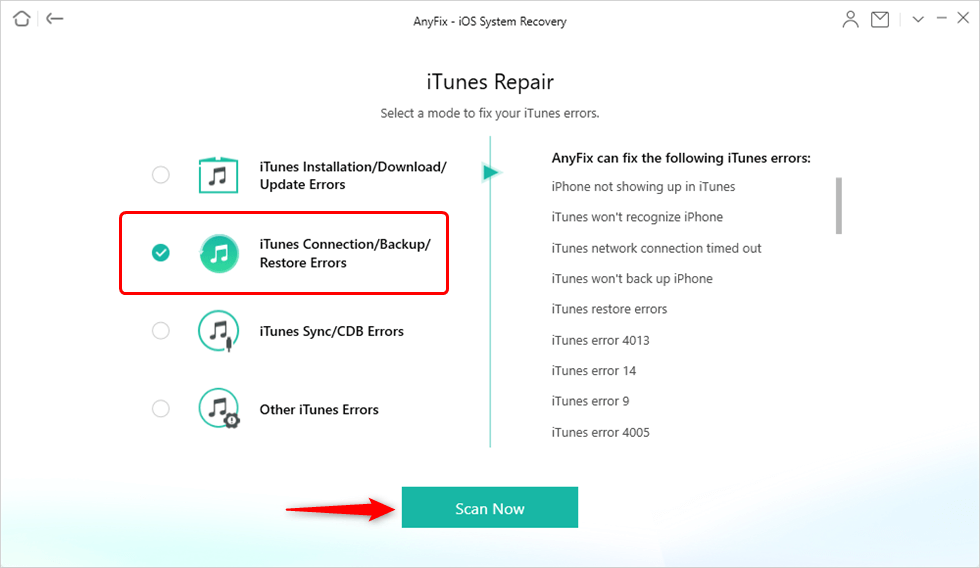
Select the Error Type to Fix
Step 3. AnyFix will then analyze the version of iTunes you have on your computer and show you the list of corrupted components after completing the analysis. You should click on the Fix Now button, and agree to give AnyFix admin rights by clicking OK.
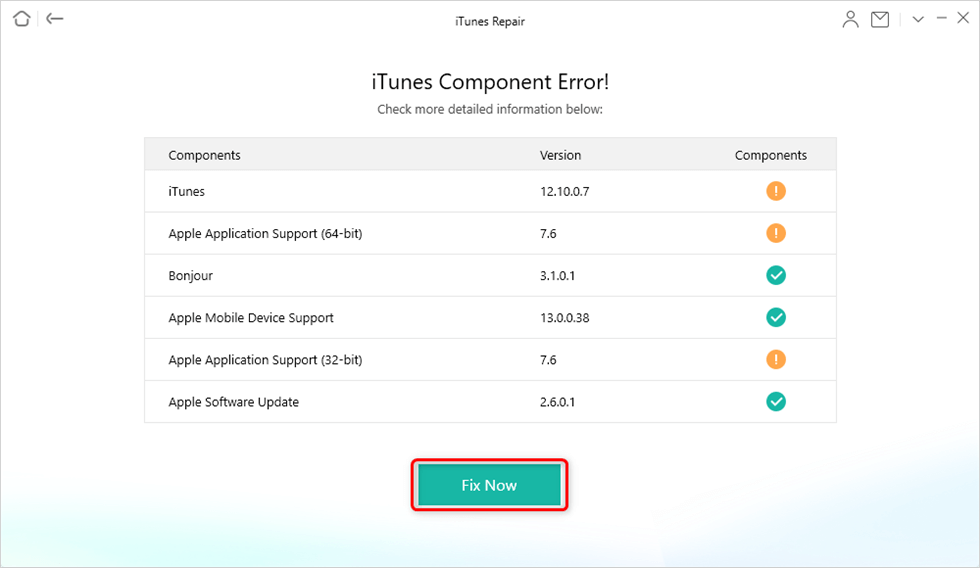
Resolve iTunes Errors
Step 4. All corrupted iTunes components will be removed and replaced. You should launch iTunes after AnyFix finishes repairing it to check if the problem persists.
The Bottom Line
Being able to update, sync, or restore your iPhone with iTunes makes using the device much more enjoyable. Errors 0xe80000 and 0xe8000084 can appear during any of these processes, but you shouldn’t panic if you see them.
Simply make sure that no processes are running in the background and that your iPhone is connected to a computer properly. In addition, you can restart your iPhone or delete some of the iTunes’ components that may be causing the issue.
Was this article helpful? Leave a comment and let us know.

Joy Taylor is a seasoned technical writer with over a decade of experience in mobile technology. At iMobie, she specializes in producing in-depth content on iOS data recovery, iPhone unlocking solutions, and iOS troubleshooting.
Product-related questions? Contact Our Support Team to Get Quick Solution >
