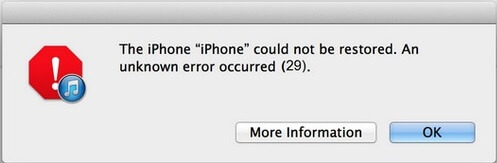
How to Fix iTunes Error 29
When you update to the newest version of iOS or you would just like to restore your iPhone, a message like Error 29 may appear on the screen for a variety of reasons. Don’t worry, in this article, you will find the reasons why iTunes error 29 appears and 6 easy ways to fix it.
iTunes & iCloud Issues
iTunes Errors
iTunes Issues & Tips
It is only natural that you want each iOS update you run through iTunes to go smooth. Even if you would just like to restore your iPhone, the last thing you do not want is an error message to pop up on the screen. To make matters worse, a message like Error 29 may appear on the screen for a variety of reasons. Moreover, you may end up asking yourself how do I fix a restore error on my iPhone. In some cases, determining what caused the issue can be difficult.
That’s why in this article we are going to take you through all reasons and solutions you can try to fix iTunes Error 29.
How to Fix iTunes Error 29
What Cause the iTunes Error 29?
There is more than just one possible reason why you are seeing iTunes Error 29 messages. So let’s take a look at the issues that can cause the error.
- Hardware can be causing the problem, such as a new non-original battery.
- The operating system on your computer needs an update.
- You’re not using the latest version of iTunes.
- The antivirus app on your iPhone is preventing the system restore or system update.
Fortunately, fixing any of these issues is relatively easy. Here are some of the most effective solutions to the iTunes Error 29 message.
Repair iTunes with AnyFix – iOS System Recovery
AnyFix is a software that can provide you a one-stop solution to fix any iTunes issues without data loss. For those who are not good at technology, this is probably the quickest way to resolve the Error 29 issue, since AnyFix lets you repair iTunes in just a few clicks. Here’s what you need to do in order to fix any problem that is related to installation, download, update, connection, backup or restore errors in iTunes.
Free Download * 100% Clean & Safe
Step 1. Click on the iTunes Repair option after you launch AnyFix.
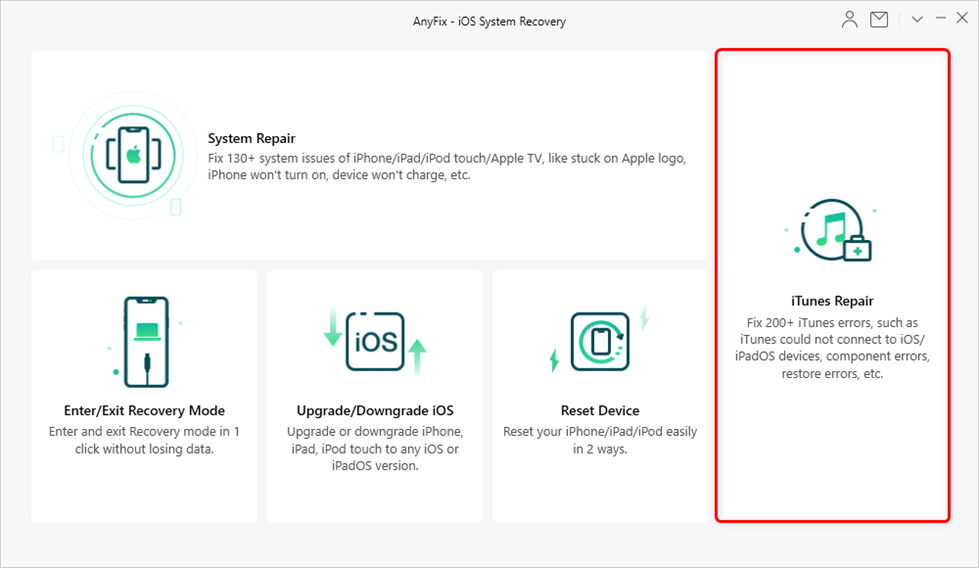
Click iTunes Repair
Step 2. Then select the iTunes Connection/Backup/Restore Errors feature once the iTunes Repair window opens > Click on the Scan Now button and wait until AnyFix completes the analysis of the components.
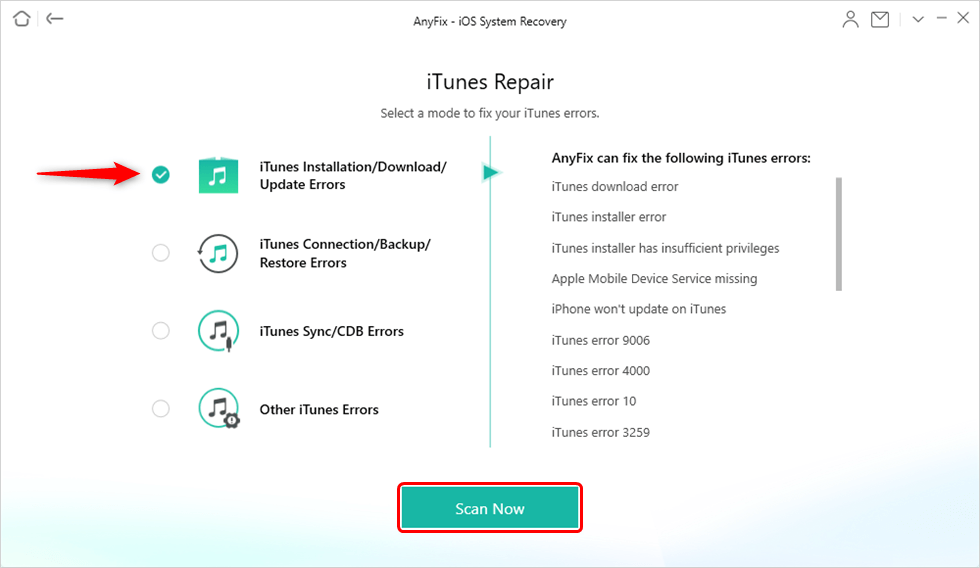
Choose iTunes Installation/Download/Update Errors
Step 3: Once the analysis is completed the software will display the list of iTunes component errors, so just click on the Fix Now button.
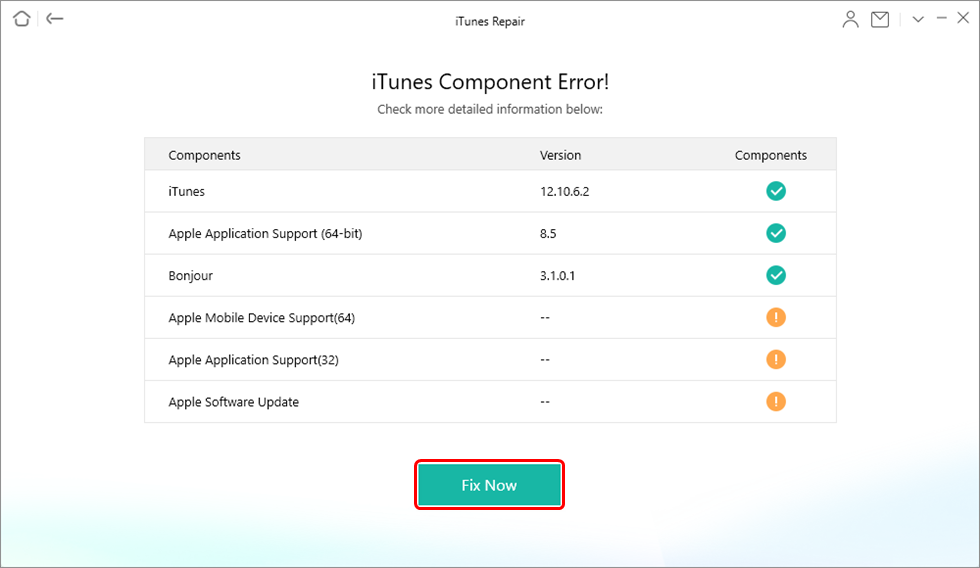
iTunes Component Errors will be Detected
Step 4. Proceed to give AnyFix administrator rights by clicking on the Yes button in the User Account Control window. The process of repairing iTunes will start immediately and you should open iTunes after this process ends to check if Error 29 has been fixed.
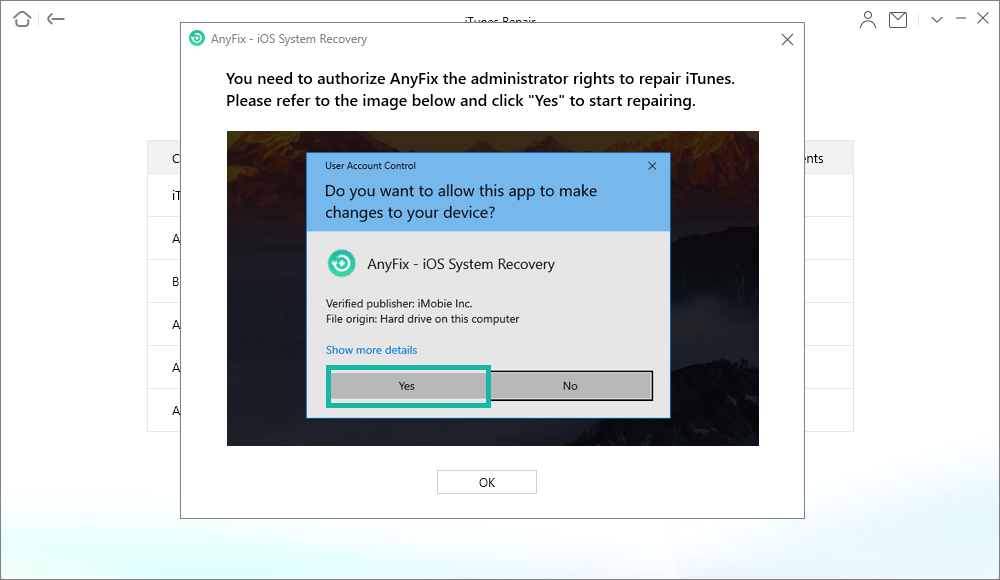
Authorize AnyFix on your Computer
Get a New Battery for Your iPhone
Sometimes recharging your iPhone can resolve iTunes Error 29, but if the issue is more persistent you may have to change the device’s battery. However, you should make sure that the replacement battery is an original produced by Apple, because if iTunes recognizes that the battery isn’t original it may display iTunes Error 29.
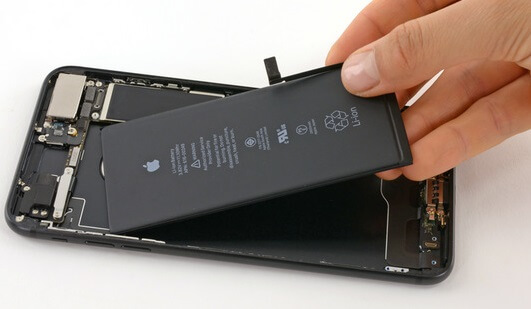
Replace a New Battery
Don’t attempt to change the battery on your iPhone on your own, if you haven’t done it before, because you may damage the device. Take your iPhone to a licensed Apple repair shop if you are experiencing difficulties with the battery and acquire the replacement part from a reliable source.
Make Sure that iTunes is Up to Date
Even though updating software regularly can be tiresome, it can help you avoid dealing with different software problems. An outdated version of iTunes may be the reason why Error 29 pops up on the screen while you are trying to restore or update your iPhone’s iOS with this app.
Check iTunes Update
To update to the latest version of iTunes you should open the app and choose the Software Update option from the Apple menu. Proceed to click on the Check for Updates option and then click on the Download and Update button.
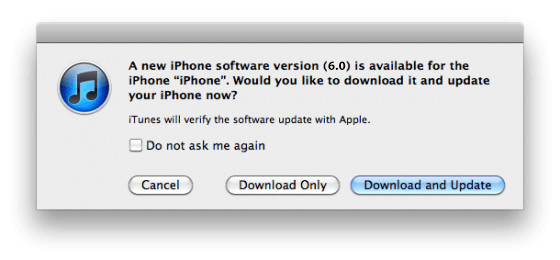
Download and Update iTunes
Select the available iTunes update from the Software Update window and follow the on-screen instructions to complete the installation process.
Disable the Antivirus App While Restoring Your Device
Antivirus apps that are produced by Apple can stop iTunes from connecting to the servers from which it acquires the data. Consequently, numeric error messages are displayed while an iPhone is updated, restored, backed up, or synced. Switch off the antivirus app you’re using while you are performing any of these actions with iTunes and then switch it back on once you’re done.
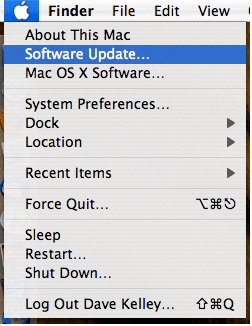
Update Your Computer’s Operating System
Incompatibilities between the latest version of iTunes and your computer’s operating system can be the reason why iTunes Error 29 keeps showing up. So, before you start updating your iPhone’s iOS you should also make sure that you have the latest version of macOS or Windows installed on your computer.
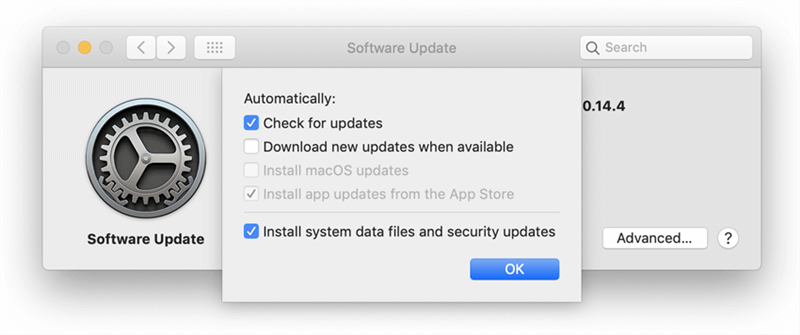
Check Mac System Update
Reset to iPhone to Factory Settings
Wiping your iPhone clean may help you fix Error 29, in case none of the above solutions produce results. Resetting an iPhone to factory settings will delete all photos, videos, or documents you stored on the device, which is why you need to create a backup before reverting back to factory settings.
You can backup your data through iCloud, by connecting your iPhone to a Mac or PC. You can find detailed instructions on Apple’s customer support website.
Factory Reset iPhone
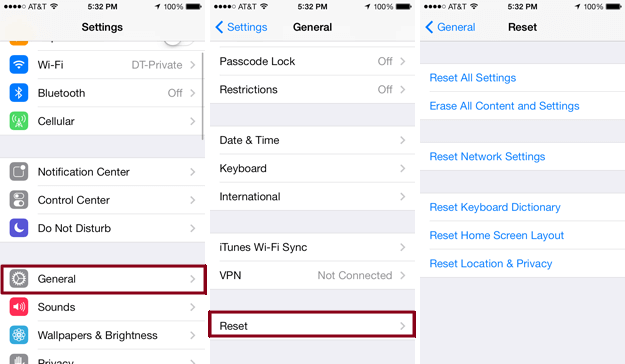
Once you created the backup, you can go on to reset the device to factory settings. Open the Settings app and tap on the General menu. Find the Reset option and tap on the Erase All Content and Settings feature. You will be asked to insert the device’s PIN code as well as your Apple ID and the process of resetting it to factory settings will begin shortly after.
The Bottom Line
Detecting the root of the problem that caused iTunes to display Error 29 is probably the most difficult part of solving the issue. In addition, ensuring that you have the latest versions of iTunes and OS on your computer will reduce the chances of Error 29 showing up. Did this article help you solve iTunes Error 29? Leave a comment and let us know.
More Related Articles

Joy Taylor is a seasoned technical writer with over a decade of experience in mobile technology. At iMobie, she specializes in producing in-depth content on iOS data recovery, iPhone unlocking solutions, and iOS troubleshooting.
Product-related questions? Contact Our Support Team to Get Quick Solution >
