How to Fix iTunes Error 9 via 5 Efficient Ways
iTunes error 9 usually occurs when you are either upgrading or restoring your iPhone with iTunes on your computer. The issue will not let you finish your task and interrupt the process. This guide shows how you can deal with it appropriately and successfully finish whatever you were doing.
iTunes Error
iTunes Sync Error
iTunes Connect Error
iTunes Update & Restore Error
iTunes Purchase Error
iTunes comes with a host of features, and at the same time, it comes with a number of errors as well. If you have been using the app for a while, you have likely experienced at least a few errors while using the app on your computer. The errors range from preventing you to update your devices to cause you to lose your data.
Error 9 on iTunes is one of these errors and it usually comes up when you are either upgrading or restoring your iOS devices. You basically get a dialog box on your screen stating the error and then it does not let you proceed.
If you are facing the aforementioned error and you have not been able to resolve it yet, this guide should help you fix it on your computer.
Part 1. How to Fix: iTunes Error 9 [9 Tips]
The following are eight methods you can try to see if they help resolve the issue you are facing with iTunes on your computer.
Top Fix to Get iTunes out of iTunes Error 9 within A Few Clicks
AnyFix is proven to be a labor-saving tool which commits to providing professional and easy-to-use solutions to fix iTunes and system issue. You can solve over 130 system problems and 200+ iTunes issues with a few clicks. Therefore, you can give it a try to get rid of iTunes Error 9 issue within a few clicks.
The listed steps will give you a clear tutorial to fix iTunes 9 error on your computer.
Step 1. Download AnyFix and run it on your computer > connect your iOS device to the computer > choose the iTunes Repair.
Free Download * 100% Clean & Safe
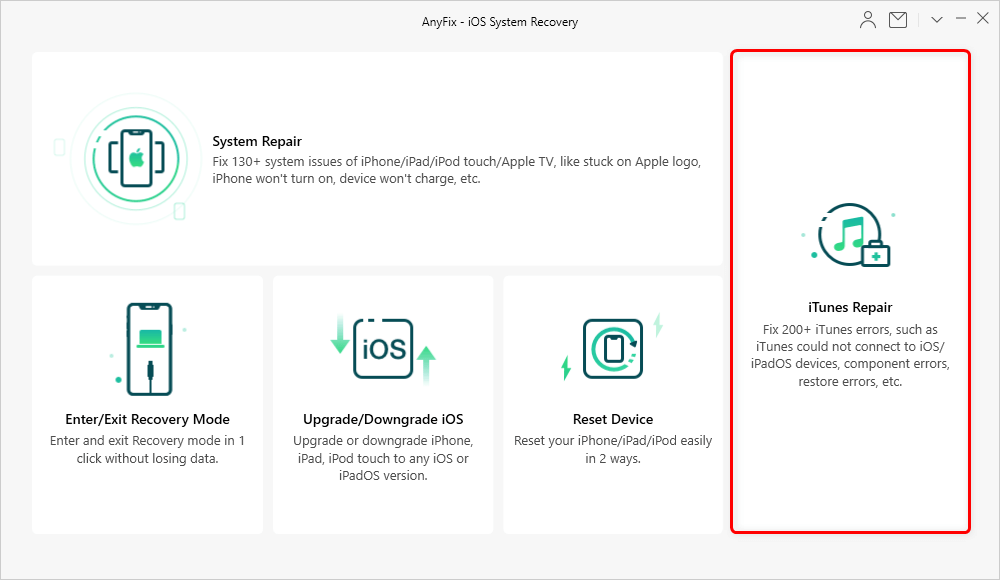
Tap on iTunes Repair from Homepage
Step 2. Click on iTunes Connection/Backup/Restore Errors > Tap on the Fix Now.
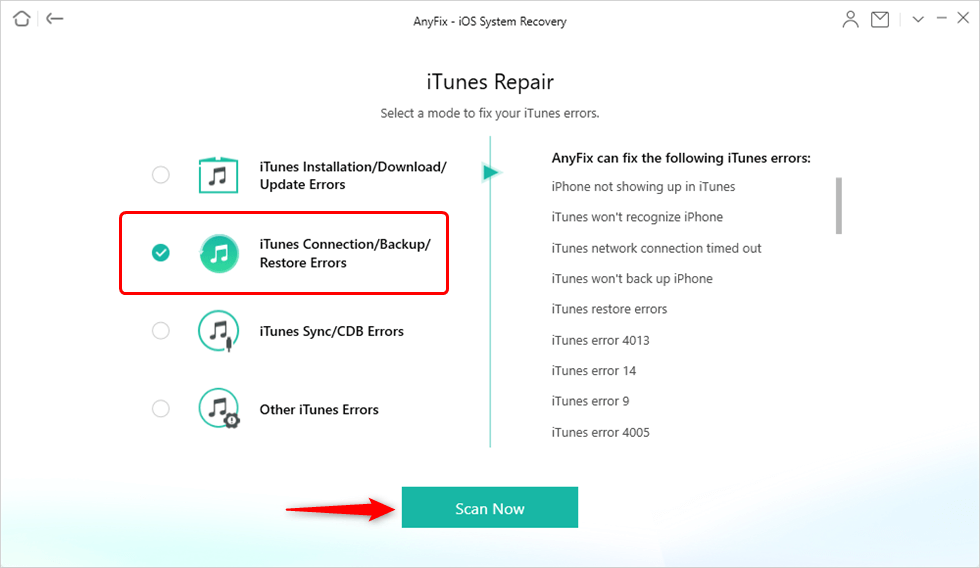
Select the Error Type to Fix
Step 3. AnyFix will analyze the iTunes’ components to check out the problem. Moments later, click on the yes and OK button to continue.
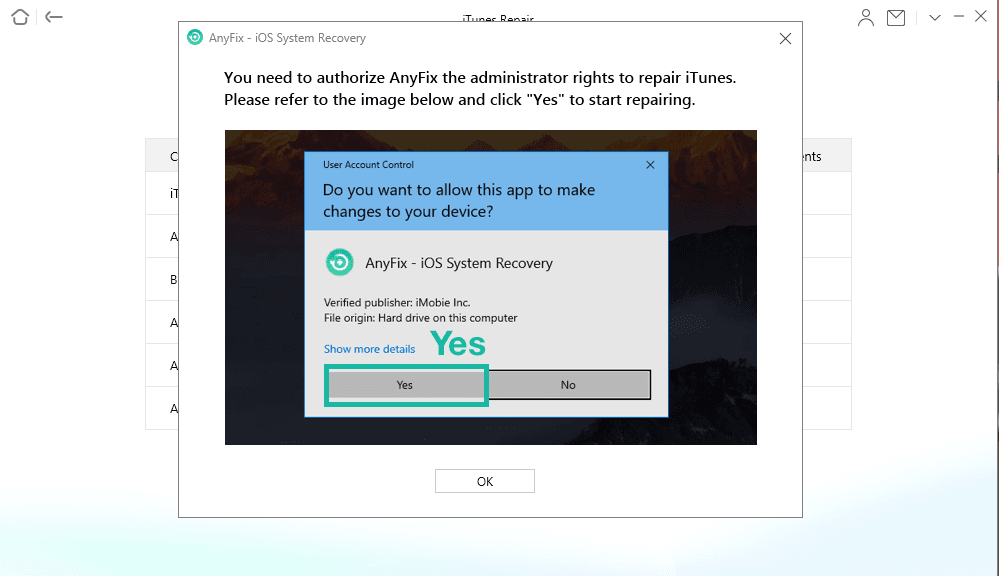
Give AnyFix Permission on your Computer
Step 4. Successfully repaired page on your screen.
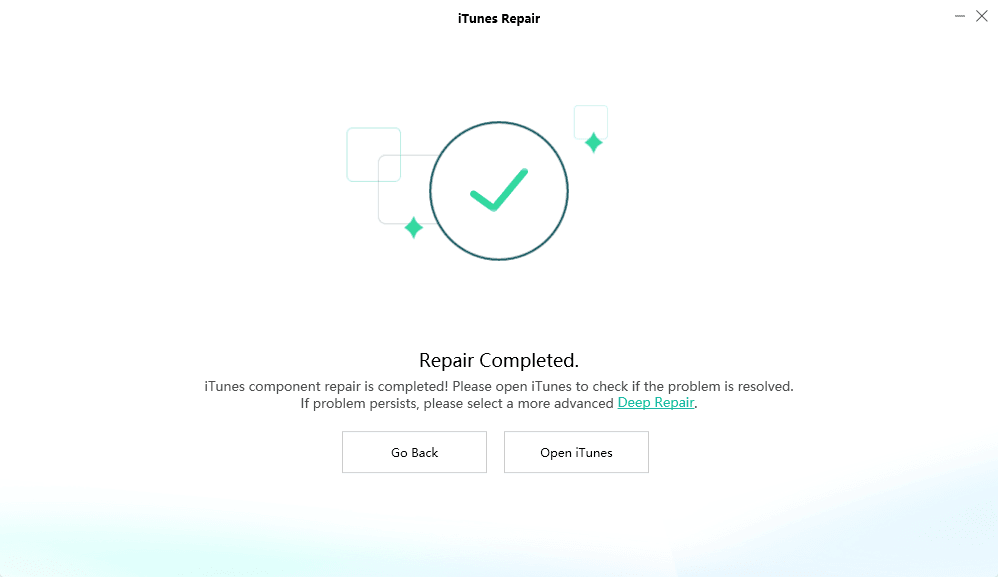
Repairing Completed
Tip 1. Ensure the USB Port is Working
One of the reasons why the iTunes error code 9 appears is because iTunes is facing an issue connecting to your device. When connection issues surface, it is usually due to a broken or damaged cable or a non-functional USB port on your computer.

Confirm the USB Port Works on Your Computer
You want to make sure the USB port that you are using to connect your iPhone to your computer is working. Ensure you have plugged something else into it and it worked. If it has gained any dust or any other obstacles that could prevent the connection from taking place, you may want to get rid of it before you use iTunes with your device.
Tip 2. Use Another USB Port on Your Computer
If you checked the USB port and found that it indeed does not work, then your best solution is to use one of the other USB ports on your computer. Most computers usually come equipped with several ports to attach external USB devices, such as your iPhone and iPad.
Use the spare USB port available on your computer to connect your device and then see if iTunes lets you successfully restore or upgrade your device. If the error was caused due to a non-functional work, it should likely be fixed now. If the issue still persists, our other methods below will help you out.
Tip 3. Forcibly Reboot Your Devices
It is not always iTunes that has issues but sometimes your devices could also create problems. It may be that your iPhone or iPad has an issue with it and that is what is causing iTunes error 9 on your computer.
Unless you know exactly what is causing the issue on your device, it is really hard to diagnose the problem and fix it. There is one thing, though, which you can do and it helps fix most minor issues on your iOS devices. It is called force reboot and you can do it with all of your iOS devices.
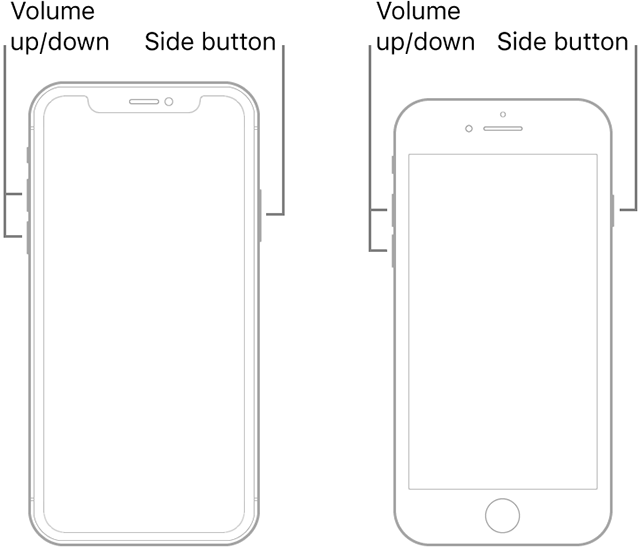
Force Reboot Your iPhone
On newer iPhone models – press the Volume Up key and let it go, press the Volume Down key and let it go, and finally press and hold down the Power key.
On older iPhone models – press and hold down both Volume Down and Power buttons simultaneously and it will force reboot your device.
Tip 4. Update the iTunes App
Running an older version of iTunes could cause many issues on your computer. It is because older versions usually have many bugs that have now been rectified in newer versions. What that means is it is always a good idea to keep the iTunes app version up to date on your computer.

Update iTunes
Updating the iTunes app is not a difficult process at all. In fact, it is the easiest of all. Simply download the latest version of the app from the Apple website and you are good to go. If you are feeling lazy to do it, then you can use the Apple Software Update tool on your computer to get the job done.
Regardless of what method you use, it will update the existing iTunes version on your computer.
Tip 5. Disable Firewall on Your Computer
What a firewall does on a computer is to decline incoming network requests that are from non-trusted sources. Due to the nature of the tool, sometimes it ends-up detecting the legitimate Apple and iTunes servers as malicious ones and could block the traffic coming and going to them.
This can cause various issues in iTunes including error code 9. Fortunately, you can fix the issue pretty quickly. You can disable the firewall on your computer while you use iTunes and then re-enable it when you have restored your phone.
Disable Firewall on a Windows Computer
Head over to Control Panel > System and Security > Windows Defender Firewall, click on Turn Windows Defender Firewall on or off in the left sidebar, and choose Turn off Windows Defender Firewall on the following screen.
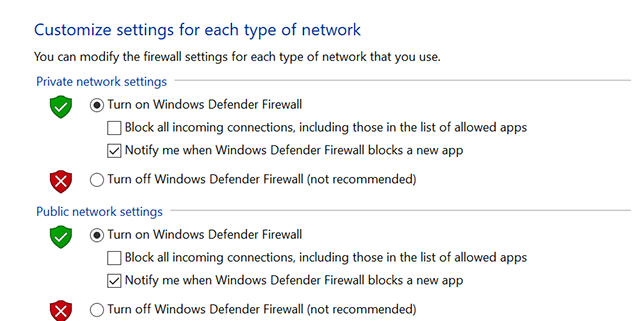
Disable Firewall on Windows
Remember to click on OK to save the changes.
Disable Firewall on a Mac
Head over to System Preferences > Security & Privacy > Firewall and click on Turn Off Firewall.
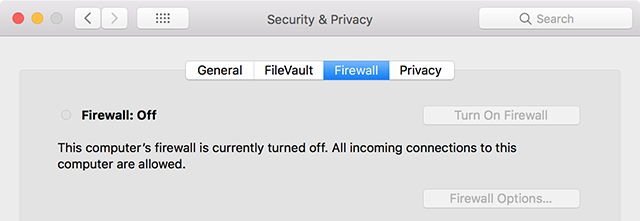
Disable Firewall on Mac
The firewall should be disabled.
Tip 6. Use Recovery Mode on Your Device
Your iOS device actually comes with a mode called recovery mode that helps you troubleshoot issues on your device. If you are having trouble upgrading or restoring your device in normal mode, you can reboot your device into the recovery mode and perform those tasks without an issue.
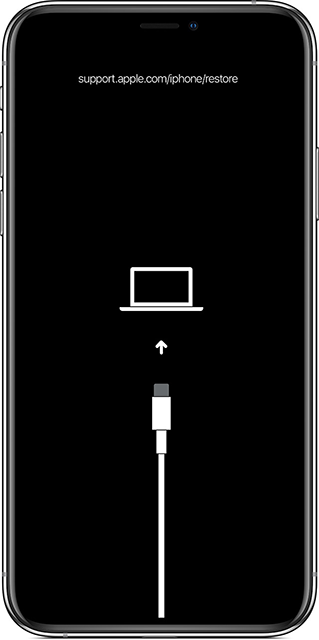
Reboot iPhone into the Recovery Mode
To use the method, ensure your phone is connected to your computer and iTunes is open. On your device, press Volume Up and let it go. Then, press Volume Down and let it go. Finally, press and hold down the Power button. Your device will go into the recovery mode and iTunes should be able to detect it.
Tip 7. Use Another Computer to Do the Task
If you have still not been able to resolve the issue, it could be the issue is not with iTunes but it is actually with the operating system of your computer. In that case, you will need to first fix your OS and then use the iTunes app to do whatever tasks you want to do.
If you are looking for a quicker option, then you can use another computer that you have access to restore your device. It will be a good idea to do this if you know fixing your machine will take a long time and you cannot wait.
Tip 8. Update Your Device without iTunes
Many of you out there may know that you do not actually need iTunes to update the software version on your iOS devices. These devices also come equipped with the option to help you update to a newer version of the iOS operating system.
You can utilize the option to update the current software version on your iPhone or iPad, and that way you will not have to face the iTunes error 9 on your computer. It is simply because you will not be using the app to update your phone.
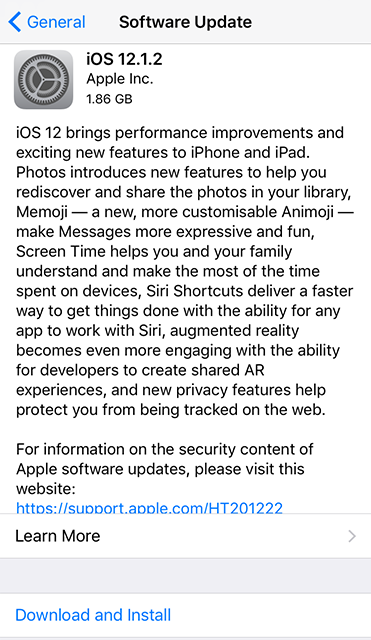
Update iPhone from the Device Itself
You can update your device by heading to Settings > General > Software Update.
Part 2. How to Manage iTunes with AnyTrans
If you face errors with iTunes too frequently, you might be frustrated with the whole experience of the app usage. For many tasks that you usually do with iTunes, you do not actually have to rely on it for them. There are now better iTunes alternative options available in the market.
AnyTrans for iOS is one of the apps that help you manage iTunes files without actually using iTunes. Whether iTunes crashes, it will not load, or whatever the issue is, AnyTrans can help you transfer music to and from iTunes on your computer.
For instance, if you want to add a music file from your iPhone to iTunes, you can do it with AnyTrans pretty easily.
Step 1. Download AnyTrans for iOS from its official website and install it on your computer.
Step 2. Connect your iPhone to your computer.
Step 3. Launch the app and click on the option that says Device Manager and then chooses Audio.
Step 4. Select Music, choose the music tracks to transfer to iTunes, and click on Send to iTunes at the top.
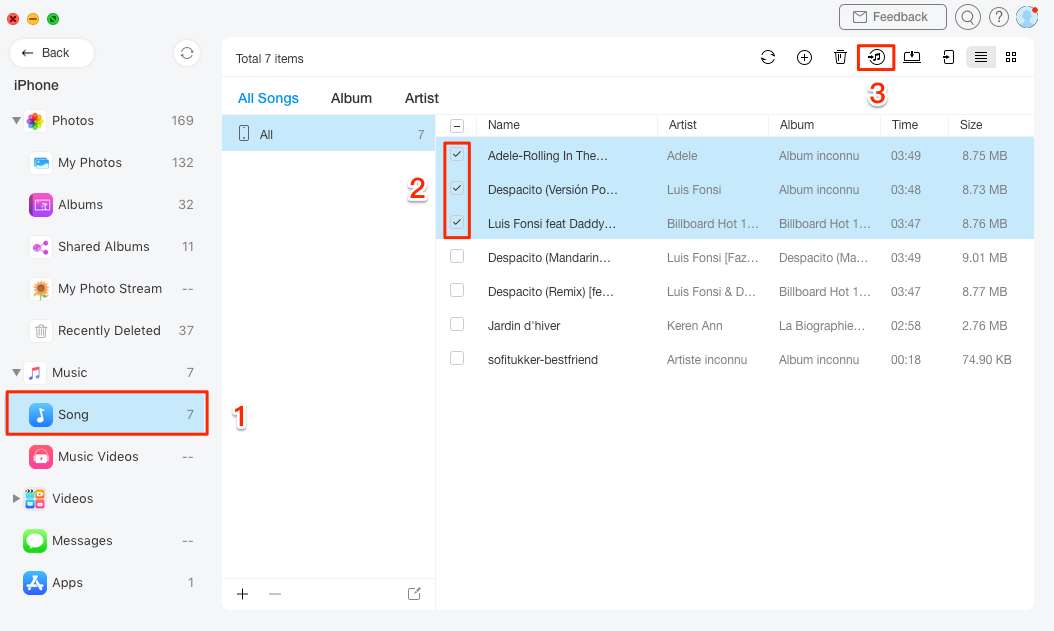
Transfer Files from iPhone to iTunes with Anytrans for iOS
Your selected music will be transferred from your iPhone to iTunes.
Conclusion
Occasional iTunes error 9 may not be much of an issue for most users, however, if it continues to appear each time you are performing a task on your device, our solutions above should help you get rid of it from your computer. If nothing works, you can always use an iTunes alternative app.

Member of iMobie team as well as an Apple fan, love to help more users solve various types of iOS & Android related issues.
Product-related questions? Contact Our Support Team to Get Quick Solution >
