How to Fix iTunes Error 23 with Ease
Encountered iTunes error 23? Don’t worry, here in this post, we will show you why iTunes error 23 occurs and how to fix it.
iTunes Error
iTunes Sync Error
iTunes Connect Error
iTunes Update & Restore Error
iTunes Purchase Error
Q: While I am restoring my iPhone, suddenly the restore process is stopped and a message pops out, saying iPhone could not be restored. An unknown error occurred (23). I tried to restore iPhone several more times, but the same message still pops out. How can I fix iTunes error 23?
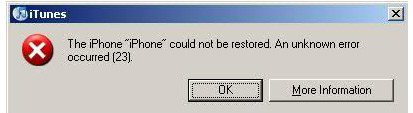
iTunes Error 23
A: iTunes error 23 is an iTunes-related error that occurs when you update, downgrade or restore iOS devices. In most cases, iTunes error 23 is caused by hardware issues. iTunes error 23 is not hard to fix, but it is still a headache for a great number of iPhone/iPad users.
Here in this post, 3 parts are introduced to help you fix iTunes error 23. We recommend you try them one by one.
Part 1. One-Stop Way to Fix iTunes Error 23
Firstly, we’d like to introduce a one-stop method that you can use to fix iTunes error 23, even other unknown errors you may meet. This tool is called AnyFix, which can help you with installation/download/update errors. So whenever you’re suffering iPhone could not be restored with iTunes, or iPhone won’t update on iTunes, etc, AnyFix can do you a favor. Now, you can follow the simple steps below to fix iTunes error 23.
Step 1. Get AnyFix from the official website > Install and launch it > Just click iTunes Repair from the homepage.
Free Download * 100% Clean & Safe
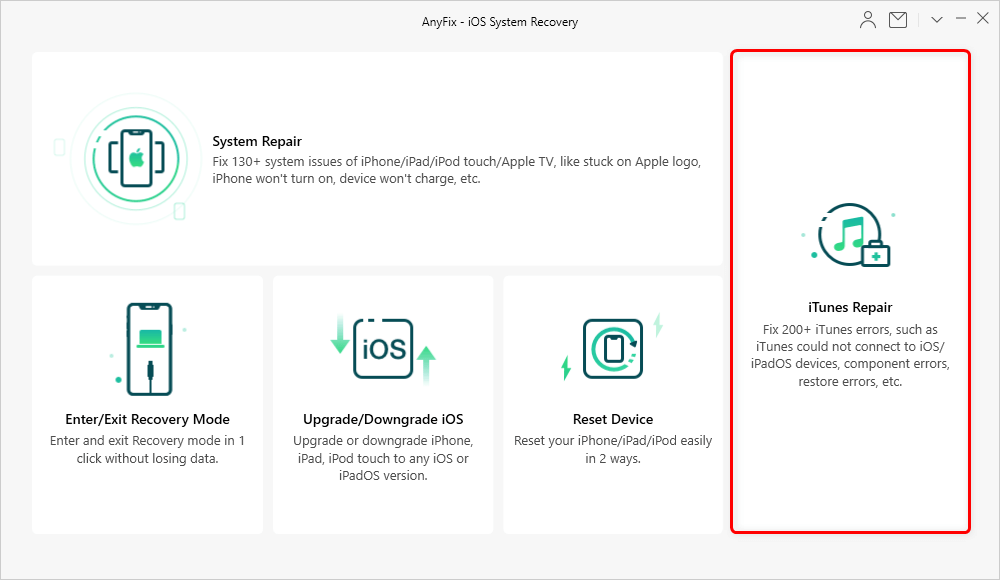
Tap on iTunes Repair from Homepage
Step 2. You will view the iTunes errors list that AnyFix can fix > Choose iTunes Installation/Download/Update Errors and Scan Now.
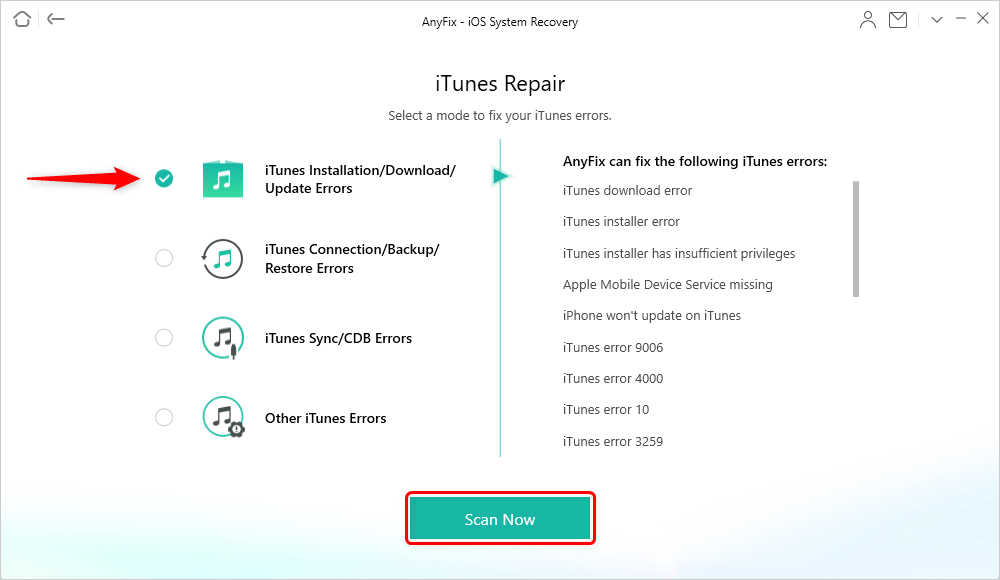
Choose Installation/Download/Update Errors
Step 3. Next, AnyFix will show you the components error of iTunes, click Fix Now button to continue.
Step 4. Then you need to give AnyFix authorization on your computer. And it will start to repair your iTunes immediately. Wait a minute and you will see Repair Completed page. Re-launch iTunes to check.
Part 2. Some Basic Ways to Fix iTunes Error 23
Method 1. Update iTunes
The old version of iTunes may contain bugs and errors, so one of the reasons why iTunes error 23 occurs is not using the latest version of iTunes.
To update iTunes on Windows, please go to Help > Check for Updates. Follow the prompts, you can update iTunes to the latest version.
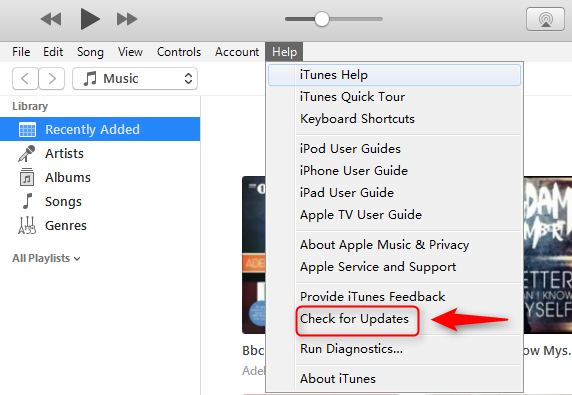
Fix iTunes Error 23 by Updating iTunes to the Latest Version
For Mac users, please launch iTunes then click on the iTunes menu > Check for Update. Follow the prompts and iTunes would be updated to the latest version.
Method 2. Reboot Your iPhone
No matter what kind of iTunes error you are encountering, rebooting your iOS device is always helpful. Simply holding the Power button and Volume Down button (for iPhone 7/7s) or Power button and Home button until Apple logo appears, after that, try to restore your iPhone again and see if your iPhone is still stuck in iTunes error 23.
Method 3. Update All Your Anti-Virus Software
Many of iTunes error 23 issues are caused by anti-virus software. Make sure all your security software are up to date. If updating anti-virus software is not helpful to solve iTunes error 23, please turn to the next solution.
Method 4. Use Original Cables
It is usually better to use original cables to do restoring. The fake cables can be the reason why you get iTunes error 23.
Method 5. Putting iOS Device into DFU Mode
If none of the methods above work for you, you can only have a try to put iOS device into DFU mode. Putting the device into DFU mode and doing restore can surely help you solve iTunes error 23, however, this may cause data loss, don’t try this before backing up everything on your iOS device.
If you need a convenient and easy way to backup iOS data, please refer to the bonus tip part.
Step 1. Power off your iOS device, launch iTunes and connect your iOS device to computer.
Step 2. Hold the Home button for at least three seconds, don’t release the Home button, then hold the Power button and Home button simultaneously for a few seconds.
Step 3. Keep holding Home button and release the Power button, you will be able to see “Connect to iTunes ” on iOS device’s screen which means your iOS device has already been detected in DFU mode, click Restore iOS Device to do restoring.
Don’t Miss: How to Fix iTunes Invalid Response on iPhone iPad >
Bonus Tip: An Alternative Tool to Backup iOS Data
As mentioned above, it is better to backup iOS data before fixing iTunes error 23 by putting iOS device in DFU mode. Actually, as many Apple experts suggest, iOS users should backup iOS data regularly in case of data loss due to many errors.
For iOS users, there are many tools to choose from for backing up iOS data, for example, iTunes, iCloud. These are nice tools, however, they are still far from perfect.
To start with, neither iTunes nor iCloud could help you backup all data, that is to say, each backing up and restoring process via iTunes/iCloud would cause data loss. Besides, iTunes backups and iCloud backups are not readable. What’s more, you can’t selectively back up data on your iOS device.
Luckily, now we have an excellent iCloud/iTunes alternative AnyTrans. It is first effective when backing up data to iCloud/computer, it would only take 5 minutes to transfer 3000 photos. Second to that, AnyTrans allows you to selectively back up iOS data to iCloud/computer. What’s more, you can view iTunes and iCloud backups on computer via AnyTrans.
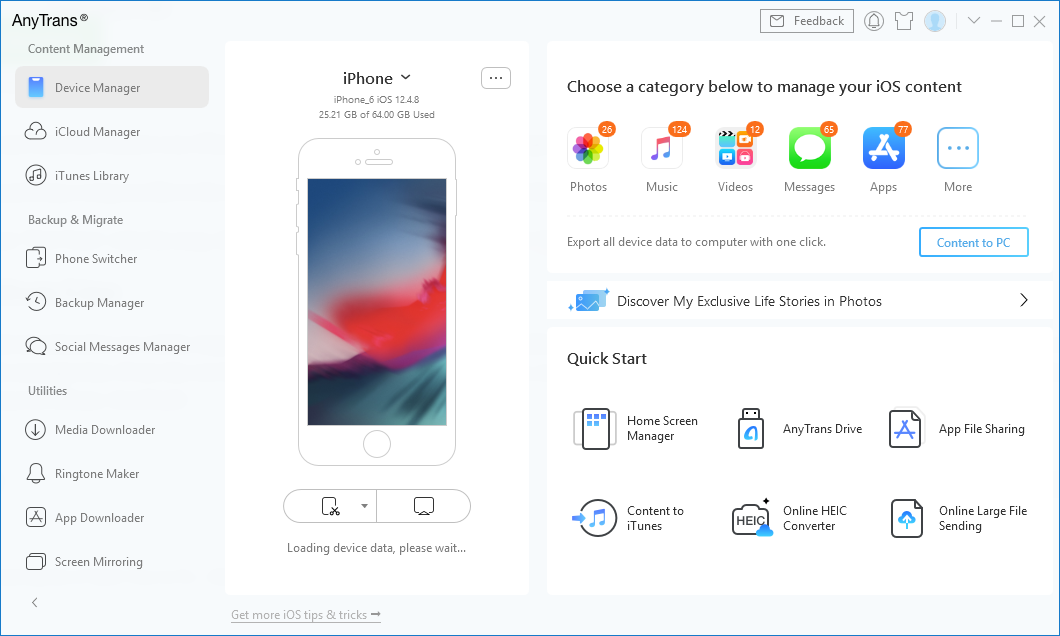
Main Interface of AnyTrans
Free Download * 100% Clean & Safe
For detailed steps of how to backup iOS data, please refer to:
How to Backup iPhone to Computer >
How to Backup iPad to iCloud >
The Bottom Line
That’s all for three parts to fix iTunes error 23 and the introduction of an alternative tool to backup iOS data. Please do let us know if this article is helpful by leaving comments on the comment column.
More Related Articles

Member of iMobie team as well as an Apple fan, love to help more users solve various types of iOS & Android related issues.
Product-related questions? Contact Our Support Team to Get Quick Solution >
