How to Fix: iTunes Error 4013
Encounter an iTunes error 4013? No worries. Read the guide below and learn all available methods that can help you fix iTunes error 4013 with ease.
iTunes Error
iTunes Sync Error
iTunes Connect Error
iTunes Update & Restore Error
iTunes Purchase Error
The last thing you ever want to encounter on your iPhone when you’re trying to update or restore it is iTunes error 4013 that tells you it can’t be restored. No doubt, this seems like big trouble, especially because you won’t be able to use your device until the problem gets fixed. Well, we have great news for you and it is that you can easily fix this problem. Continue reading the post to learn about iTunes 4013 error fix with ease.
Part 1. What is iTunes Error 4013?
Also known as iPhone error 4013, iTunes error 4013 is generally an issue related to hardware. Mostly, it occurred due to a faulty USB port or USB cable. To put in simple words, it is a connection error that indicates there is a communication problem between your iOS device and iTunes. The error won’t let iTunes update or restore your iOS device.
In addition to damaged USB cable or port, there could be other reasons to encounter the error such as weak Wi-Fi connection and outdated iTunes.
Part 2. How to Fix: iTunes Error 4013
To fix iTunes error 4013, the following troubleshooting ways are recommended.
Fix 1. Check USB Port, Cable, and Connector
When you encounter iTunes error 4013, it’s mainly because of the hardware-related problem. Therefore, you should begin with inspecting all your USB connectors and ports are working fine.
- Ensure that you are only using an Apple USB cable and port.
- Try a different USB port.
- You can also try to connect the device with another PC.
Fix 2. Update iTunes
Such errors can be encountered due to the outdated iTunes version. Indeed, iTunes is imperative to both updating and restoring, and it’s important to ensure that you’re using the latest version of iTunes. So, by simply updating iTunes could fix your problem.
To update iTunes on Mac, follow the below steps:
Step 1: Go to the App Store.
Step 2: Tap the “Updates” tab located at the top of the screen.
Step 3: If any iTunes updates are available, then click install them right away.
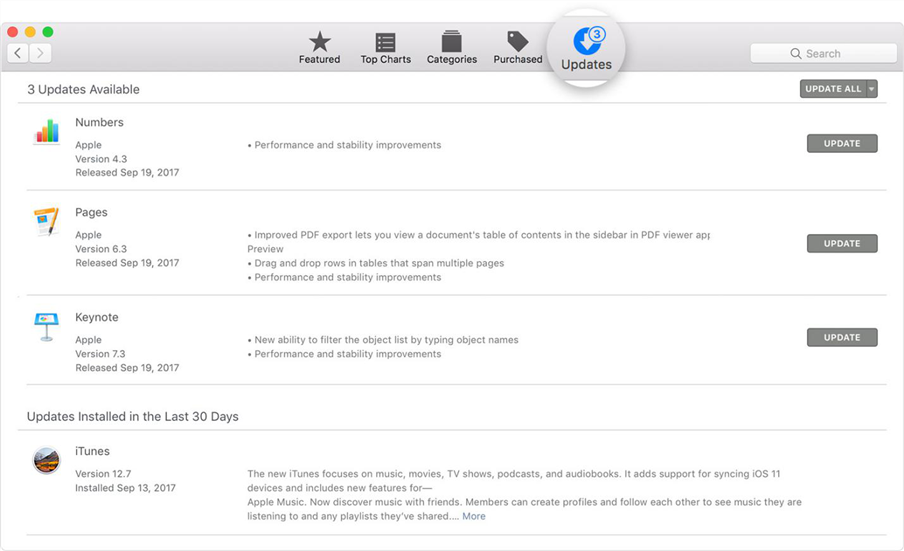
Fix iTunes Error 4013 via Update iTunes on Mac
To update iTunes on Windows, follow the below steps:
Step 1: Open iTunes
Step 2: From the menu bar, select the “Help”>” Check for Updates”.
Step 3: If any iTunes updates are available, then click install them right away.
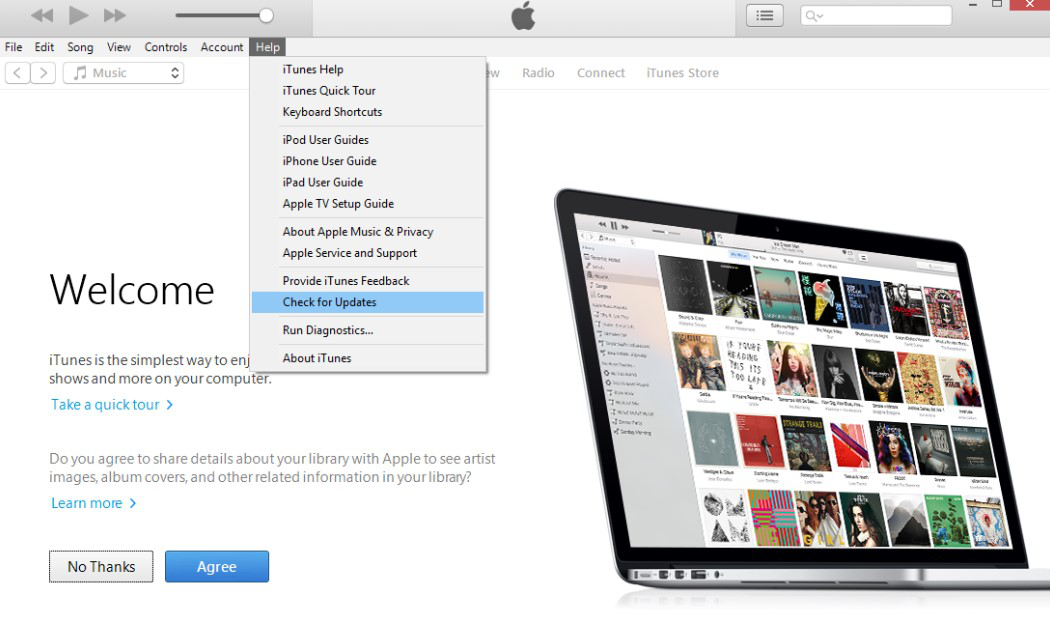
Fix iTunes Error 4013 via Update iTunes on Windows
Fix 3. Force Restart the Device
You can also try to force restart your iOS device to fix error 4013 iTunes. After performing force restart on your iOS device, you can try again restore or update to check if the problem is gone.
- iPad with Face ID: Quickly press and release the Volume Up button. Follow the same with the Volume down button. Press and hold down the Top button until your device restarts.
- iPhone 8 or above: Quickly press and release the Volume Up button. Follow the same with the Volume down button. Press and hold down the Top button until your device restarts.
- iPhone 7/7 Plus or iPod Touch (7thGen): Press and hold down the both Volume Down and Top or Side button until the Apple logo appears.
- iPad with Home button, iPod Touch (6thGen), iPhone 6s or earlier: Press and hold down both Home and Top or Side button until the Apple logo appears.
Fix 4. Reset Network Settings
For iTunes 4013 error fix, you can try resetting network settings. If the error is due to some network issue, then performing reset network settings would probably fix the problem.
Step 1: Go to the “Settings” on your iDevice.
Step 2: Open “General”>” Reset”.
Step 3: Hit “Reset Network Settings” and that’s all.
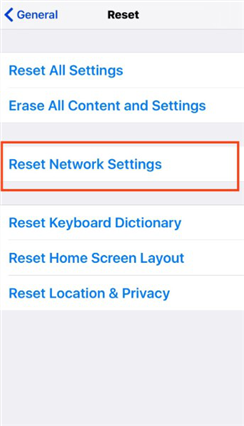
Fix iTunes Error 4013 via Reset Network Settings
Fix 5. Fix iTunes Error 4013 with A Few Clicks
Although we have already mentioned four methods to address iTunes error 4013, we find it hard to find out the real reason behind the issue. That means you might have to try on those methods but still fail to bring iTunes back to normal. Here, we introduce you another effective tool: AnyFix—iOS System Recovery, a software that could immediately diagnose iTunes/iOS/iPadOS/tvOS issues so as to fix various issues in minutes. With the help of AnyFix, you can easily get iTunes back to life at the first moment.
Now it is exactly the right time to download and install AnyFix—iOS System Recovery on your computer so as to fix iTunes error 4013 with a few clicks.
Free Download * 100% Clean & Safe
Step 1. Launch AnyFix on your computer and click iTunes Repair mode to address iTunes related issues.
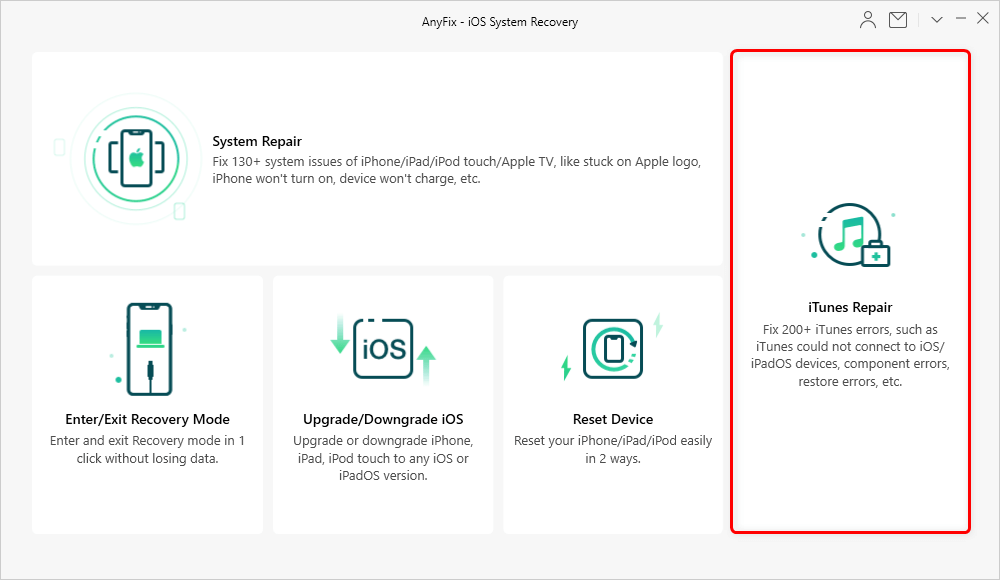
Tap on iTunes Repair from Homepage
Step 2. Then you are expected to click iTunes Connection/Backup/Restore Errors and you can see iTunes error 4013 is demonstrated in the right list. Then you need to tap Scan Now to let AnyFix scan your iTunes and diagnose its issue.

Choose iTunes Connection/Backup/Restore Errors
Step 3. Once AnyFix has analyzed its components and found out issues, it will get iTunes back to normal with ease. Now all you need to do is to click OK button to give AnyFix permission on your computer.
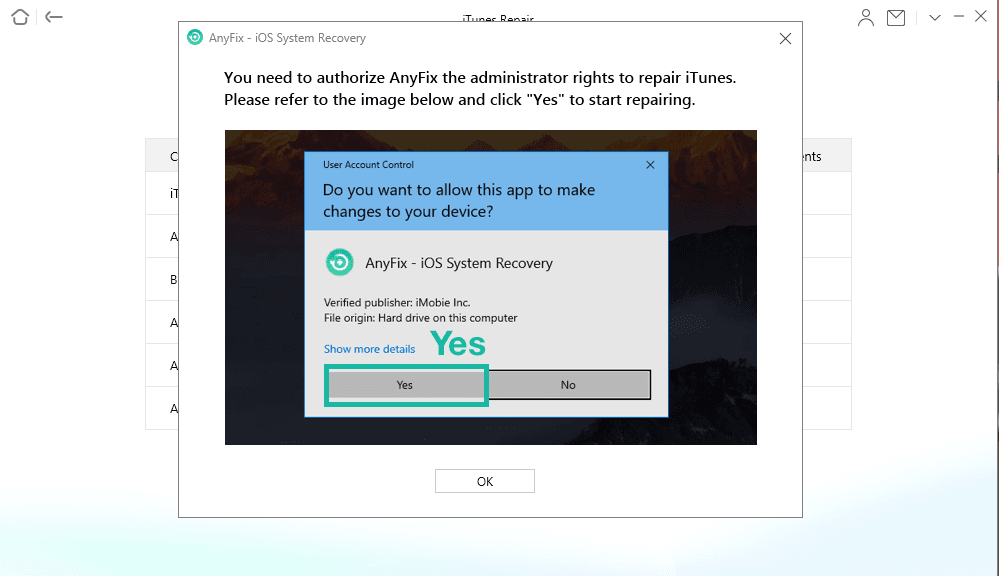
Give AnyFix Permission on your Computer
Step 4. Wait for a few seconds, you will see the following Repair Completed page.
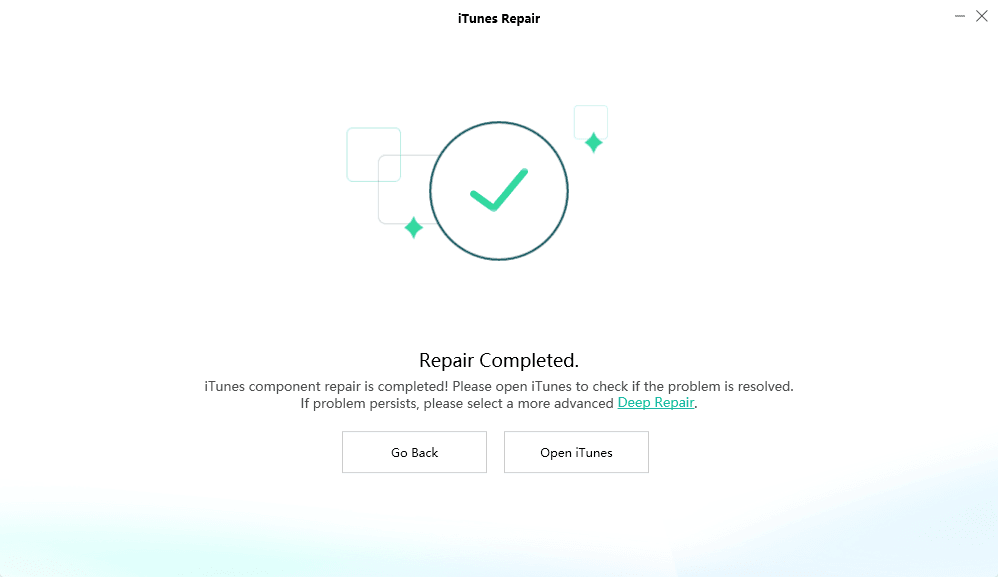
iTunes Repair Completed and Open to Check
Fix 6. Try Recovery Mode
Restoring your iDevice in recovery mode can resolve most iTunes errors. So, you must give a try to this method also to fix the error you are facing now.
Step 1: Connect your iDevice to the computer using a USB cable and open iTunes.
Step 2: While your iDevice is connected, enter the device in the recovery mode:
- iPhone 8 or above: Press and quickly release the Volume Up button. Follow the same with the Volume Down button. Press and hold down the Side button until the recovery mode screen appears.
- iPhone 7/ iPhone 7 Plus: Press and hold down the Volume Down and Side button at the same time. Continue holding them until the recovery mode screen appears.
- iPhone 6s or earlier, iPod touch or iPad: Press and hold down the Top/Side button and Home button at the same time. Continue holding them until the recovery mode screen appears.
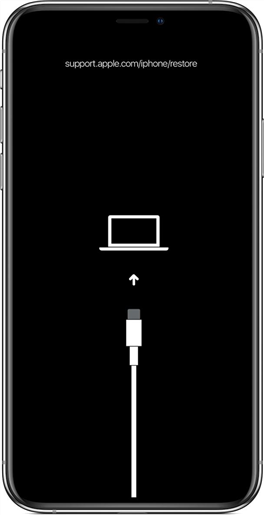
Fix iTunes Error 4013 via Recovery Mode
Step 3: Once iTunes detects your iDevice in recovery mode, it will let you restore your device. So, restore your device using iTunes and that’s it.
Part 3. How to Manage iTunes with AnyTrans?
iTunes keeps your data such as movies, songs, ringtones, and playlists. You will be glad to know that you can now efficiently manage your iTunes and all thanks go to AnyTrans. Developed by iMobie, AnyTrans comes with great iTunes functions such as transferring iTunes music to iPhone/Computer or adding music to iTunes from a computer. Using this iTunes content manager software, you can make your transfer tasks easier and quicker.
Here are the key highlights of the software:
AnyTrans – iTunes Alternative
- Transfer music from iTunes to iPhone with one click.
- Support adding music from computer to iTunes.
- No harm to your music and will be kept in original quality.
- Work well with all iPhone models as well as computer systems.
Free Download100% Clean & Safe
Free Download100% Clean & Safe
Free Download * 100% Clean & Safe
Get AnyTrans on your computer and then follow the below step-by-step guide to learn how to manage iTunes using the software.
Step 1: Lunch AnyTrans and connect your iDevice to the computer with the help of a USB cable. Once the software detects your device, you will see the main interface.
Manage iTunes with AnyTrans
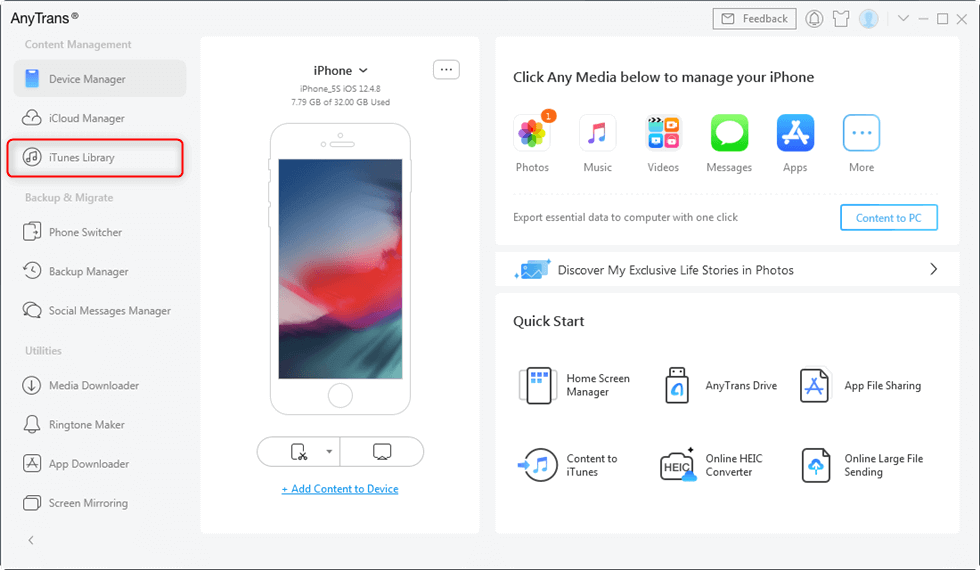
Step 2: Choose the “iTunes Library” option to move to the iTunes page. Here, wait for a while until your iTunes load. Select the target files that you would like to transfer and hit on the “To Device” or “To Computer” button.
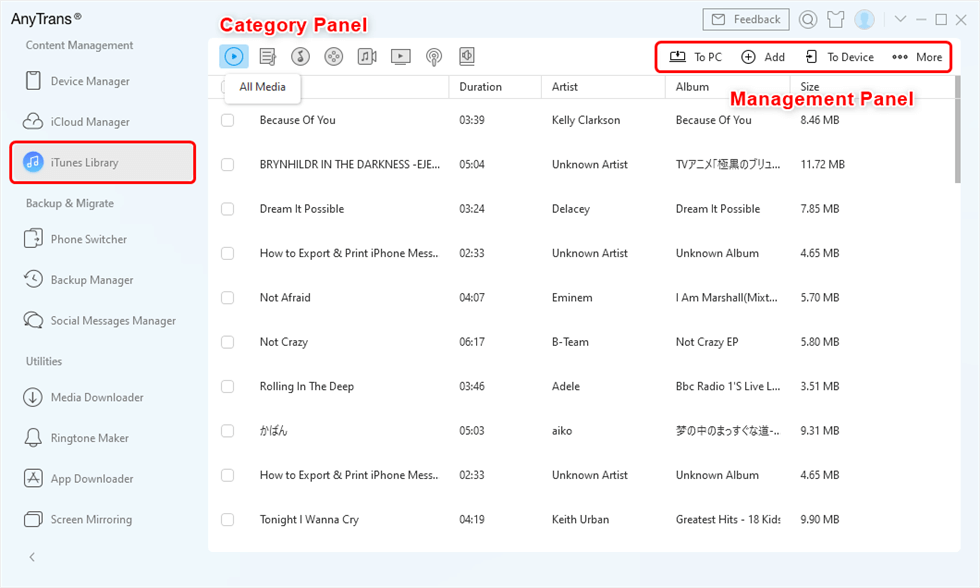
Manage iTunes Library with AnyTrans
Step 3: Wait for a few minutes and let the software complete the transfer process.
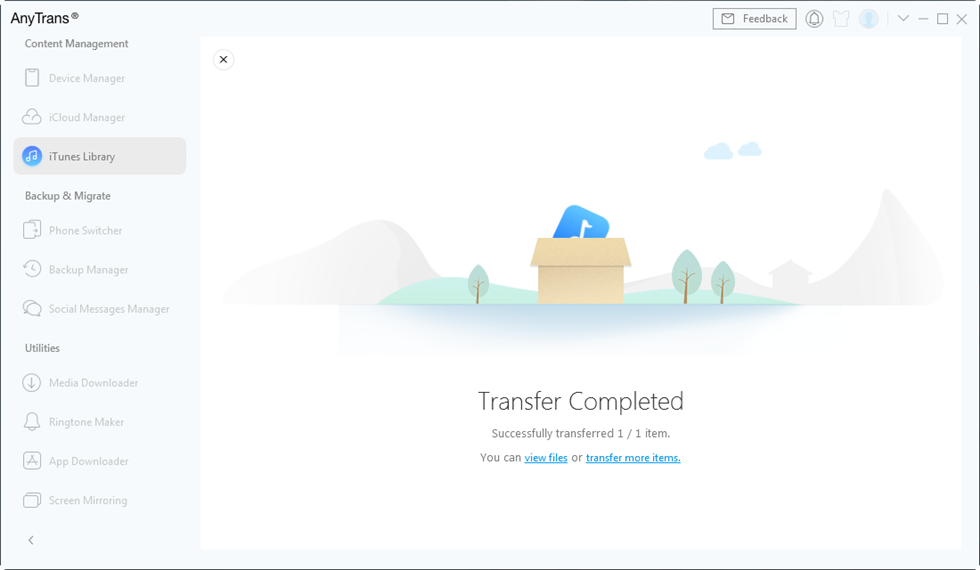
Wait until Transferring Process Complete
The Bottom Line
Hopefully, the solutions mentioned here have helped you in your iTunes 4013 error fix. Plus, we recommend you using AnyTrans as your iTunes content manager. The best thing about the software is that it ensures to transfer content between iTunes and iPhone/computer with 100% safety of your personal info and data. Try AnyTrans today.
More Related Articles

Member of iMobie team as well as an Apple fan, love to help more users solve various types of iOS & Android related issues.
Product-related questions? Contact Our Support Team to Get Quick Solution >
