Backup and Restore iPhone iPad With/Without iTunes
This guide offers you detailed tutorial about how to backup iPhone to iTunes and restore iPhone from iTunes backup. Also applies to iPad and the new iPhone 13. Just follow us and have a try.
iPhone Backup Tips
Backup iPhone Data
iPhone Backup Locations
With the launch of the new iPhone 13 and iPhone 13 pro max, many old iPhone users might want to perform an upgrade to the new iPhone. But after buying the new iPhone, what would you do if you want to transfer data to your new iPhone from the old device? Actually, iTunes could be a nice app to get the job done by a simple “backup and restore”.
Must Read: Top iTunes Alternatives for Backing up and Restoring iDevices >
But you may be wondering how to backup my iPhone on iTunes. No worries, iTunes Backup and Restore could be more helpful to keep your data safe. Since if you have created a backup with iTunes, when you lost some data on your iPhone or iPad, you can quickly perform a “Restore” to get them back. So how to backup iPhone to iTunes and restore iPhone from iTunes?
Part 1. How to Backup iPhone to iTunes Step By Step
iTunes cannot backup songs, your synced photos, iBooks, etc, so if you want to back up these files, you can jump to Part 2 – backup iPhone without iTunes. Besides, if you accidentally encounter some errors while backing up the iPhone to iTunes, you can read our post to fix the iTunes backup errors.
Don’t Miss: What Does iTunes Backup to Computer?
With iTunes, you can backup almost all data and setting on your iPhone iPad to a PC or a Mac. To make sure all goes well to do a backup using iTunes, you are suggested to upgrade your iTunes to the latest version, since your new iPhone 13 running in iOS 15 may not be compatible with the old iTunes versions. After, you can start the backup process by following the steps below.
For Windows:
Step 1. Connect iPhone iPad to computer > Open iTunes if it doesn’t pop up automatically > Click the iOS device name in the top right corner (besides the iTunes Store button).
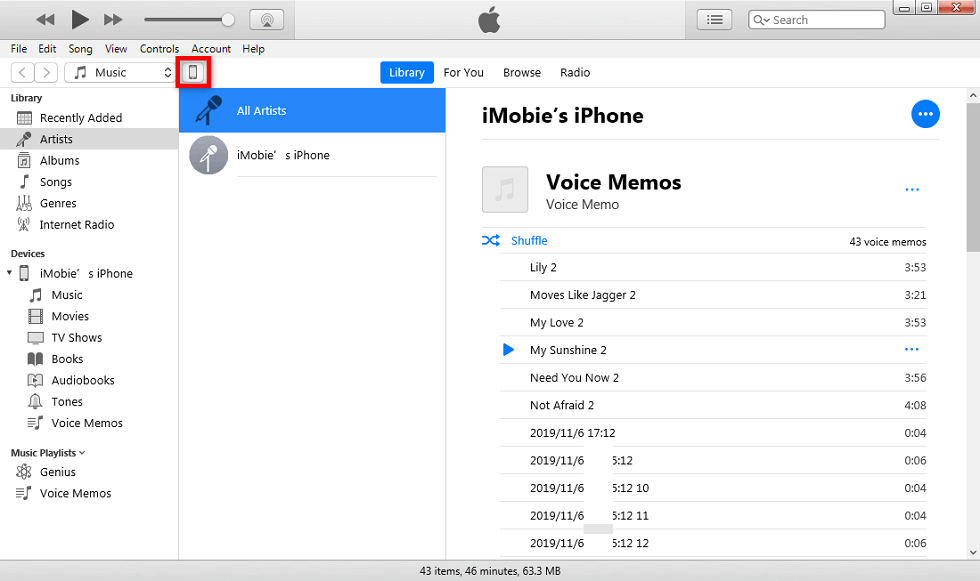
Click iOS Name Button in iTunes
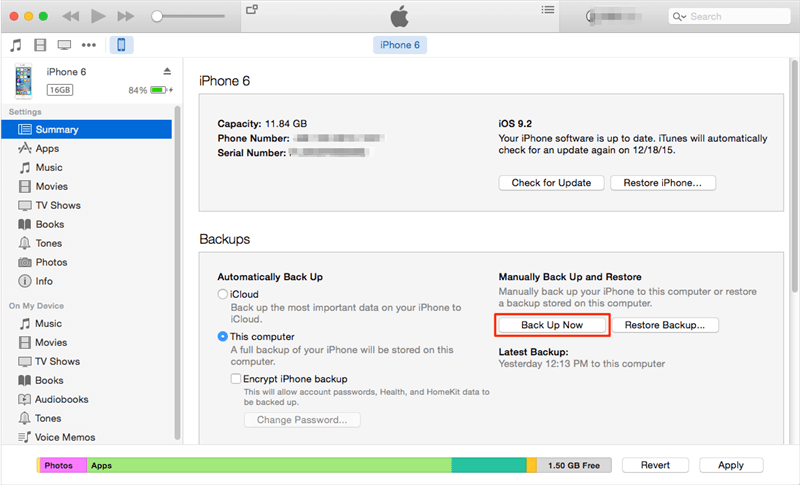
Step 2. Tap “This computer” button > Choose “Back Up Now” on the Backups column. (For encrypt backup, please skip step 2.)

Click Back Up Now Button
Step 3. Tap “This Computer” button > Tick “Encrypt iPhone/iPad backup” to set a password to protect your backup. In order to avoid forgetting iPhone backup password, you’d better keep it in mind firmly.
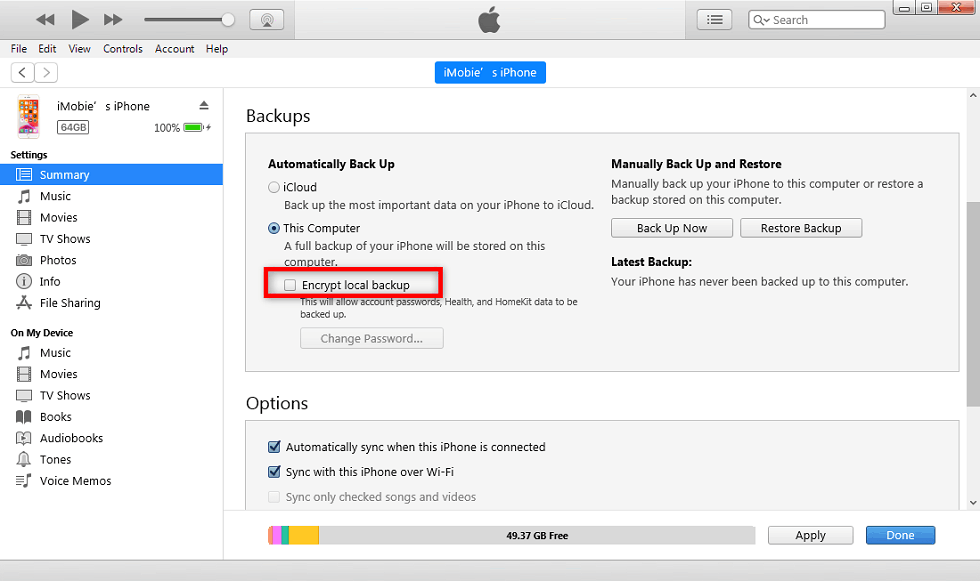
Set a Password for the Backup
For Mac:
Step 1. Connect your iPhone to computer and lunch the iTunes.
Step 2. After launching iTunes, please click the device icon and click the “Summary” option.
Step 3. And then, please click Back Up Now to save your WhatsApp message to the computer.
Backup iPhone to the Computer with iTunes
Part 2. How to Backup iPhone iPad without iTunes
It is true that iTunes is convenient for backing up your device, but it will only keep the latest backups and previous backups will be overwritten. So, if you need to keep multiple backups at the same time, you will need a powerful iOS data manager like AnyTrans. Among all iTunes alternatives on the market, it is outstanding for its powerful features. Here are the reasons why you will like AnyTrans.
- As we mentioned in part 3, iTunes can not help you back up songs, your synced photos, iBooks, etc. But with AnyTrans, you can back up whatever you want to your computer.
- You can selectively backup iPhone iPad to a computer with AnyTrans.
- All data backed up to the computer through AnyTrans are viewable. Gone are days when you can’t view the data backed up to the computer if you use AnyTrans.
- You can also use AnyTrans to view the data in iTunes backup.
Now, let’s see how AnyTrans help you backup iPhone iPad data.
Step 1. Download AnyTrans on your computer and then launch it. Note that AnyTrans is developed by an Apple-trusted developer and it is also now Norton and McAfee secured. You have our guarantee that it does no harm to your devices and incidents like data loss or information leakage would never occur. Be feel free to use AnyTrans.
Free Download * 100% Clean & Safe
Step 2. Plug in your iDevice and then click Content to PC button to go to the category management button. Here AnyTrans would display you all types of data on iDevice. Select one data type to continue.
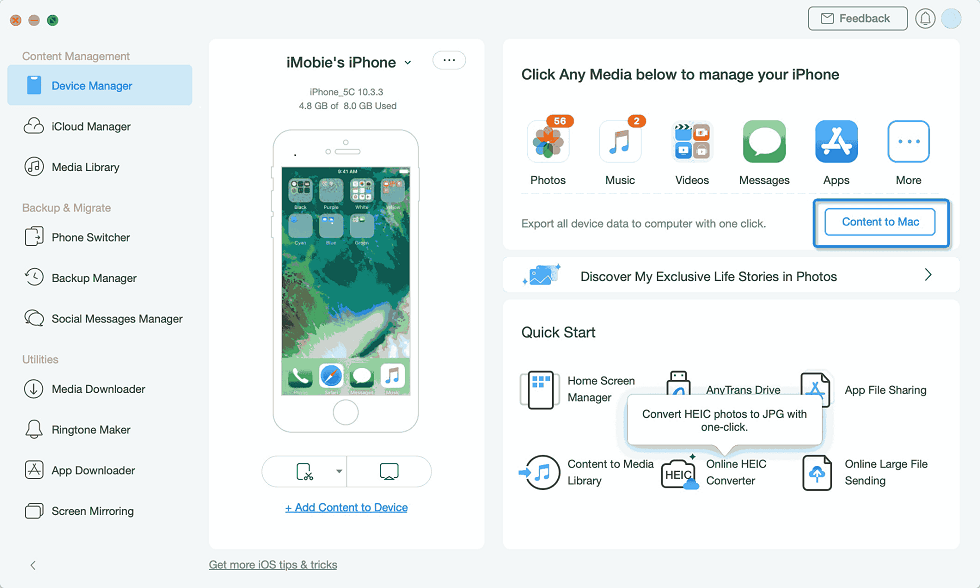
Go to Device Manager and Click Content to PC
Step 3. Select the data you want to backup to computer and choose the right folder on your computer to receive the data from the iPhone, then click the Next to continue.
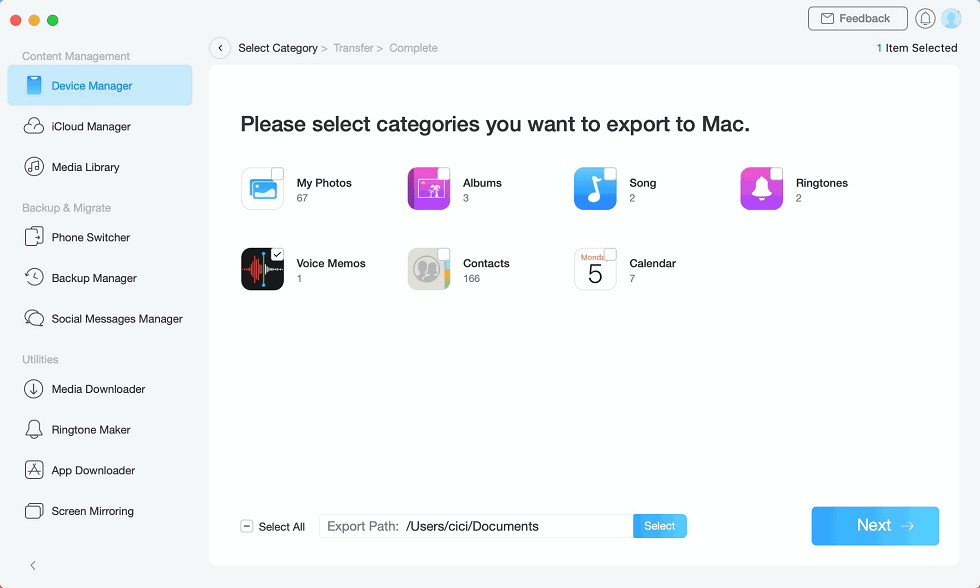
Choose Data You Want to Backup
Step 4. All your files would be backed up to your computer.
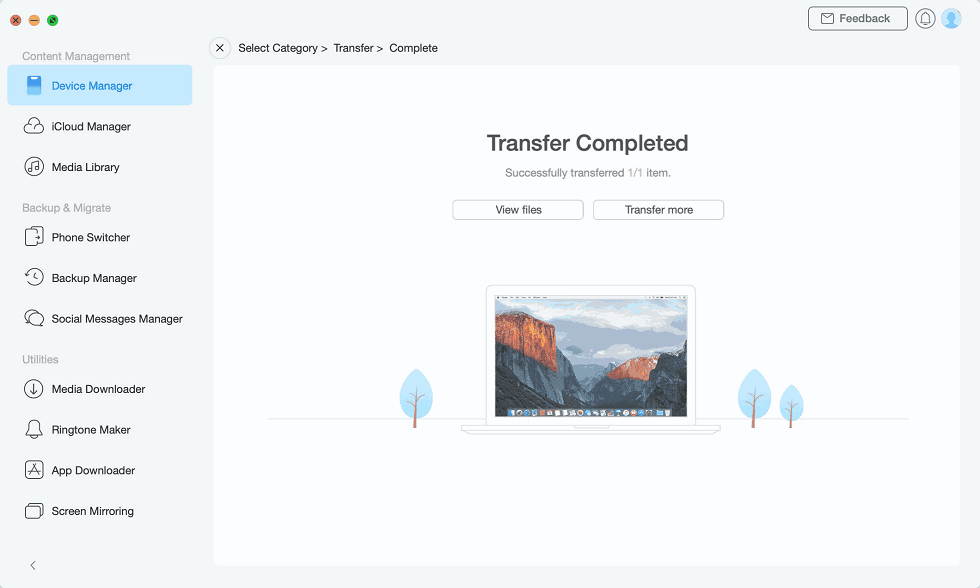
Transfer Content to Computer Completed
You can also make an iTunes backup with AnyTrans. Click the Content to iTunes, you can transfer any data to your iTunes.
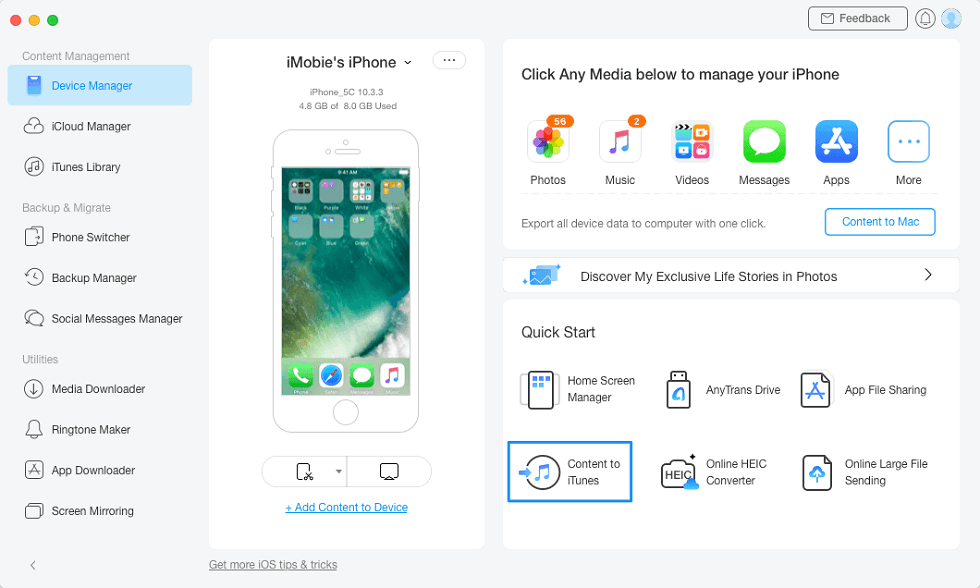
Click Content to iTunes Button
Part 3. How to Restore iPhone from iTunes Backup
Be aware that all existing data on your device will be erased, and then iTunes will put all things from the backup to your device. If you don’t want to erase your iPhone, you can jump to the part 4 – restore iPhone from iTunes backup without erasing. If you encounter some issues while restoring your iPhone or iPad, you can refer to this post – most common iPhone restore errors and solutions.
Make sure your computer contains the backup that you want to restore. To know whether the backup contains the data you want, you can use an iPhone backup extractor. Now let’s follow the steps to restore iPhone from iTunes.
Step 1. Connect the device to the computer in which there are iTunes backups > Launch iTunes > Click Summary on your left > Click Restore Backup.
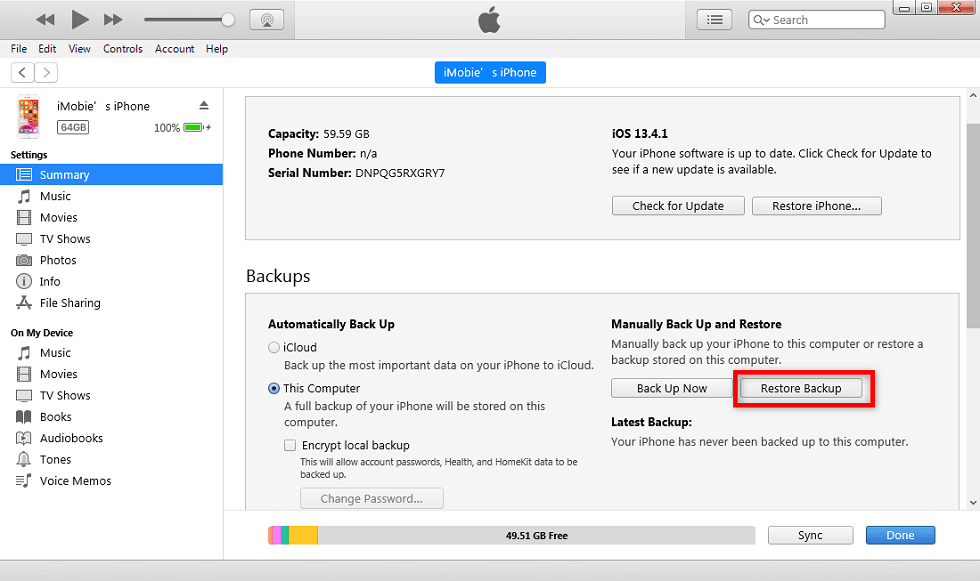
Click Restore Backup from iTunes
Step 2. Choose a backup you want to restore from.
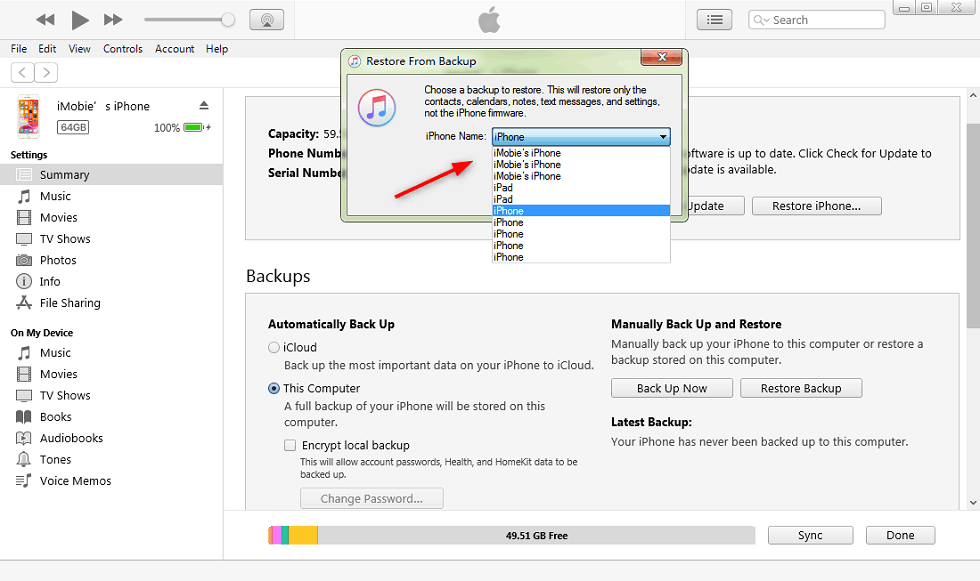
Choose iTunes Backup to Restore
Step 3. You need to confirm the “Restore” process by clicking Restore.
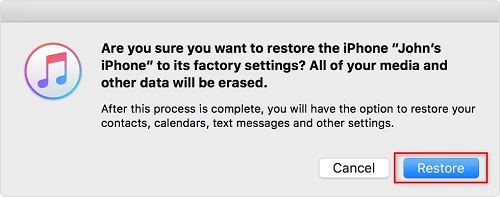
Restore iPhone with iTunes Backup
1. To restore iPhone/iPad with iTunes, please make sure that the destination device is newer than the backup device because iTunes doesn’t support backup to an older device than the backup device.
2. Before restoring, please turn off Find My iPhone.
3. If you encounter iTunes backup corrupt or incompatible, please refer to Fix: iTunes Backup Corrupt or Incompatible Backup >
Part 4. How to Restore from iTunes Backup without Erasing
As we talked in part 3, iTunes restore will erase your data and settings on your iPhone, and then put all the things from backup to your device. Think about that if you are not clear about the data on your iTunes backup, you may mistakenly restore a wrong backup to your iPhone or iPad. So is there some better way to restore without erasing?
In fact, there are lots of iPhone data recovery software that you can use to do the job. And here we will tell you how to make it with PhoneRescue iPhone Data Recovery, which is developed to serve iPhone users to retrieve deleted data. And it can help you selectively restore iPhone iPad from iTunes backup. Worth to mention is that no existing data on your iPhone would be erased if you use PhoneRescue for iOS.
Now, download PhoneRescue (choose Download for iOS) and follow steps below to selectively restore your iPhone.
Free Download * 100% Clean & Safe
Step 1. Install PhoneRescue for iOS and launch it on your Mac or PC computer. Select Recover from Backup and click on the arrow button.
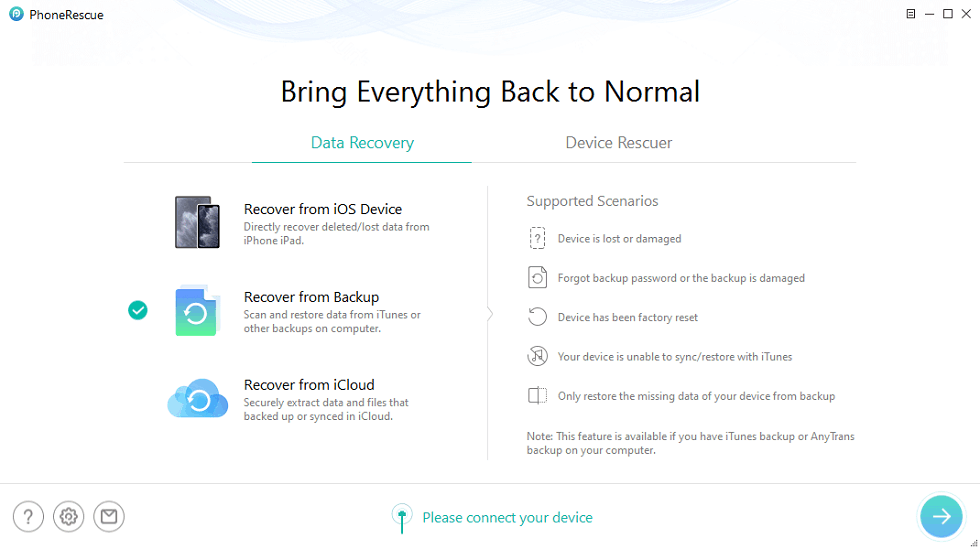
Choose Recover from iTunes Backup
Step 2. Select one of backup and tick the types of data you want to restore, if you want to scan all data, just tick Select All and click on “OK”.
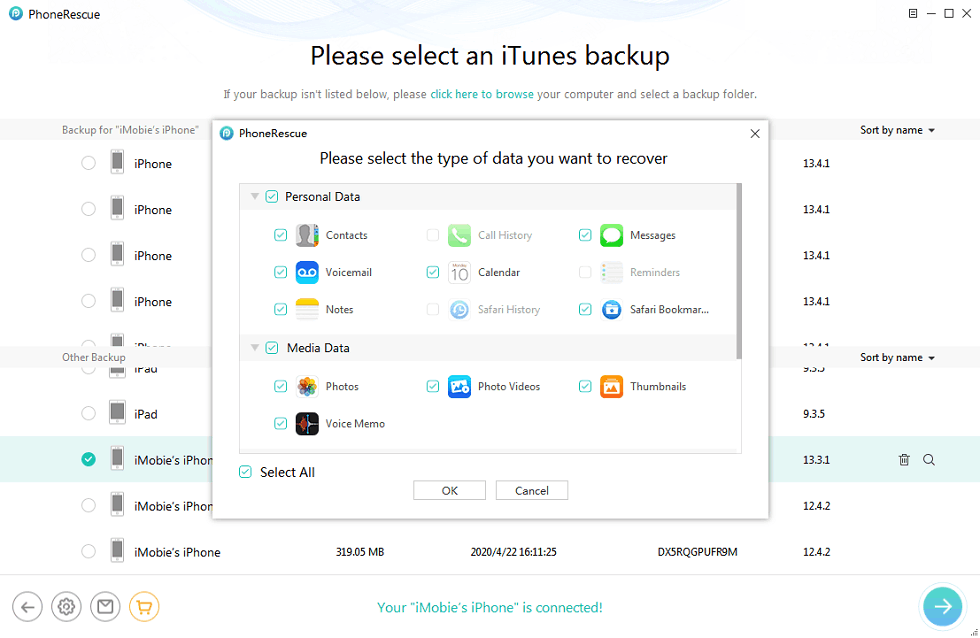
Choose a Desired Backup
If your backup is encrypted, PhoneRescue will ask you to enter your password to decrypt and scan your backup. Unfortunately, if you forgot it, you can have a try on all possible passwords or with the aid of some iPhone backup password recovery to find it out.
Step 3. Preview and select data you want to restore. Click Recover to Device or Recover to Computer button on the bottom right to start restoring selected data.

Choose Data You Want to Restore
The Bottom Line
Above are how to backup iPhone with/without iTunes and restore iPhone from iTunes, don’t forget to give PhoneRescue for iOS and AnyTrans a try! In the meantime, we also have the answers to these questions for you, for examples, how do I do a full backup of my iPhone and how do I backup my iPhone without iCloud.

Work for iMobie team for 5 years as well as an Apple fan, love to help more users solve various types of iOS or Android related issues.
Product-related questions? Contact Our Support Team to Get Quick Solution >
