How to Transfer Music from iPod/iPod Touch to iTunes
How to transfer music from iPod to iTunes? No matter you want to rebuild iTunes library or merge iTunes library from multiple devices, you will find the quick solution to transfer iPod music to iTunes in this guide.
AnyTrans – Full-way iOS Data Manager
Free download AnyTrans to enrich your Apple life, managing iPhone/iPad/iPod, even iTunes/iCloud content, transferring all photos, messages, contacts, music, etc. from iPhone/iPad/iPod to PC/Mac, and vice versa.

Can You Transfer Music from an iPod to iTunes?
Yes, but not every song can be copied back to iTunes in the same way. If the music was purchased from the iTunes Store, you can first try the built-in Transfer Purchases option on an authorized Windows PC. Music imported from CDs, downloaded elsewhere, or synced from an older computer is different and may need to be exported from the iPod before it can be added to the computer music library.
Important: If an old iPod contains the only copy of your music and you are connecting it to a new or empty iTunes library, do not start a new music sync before backing up the songs you want to keep.
Which Method Should You Use?
| Your Music | Recommended Method | Main Limitation |
| Music purchased from the iTunes Store | Transfer Purchases in iTunes | Only applies to eligible purchased content associated with an authorized Apple Account |
| MP3/AAC files imported from another computer or CD | Export the music from the iPod first | iTunes does not provide a general reverse-sync option for every local song |
| Music on an old iPod that is no longer on your computer | Back up or export before syncing | A new sync configuration can change music stored on the iPod |
| You want to select specific songs or preserve available music information | Compatible iPod music-management tool | Supported content and metadata depend on the current software version |
| Older iPod exposes music files through disk storage | Manual iPod_Control recovery | Files may have generated filenames and require manual importing |
Before You Transfer: Do Not Sync the iPod Yet
- Check whether the songs still exist on another computer or backup. If the iPod is the only copy, treat it as a recovery source first.
- Identify purchased and non-purchased music. The iTunes Transfer Purchases feature does not recover every song stored on the device.
- Back up irreplaceable music before changing sync settings. Be especially careful if the iPod was originally synced with another computer.
- Make sure the computer recognizes the iPod. Check the USB cable, USB port, and device connection before troubleshooting the music library.
- Keep exported music files in a safe folder. Do not delete the source copy until you have confirmed that the songs were successfully imported into your computer music library.
Method 1. Transfer Purchased Music from iPod to iTunes
Best for: Music that you purchased from the iTunes Store and want to copy from an iPod to an authorized Windows PC.
If the songs on your iPod were purchased from the iTunes Store, try Apple’s built-in Transfer Purchases option first. This is the simplest method when the computer is authorized with the Apple Account associated with those purchases.
- Open iTunes on your Windows PC.
- Choose Account > Authorizations > Authorize This Computer and sign in with the Apple Account associated with the purchased music.
- Connect the iPod to the computer with a USB cable and wait until iTunes recognizes the device.
- Choose File > Devices > Transfer Purchases from [your iPod].
- Wait until the eligible purchased content is transferred, then open the iTunes library and confirm that the songs are available.
Limitation: Transfer Purchases is not a complete iPod music recovery feature. Songs imported from CDs, downloaded from other sources, or originally synced from another computer may not be copied back to iTunes using this method.
What If Transfer Purchases Doesn’t Copy All Your Songs?
This usually means that at least some music on the iPod is not eligible iTunes Store purchased content. For example, an older iPod may contain MP3 files imported from CDs, music copied from a previous computer, or files obtained from other sources.
In this situation, do not assume the songs are gone. Instead, use an export method that can read the music already stored on the iPod before you make changes to its sync settings.
Method 2. Transfer Local iPod Music to iTunes with AnyTrans
Best for: Music already stored on an iPod that is not covered by Apple’s Transfer Purchases option, especially when rebuilding a computer music library from an older device.
If the songs are stored locally on the iPod but were not purchased from the iTunes Store, a compatible iPod music-management tool can provide another export workflow.
AnyTrans lets you browse supported music on a connected iPod, select the tracks you need, and transfer them to the computer or iTunes library. This approach is most relevant when recovering music from the device rather than syncing a computer library back to the iPod.
- Preview supported music stored on the connected iPod.
- Select individual songs instead of exporting the entire library.
- Transfer supported music from the iPod to a computer or iTunes library.
- Manage other supported iPod content from the same device interface.
How to Transfer Music from iPod to iTunes Library in 3 Steps
Step 1. Connect the iPod
Launch AnyTrans on your computer and connect your iPod or iPod touch with a USB cable. Wait until the device is recognized before continuing.
Step 2. Open the Music Category
Under Device Manager, choose Music to view the supported songs stored on the connected iPod.
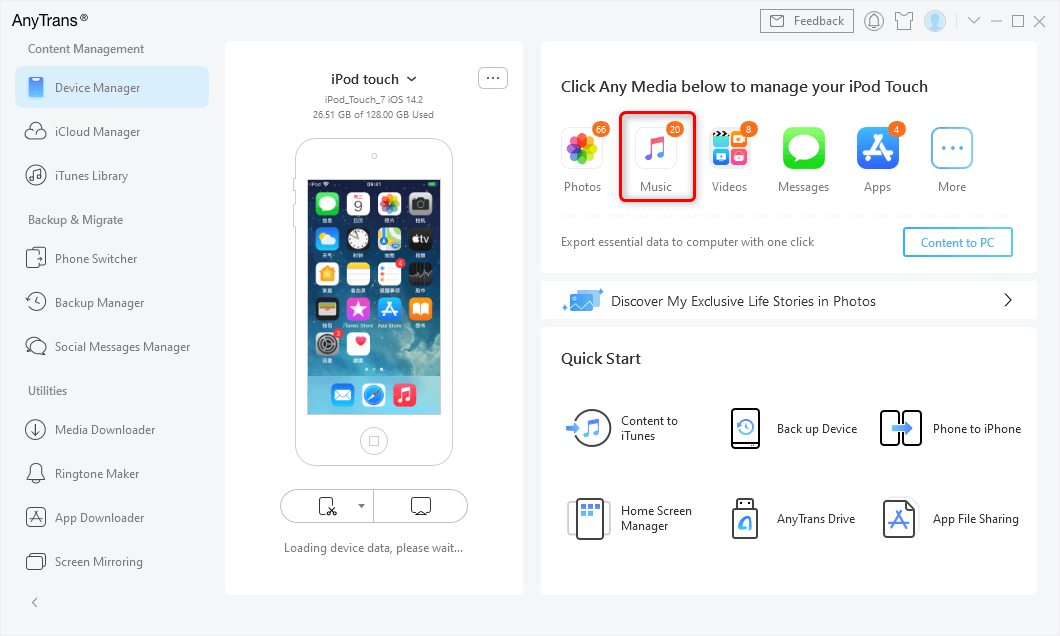
Open Music for the connected iPod
Step 3. Select Music and Transfer It to iTunes
Select the songs you want to export, choose More, and then select To iTunes. Wait until the transfer completes.
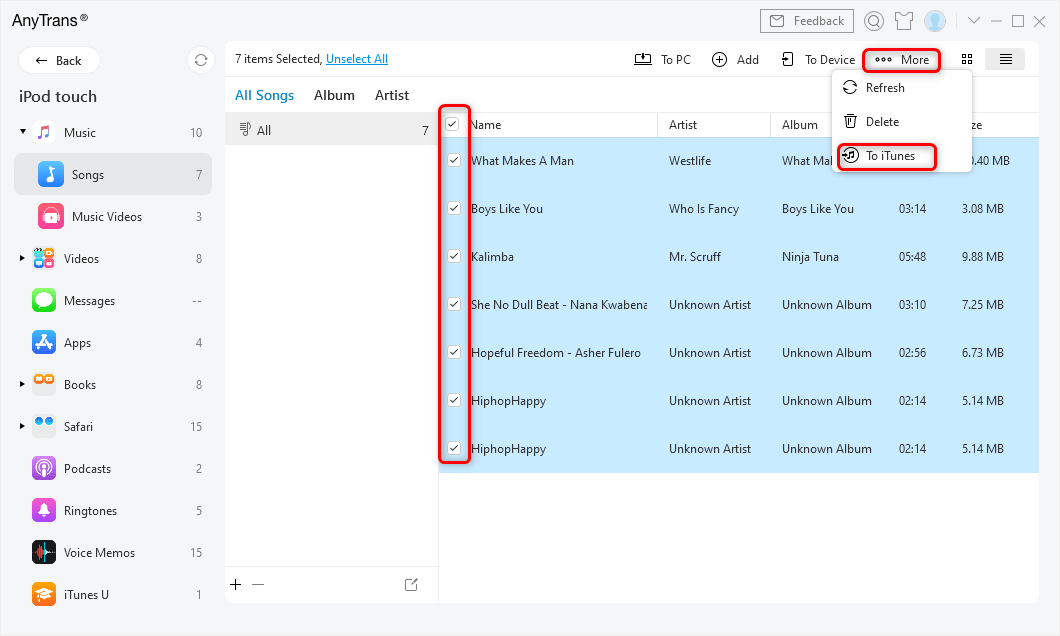
Select the iPod music to transfer to iTunes
After the transfer finishes, open the iTunes library and confirm that the selected songs appear before disconnecting the iPod.
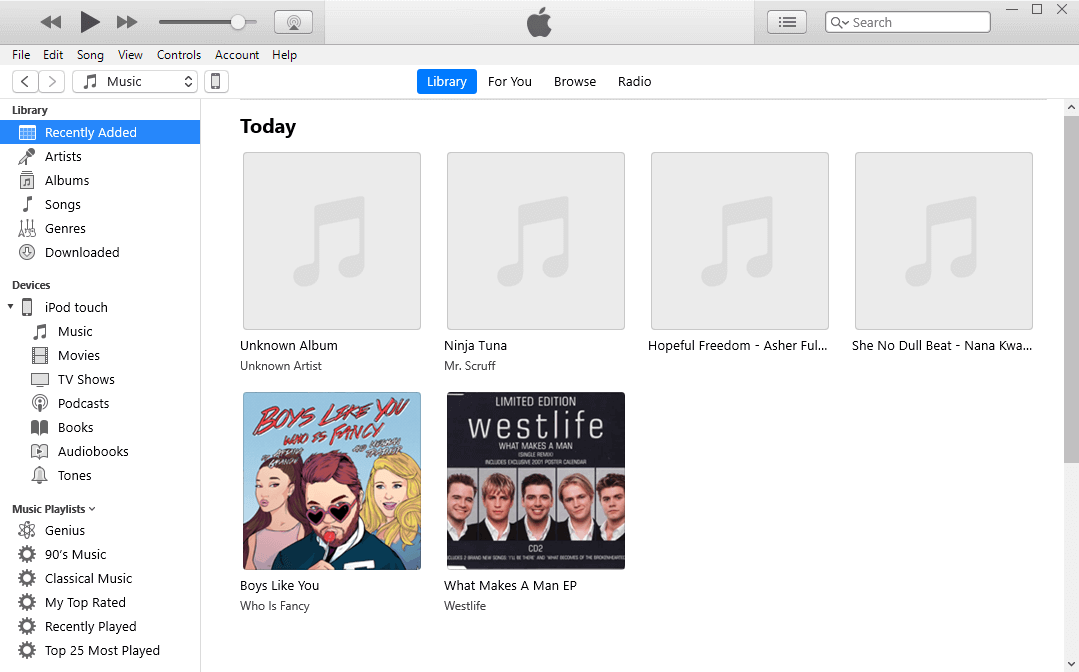
Check the transferred songs in iTunes
Tip: If your goal is another transfer direction, such as computer-to-iPod or iPod-to-iPod, use the corresponding transfer workflow rather than applying this iPod-to-iTunes recovery process in reverse.
How do I Transfer Music from iPod to iTunes without Deleting?
Another option for some older iPod models is to recover the local music files through the iPod’s disk storage and then import those files into iTunes. This method is mainly useful for older iPods that expose their storage as a disk.
The files inside the iPod_Control folder may use generated filenames instead of normal song titles, so this method is less convenient than a music-management interface. However, it can be useful when the iPod contains the only remaining copy of older local music.
Before starting: Do not enable a new automatic music sync on a computer that does not already contain your music library. First copy the music from the iPod to a safe location on the computer.
Step 1. Prevent Automatic Syncing
Open iTunes settings and disable automatic device syncing before connecting the old iPod, especially if the computer does not contain the same music library that was originally synced to the device.
Step 2. Connect the iPod and Open Its Storage
Connect the iPod to the computer. For an older iPod that supports disk use, confirm that the device storage is accessible through File Explorer on Windows or the appropriate storage interface on the computer.
Step 3. Find the iPod_Control Music Folder
Open the iPod storage and navigate to: iPod_Control > Music
If the folder is not visible, enable the display of hidden files and folders on your computer.

Open the iPod_Control Music folder
Step 4. Copy the Music to the Computer
Copy the folders inside iPod_Control > Music to a new folder on your computer. Do not move or delete the original files from the iPod during this step.
Older iPods may organize the files into folders such as F00, F01, F02, and similar names. The audio filenames themselves may also look different from the song titles.
Step 5. Import the Recovered Files into iTunes
After the files have been safely copied to the computer, open iTunes on Windows and add the recovered music to the library.
On newer macOS versions where iTunes is no longer available, use the Music app instead.
Windows library note: If iTunes is configured to reference files in their current location instead of copying them into the iTunes Media folder, moving the recovered files later can cause iTunes to lose track of them. Keep the recovery folder in a permanent location or configure iTunes to copy imported files into its media folder.
What If You Can’t Transfer iPod Music to iTunes?
| Problem | What to Check | First Step |
| The iPod does not appear in iTunes | USB cable, USB port, device recognition | Reconnect the iPod and try another known-good cable or USB port. |
| Transfer Purchases does not copy all songs | Whether the music was purchased from the iTunes Store | Use an export method for local or non-purchased music. |
| The iPod_Control folder is not visible | Hidden-file settings and disk access | Enable hidden-file viewing and confirm that the older iPod exposes disk storage. |
| Copied songs have strange filenames | The iPod’s internal media organization | Import the audio files into the music library and check embedded artist, album, and track metadata rather than relying only on the filenames. |
| The music-management tool does not recognize the old iPod | Device compatibility, USB connection, operating system | Reconnect the device and confirm that the current software version still supports your iPod model. |
| Music disappears after connecting to a new computer | Existing sync relationship and library settings | Stop further syncing and use your backup or exported copy if one is available. |
If an Old iPod Is Not Recognized
Start with the least destructive checks: reconnect the iPod, try another USB port, test another compatible cable, and restart the computer. If the device still does not appear, verify that the computer’s current Apple device software or music-management tool supports the iPod model you are using.
Do not repeatedly restore or reset an old iPod simply because the computer does not detect it if the device contains music that exists nowhere else.
FAQs about Transferring iPod Music to iTunes
1. Can I transfer music from an old iPod to iTunes?
Yes. Eligible iTunes Store purchases may be transferred through Apple’s Transfer Purchases option on an authorized computer. For local music that exists only on the old iPod, export or back up the files before changing the device’s sync settings.
2. Can iTunes copy every song from my iPod back to the computer?
No. Apple’s Transfer Purchases feature should not be treated as a complete reverse-sync or recovery feature for every song stored on an iPod. Locally imported music may require another export method.
3. Can I transfer non-purchased music from an iPod to iTunes?
Yes, but you generally need to export the local music from the device first or use a compatible iPod music-management tool. Songs imported from CDs or an older computer are different from iTunes Store purchases.
4. Can I transfer music from an iPod Classic to iTunes?
Yes. If the iPod Classic contains eligible purchased music, try Transfer Purchases first. For locally stored music that is no longer available on the original computer, use a backup or export workflow before creating a new sync relationship.
5. Will syncing an old iPod with a new computer erase the music?
Changing the sync relationship or selected library content can affect what remains on the iPod. If the old iPod contains the only copy of important songs, back up or export them before starting a new music sync.
6. Why are the songs in the iPod_Control folder named F00 or F01?
F00, F01, and similar names are folders used by older iPods to organize media internally. Individual filenames may also look unrelated to the song titles, while artist, album, title, and track information may still be stored in the audio files’ metadata.
7. Can I transfer playlists, ratings, and play counts from an old iPod?
That depends on the export method and the information still available on the iPod. A basic manual copy of files from the iPod_Control folder is mainly a music-file recovery method and should not be assumed to preserve every playlist, rating, or play-history field.
8. Should I use Transfer Purchases or an iPod transfer tool?
Use Transfer Purchases first when the music was purchased from the iTunes Store and the computer can be authorized for the associated Apple Account. If the songs are local files, exist only on the old iPod, or need to be selected individually for export, use an appropriate backup or music-management workflow instead.
The Bottom Line
Transferring music from an iPod to iTunes depends mainly on where the songs came from. For eligible iTunes Store purchases, use Apple’s Transfer Purchases option first. If the iPod contains local music imported from CDs, an old computer, or other sources, export those files before changing the device’s sync configuration.
If you want to select and recover supported music from an iPod through a graphical device-management workflow, AnyTrans provides another option for compatible devices.
Most importantly, if an old iPod contains the only remaining copy of your music library, treat the device as a backup source first. Recover the songs you need and verify the computer copy before starting a new sync or making changes to the iPod.



Joy Taylor is a seasoned technical writer with over a decade of experience in mobile technology. At iMobie, she specializes in producing in-depth content on iOS data recovery, iPhone unlocking solutions, and iOS troubleshooting.
Product-related questions? Contact Our Support Team to Get Quick Solution >
