iTunes Backup Session Failed? 6 Solutions to Fix it
Don’t know why iTunes backup session keeps failing? Here you’re in the right place, you’re going to read 6 useful solutions help you out the dilemmas.
iTunes & iCloud Issues
iTunes Errors
iTunes Issues & Tips
- iTunes Has an Invalid Signature
- iPhone Cannot Connect to iTunes
- iTunes Backup Session Failed
- iTunes Not Opening on PC
- iTunes Can’t Verify Server Identity
- iTunes Stuck on Preparing for Restoring
- iTunes Won’t Recognize iPhone
- iTunes Update Not Working
- iTunes Repair Tools
- iTunes Asks for Backup Password
I’m trying to back up my iPhone 6 to my Windows 10 PC, but whenever I do, it tells me the backup session failed. This is a relatively new computer, and I have not backed it up to this computer before. I need to get this done. Any ideas?
—— Question from Apple Community
When you connect your iPhone with a computer to back up with iTunes, you may continuously get a pop-up message saying “iTunes could not back up the iPhone NAME because the backup session failed”. Generally, it means that your iTunes backup session failed but don’t know the reasons.
Then, why does iPhone backup keep failing on iTunes? How can you fix this backup error? Here in this post, you’re going to read some possible solutions. And you can try them to fix iTunes backup session failed.
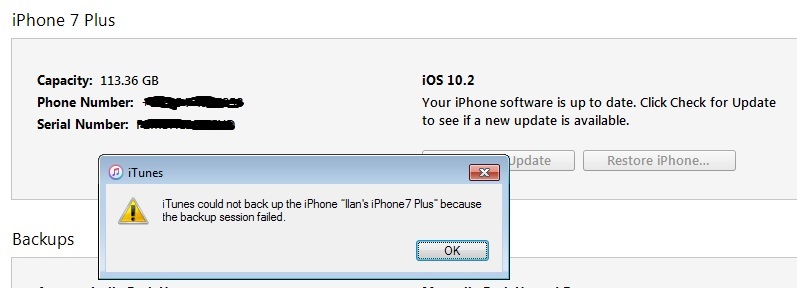
iTunes Could Not Backup the iPhone Because the Backup Session Failed
Also Read: How Long Does it Take to Backup iPhone to iTunes >
Part 1: Try Some Simple Tips to Fix iTunes Backup Session Failed
Method 1: Restart Computer and iPhone
Mostly, software issues could happen when your computer launches for a long time or computer system got some unknown errors. So if you want to fix iTunes backup failing issue, firstly you can restart your computer. Similarly, you can try to restart iPhone if it’s acting sluggish or apps are failing to run. Next, read the guide to learn how to restart them:
How to Restart Computer
For Windows PC: Just go to Start menu and click Power button > Choose Restart and it will close all apps (including iTunes) and turn off the PC. Then it will turn on automatically and starts up fresh.
For Mac:
- Way 1: Go to Apple Menu in the top-left corner of the screen > Click Restart. The computer will shut down and come back on a few moments later.
- Way 2: Or you can use hot keys: Press the Control + Command + Eject keys at the same time.
How to Restart iPhone
- For iPhone X or later: Press and hold either volume down and side button until the power-off slider appears. Drag the slider to turn it off. In a while, press and hold the side button until the Apple logo appears.

Restart iPhone X or Later Models
- For iPhone 8 or earlier Press and hold the side/Top button until the power-off slider appears. Drag the slider to turn it off. In a while, press and hold the side/Top button until the Apple logo appears.

Restart iPhone 8 or Earlier Models
Method 2: Check for iTunes Updates
For Windows PC:
Step 1: Open iTunes > Choose Help from the top of the iTunes window > Click Check for iTunes Updates.
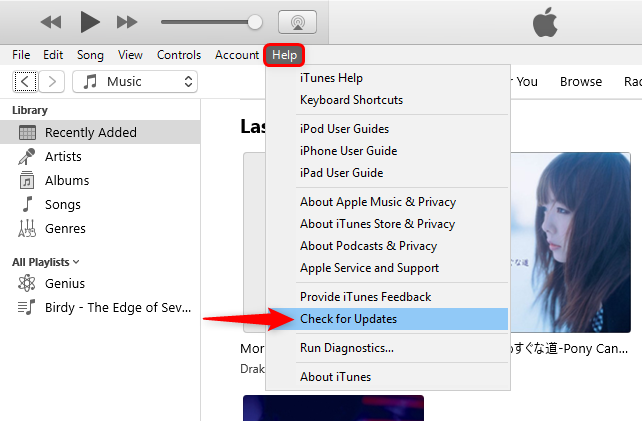
Check for iTunes Updates on Windows
Step 2: Then Apple Software Update window pops up and check. If any iTunes latest version is available, click Download iTunes to update.
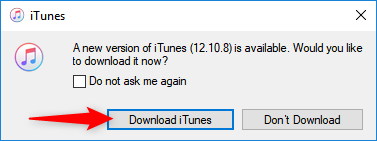
Download iTunes Update on Windows
For Mac:
- Way 1: Open iTunes > Tap on iTunes from the top left of the window > Click Check for iTunes Updates. If there is an available update, click Download iTunes to get.
- Way 2: Choose System Preferences from the Apple menu > Click Software Update to check for updates. If any updates are available, click Update Now button to install. Then all default apps on Mac are up to date.

Update iTunes on Mac
Method 3: Check Windows Security Settings
Sometimes, security software like Malwarebytes can cause this problem since iTunes could be blocked. So you can temporarily disable your antivirus and firewall programs, then try to backup with iTunes once again.
Besides, if you haven’t added iTunes as an exception, Windows firewall might prevent iTunes from connecting to the Internet and iTunes backup could fail. So follow the steps below to make sure that the Windows firewall isn’t blocking iTunes:
Step 1: Press the Ctrl + Esc keys > Type to search firewall.cpl and click it.
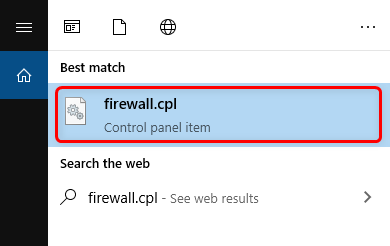
Search Firewall.cpl on Windows
Step 2: When the Windows Firewall window opens, click Allow an app or feature through Windows Firewall (Windows 10/8).
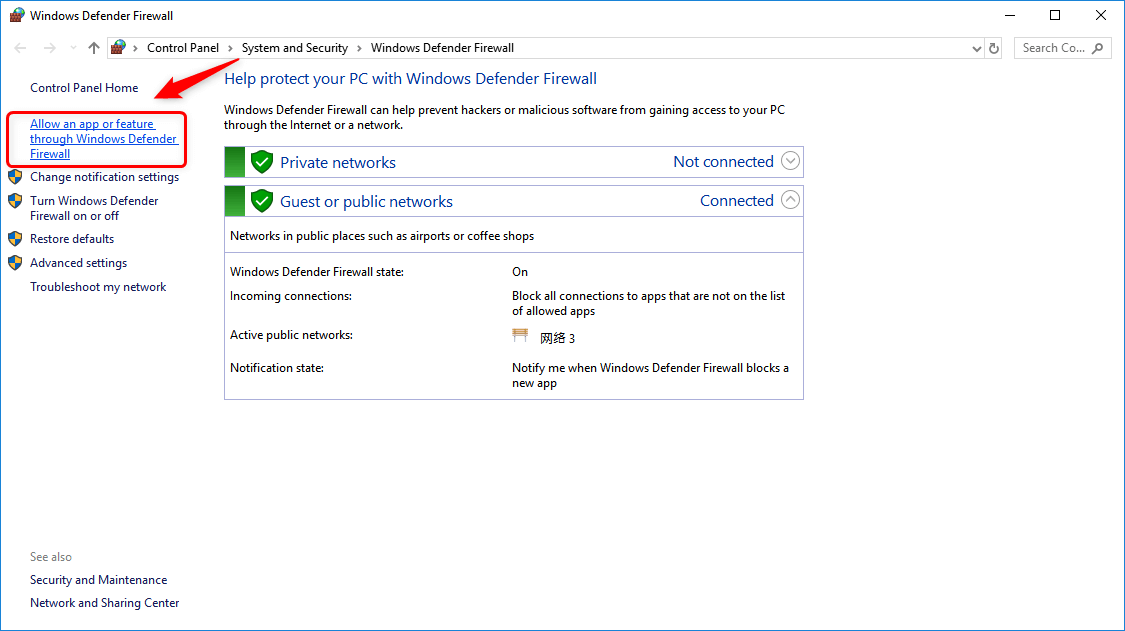
Click Allow an App or Feature Through Windows Firewall
Step 3: Click Change settings.
Step 4: Make sure that iTunes is selected for both private and public networks and that Bonjour is selected for private networks only. Then click OK button to close the Windows Firewall window.
Method 4: Reset the Lockdown Folder
Next, iTunes backup issue could happen when iTunes didn’t get permission from computer since the Lockdown folder saves the certificate from your device to let iTunes read your iPhone. So you can try to reset it on your computer. Read the step by step guide to do it:
Step 1: Delete all files in the Lockdown folder
- Turn off iTunes and disconnect iPhone from computer.
- Then go to Disk C > ProgramData > Apple > Lockdown, you can find the Lockdown Folder.
- Now, Delete all files in this folder.
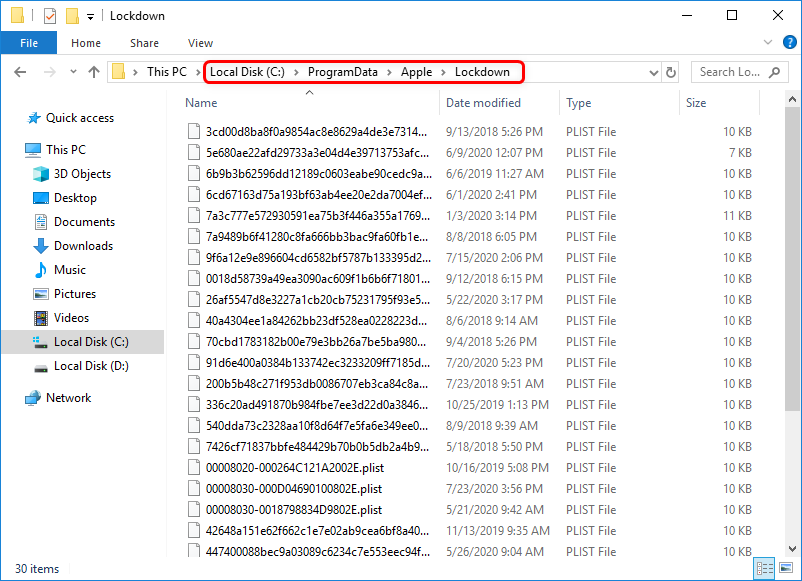
Delete All Files in the Lockdown Folder
Step 2: Launch iTunes again
- Launch iTunes again and connect iPhone to computer.
- Tap Trust on your iPhone and you can try to backup iPhone with iTunes.
Part 2: Fix Any iTunes Backup Errors with iTunes Repair Tool
If the above methods didn’t work at all, you must try to repair your iTunes with a professional tool. Here we’d like to introduce AnyFix to you. It’s a top iTunes repair tool, which can fix 200+ iTunes errors, including iTunes could not back up the iPhone. Besides, AnyFix allows you to fix more other iTunes errors, including can’t download/install/update iTunes, connection/restore errors, sync/CDB errors, etc. With AnyFix, you can solve anyone of them by simply clicking a button.
Now, follow the steps below and take a look at what AnyFix can help you.
Step 1: Get the latest versions of AnyFix on your computer. Launch it and you will see the interface below. Choose iTunes Repair.
Free Download * 100% Clean & Safe
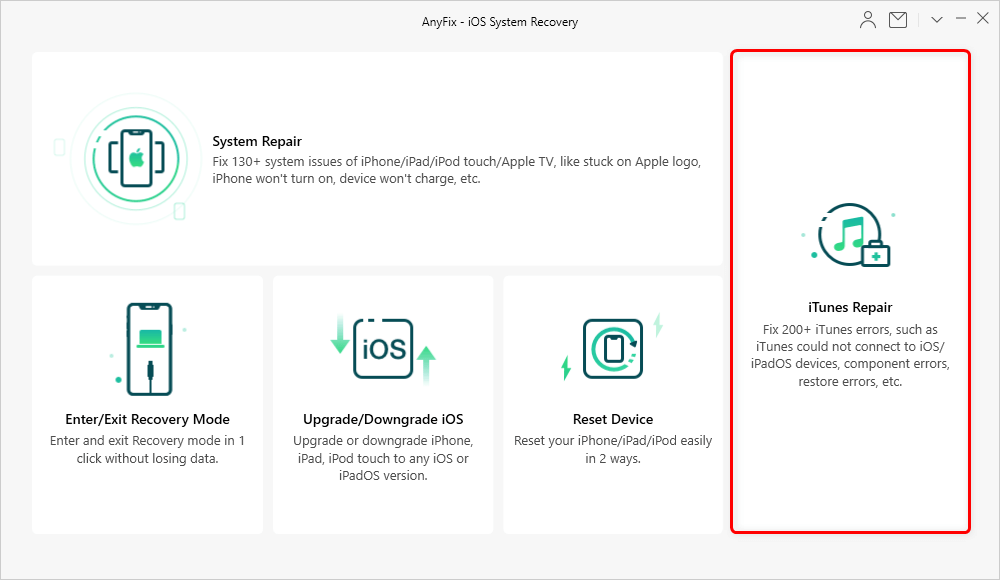
Tap on iTunes Repair from Homepage
Step 2: For iTunes could not back up the iPhone, choose iTunes Connection/Backup/Restore Errors. Then tap on Scan Now.
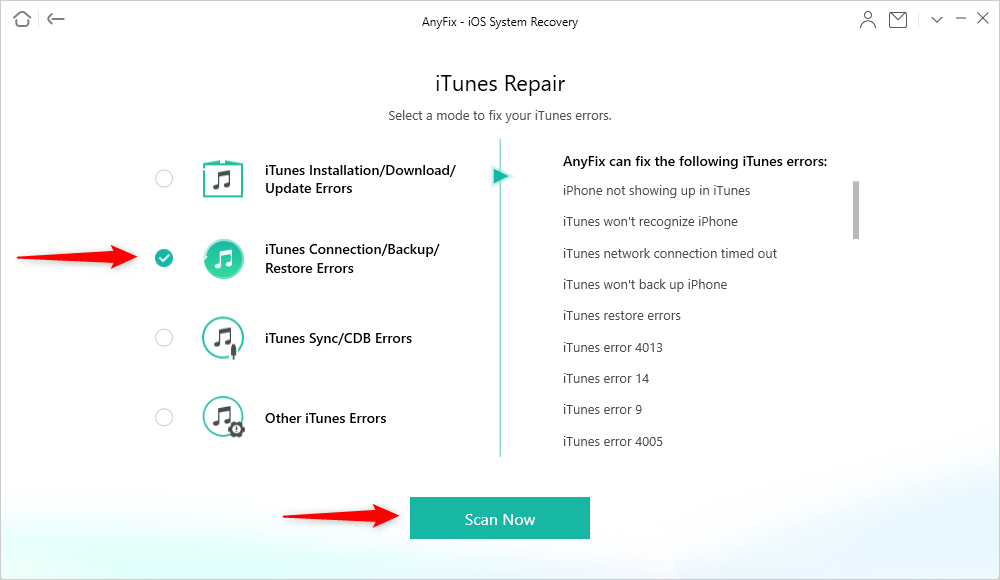
Choose iTunes Connection/Backup/Restore Errors
Step 3: When AnyFix finished scanning, you will see the component error just like the below picture shows. Then tap on Fix Now.
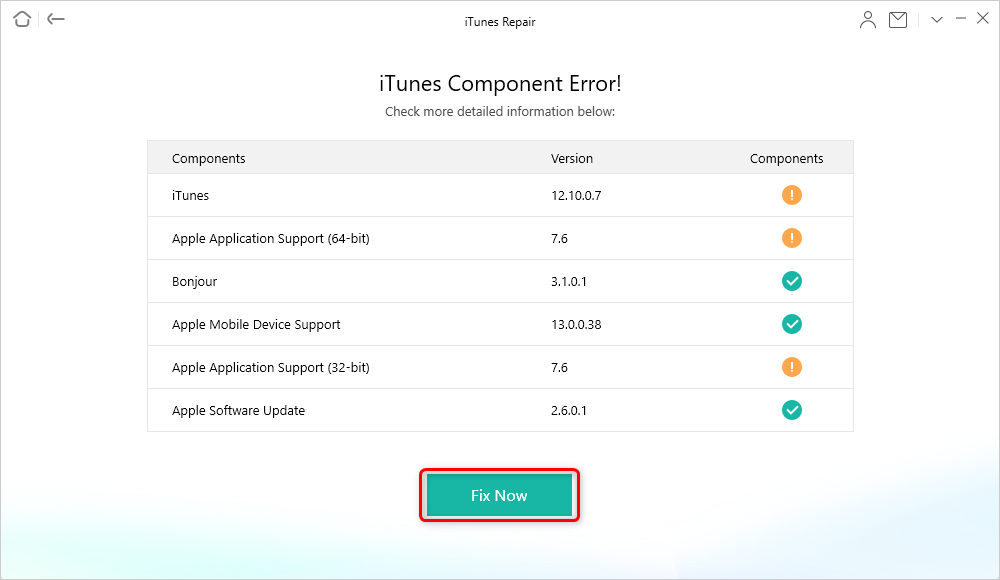
iTunes Component Errors will be Detected
Step 4: Then, you will see a prompt to instruct you to authorize AnyFix the administrator rights. Please click Yes to give AnyFix permission. Then, the repairing process will begin. Once it’s finished, you will see a Repair Completed page.
Part 3: Use iTunes Alternative to Back Up iPhone
You can use the above methods to figure out why iTunes backup session failed and then fix the issue. Also, you can try an iTunes alternative to help you backup iPhone. AnyTrans is the powerful software. With it, you don’t worry about any data loss and will not suffer from iTunes errors. Some main features of AnyTrans are listed below and you can easily check:
- Transfer iPhone/iPad/iPod data to computer wholly or selectively, and vice versa.
- Backup iPhone data incrementally or wirelessly and choose to restore when you need it.
- Also, if you’d like to change a new iPhone, AnyTrans allows you to sync the old iPhone to the new one. It also supports syncing Android devices to iPhone.
- Besides, you can manage your iTunes library with AnyTrans. iCloud management also supported.
Just get AnyTrans on your computer and back up your iPhone easily.
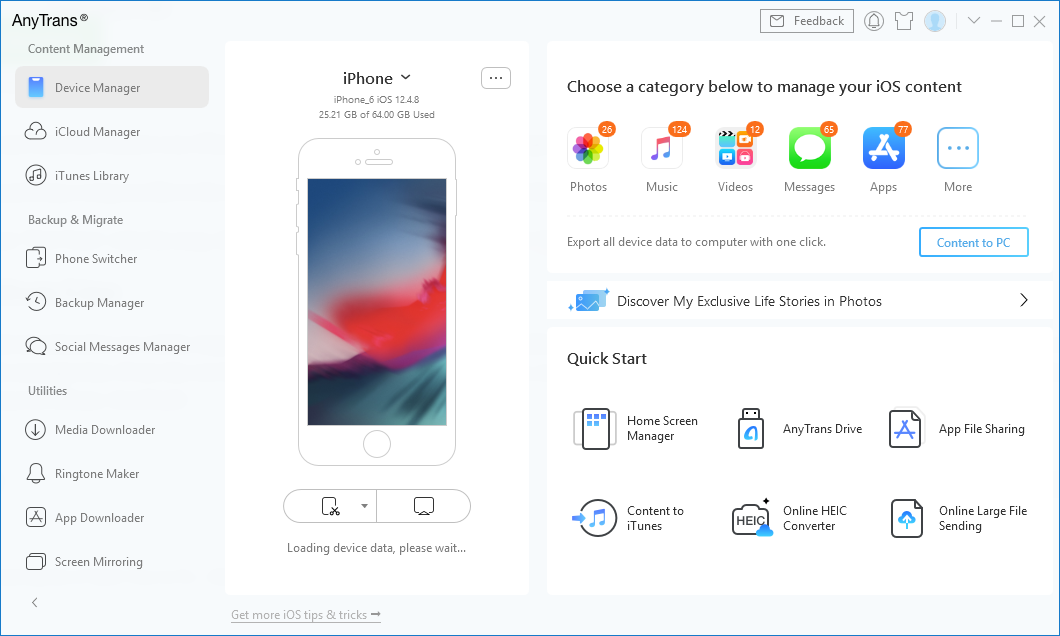
Main Interface of AnyTrans
The Bottom Line
That’s all for how to fix iTunes backup session failed. You can first try to apply some simple tips on your computer. Or you can use AnyFix – iTunes repair tool to fix iTunes won’t backup iPhone or more iTunes errors. And also, you can try an iTunes alternative to back up your iPhone, even iPad or iPod – AnyTrans will help you backup/migrate data as you want.
If you got any questions, feel free to leave your comment below and share your fix tips with us.

Member of iMobie team as well as an Apple fan, love to help more users solve various types of iOS & Android related issues.
Product-related questions? Contact Our Support Team to Get Quick Solution >
