How to Fix Keep Asking Update Apple ID Settings
If your Apple device keeps on displaying the update Apple ID settings, you might get frustrated. There are actually some ways to get rid of this notification from your device and this guide shows those methods for you.
iPhone Unlock & Password Tips
iPhone Password Tips
iPhone Unlock Tips
Apple ID Unlock Tips
- Remove Apple ID from Locked iPhone
- Forget Apple ID Email
- Cannot Update Apple ID Settings
- Unlock Apple ID Without Phone Number
- Unlock Apple ID Securely
- Completely Delete Apple ID Account
- Unlink iPhone From an Apple ID
- Apple ID Cannot Unlock iPhone
- Apple ID Locked for Security Reasons
- Top Apple ID Unlock Tools
Although most Apple devices are stable and you hardly face any issues with them, they are not fully without issues. One of the problems you could face on your Apple devices is that your device keeps on asking you to update your Apple ID settings. When this happens, you cannot use certain features on the phone before you update your settings.
It’s usually because you changed your password. While if you have not made any changes to your phone lately, you might be surprised to see this error on your screen. Luckily, there are several ways to get rid of the “Update Apple ID settings, some account services require you to sign in again” notification from your device. This guide teaches you to fix this issue once and for all.
How to Fix Keep Asking Update Apple ID Settings
Part 1. What Does Update Apple ID Settings Mean
Before you go further and use any of the fixes, you might want to learn what is causing this notification to pop-up on your device and what it means.
When you see the message to update your Apple ID settings, it is basically asking you to reenter the password for your iCloud account on your device. This way, your device can re-authorize itself with Apple and let you access all features that utilize your account on your device.
Part 2. How to Remove Update Apple ID Settings Notification
You are probably frustrated as the message just does not seem to disappear no matter what you do. The following are some of the methods that you can apply and possibly remove the message from your device.
You will need to try multiple methods before the message disappears and you can finally use your phone without any distractions.
Method 1. Make Sure you’re Logged into the Right Apple ID
One of the first few things you need to check on your device is your Apple ID. You need to make sure your device is using the Apple ID that you want it to use. It may be that someone has logged-in to your device and so your password is turning out to be incorrect.
On your iOS-based devices, it is pretty easy to check what Apple ID they are using. You do not even need to log-in to your device to see that as the Settings app has that information available without the need for a password.
The following shows how you can verify the Apple ID on your device.
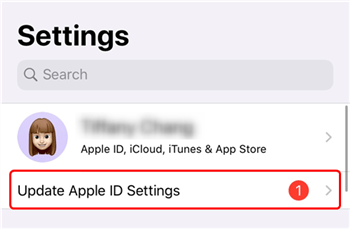
Step 1. Launch the Settings app from the home screen on your iOS device.
Step 2. Tap on the name banner at the top and it will take you to your account settings screen.
Step 3. On the following screen, make sure the Apple ID displayed on the screen is the one that you want to use.
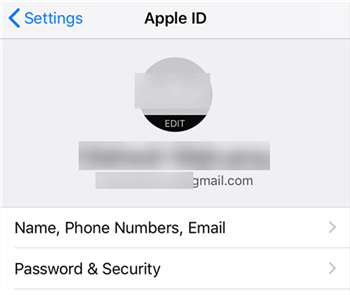
Make Sure You’re Logged into the Right Apple ID
If the Apple ID does not match, you can change it to yours.
Further Reading: How to Change Apple ID on iPhone/iPad/iPod >
Method 2. Sign Out Apple ID and Sign Back In
If you have confirmed that your iOS device uses the correct Apple ID, the second thing you can do to possibly fix the issue is to log out of your account and then log back in. While this does not change any settings on your device, it actually provides your device with a chance to refresh your login credentials.
To do this, you need to have your Apple ID login details handy. Your device should be connected to the Internet. Then, follow the following steps.
Step 1. Open the Settings app from the springboard on your device.
Step 2. Tap on the name banner at the top to view your account settings.
Step 3. Scroll all the way down on the following screen and tap on Sign Out.
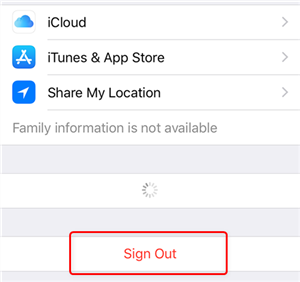
Sign Out of Your Apple ID on iPhone
Step 4. Once you are signed out, sign back in using the same Apple ID details.
The message asking you to update your Apple ID settings should now be gone.
Further Reading: How to Remove Apple ID from iPhone/iPad >
Method 3. Update Apple ID on All Devices
The issue that you are facing on your Apple devices is actually related to your Apple ID. One way to get around this issue is to manually enter the username and password for your Apple ID account on all your devices. This will refresh your login credentials and it might just fix the issue for you.
This is pretty easy to do on most Apple devices. If you are on an iPhone or iPad, you can head into the Settings app and re-enter your login details. If you are on a Mac, you can open System Preferences and select the iCloud option to sign into your account.
Once that is done, your device should no longer ask you to update your Apple ID settings.
Method 4. Check Apple’s System Services
Apple uses different servers for various iCloud-based activities. Your Apple ID is also linked to one of Apple’s servers, and if that server is experiencing any issues, your phone is likely to display the update Apple ID settings message.
There is actually no way to check if Apple servers are indeed facing an outage on your iOS or Mac devices. However, Apple has actually published a webpage telling you the status of its servers.
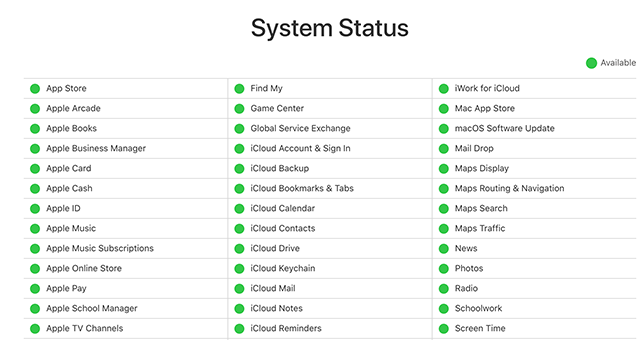
Go to Apple and Check Apple’s System Services
You can head over to the Apple system status webpage and find out for yourself if the Apple ID server is facing a downtime. If you see any issues with the server on that page, you will need to wait until Apple fixes the issue. Once the server is back up and running, you should be able to fix the error on your device.
Method 5. If you Got this Message on Mac
If it is your Mac that asks you to update the Apple ID settings, you can actually head into your Mac’s settings menu to update the settings for yourself. There is an option that allows you to modify the settings for your account. You can change any setting you want and it will reflect on your Mac.
To fix the issue that you are experiencing on your Mac, all you need to do is sign out of iCloud on your Mac and then sign back in. You will not lose any data while doing this. The following shows how to do it and get rid of the error.
Step 1. Click on the Apple logo at the top-left corner and select System Preferences.
Step 2. Select iCloud on the following screen to view your iCloud settings menu.
Step 3. Click on the Sign Out button to sign out of your account on your Mac.
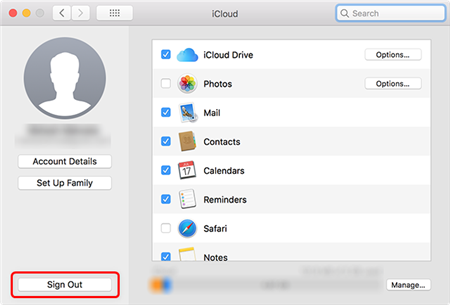
Sign out of your Apple ID on Mac
Step 4. Select Keep a Copy option to not delete any data from your Mac.

Preserve Files
Step 5. Sign back into your Mac with your Apple ID.
That should fix the issue for you.
Part 3. How to Fix iPhone Stuck on Updating iCloud Settings
If your iPhone is stuck on updating iCloud settings, you have a couple of ways to fix this issue on your phone.
Method 1. Use iOS System Recovery Tool
One of the ways to fix it when your iPhone is stuck on updating iCloud settings is to use third-party repair tools. One of the working tools that you can use to fix the issue on your iPhone is AnyFix – ios system recovery. It comes loaded with several solutions to fix many types of issues on your iOS devices. You can use it to fix the system of your iPhone which then fixes all other issues on the device.
Except that AnyFix can fix 130+ system issues for iPhone/iPad/iPod touch/Apple TV, it is capable of fixing 200+ iTunes errors and gets it back to life. Therefore, whenever you got system issues and iTunes errors, go to AnyFix and find the way.
Now, you can download and install the AnyFix tool on your Windows or Mac machine. And the following shows how you can use this tool if you are interested in giving it a try.
Free Download * 100% Clean & Safe
Step 1. Plug-in your iPhone to your computer, open the tool, and select System Repair.
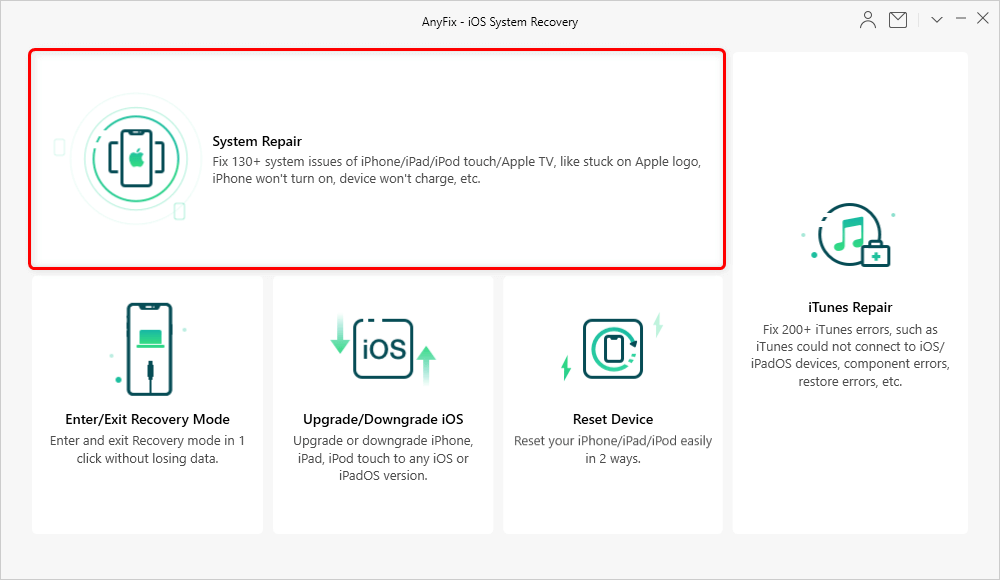
Tap on System Repair
Step 2. Click iPhone Problems and tap on Start Now to start fixing issues on your iPhone.
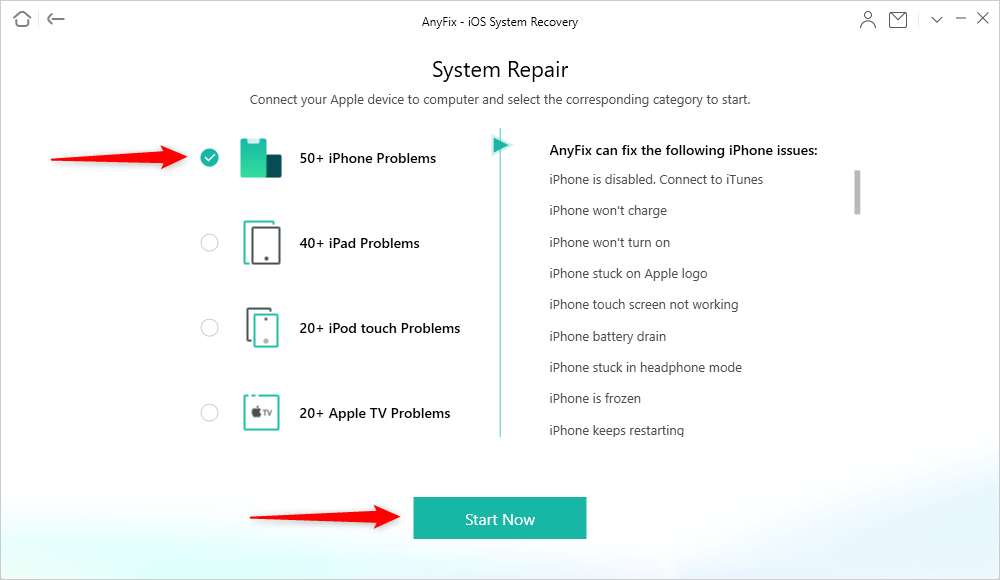
Choose iPhone Problems and Start Now
Step 3. Then, you need to select a mode to repair your phone. AnyFix provides you three modes to get the highest success rate. You can select according to your iPhone’s situation.
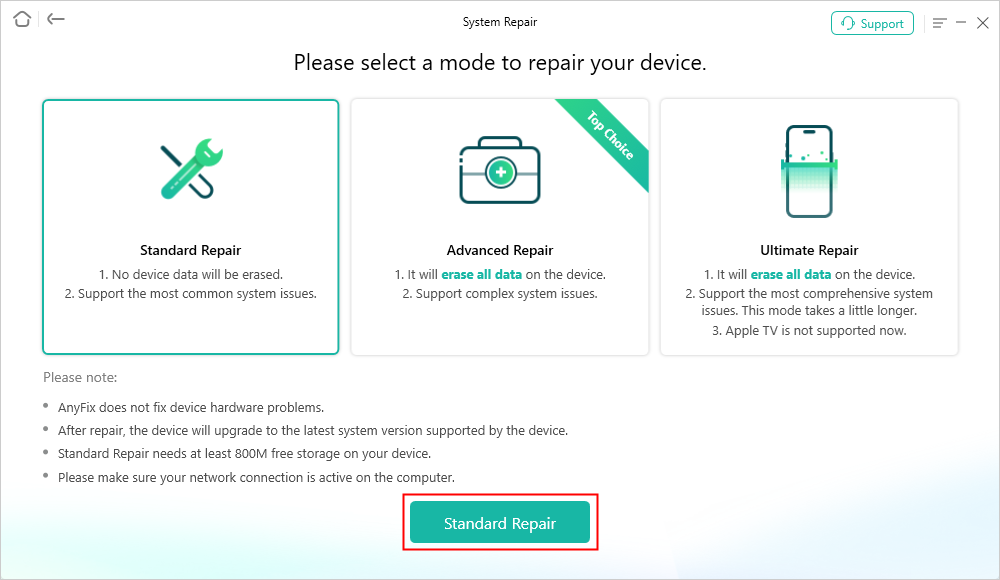
Choose One Repair Mode
Step 4. Click Download button to get the matching firmware. When the firmware downloaded, tap Fix Now button. After that, you need to put iPhone into recovery mode or DFU mode.
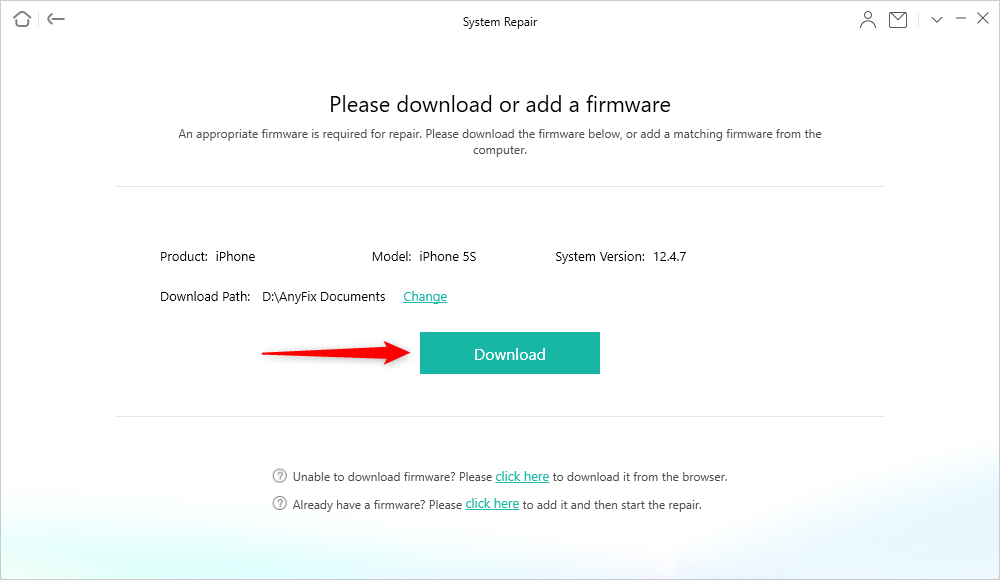
Download a Matching Firmware for your Device
Step 5. Go through the on-screen prompts and your iPhone will finally be fixed.
You should no longer get any messages that ask you to update your settings.
Method 2. Try to Hard Reset iPhone
Hard resetting your iPhone fixes many issues such as the one you are currently experiencing on your device. Doing this does not erase any data on your phone and it is pretty easy to do that.
On most iPhone models, you can press and hold down the Home and Power buttons at the same time. This will force reboot your device.
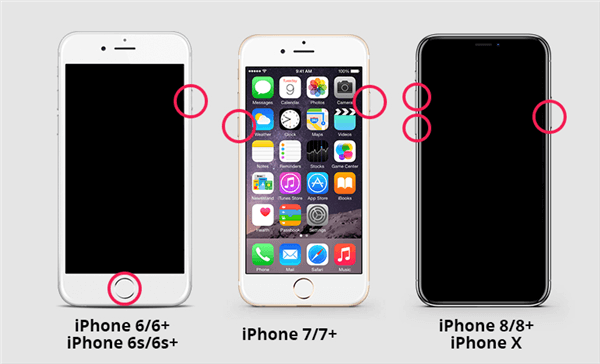
Try to Hard Reset iPhone
When your iPhone boots back up, you should not have the issue that you were experiencing earlier.
The Bottom Line
If you are annoyed by your Apple device that constantly asks you to update Apple ID settings, give a try to the methods above and they will fix the issue on your phone. In case your phone shows iCloud settings issue, you can fix that using a third-party tool as shown above.
More Related Articles

Member of iMobie team as well as an Apple fan, love to help more users solve various types of iOS & Android related issues.
Product-related questions? Contact Our Support Team to Get Quick Solution >
