Odin Complete(Write) Operation Failed? 5 Fixes!
Odin complete(write) operation failed is one of the many errors you might encounter while using the Odin tool to flash files on your Samsung device. If you are facing this issue, this guide has some solutions for you to apply and potentially resolve the problem.
Common Android System Issues
Android System Issues & Fixes
Android Boot Issues & Fixes
Android Safe Mode Issues & Fixes
Android Recovery Issues & Tips
- Recover Deleted Huawei Files
- Huawei Data Recovery
- Recover Deleted History on Android
- Recover Deleted Huawei Contacts
- Recover Deleted Huawei Videos
- Restore Deleted Huawei Photos
- Recover Data After Factory Reset
- Retrive Deleted Huawei Messages
- Recover Deleted Samsung Photos
- Huawei Broken Screen Data Recovery
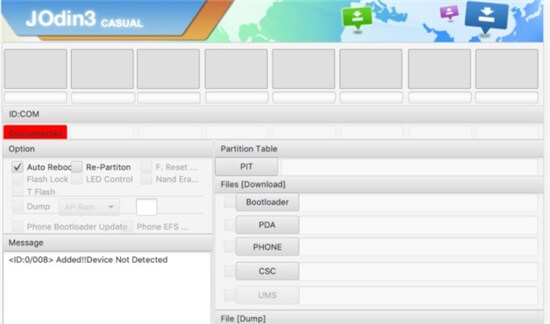
If you ever want to customize your Samsung phone beyond what the built-in options allow, you need to flash a custom ROM using Odin. Odin is a firmware flashing tool for Samsung devices, and you can use it to flash many types of files on your phone. Occasionally, you would encounter various issues with this tool, one of which is Odin’s complete (write) operation failed. Many people ask how to fix the complete(write) operation failed?
If this error occurs, you will find that the data you wanted to write to your device did not get written. The whole procedure of flashing a custom file has failed and that’s what this error message is about. Luckily, there are some complete write operation failed Odin solutions for you. Just keep reading.
You may also like: How to fix Android stuck in Odin mode
Why Odin Complete(Write) Operation Failed
Why does Odin keep failing? Before you go further down the guide, you might want to know the possible causes of the issue. If you can identify the cause, then perhaps you only need to follow one method to fix the issue. So here we list several reasons for the Odin write operation failed error.
Cause 1. Data Write Issues
As you can see for yourself in the error message, Odin talks about a write operation that has failed. This usually occurs when the tool cannot write your data to your device. It might be a permissions issue, or there might be something blocking the data from being flashed on your phone.
Cause 2. Obsolete Odin Version
The second possible reason you have the aforementioned issue is that you are using an extremely old version of the Odin tool or with an unassigned file Odin. In early versions, Odin had many issues which were then patched in newer updates.
Therefore, an obsolete version of Odin is often the cause of many issues.
The Odin App on Samsung Phone
Cause 3. Corrupted Firmware File
Your firmware files are as much to be blamed for this error as the Odin tool. It might be that the firmware file you have downloaded is corrupt and so Odin is having trouble flashing it on your phone.
This inability to install firmware causes Odin to throw the aforementioned error message on the screen, and stop the flashing procedure altogether.
Cause 4. Lack of Drivers
One possible reason is that you do not have the proper drivers installed on your computer. This causes your machine not to recognize your Samsung device, and this in return leads Odin to throw an error message.
This is an often overlooked thing that later causes many issues.
Now you have known the possible causes of this problem. Then, how to fix Odin complete write operation failed? Just go to the next section to find out the solutions.
How to Fix Odin Complete(Write) Operation Failed Error
How do you fix Odin fail complete write operation failed flash write failure? Fortunately, there is not a single way to get around the said Odin issue. You need to follow the following methods until you find the method that works for you.
Fix 1. Change the USB Port or the Computer
It might be that the issue is not with Odin but is with the USB port on your computer. Many times, the USB port on your computer gets jammed and it will not work the way it is supposed to. This causes your Samsung phone not to be recognized by your computer, as your computer simply does not see the connected device.
One way to fix Odin operation failed is to change the USB port on your computer. Most computers have multiple ports and you simply need to unplug your phone’s cable from one port and plug it into another. This should likely fix the issue.

Change the USB Port
Fix 2. Enable USB Debugging and OEM Unlock
As you just learned, one of the reasons Odin displays that error message is that it cannot write data to your phone. There are actually a couple of options on your phone that need to be enabled if you want to perform certain actions on your phone. If you do not turn these options on, your phone will block new content from being added to it using tools like Odin.
These options are USB debugging and OEM unlocks.
USB debugging allows your computer to interact with your Android device over an Android Debug Bridge (ADB) connection. It is a good idea to keep this option enabled when you are using your phone with your computer.
OEM unlock allows the bootloader on your phone to be unlocked. If you are flashing something that requires unlocking the bootloader, this option must be enabled.
Enabling both of these options is easy. So just follow the steps below to solve odin complete(write) operation failed problem.
Step 1. Open the Settings app on your phone and tap System.
Step 2. Tap Developer options on the following screen.
Step 3. Enable both USB debugging as well as OEM unlock options.
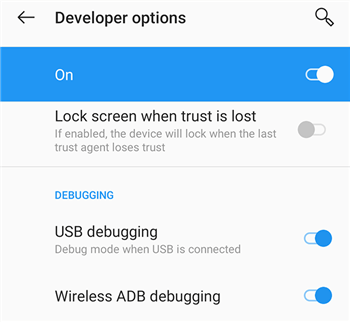
Activate USB Debugging on the Phone
Fix 3. Ensure the Proper Samsung Drivers Are Installed
To recognize your Samsung device, your computer needs something called the driver. These drivers are specific to certain phones, and since you have a Samsung device, you need Samsung drivers installed on your computer. These help your computer to detect your device and then let you work with it from your machine. Therefore, Odin failed write operation may be because you used the improper driver. To fix it, just change to the right one.
If you are not sure you have the required drivers, you can download and install these drivers free of cost.
Step 1. Open a browser on your computer and head over to the Samsung drivers website.
Step 2. Download the driver’s package to your computer.
Step 3. Double-click the driver’s file and go through the installation wizard.
Step 4. Reboot your computer when the drivers are installed.
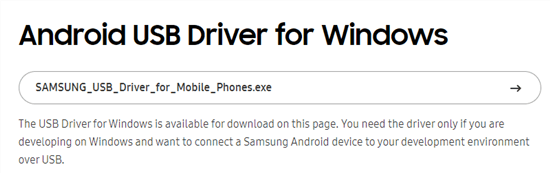
Download Android USB Driver on Phone
Odin should now detect your device without any issues.
Fix 4. Enable USB Debugging
Sometimes, this error happens because there is not a good Odin connection. But how do I fix Odin connection? For Android users, you need to turn on the USB debugging option manually on your device, to build a connection between the computer and your phone. Please follow the steps below to enable USB debugging to ensure a stable Odin connection:
Step 1. Find and open Settings on your phone > Tap on About phone > Find the Build number option and click it 7-8 times until it says you are a developer.
Step 2. Back to Settings > Developer options and turn on the option that says USB debugging.
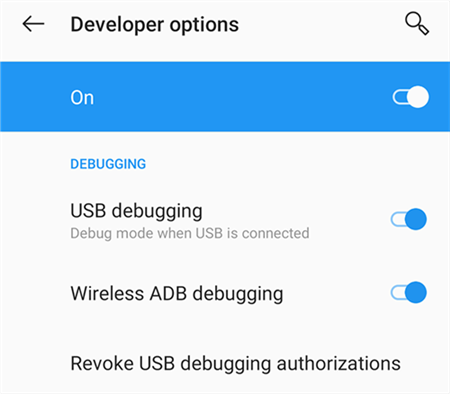
Turn on USB Debugging
Fix 5. Update the Odin Version
Odin has many versions available for it. If you are currently running a really old build of the tool, it is time you get it updated to eliminate many issues attached to it. Updating the Odin version ensures you get newer features as well as all the bug fixes that come with it.
The thing with Odin is that you cannot update it from within the app. You are going to have to get a newer version manually, and then use it to flash files on your phone.
Step 1. Head over to a site like Odin Download to download Odin to your computer.
Step 2. Once you are on the site, click the button for the latest version of Odin to download the tool to your machine.
Step 3. When Odin is downloaded, use it to flash files on your phone.
Bonus Part. How to Fix Android System Issues Without Flashing
Besides fixing the complete write operation failed on Odin, you may also wonder if it’s possible to fix Android system issues without flashing. Yes, DroidKit is a handy tool for fixing kinds of Android system issues easily. As a complete Android Toolkit, it can fix almost all system problems on an Android device, such as the white screen of death, black screen, device frozen, touch screen not working, etc. Moreover, DroidKit also provides your Android phone unlocker to unlock your phone if you forgot password.
Follow the detailed steps below to fix Android system issues with DroidKit:
Step 1. Download the latest version of DroidKit on your computer > Launch DroidKit > Connect your Android device and tap on System Fix mode.
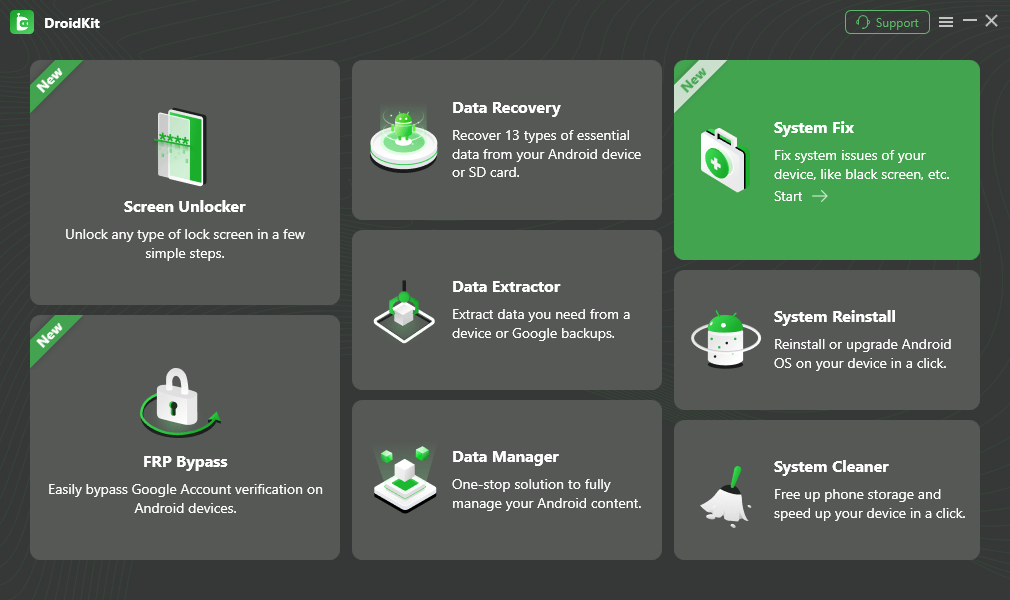
Click System Fix Function
Step 2. Once DroidKit detects your device, click the Start button to continue.
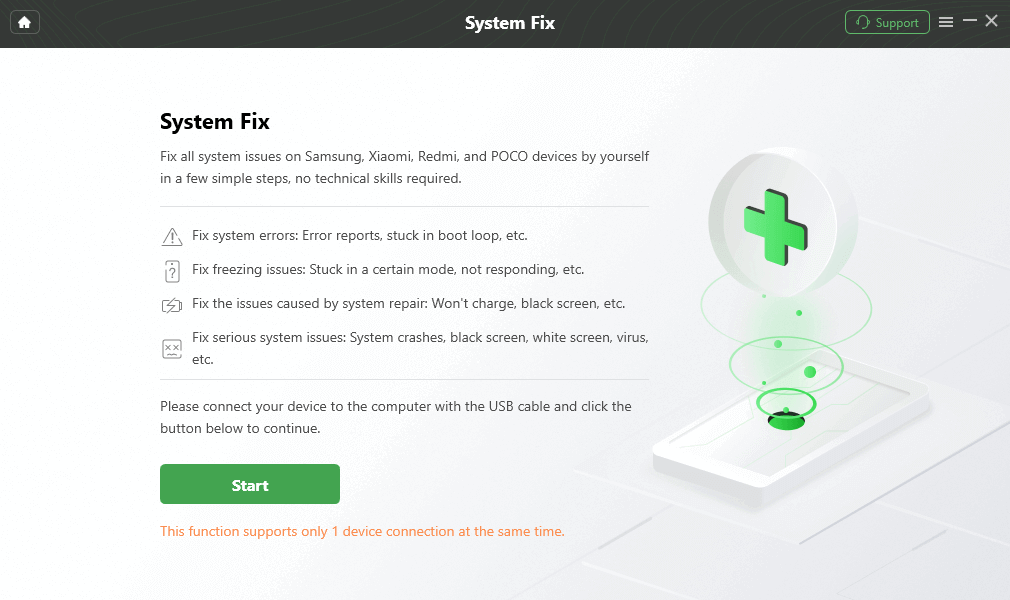
Start to Repair Samsung Phone
Step 3. The software will match the PDA code of your Samsung Device Automatically > Then click Download Now to download the firmware (If there is no matching PAD code, you need to put your device into recovery mode and get the PDA code).
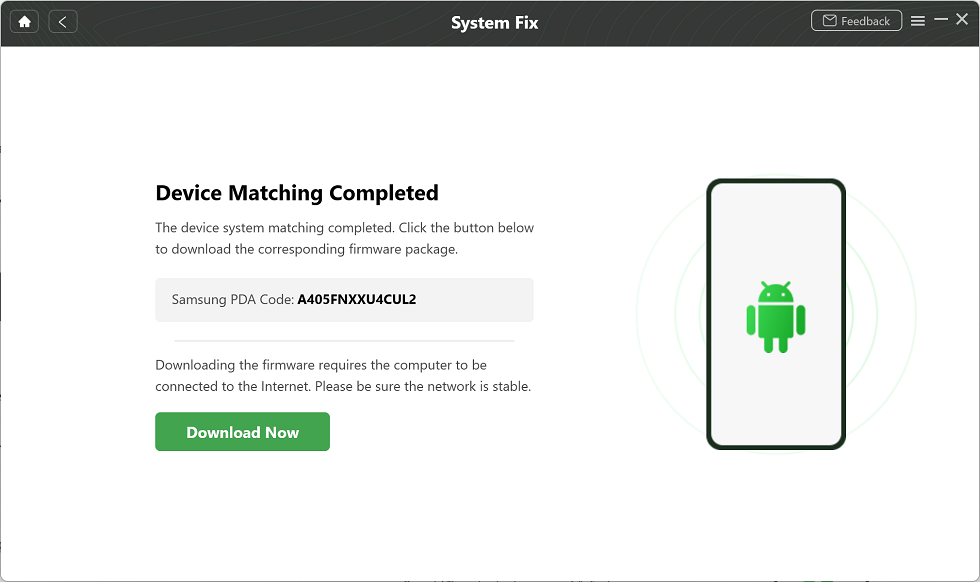
PDA Code Matched
Step 4. After the firmware is downloaded, click the Fix Now button to start the fixing process >Then follow the instructions to put your device into download mode.
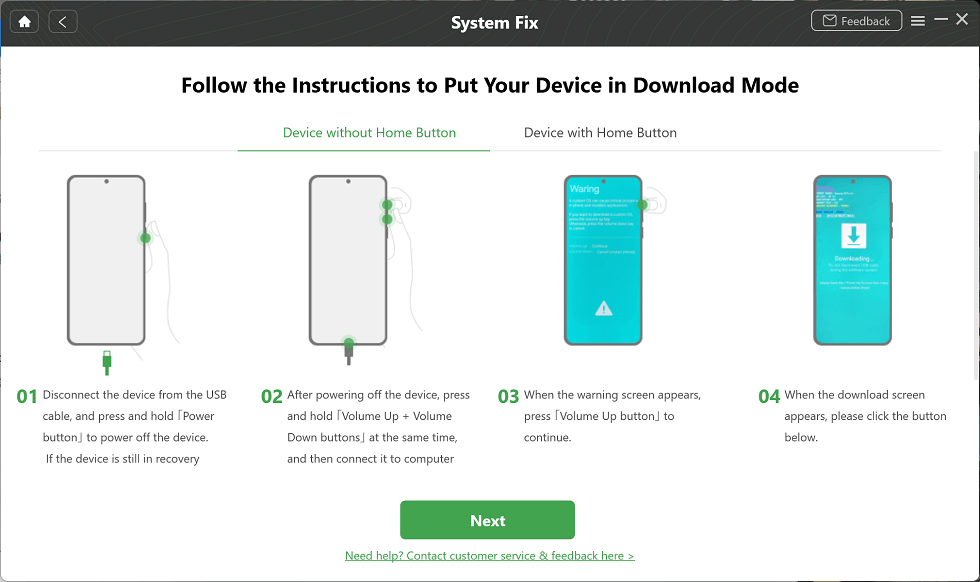
Put Samsung into Download Mode
Step 5. Then, it will automatically start repairing your Android system. After completing the repair process, you will get the system fixed successfully page as below and your Android device will be restarted.
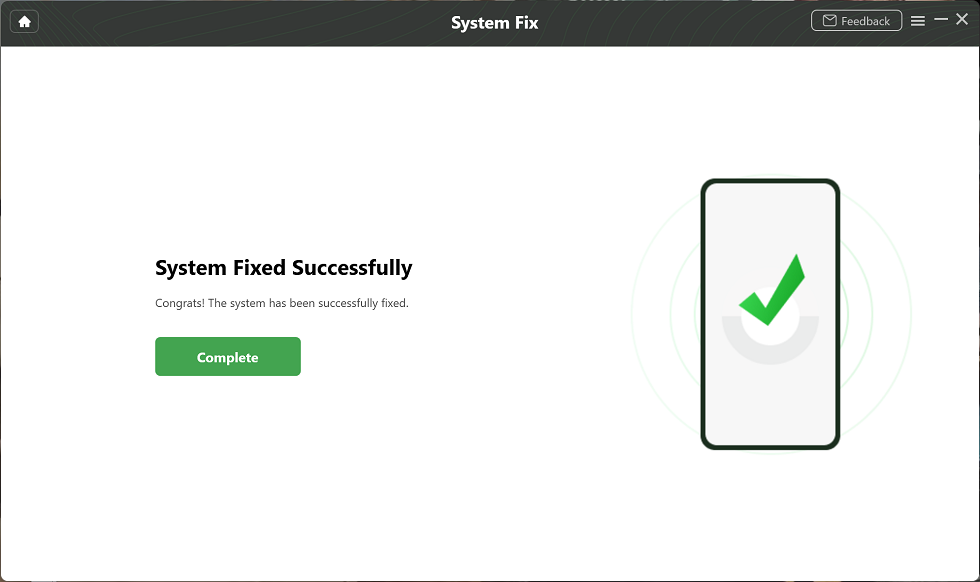
Completing the Repair Process
FAQs About Odin Flash Tool
If you have questions related to Odin, we aim to answer them below.
1. How Long Does Odin Mode Last Normally
If you are using the Odin mode for the first time, you probably want to know how long it takes for the Odin flash process to complete. This helps you find out whether Odin is working the way it should or if it is taking longer than expected.
Usually, Odin should take about five to fifteen minutes to finish a flash process. This depends on the file that you are flashing, though. If you are installing something like a full firmware, this is going to take a bit longer.
On the other hand, if you are only installing a kernel or items like that, that should only take a couple of minutes to flash.
2. Other Possible Odin Mode Errors
Odin complete (write) operation failed is one of the numerous errors you could experience with this tool on your computer. If you would like to know what other Odin errors are, take a look below.
Odin error: “Firmware upgrade encountered an issue. Please select recovery mode in Kies & try again”
Odin error: md5 error! Binary is invalid
Odin error: “Can’t open the serial(com) port”
Odin error: FAIL! SHA256 is invalid
Odin error: Please get approval to use factory binary (Pit)
The Bottom Line
Odin has its fair share of issues but most of these issues can be fixed pretty easily. The guide above shows how to fix Odin complete(write) operation failed, a common error message with Odin, so that you can then flash away from your files on your phone. Also, you are recommended to use DroidKit for common Android system issues without flashing. Download DroidKit and say goodbye to annoying system failures on your Android now!
Free Download * 100% Clean & Safe
More Related Articles

Senior writer of the iMobie team as well as an Apple fan, love to help more users solve various types of iOS & Android-related issues.
Product-related questions? Contact Our Support Team to Get Quick Solution >
