How to Fix: iTunes Could not Connect to This iPhone. You do not Have Permission
Encountered with “iTunes could not connect to this iPhone you do not have permission” error? Read this post as here we have compiled fixes you can try to come out of this error.
Common iTunes Issues
iTunes Sync issue
iTunes Connect Problem
iTunes Backup and Restore
AnyFix – Fix iTunes Could Not Connect to the This Device
Free download AnyFix to fix connection errors when you received the message that says iTunes could not connect to this iPhone. You can also fix when you cannot connect to iTunes Store, or iPhone is disabled connect to iTunes.
I can’t seem to connect my brand new iPhone XS to iTunes so I can do a restore backup from my old phone 7. Running the latest iTunes 12.8. On my Mac Pro Tower running 10.13. I just keep getting – iTunes could not connect to this iPhone. You do not have permission. Any help would be super appreciated.
— An user from Apple Support Communities
Recently, several iPhone users have reported their iPhone xs/xs max won’t connect to iTunes. iTunes could fail to recognize your device when you connect your iPhone to restore a backup from iTunes and plan to set up a new iPhone with iTunes. And, you might get a message saying “iTunes could not connect to this iPhone. You do have permission”. If you are also going through this situation, then you have come to the right page.
There’re various reasons behind it such as the damaged cable you are using to connect your iPhone to computer, the iTunes driver cannot be installed on your computer, or the outdated iTunes/Mac version, etc. Whatever the reason is for the error you are facing, here, we have listed some common tips for you to resolve iTunes can’t connect to iPhone error. Also, you will pick up an iPhone repair software to fix unable to connect iPhone to iTunes easily.
Also Read: How to Fix iPhone Won’t Connect to iTunes Because it is Locked >
Common Tips to Fix: “iTunes Could Not Connect to This iPhone. You do not Have Permission”
To fix the “iTunes not connecting to iPhone” problem, there are many solutions. Now, let’s discover all fixes to come out of the “iTunes Could Not Connect to This iPhone. You do not Have Permission” issue.
-
- Trust your computer on your iPhone. When you connect your iPhone to your computer, a message will ask you to “Trust This Computer”. So, make sure that you have trusted your computer on your iOS device.
- Connect to a stable network. Check the network connection and see if it is properly connected when you fail to connect your iPhone to iTunes.
- Restart Your Computer. Just restart your computer to fix the iTunes won’t connect error.
- Check your iTunes version. Make sure that you have installed the latest version of iTunes on your system and you have updated your system.

Check iTunes Version
- Update your iOS version. Many users said that update the iPhone to the latest iOS version can resolve iTunes not connecting the iPhone issue.
- Uninstall and reinstall iTunes on your computer. This simple method has worked for many iPhone 11 users to fix the “iTunes could not connect to this iPhone. You do have permission” problem.
- Try another Apple USB cable. You can try a new Apple USB cable to see if the USB port is working properly.
- Disable the restrictions on your iPhone. Many users have set up parental controls on their iPhones, and this may cause the iPhone won’t connect to the iTunes problem. You need to check if you have used the restrictions feature on your iPhone. If so, just disable the restrictions on your device: Open “Settings” on your iPhone > Choose “Screen Time” > Tap on the “Content & Privacy Restrictions” option > Disable it.
- Update Apple USB Driver. If the methods above are still not working, maybe you can try to check and update the Apple USB driver on your computer: Reconnect the iPhone to the PC. If iTunes opens, close it > Right-click the Windows Start button, choose Device Manager > Tap on the Portable Devices and right-click on Apple iPhone and choose Update driver > Select the option – Search automatically for updated driver software. After the search and installing complete, go to Settings on computer > Update & Security > Windows Update and verify that no other updates are available.
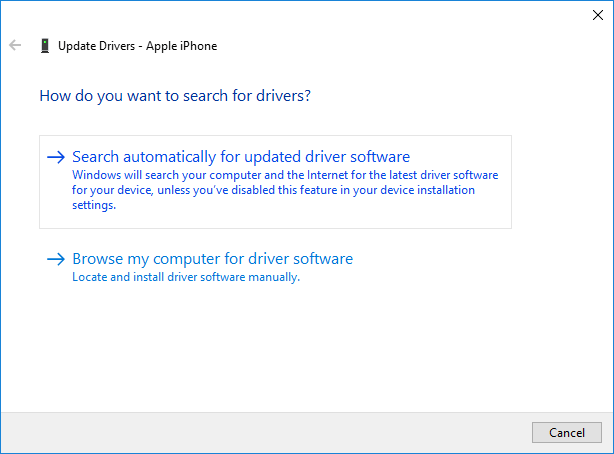
Update Apple USB Driver on Computer
Fix iTunes Could Not Connect to This iPhone via iPhone Repair Tool
After you tried the above methods to allow permission on my iPhone for iTunes, it still not works. You can try a system repair tool. AnyFix – iOS System Recovery is both an iOS system repair and iTunes issue repair tool. It gives a one-click solution to fix 200+ iTunes errors, covering iTunes could not connect to this iPhone, cannot connect iTunes store, iTunes could not back up an error occurred and more connection/Backup/Restore errors. It can also fix other Installation/Download/Update Errors like iPhone won’t update iOS 16 on iTunes, iTunes error 4000, etc. iPhone 12 is supported.
AnyFix – iPhone Repair Software
- Fix iTunes could not connect to this iPhone, new iPhone won’ connect to iTunes in clicks.
- Fix 200+ iTunes errors and iOS system problems without data loss.
- Upgrade or Downgrade your iOS without iTunes (iOS 16 supported).
Free Download100% Clean & Safe
Free Download100% Clean & Safe
Free Download * 100% Clean & Safe
To Fix iPhone Can’t Connect to iTunes with 4 Steps:
- Download and install AnyFix on the computer. Choose iTunes Repair to fix your iTunes problem.
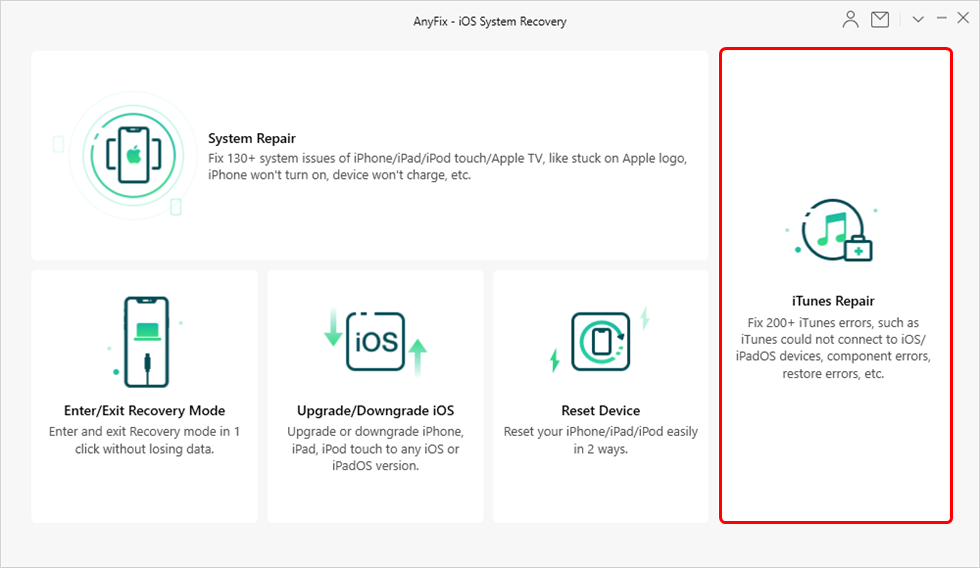
Click on iTunes Repair
- Locate your problem, iTunes won’t recognize iPhone > Choose the iTunes Connection/Backup/Restore Errors > Click on Fix Now to continue.
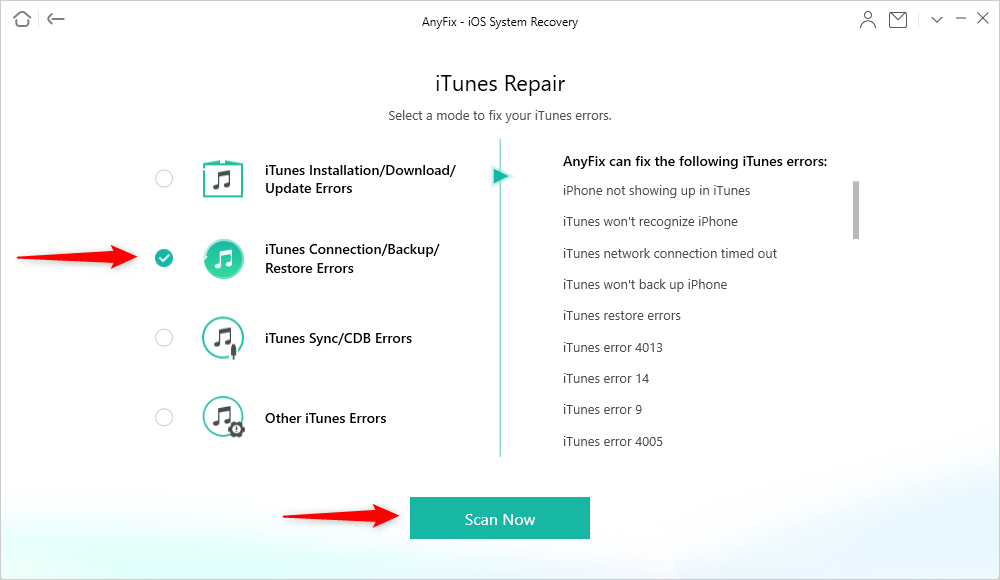
Choose iTunes Connection/Backup/Restore Errors
- After analyzing your iTunes, AnyFix will show you the problem it detects. Click on Fix Now to repair it.
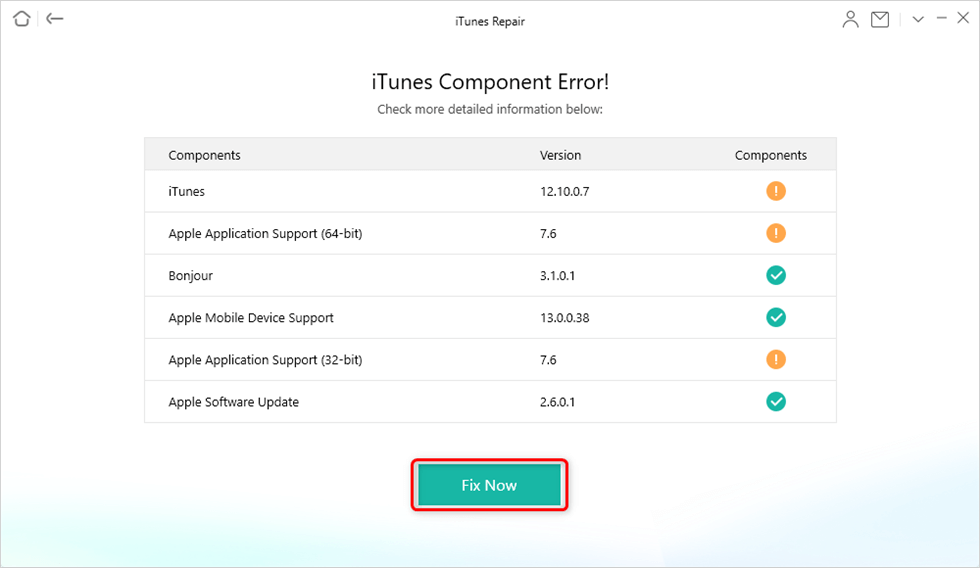
Resolve iTunes Errors
- AnyFix will show you the Repair Completed interface. Connect your iPhone with iTunes again.
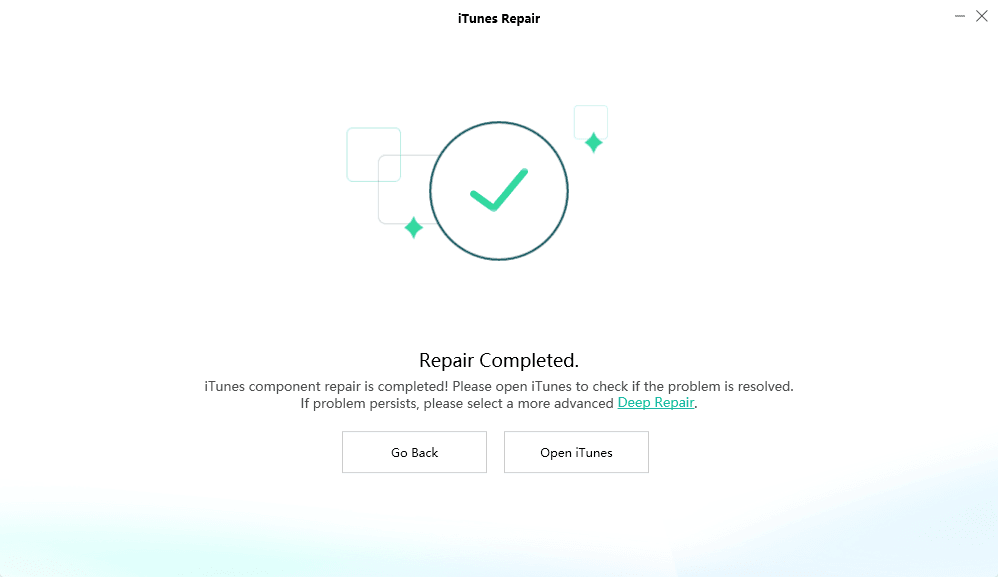
iTunes Repair Completed and Open to Check
The Bottom Line
That’s all on how you can come out of the “iTunes could not connect to this iPhone” error. Try the above-mentioned methods and AnyFix to get issues fixed. Also, share the guide with more people as this error is quite common and that’s why your share can be very helpful for others.
More Related Articles

Senior writer of the iMobie team as well as an Apple fan, love to help more users solve various types of iOS & Android-related issues.
Product-related questions? Contact Our Support Team to Get Quick Solution >
